Physical Address
304 North Cardinal St.
Dorchester Center, MA 02124
Physical Address
304 North Cardinal St.
Dorchester Center, MA 02124

How to fill cracks in wood? Discover the art of restoring wood to its former glory with this comprehensive guide. From small surface cracks to intricate through-cracks, we’ve got you covered. Get ready to unleash your inner woodworker as we delve into expert tips, creative techniques, and time-tested solutions.
Whether you’re a seasoned DIY enthusiast or a novice with a passion for craftsmanship, this guide will equip you with the knowledge and confidence to tackle any crack with finesse. So, grab your tools, embrace the challenge, and let’s breathe new life into your woodwork together!
Key Summary: How to Fill Cracks in Wood?
To repair wood cracks: Clean the area, and select appropriate filler matching the wood tone. Apply, press into the crack, smooth with a putty knife, and wipe excess. Follow the filler’s drying time. Gently sand for an even surface. Apply stain or paint for a cohesive finish.


Wood, a timeless and captivating material, adds warmth and beauty to our homes and furniture. However, even the sturdiest of wood can fall victim to cracks over time. Understanding the causes and learning how to effectively repair these cracks is crucial in preserving the integrity of your cherished woodwork.
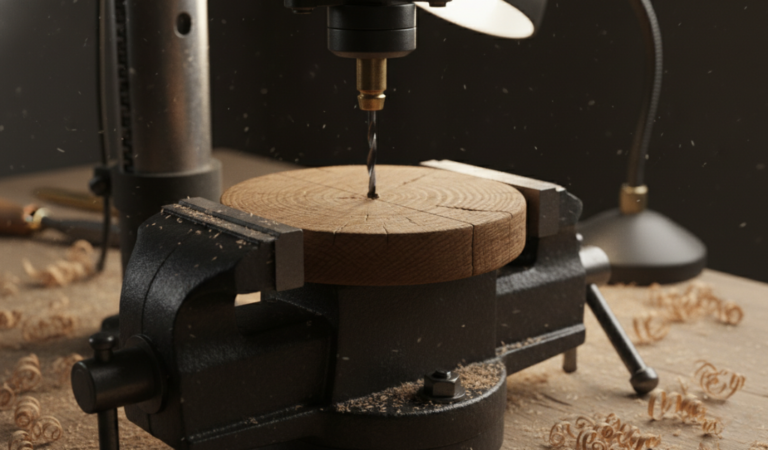
Wood cracks, like battle scars, tell a story of the wood’s journey through time. They come in different forms: surface cracks, those that extend through the wood (known as through-cracks), and the tiny checks that appear at the ends of wooden planks (known as end-checks). These cracks often result from a combination of environmental factors and natural wear and tear.
Before embarking on your wood crack filling adventure, you’ll need to assemble a few essential tools and materials. Gather your troops, including a reliable wood filler, a putty knife for precise application, sandpaper to smooth the surface, and a quality finish to restore the wood’s luster. Armed with these tools, you’ll be well-prepared to tackle any cracks that come your way.
Just as a surgeon carefully assesses a patient before surgery, you must evaluate the severity of the cracks in your wood. Inspect each crack with care, determining whether it requires immediate attention or can be left for another day. Once you’ve diagnosed the situation, it’s time to prepare the wood surface for treatment.
Begin by giving the affected area a thorough cleaning, removing any dirt or debris that might hinder the filling process. Then, gently sand the cracked surface to create a smooth and clean canvas for the forthcoming repair work. Remember, a clean canvas sets the stage for a masterpiece.
In the art of wood crack filling, selecting the right wood filler is akin to choosing the perfect brush for a painting. Different fillers cater to various crack sizes and types, so be sure to pick one that suits your woodwork’s unique needs.
With your chosen filler in hand, it’s time to wield your putty knife with finesse. Apply the wood filler to the cracks, ensuring it seeps into every crevice and forms a tight bond with the wood. Pay attention to the details, for it is in the details that true artistry lies.
As your wood fills with newfound strength, remember that perfection is not merely the absence of flaws but the blending of repaired areas with the rest of the woodwork. With a steady hand and keen eye, work the wood filler until the repaired sections become one with the surrounding wood.
Beware of air pockets that may seek to mar your masterpiece. Eliminate them with diligence, for every great artist knows that flaws should be left to the imagination, not on the canvas.
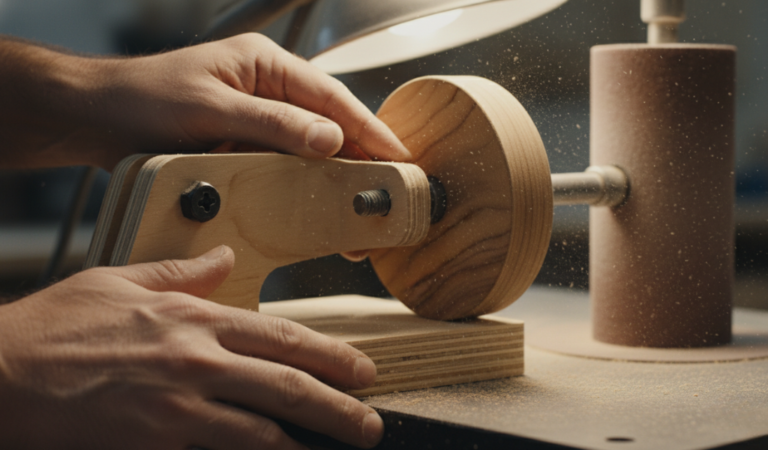
With the cracks filled and your woodwork on the mend, it’s time to refine your creation. Sanding is the artistic touch that elevates your wood from ordinary to extraordinary. Carefully sand the filled areas until they become one with the rest of the wood, a seamless blending of old and new.
To put the final flourish on your masterpiece, apply a finish that enhances the wood’s natural beauty. The right finish can accentuate the wood’s grain, imbuing it with a timeless charm that captivates all who behold it.
Ah, the charm of woodwork – a testament to timeless elegance and craftsmanship. Yet, over time, even the sturdiest wood can develop cracks. Fear not, for I have the secrets to help you not only repair cracks but also prevent them from reappearing in the future.
Before we delve into prevention, let’s understand the nature of wood cracks. From surface cracks that graze the wood to deep through-cracks that reach its core, each crack has its own story to tell. By knowing the enemy, we can better prepare our defenses.
To protect our wood from cracks, we need the right tools and materials. Sealants, such as varnishes or wood oils, create a protective shield against moisture and environmental stressors. Choose wisely, for the right sealant can be the difference between long-lasting beauty and premature aging.
Humidity is a silent but powerful adversary to wood. High humidity causes wood to absorb moisture, leading to swelling and potential cracks. Conversely, low humidity can cause wood to lose moisture, resulting in shrinkage and surface cracks.
Invest in a hygrometer to monitor indoor humidity levels. Keep it between 30% to 50% to create a stable environment for your wood items.
Just as we seek shade on a scorching day, so does wood. Direct sunlight can fade and dry out wood, making it more susceptible to cracks. Position your wood furniture away from direct sunlight or use curtains and blinds to shield it from harmful UV rays.
Avoid placing wood items near heat sources like radiators or heaters. Heat can cause wood to expand and contract rapidly, leading to cracks.
Regular cleaning and maintenance are vital to keeping wood crack-free. Dust and dirt can accumulate in crevices, promoting cracks over time. Use a soft, damp cloth to clean wood surfaces gently. Avoid using abrasive cleaners that can damage the finish.
For deep cleaning, use a mild soap solution, but ensure you wipe it dry immediately. Excess moisture is not a friend to wood.
No matter how well we prevent cracks, some may still find their way into our woodwork. The key is to address them promptly. As soon as you spot a minor crack, apply a wood filler to prevent it from worsening. Nip the problem in the bud, and your woodwork will thank you with many years of crack-free beauty.
Wood, like us, responds to changes in the seasons. During humid summers, wood absorbs moisture and expands. In dry winters, it loses moisture and contracts. As a proactive measure, adjust the environment accordingly. Use a humidifier during dry winters and a dehumidifier during humid summers to maintain stable humidity levels.
Inspect your wood items periodically for any signs of cracks or damage. Catching issues early allows you to address them before they escalate. Keep an eye on joints and corners, as they are common areas for cracks to form.
Regularly reapply sealants and finishes to maintain wood protection. A well-maintained finish adds an extra layer of defense against cracks and enhances the wood’s natural beauty.
During seasonal changes, protect outdoor wood items from harsh weather by storing them indoors or under protective covers. This prevents exposure to extreme elements and reduces the risk of cracks.
Remember, seasonal storage is like a vacation for your wood – a well-deserved break from the elements.

Wood, a marvel of nature, graces our homes with its warmth and beauty. As we venture into the world of crack filling, let us also be wary of the pitfalls that lie ahead. In this section, we will explore the common mistakes to avoid when filling cracks in wood.
In our eagerness to restore our wood to its former glory, we may be tempted to rush the crack filling process. But like a fine painting that requires patience and precision, crack filling demands careful attention.
Take your time to assess the cracks, prepare the wood surface, and choose the right wood filler. Haste may lead to subpar results and compromise the long-term integrity of your woodwork.
Sanding, the unsung hero of wood restoration, is often overlooked or underestimated. Neglecting proper sanding can result in uneven surfaces and visible filler lines, giving your woodwork a less-than-polished appearance.
Don’t skimp on sanding. Treat it as a crucial step in the process, allowing the wood filler to blend seamlessly with the wood’s natural grain and ensuring a professional finish.
Not all wood fillers are created equal, and using the wrong type can lead to disappointing outcomes. Some fillers are better suited for small surface cracks, while others are designed for larger through-cracks.
Choose a wood filler that matches the type and size of the cracks in your woodwork. Test it on a discreet area to ensure it blends well with the wood’s color and texture.
Filling cracks in wood requires finesse, much like a skilled potter molding clay. Avoid haphazardly applying the wood filler, as it may lead to uneven results and an unprofessional finish.
Follow the proper application techniques, such as pressing the filler firmly into the cracks and smoothing out any excess. A little attention to detail goes a long way in achieving flawless repairs.
After diligently filling the cracks, don’t forget the finishing touches that elevate your woodwork to perfection. Applying a suitable finish not only enhances the wood’s natural beauty but also protects it from future damage.
Choose a finish that complements the wood and provides adequate protection against moisture and environmental elements.
Filling cracks in wood is more than a cosmetic fix; it’s about addressing underlying issues that may lead to future cracks. Ignoring these issues may result in repeated repairs and compromise the structural integrity of your woodwork. Inspect your wood items regularly and address any signs of moisture damage, improper installation, or structural weaknesses.
Once your woodwork is restored to its former glory, don’t rest on your laurels. Neglecting preventative maintenance can undo all your hard work and lead to new cracks down the road.
Maintain stable indoor humidity levels, shield wood from direct sunlight and heat, and periodically apply sealants and finishes to protect your woodwork from potential cracks.
While DIY crack filling can be rewarding, some cracks may require professional intervention. If you encounter large or complex cracks that are beyond your expertise, don’t hesitate to seek help from a skilled woodworker or carpenter. They can provide expert advice and ensure the best possible repairs for your woodwork.
As we embark on our journey to fill cracks in wood, let us glean insights from the experts to achieve flawless repairs that stand the test of time. In this section, we will explore valuable tips and techniques shared by seasoned woodworkers for impeccable crack repairs.
The first step to flawless wood crack repairs is selecting the right wood filler. Seasoned woodworkers advise using epoxy-based fillers for larger and deeper cracks, as they offer superior bonding strength and durability. For smaller surface cracks, opt for latex-based or water-based fillers, which are easier to work with and ideal for quick touch-ups.
Achieving a perfect color match between the wood filler and the wood surface is crucial for seamless repairs. Experts recommend mixing wood fillers with sawdust from the same wood to create a custom filler that blends seamlessly with the surrounding wood. This technique ensures that the filled cracks become virtually invisible, enhancing the overall aesthetic of your woodwork.
Repairing large through-cracks requires precision and attention to detail. Experts recommend using wooden dowels or butterfly keys to reinforce the crack and prevent it from widening further. These methods not only stabilize the wood but also add an artistic touch to your repairs, making them a focal point of admiration.
For enhanced color consistency, consider pre-staining the wood filler before applying it to the cracks. This technique ensures that the filler perfectly matches the wood’s hue, leaving no trace of the repair work. Remember to test the pre-stained filler on a small area to confirm the color match before proceeding with the entire repair.
Sometimes, standard wood fillers may not match the unique color of your wood. In such cases, experts recommend using dry pigments to tint the filler to a custom color. Blend the dry pigments into the filler until you achieve the desired shade, and then apply it to the cracks for a tailor-made repair solution.
Sanding is a crucial step in achieving a flawless finish, but the timing is equally important. Experts advise waiting for the wood filler to set completely before sanding the filled cracks. Sanding too early may lead to uneven surfaces and compromise the repair’s quality.
Wood crack repairs demand patience and precision, akin to a delicate dance between craftsmanship and artistry. Take your time during each step of the process, from assessing the cracks to applying the filler and sanding the surface. Remember, each movement is an expression of your dedication to excellence and love for the craft.
To achieve clean edges around the filled cracks, use masking tape as a protective barrier. Apply the tape around the cracks before applying the filler, ensuring a clean and professional finish.
For hairline cracks that are challenging to fill with traditional wood fillers, consider using cyanoacrylate glue (commonly known as super glue). Apply the glue to the crack, and then sand the surface for a seamless repair.
Before filling cracks, evaluate the structural integrity of the wood. If the cracks indicate underlying issues that compromise the wood’s strength, it is essential to address these concerns before proceeding with the repairs.
In the realm of woodwork, crack filling is an art that requires both skill and dedication. By heeding the expert tips and embracing patience, you can achieve flawless repairs that celebrate the beauty of wood. Remember to choose the right filler, blend it with precision, and sand with care.
With each crack filled, you breathe new life into your woodwork, preserving its allure for generations to come. So, embark on this journey with confidence, knowing that your craftsmanship will leave a mark on the canvas of wood, forever cherished.
To close cracks in wood, start by cleaning the crack thoroughly to remove debris. Then, apply wood filler or epoxy resin designed for wood repair. Sand the area after it dries for a smooth finish.
Wood filler, epoxy resin, or cyanoacrylate (super glue) are commonly used to fill cracks in wood. Choose the material based on the size of the crack and the desired finish.
To fix cracks and splits in wood, clean the area, apply wood filler, and allow it to dry. Sand the surface to achieve a seamless blend with the surrounding wood. Finish by staining or painting as needed.
For large cracks in wood, opt for epoxy resin. Mix the epoxy according to the instructions and fill the crack with the mixture. Sand and finish the surface for a professional look.
The best material to fill cracks depends on the size and location of the crack. Epoxy resin is versatile and durable, suitable for various crack sizes. Wood filler works well for smaller cracks and imperfections.
If you don’t have wood putty, you can use epoxy resin or cyanoacrylate glue to fill cracks in wood. These alternatives provide effective adhesion and filling properties.
While wood glue can work for small cracks, it’s not the best choice due to its limited flexibility. Epoxy resin or specialized wood filler are better options as they provide stronger bonding and flexibility for lasting repairs.