Physical Address
304 North Cardinal St.
Dorchester Center, MA 02124
Physical Address
304 North Cardinal St.
Dorchester Center, MA 02124
In the high-stakes world of automotive repair, professional bicycle maintenance, and structural construction, the difference between a job well done and a catastrophic failure often comes down to a few millimeters of metal stretch. We have all heard the term “tight enough,” but in engineering, “tight enough” is a variable that can lead to disaster. Whether you are rebuilding a high-performance engine, securing the lug nuts on a heavy-duty truck, or attaching a delicate carbon fiber handlebar to a racing bike, the stakes of fastener tension are incredibly high. This is where the torque wrench—the most critical hand tool in any precision toolkit—comes into play.
A torque wrench is a sophisticated precision instrument designed to apply a specific, measurable amount of rotational force to a fastener, such as a nut or bolt. Unlike a standard wrench, which relies entirely on the subjective “feel” or muscle memory of the mechanic, a torque wrench provides a repeatable, scientific metric. It ensures that a bolt is neither under-tightened (which leads to parts vibrating loose) nor over-tightened (which causes stripped threads, snapped bolt heads, or warped components).
To understand the use of a torque wrench, one must first understand the concept of “preload.” When you tighten a bolt, you are not just turning a screw; you are actually stretching the bolt’s metal body. This stretch creates a spring-like tension that clamps two surfaces together. Engineers calculate the exact “clamping force” required for a joint to remain stable under heat, vibration, and load. If the torque is too low, the clamping force is insufficient; if it is too high, the bolt exceeds its “elastic limit” and permanently deforms or snaps.
Torque is defined as force multiplied by distance ($T = F \times d$). Because of this, it is measured in units that reflect both:
Before you start turning bolts, you must identify the specific tool in your hand, as each requires a different operational technique.
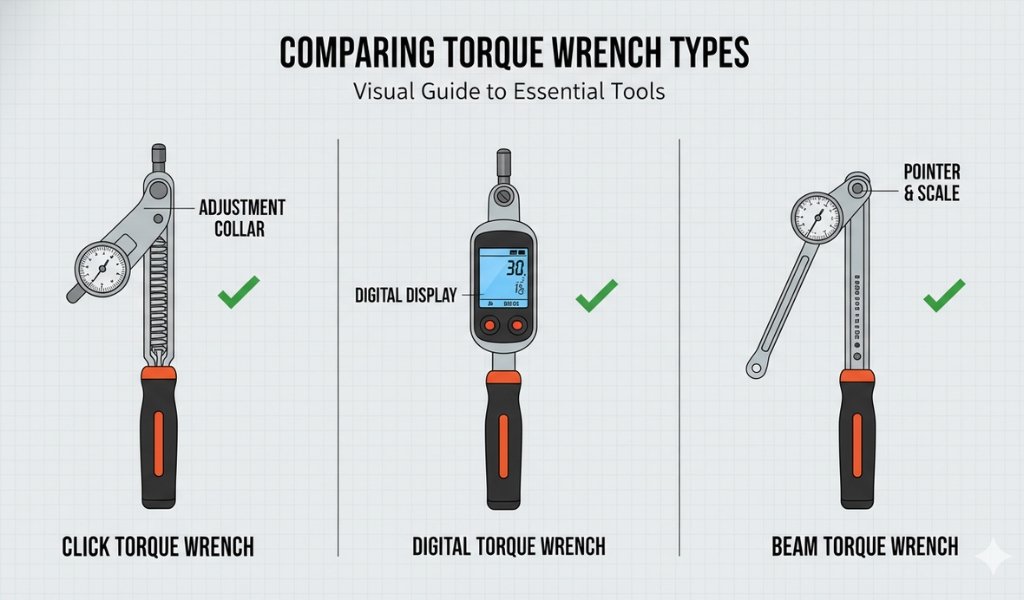
The “Clicker” is the most ubiquitous version of this hand tool. It uses an internal spring under tension. When the force you apply overcomes the spring’s resistance, an internal mechanism hits the side of the tool’s casing, creating a distinct “click” sound and a tactile “thump” in the handle.
A digital torque wrench is the pinnacle of modern fastening technology. It utilizes a strain gauge—a small electronic sensor—attached to a torsion bar. This sensor sends data to a microprocessor that displays the real-time torque on an LCD screen.
Often overlooked as “old technology,” the beam wrench is actually one of the most accurate tools because it has no moving internal parts to go out of adjustment. It relies on the natural elasticity of steel. As you pull the handle, the main beam bends while a secondary “indicator beam” stays straight, pointing to a scale near the handle.
Commonly found in the kits of professional cyclists, these look like thick-handled screwdrivers. They are “pre-set” or adjustable within a very narrow range (usually 2–10 N⋅m). Once the torque is reached, the internal clutch slips entirely, making it physically impossible to over-tighten the bolt.
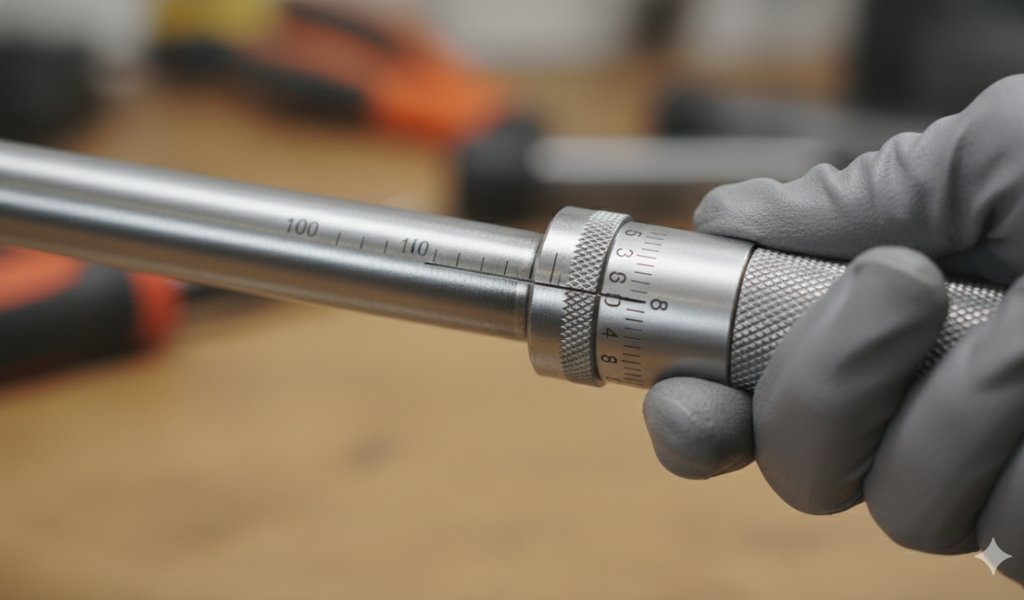
Setting a manual wrench is where most errors occur. It requires a steady hand and a clear eye for the engraved markings on the tool’s shaft.
Located at the very base of the handle is a locking nut or a pull-down ring. You must disengage this before attempting to turn the handle. Forcing the handle while it is locked can permanently damage the internal threads and ruin the tool’s calibration.
The shaft of the wrench has a vertical scale (usually in increments of 5 or 10), and the rotating handle has a horizontal scale (usually 0 through 9). Think of this like reading a ruler and a dial simultaneously.
Rotate the handle until the zero mark on the dial aligns with the center vertical line on the shaft, and the top edge of the handle rests on the horizontal line of your target “base” number.
Now, continue to turn the handle clockwise slowly. Watch the numbers on the rotating handle. Since you are at 80, you need 5 more. Rotate until the “5” on the handle aligns perfectly with the vertical line on the shaft.
Once the numbers are aligned, re-tighten the locking knob. Check the dial one last time after locking, as the act of tightening the knob can sometimes shift the handle slightly.
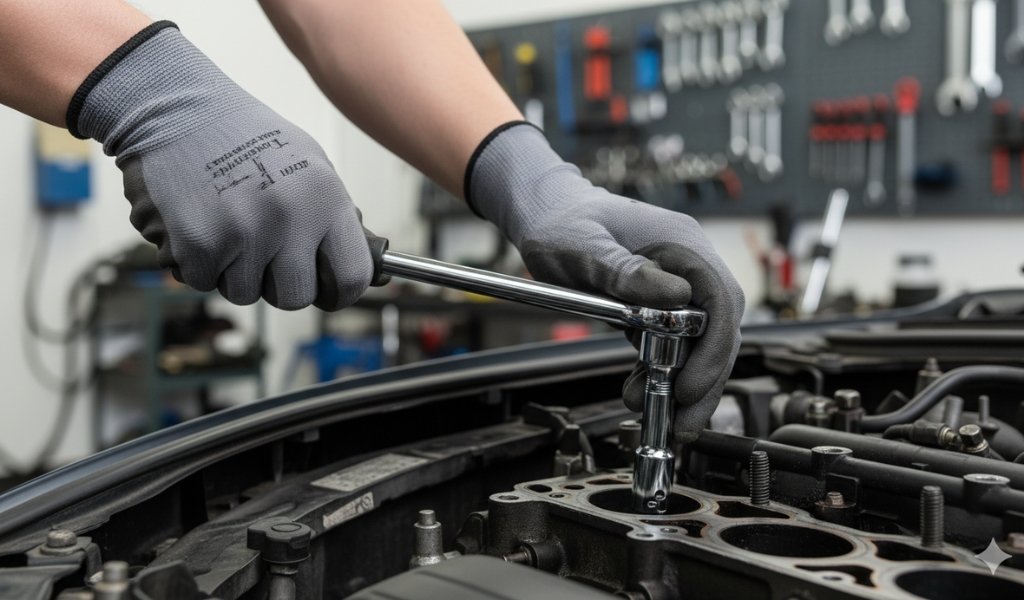
Using a torque wrench is a finishing maneuver. It is a measurement tool, not a workhorse tool.
Because this is a precision hand tool, it requires a level of care similar to a laboratory scale or a microscope.
This is the number one cause of torque wrench failure. When you are finished with a click-type wrench, you must dial the setting back down to its lowest possible value (usually the “stop” or the lowest marked number).
Even if you treat your tool perfectly, it will drift over time.
Mastering the use of a torque wrench is what separates a “parts changer” from a true technician. It requires patience, a respect for engineering limits, and a commitment to tool maintenance. By choosing the right tool—whether it is a rugged beam-type or a high-precision digital torque wrench—and following the “Zero Out” rule, you guarantee that every bolt you turn is a testament to safety and quality. In the world of mechanics, accuracy isn’t just a goal; it’s a requirement for survival.
Q: Can I use a torque wrench on my car’s oil drain plug?
A: Yes, and you should! Many people over-tighten drain plugs, stripping the threads in the expensive oil pan. Most drain plugs require between 20 and 30 lb·ft.
Q: How do I know if my torque wrench is out of calibration?
A: If the “feel” of the bolt doesn’t match the click—for example, if the bolt feels dangerously tight but the wrench hasn’t clicked yet—stop immediately. Another sign is if the handle feels gritty or difficult to turn when adjusting the settings.
Q: Why are some torque wrenches so much more expensive than others?
A: Cost usually reflects the quality of the internal spring steel and the precision of the ratcheting mechanism. A high-end wrench (like Snap-on or CDI) is built to stay within a 2-4% accuracy range for years, while a “bargain” wrench might have a 10-15% margin of error right out of the box.
Q: What is “Angle Torque” or “Torque-to-Yield”?
A: Some modern bolts are designed to be stretched to their permanent deformation point. The instructions will say something like “Torque to 30 lb·ft, then turn an additional 90 degrees.” A digital torque wrench with a built-in gyroscope is the best tool for this, though you can use a manual “angle gauge” adapter.
Q: Is it okay to use a socket adapter (e.g., 1/2″ to 3/8″)?
A: Yes. Adapters that stay in line with the drive do not change the torque value. Only extensions that change the length of the handle (the lever arm) require mathematical adjustment.