The Ultimate Guide to Mastering the Table Saw: Precision, Safety, and Techniques
In most woodworking shops, the table saw is considered the central tool that drives nearly every project. Learning how to use a table saw properly is essential for achieving accurate, safe, and professional woodworking results. Whether you are a professional carpenter or a weekend DIY enthusiast, understanding how to use a table saw is the gateway to professional-grade results. It offers a level of power, repeatability, and accuracy that hand-held tools simply cannot match. However, as Aaron Barnett of BangingToolbox aptly puts it: “A table saw is big business; with higher risk comes a higher reward.”

To reap those rewards, you must respect the machine, understand its components, and master the fundamental techniques of the saw.
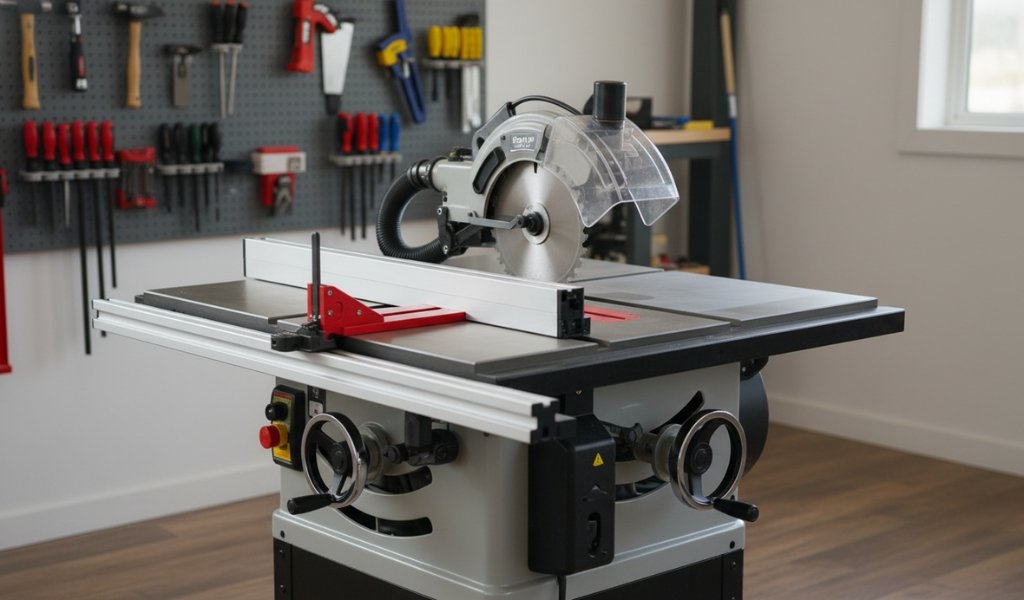
Anatomy of a Table Saw: Parts You Need to Know
Before you flip the switch, you must be intimately familiar with the anatomy of your cutting tool. Understanding these components is a critical part of learning how to use a table saw safely and effectively.A table saw is an assembly of precision-engineered parts designed to work in harmony.
The Power System and Motor
- Power Button: Typically a large paddle switch. High-end industrial saws often feature a “knee-stop” at the lower end of the table saw bench. This is a critical safety feature: if both hands are occupied stabilizing a large sheet of plywood and an emergency occurs, you can bump the switch with your leg to kill the power instantly.
- The Motor: Motors are usually rated by horsepower (HP). A 1.5 HP to 2 HP motor is standard for most home workshops, capable of cutting through $1$-inch or $2$-inch thick hardwoods. Professional cabinet saws often boast 3 HP to 5 HP motors, requiring a 220V circuit to handle heavy-duty, all-day ripping of dense timber.
The Workspace and Alignment Tools
- Table Surface: This is your foundation. It must be perfectly flat. Most high-quality saws use cast iron because of its weight and vibration-dampening properties. Keeping this surface waxed with paste wax prevents rust and allows wood to glide with minimal resistance.
- The Fence (Rip Fence): This is a perpendicular panel that guides workpieces to make accurate straight cuts. It must lock perfectly parallel to the blade. If the fence is even slightly skewed toward the back of the blade, it will pinch the wood, causing a dangerous kickback.
- Fence Dog: This is the lever that locks the fence in place. A “mushy” fence dog is a liability; it must provide a firm, unmoving lock.
- Miter Gauge: This sits in the miter slots on the table. It is used for crosscutting (cutting across the grain) and can be adjusted to various angles (0° to 60°) for mitered joints.
The Business End
- Saw Blade: The circular cutting tool that does the work.
- Arbor: The threaded shaft that holds the blade. High-quality arbors have minimal “runout” (wobble), which ensures a cleaner cut.
- Blade Insert (Throat Plate): This is a replaceable panel. While most saws come with a “standard” insert, many woodworkers prefer a “zero-clearance” insert. This supports the wood right up to the edge of the teeth, preventing the bottom of the wood from splintering.
- Adjustment Wheels: Usually, there are two. The front wheel controls the blade height, while the side wheel controls the tilt (bevel) angle.
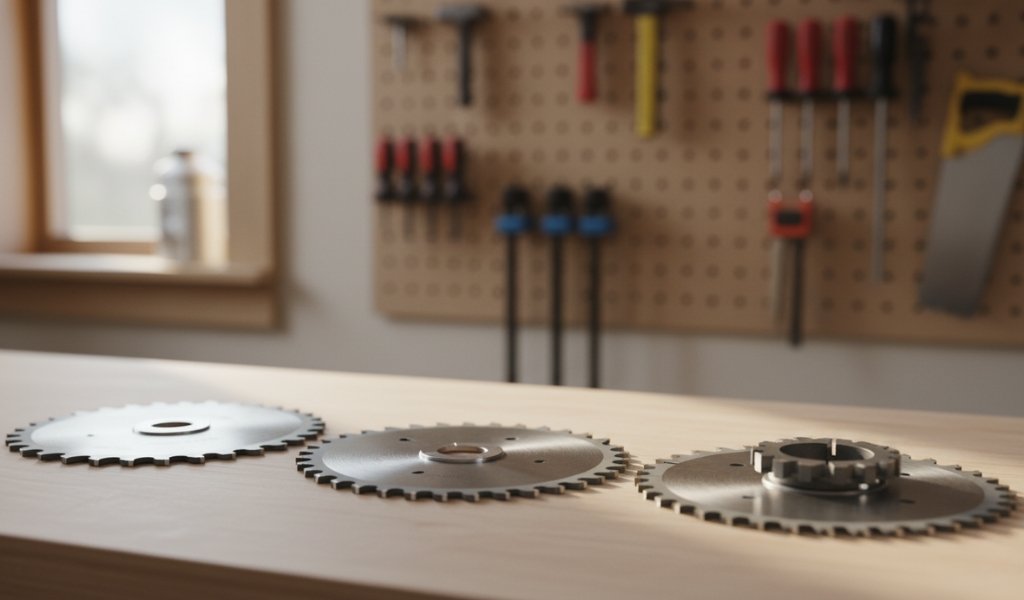
Choosing the Right Table Saw Blade
Not all saw blades are created equal. Using the wrong blade is like trying to cut a steak with a bread knife—it’s messy, inefficient, and potentially dangerous. The performance of your saw is directly tied to the quality and type of blade installed.
Understanding Tooth Geometry
- Flat Top Grind (FTG): Designed for ripping wood. These teeth act like tiny chisels, raking out material quickly.
- Alternate Top Bevel (ATB): The teeth are angled, allowing them to shear wood fibers cleanly. This is essential for crosscutting to prevent “fuzz” or tear-out on the edges.
Material Compatibility
| Blade Type | Teeth (TPI/Total) | Best Use Case |
| Ripping Blade | 24T | Large gullets for fast, aggressive cuts along the grain. |
| Crosscut Blade | 60T–80T | Fine teeth for clean, smooth cuts across the grain. |
| Combination Blade | 40T–50T | A “jack-of-all-trades” for general shop work. |
| Dado Set | Stacked | Used for cutting wide grooves (rabbets/dadoes) for joinery. |
| Non-Ferrous Blade | 100T+ | High TPI for cutting Aluminum or thin plastics. |
Thin Kerf vs. Full Kerf: A standard full-kerf blade is 1/8 inch ($0.125$ inches) wide. A thin-kerf blade is approximately $0.094$ inches. If you have a lower-horsepower portable saw, a thin-kerf blade is often better because the motor doesn’t have to work as hard to remove material.
Essential Table Saw Safety Protocols
Safety isn’t just a section in a manual; it’s a lifestyle in the workshop. The table saw is one of the most powerful tools you will own, and it demands constant vigilance.
The Primary Threat: Kickback
Kickback is the leading cause of table saw injuries. It happens when the workpiece snags on the back teeth of the blade. Because the blade is spinning toward the operator, it picks up the wood and launches it like a projectile.
- The Fix: Always use a riving knife. This is a stationary metal plate that stays behind the blade to keep the “kerf” (the cut) from closing up and pinching the blade.
- Anti-Kickback Pawls: These are small metal “teeth” that allow wood to move forward but dig in if the wood tries to move backward.
Personal Protective Equipment (PPE)
- Eye Protection: Essential for shielding against flying wood chips and “blow-out” from knots.
- Hearing Protection: Prolonged exposure to the high-pitched whine of a saw can lead to permanent hearing loss. Use earmuffs or high-quality plugs.
- Respiratory Safety: Wood dust, especially from hardwoods like walnut or oak, is a known irritant and carcinogen. Use a dust mask and ensure your table saw bench has adequate dust extraction connected to a vacuum.
- The “No Glove” Rule: This is counter-intuitive but vital. NEVER wear gloves. If a glove finger touches a spinning blade, the fabric will snag and pull your entire hand into the machine. Bare skin may get a nick; a gloved hand gets an amputation.
Advanced Safety: SawStop Technology
Modern innovation has brought us the SawStop system. It uses an electrical signal to detect human skin. If you touch the blade, an aluminum brake springs into the teeth, stopping the blade in less than 5 milliseconds. The blade’s angular momentum carries it beneath the table, away from your hand.
Setup Fundamentals: Blade Height and Fence Alignment
Even an expensive professional saw will produce poor results if it isn’t calibrated correctly. Precision in woodworking starts with the setup.
Setting the Perfect Blade Height
A common beginner mistake is raising the blade as high as it will go. This exposes more of the spinning “cutting tool” than necessary.
- Disconnect power or engage the safety lockout.
- Place your workpiece on the table next to the blade.
- Turn the height adjustment wheel until the “gullet” (the bottom of the curve between teeth) is level with the top of the wood.
- Standard rule: The blade should protrude roughly 1/8 inch above the material. This ensures the teeth are striking the wood at the most efficient angle.
Aligning the Guide Rail (Fence)
Your fence must be perfectly parallel to the blade. If it’s even a fraction of a millimeter off, your cuts won’t be “square,” and you’ll struggle to assemble furniture.
- Use a precision square or a dedicated dial indicator to check the distance between the miter slot and the blade at the front and back.
- Adjust the fence so it matches these measurements.
- Check the fence dog tension; it should require a firm press to lock, ensuring no “creep” occurs mid-cut.
Mastering the Basic Cuts: Rips and Crosscuts
Mastering these two cuts allows you to complete 90% of all woodworking projects.
In fact, mastering these techniques is one of the most important steps in learning how to use a table saw like a professional woodworker.
The Rip Cut (Cutting with the Grain)
This is used to change the width of a board.
- Preparation: Set the fence to the desired width and lock it.
- Technique: Stand slightly to the side of the blade (to avoid the “kickback zone”). Use your left hand to keep the wood pressed against the fence and your right hand to feed the wood forward.
- The Push Stick: Once your hand is within 6 inches of the blade, stop using your bare hands. Use a push stick or a “push block” (like a GRR-RIPPER) to finish the pass. This keeps your fingers safely away from the spinning teeth.
The Crosscut (Cutting Across the Grain)
This is used to change the length of a board. CRITICAL SAFETY WARNING: Never use the fence and the miter gauge together for a crosscut. The offcut will get trapped between the blade and the fence, leading to a violent kickback.
- Move the fence out of the way or use a “stop block” clamped to the fence before the blade so the wood is free once the cut starts.
- Place the wood against the miter gauge.
- Hold the wood firmly and push the gauge through the blade in one smooth motion.
Advanced Techniques: Bevels, Joints, and Kerfing
Once you are comfortable with basics, you can unlock the table saw’s potential for complex joinery.
Beveled Rip Cuts
By tilting the blade using the blade angle adjuster, you can create “miters” or “bevels.” This is common for making boxes or French cleats.
- Pro Tip: Always tilt the blade away from the fence (if your saw allows) to prevent the workpiece from getting trapped under the angled blade.
Cutting Joints: Dadoes, Rabbets, and Shiplaps
The table saw is a master of joinery.
- Dadoes: These are grooves cut into the face of the wood. By using a “dado stack” (a set of blades bundled together), you can cut a $3/4$-inch wide groove in a single pass.
- Rabbets: Similar to a dado, but on the edge of the board. These are essential for cabinet backs.
- Shiplap: This involves cutting identical rabbets on opposite sides of two boards so they “lap” over each other.
Kerfing for Curved Wood
If you need to bend wood (for a curved bar front or a rounded corner), you can “kerf” the back. You make a series of shallow cuts (the depth of the “kerf”) every 1/4 inch. This removes the “bulk” of the wood, allowing the remaining thin layer to flex without breaking.
The Table Saw Bench and Workspace Optimization
Your workspace setup dictates your efficiency and safety. A cramped shop leads to accidents.
Outfeed Support
When you cut a 4×8 sheet of plywood, most of the weight will be hanging off the back of the saw by the time you finish the cut. This causes the wood to tip, which can pull your hands into the blade.
- Solution: Build or buy an outfeed table. This should be the same height as your table saw bench (or slightly lower) to catch the wood as it exits the blade.
Mobile Bases and Stability
If you have a small garage, put your saw on a mobile base. However, ensure the base has locking casters. A saw that “walks” or vibrates while you are mid-cut is extremely dangerous.
Cleaning and Maintenance
- Dust Extraction: Connect a 4-inch dust hose to the bottom of the saw.
- Blade Cleaning: Pitch and resin from pine or cherry can build up on the teeth. This causes heat and “burning.” Use a specialized blade cleaner or even simple laundry detergent to soak and scrub the blades monthly.
Pro Tips for Maximum Precision
Woodworking is a game of millimeters. Here is how the pros get perfect results every time:
- The “Featherboard” Advantage: A featherboard is a tool that clamps to the table and exerts constant lateral pressure on the wood. It ensures the wood never drifts away from the fence, resulting in a perfectly straight cut.
- Zero-Clearance Inserts: If you find your wood is splintering at the exit of the cut, swap your factory throat plate for a zero-clearance one. You can make these yourself out of MDF or plywood.
- Scribe Your Lines: For ultra-precise cuts, use a marking knife instead of a pencil. The knife creates a physical “groove” that the blade teeth can track into, preventing wandering.
- Use a Sled: For the ultimate in accuracy and safety, build a “Crosscut Sled.” This is a large wooden platform that slides in both miter slots. It supports the wood on both sides of the cut and makes crosscutting much safer.
Conclusion
The table saw is the “King of the Workshop” for a reason. Once you truly understand how to use a table saw, you can perform a wide range of woodworking tasks with precision and confidence. Its ability to provide speed, versatility, and repeatable accuracy is unmatched by any other cutting tool. However, it is a tool that requires your full attention. By understanding the anatomy of the saw, choosing the right table saw blade, and adhering to strict safety protocols, you can take your DIY skills to a professional level.
Whether you are ripping framing lumber or cutting intricate joinery for a jewelry box, the principles remain the same: calibrate your fence, set your blade height correctly, and never, ever take your eyes off the blade.
Frequently Asked Questions (F.A.Q.)
Q: Can I cut metal with my table saw?
A: You can cut non-ferrous metals like aluminum, but you must use a specialized high-TPI blade designed for metal. Never attempt to cut steel or iron on a table saw, as the sparks and friction can cause fires or shatter the blade.
Q: Why is my wood burning during a cut?
A: Burning is usually caused by one of three things: a dull blade, a blade that isn’t parallel to the fence (causing friction), or feeding the wood too slowly.
Q: What is a “Zero-Clearance” insert?
A: It is a custom blade insert with an opening that is exactly the width of the blade. This supports the wood fibers right up to the edge of the cut, preventing “tear-out” or splintering.
Q: Is it okay to use a table saw without a riving knife?
A: It is highly discouraged. The riving knife is the single most effective tool for preventing kickback. Most modern saws come with one pre-installed for a reason.
Q: How do I know if my saw blade is dull?
A: If you see increased burning, feel more resistance when pushing the wood, or notice that the wood is “splintering” more than usual, it’s time for a sharpening or a replacement.