Physical Address
304 North Cardinal St.
Dorchester Center, MA 02124
Physical Address
304 North Cardinal St.
Dorchester Center, MA 02124

“What do the diamonds mean on a tape measure?” Curious about those enigmatic symbols? Brace yourself for an insightful journey into the world of measurements that goes beyond mere inches and centimeters.
These diamonds hold the key to unlocking precision in your projects, whether you’re a DIY enthusiast or a seasoned pro. Ready to decode the secrets behind these markings? Let’s dive in and demystify the tape measure’s hidden language of accuracy.
Key Summary: What Do the Diamonds Mean on a Tape Measure?
Diamonds on a tape measure indicate standard spacing for framing. Placed at 19.2-inch intervals, they guide precise stud placement for walls. This innovative spacing optimizes material use, enhances stability, and streamlines building projects.
[amazon_auto_links id=”11426″]
When you grasp a tape measure, it’s not just a tool; it’s a portal to a world of precision. Among its cryptic symbols, the diamonds stand out as enigmatic markers, and their significance is far from arbitrary. These diamonds play a pivotal role in construction and carpentry, serving as silent guides for craftsmen and DIY enthusiasts alike.
The most common of these diamonds are the whites, thoughtfully spaced every 16 inches. This seemingly random interval aligns with the standard placement of wall studs, a fundamental element in building structures. For those in the know, these white diamonds are a beacon, aiding in the precise framing of walls and the installation of fixtures.
But the story doesn’t end there. Interspersed between these whites are the black diamonds, appearing at the 8-inch mark. These subtle, yet crucial, markers signify the midpoint of a standard 16-inch stud spacing. If you’re aiming for a perfectly centered picture frame or a securely anchored shelf, these black diamonds become your trusted allies.
They eliminate guesswork, ensuring that whatever you hang or mount will be anchored firmly in place. So, the next time you wonder about the diamonds on a tape measure, remember that they are more than mere symbols; they are the keys to accuracy and efficiency in the world of measurements.

Tape measures, those unassuming tools found in every toolbox, have a hidden complexity that many overlook. Among their various features, the diamond-shaped markings stand out as key indicators of measurement and spacing. Let’s delve deeper into the world of these diamonds and explore their diverse meanings.
The white diamonds on a tape measure are far from random. In fact, they serve a crucial purpose in construction and carpentry. Positioned at regular intervals, typically every 16 inches, these diamonds align perfectly with the standard spacing of wall studs. This design choice is anything but arbitrary – it caters to the foundational structure of buildings.
In the realm of construction, a common practice is to place wall studs at 16-inch intervals. This standardization ensures stability and uniformity in construction projects. By aligning with the white diamonds on your tape measure, you’re essentially working in sync with the framework of the built environment.
Amidst the array of markings, the black diamonds emerge as valuable guides for pinpoint accuracy. Positioned at the 8-inch mark – precisely halfway between two white diamonds – they serve as indicators of stud midpoints within the 16-inch spacing.
These black diamonds facilitate tasks that require precision, such as attaching fixtures to walls or aligning objects symmetrically. Instead of relying on calculations or guesswork, aligning with the black diamond ensures that you’re working with a stud’s center, enhancing stability and support.
While white and black diamonds are the most common, you might encounter red diamonds in some tape measures. These red diamonds signify a spacing of 24 inches, often associated with roof truss systems. Roof trusses are structural components that provide support for the roof, and they are typically spaced at 24-inch intervals. The red diamonds act as a visual cue for measurements relevant to roofing projects.
Cracking the code of diamond markings on a tape measure opens up a world of precise measurements and streamlined projects. These markings hold the key to understanding measurements at a glance and can significantly speed up your work. Let’s delve deeper into the intricacies of interpreting these diamond markings:
The prominent white diamonds on a tape measure, spaced at 16-inch intervals, are far from arbitrary. They correspond to the standard placement of wall studs in construction. These diamonds serve as visual guides for efficiently framing walls. By aligning these diamonds with studs, you’re ensuring that your construction work is sturdy and up to code.
Adjacent to the white diamonds, you’ll find the black diamonds, positioned at the 8-inch mark. These hold a secret that’s particularly valuable for hanging objects securely on walls. These black diamonds indicate the midpoint between two consecutive studs.
This means that if you want to hang a picture frame or install a fixture where it’s centered between studs, you can simply align it with one of these black diamonds. It eliminates the need for tedious measuring and calculating, giving you a foolproof method for balanced installations.
While these diamonds are exceptionally useful for wall framing, their applications don’t stop there. Think about projects where you need uniform spacing between objects, like shelves or hooks. The diamond markings offer a consistent reference point that takes the guesswork out of measurement. This is particularly handy when you’re aiming for a professional finish, whether you’re a seasoned contractor or a DIY enthusiast.
Interpreting the diamond markings is all about efficiency and accuracy. When you integrate these markings into your workflow, you’re streamlining your projects. No more constant re-measuring or fretting about uneven placements. These markings empower you to work confidently, knowing that your measurements are spot-on.
What’s truly remarkable about these diamond markings is their simplicity. They offer a sophisticated solution without complicating the process. Instead of relying on complex calculations, you’re relying on a few well-placed diamonds to guide you. It’s a testament to the principle that elegant solutions often yield the best results.
Using a tape measure effectively goes beyond grasping its diamond markings. It involves a blend of technique, attention to detail, and a touch of finesse. Let’s delve into a comprehensive set of tips to elevate your tape measure game and ensure the utmost accuracy in your measurements.
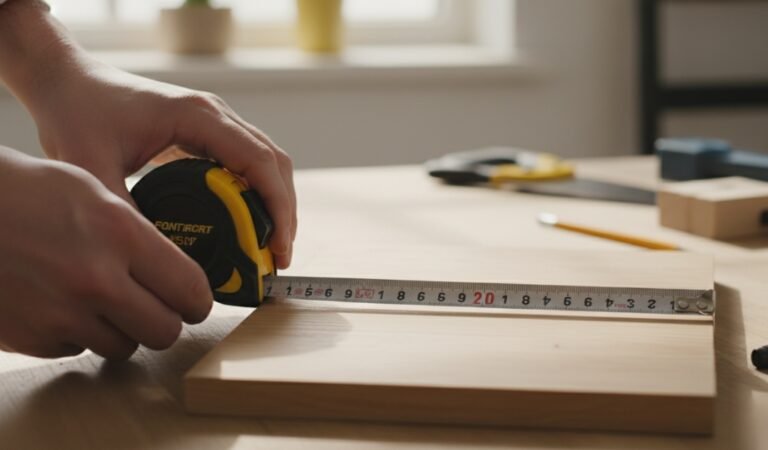
Consistency is the cornerstone of accurate measurements. When extending the tape, ensure it’s held taut against the surface you’re measuring. A slight slack can introduce errors, particularly when gauging longer distances. By keeping the tape under steady tension, you’re minimizing the risk of discrepancies.
Ever wondered why tape measures don’t begin with zero at the metal end? The answer lies in accuracy. Always commence your measurement from the “0” mark on the tape, not from the metal end. This accounts for the tape’s housing, providing you with a true measurement from the very start.
The metal hook at the end of a tape measure isn’t just an accessory; it’s a crucial part of measurement accuracy. When measuring an object, ensure the hook is pressed firmly against one end. This not only prevents slippage but also guarantees precision from point to point.
Many tape measures feature measurements on both sides of the tape. This dual-sided design serves a purpose beyond convenience. It enables you to measure both internal and external dimensions without the need to flip the tape. This is especially valuable when you’re working in tight spaces where maneuvering the tape might be challenging.
Different projects may require different units of measurement. Whether you’re dealing with metric or imperial units, always double-check that you’re using the correct scale. Mixing units can lead to confusion and inaccuracies, so establish the unit you need from the outset.
The width of the tape itself can introduce minor variations, especially when measuring smaller dimensions. For utmost precision, align the tape’s edge with the edge of the object you’re measuring. This technique mitigates any potential errors caused by the tape’s width.
When measuring particularly long distances, having a helping hand can enhance accuracy. Enlist a friend to hold the tape at the other end, ensuring it’s under constant tension. This minimizes sagging and provides a more precise measurement, especially in scenarios where solo measurements might be challenging.
Ensure your eye level is consistently aligned with the markings on the tape. Reading from a skewed angle can lead to parallax errors, where the measurement appears different due to the viewing angle. By maintaining a steady eye level, you’re reducing the likelihood of misreadings.
When measuring curved or angular surfaces, it’s essential to adapt your technique. Follow the contour closely and take measurements at several points to ensure accuracy. For inside corners, use the hook’s edge as a reference, and for outside corners, extend the tape along the surface for precision.
Becoming a tape measure virtuoso takes practice. Regularly measure various objects and distances to hone your skills. Over time, you’ll develop an intuitive sense of tension, alignment, and precision that will serve you well in a wide range of projects.
The diamond markings on a tape measure hold a wealth of advantages that extend far beyond their initial appearance. These unassuming symbols are not just aesthetic embellishments; they serve as valuable tools that can significantly enhance your projects and save you time and effort.
The primary benefit of understanding diamond markings is the unparalleled precision they offer. By utilizing these markings as reference points, you’re able to achieve measurements that are spot-on accurate. This level of precision is crucial in various scenarios, from home improvement projects to professional construction endeavors.
In the realm of measurements, time is often of the essence. With diamond markings, you’re granted the ability to expedite the measuring process. No longer do you need to measure, mark, and remeasure. Instead, you can swiftly align your tape measure with the appropriate diamond, eliminating the need for repetitive steps and allowing you to progress through your tasks more efficiently.
Human error is an inevitable factor in manual measurements. However, with diamond markings, you significantly reduce the margin of error. The consistency of using these markings as benchmarks minimizes the risk of misjudgments and inaccuracies that could lead to subpar results.
Consistency breeds confidence. By incorporating diamond markings into your measurement routine, you’re fostering a sense of reliability in your work. This newfound confidence allows you to approach each task with assurance, knowing that your measurements are dependable and your projects will be executed flawlessly.
The planning phase of any project is critical. Diamond markings empower you to plan with precision, enabling you to visualize and strategize how components will fit together. This is especially advantageous in complex projects where accurate placement is essential for successful execution.
In scenarios where you need to replicate measurements across multiple objects, diamond markings prove invaluable. Once you’ve determined the correct positioning using the markings, you can effortlessly replicate the same measurements on additional components, ensuring uniformity and consistency.
Whether you’re a professional tradesperson or a dedicated DIY enthusiast, the use of diamond markings adds a touch of professionalism to your craftsmanship. Clients and observers will notice the meticulous attention to detail, elevating the overall perception of your work.
For those new to the world of measurements and construction, understanding diamond markings provides an excellent learning opportunity. Teaching newcomers how to utilize these markings effectively not only imparts valuable skills but also instills an appreciation for precision and meticulousness.
Embarking on a journey of measurement mastery isn’t just about deciphering diamond markings or wielding a tape measure with finesse. It’s equally important to steer clear of common mistakes that can lead you astray.
In this segment, we’ll dive into the potential pitfalls that can undermine your measurements and projects. By understanding and sidestepping these missteps, you’ll not only enhance your accuracy but also elevate your craftsmanship to new heights.
Your tape measure is a reliable companion, but like any tool, it requires occasional fine-tuning. Over time, tape measures can lose accuracy due to wear and tear. Neglecting regular calibration against a trusted standard can lead to progressively inaccurate readings.
While diamonds are prominent, marking colors also carry significance. Some tape measures employ different colors to indicate specific measurements or intervals. Misinterpreting these color codes can lead to misguided calculations and project setbacks.
Diamonds might be the stars of the show, but intermediate markings play a crucial supporting role. These smaller marks provide finer measurements between diamonds. Disregarding or misreading these markings can introduce subtle errors into your measurements.
Flat surfaces are straightforward, but the real world is full of curves and contours. Ignoring the curvature of objects can lead to inaccuracies. When measuring curved surfaces, consider how the tape conforms to the shape and adjust accordingly.
In reality, obstacles can obstruct your measurement path. Trees, furniture, or other objects can interfere with the tape’s trajectory, leading to skewed readings. Ensuring a clear path for your tape to extend freely is essential for reliable measurements.
Patience is a virtue in the realm of precision. Rushing through measurements can lead to skipped steps, misaligned readings, and inconsistent results. Dedicate the time required for each measurement to ensure accuracy.
Temperature can impact the integrity of your measurements. Extreme cold or heat can cause the tape to contract or expand, affecting its accuracy. Be mindful of environmental conditions that might influence your readings.
Routine maintenance ensures your tape measure’s longevity and accuracy. Neglecting proper care, such as cleaning, lubricating, and protecting the tape, can lead to snags, uneven retraction, and inaccurate measurements.
Switching between metric and imperial units demands precision in its own right. Miscalculating conversions can lead to measurement mix-ups and project errors. Always ensure accurate conversions when working with different units.
The hook at the tape’s end isn’t just for show. Failing to account for its length when measuring from an edge can introduce discrepancies, particularly in small-scale measurements where every fraction counts.
Tape measures often feature fractional markings that can challenge interpretation. Misreading these fractions, even slightly, can accumulate errors over multiple measurements, ultimately affecting the precision of your project.
Understanding the significance of diamond markings on tape measures isn’t just about acquiring theoretical knowledge. It’s about equipping yourself with a versatile tool that can make a substantial impact in various real-world scenarios. Let’s explore the wide array of practical applications where this understanding can lead to tangible success.
Embarking on a home renovation or remodeling project involves a myriad of measurements. Whether you’re installing cabinets, hanging curtains, or adding a new fixture, accurate measurements are essential. Diamond markings come to the rescue by providing reference points that simplify alignment and ensure your additions fit seamlessly into your space.
Putting together furniture pieces, whether from a store or a DIY project, demands precision. Diamond markings streamline the process by offering guidelines for optimal placement. You can confidently position components and ensure your furniture not only looks polished but is also structurally sound.
Craftsmen in the realm of carpentry and woodworking rely on exact measurements to create functional and visually appealing pieces. Diamond markings facilitate precision when cutting materials, ensuring joints fit snugly and angles align perfectly for a flawless finished product.
For art enthusiasts and interior decorators, proper placement of artwork is paramount. Diamond markings simplify the process of hanging artwork at consistent heights and aligning multiple pieces with precision. This knowledge transforms arranging art from a subjective endeavor into a methodical one.
Outside the confines of interiors, diamond markings still prove their worth. In gardening and landscaping, knowing the midpoint between studs can guide the installation of support structures, trellises, or garden beds. These markings assist in establishing even spacing and symmetry in outdoor projects.
In educational settings, diamond markings offer a tangible way to teach measurement concepts. From primary school math lessons to construction training, these markings serve as visual aids that bridge theory and practical application.
For professionals in the construction industry, time efficiency is a valuable asset. Diamond markings expedite the process of framing, locating structural elements, and ensuring precise measurements during large-scale projects. This efficiency translates into increased productivity and reduced project timelines.
Architects and designers use accurate measurements as the foundation of their plans. Diamond markings enable them to translate designs into physical spaces with meticulous accuracy, ensuring that the envisioned concepts materialize as intended.
In tasks involving plumbing and electrical work, accurate measurements are essential to prevent costly mistakes. Diamond markings facilitate the strategic placement of pipes, fixtures, and outlets, reducing the likelihood of errors and the need for rework.
Teaching measurement skills to students, apprentices, or enthusiasts becomes more engaging and practical with the aid of diamond markings. From understanding stud placements to calculating midpoints, these markings serve as tangible examples that foster a deeper comprehension of measurement principles.
Understanding the significance of diamond markings on tape measures is akin to unlocking a secret language of accuracy and efficiency. These unassuming symbols hold the key to streamlined measurements, precise alignments, and successful projects.
By delving into the world of diamond markings, you’re arming yourself with a versatile tool that transcends industries, from construction to artistry. Embrace this knowledge, and you’re poised to elevate your craftsmanship, enhance your project outcomes, and navigate the intricacies of measurement with confidence.
The diamond symbols on a tape measure indicate specific intervals, often representing stud placements or midpoint measurements for framing and alignment in construction projects.
While not mandatory, diamond markings provide visual guides for precise measurements and aligning objects with consistent intervals, enhancing accuracy and efficiency.
Yes, usually white and black diamonds serve different purposes. White diamonds often mark stud positions, while black diamonds signify midpoint measurements within a 16-inch stud spacing.
Align your object with the appropriate diamond to ensure accurate placement. For instance, use black diamonds for midpoints and white diamonds for consistent stud positioning.
Absolutely. White diamonds, often spaced 16 inches apart, help locate wall studs. Aligning your measurements with these diamonds ensures sturdy and balanced installations.
While the concept of diamond markings is common, spacing and usage can vary. Always refer to your tape measure’s guidelines to interpret the markings accurately.
Avoid misaligning with the black diamonds at the 8-inch mark, overlooking tape tension, disregarding tape width, and reading from skewed angles to ensure accurate measurements.
Diamond markings complement traditional measurements. They offer quick reference points, enhancing measurement precision and efficiency in various projects.
Absolutely. Diamond markings aid in accurately hanging artwork, mirrors, and fixtures at consistent heights, ensuring a harmonious and visually appealing interior layout.
Explore tutorials, articles, and guides online about tape measure usage and markings. Many DIY and construction websites offer valuable insights into understanding and utilizing diamond markings effectively.