Physical Address
304 North Cardinal St.
Dorchester Center, MA 02124
Physical Address
304 North Cardinal St.
Dorchester Center, MA 02124
In the world of DIY, construction, and interior design, there is a golden rule that separates the amateurs from the experts: “Measure twice, cut once.” While it sounds like a simple cliché, the reality is that the humble tape measure is the most misunderstood tool in the toolbox.
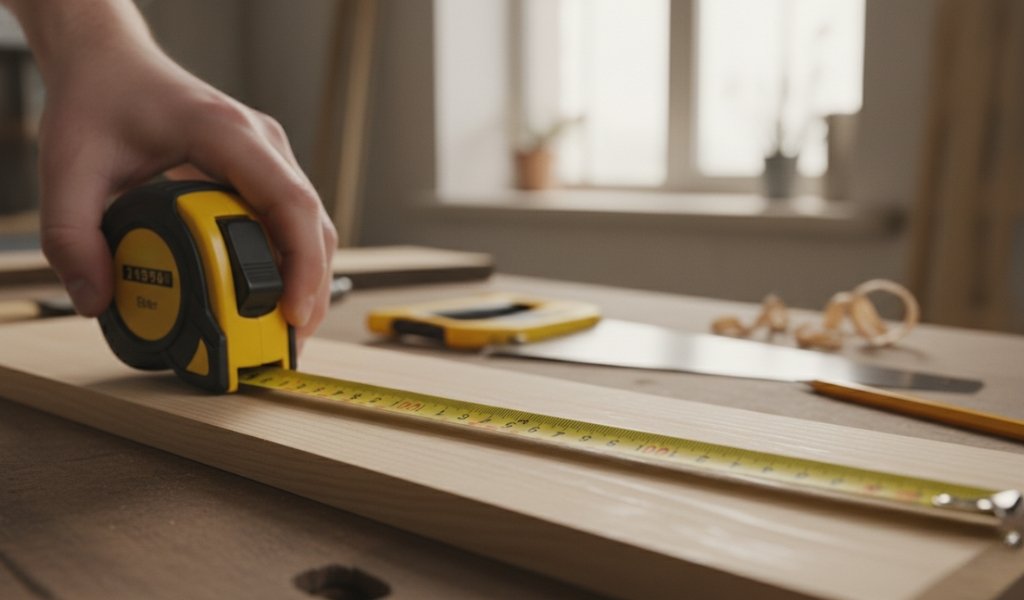
Whether you are a homeowner in the UK looking to hang a gallery wall or a budding carpenter aiming for seamless joinery, knowing how to use a tape measure accurately is the foundation of your success. A single millimeter of error might seem insignificant, but in a large-scale project, those tiny discrepancies compound, leading to wobbly shelves, gaps in flooring, or expensive wasted timber.
In this comprehensive guide, we will break down everything from the basic definition to advanced techniques for internal measurements, and even explore how a digital tape measure might be the modern upgrade your toolkit needs.
At its most basic level, a tape measure is a flexible ruler used to measure distance or size. Unlike a standard wooden ruler, its flexibility allows it to be carried in a pocket and to measure around curves or corners. The modern “spring-return” tape measure was patented in the 19th century and has since become the universal standard for trade work.
In terms of construction, it is a “linear measuring device” consisting of a stiffened ribbon of metal, plastic, or fiberglass.While a tailor uses a soft fabric tape, a DIYer or builder uses a “stiff” metal tape that can hold its own weight. This stiffness is vital because it allows a single person to extend the tape across a room without it collapsing, making it the most efficient way to quantify space in three dimensions.
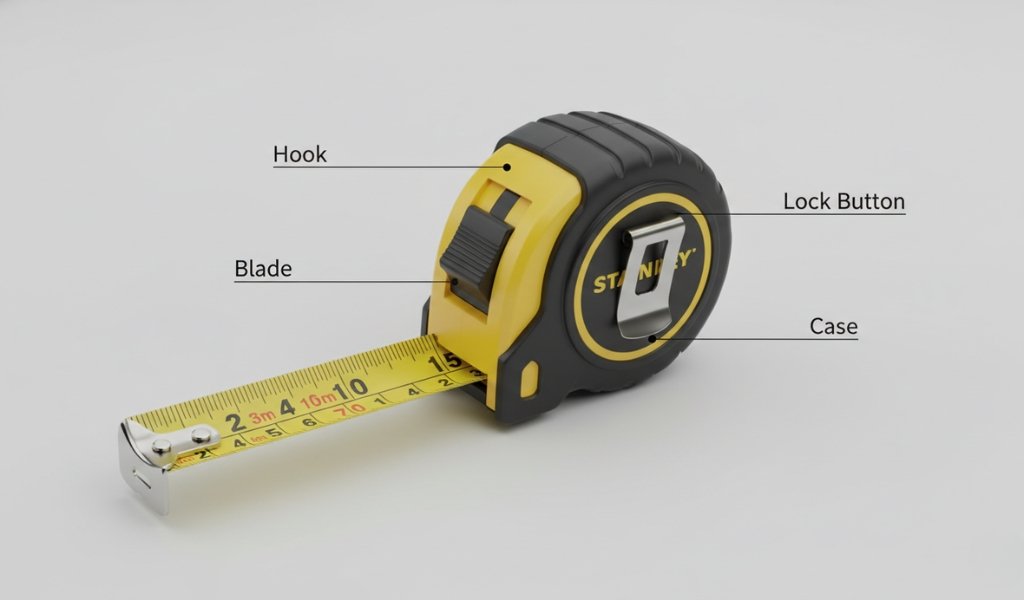
Before you pull the blade out, you need to understand the components that make this tool functional. A standard tape measure isn’t just a ribbon of metal; it’s a carefully engineered device designed to handle specific stresses. The internal spring is the “heart” of the tool of the tool, providing the tension necessary for the blade to return home automatically.
The outer housing is typically made of high-impact plastic or rubber-armored metal. It’s designed to withstand drops on concrete.Regarding the case often include its “over-molding,” which provides a non-slip grip. A further explanation of the case design reveals that its flat bottom is engineered specifically to sit level on surfaces, allowing it to act as a stable base when you are measuring vertical heights against a wall.
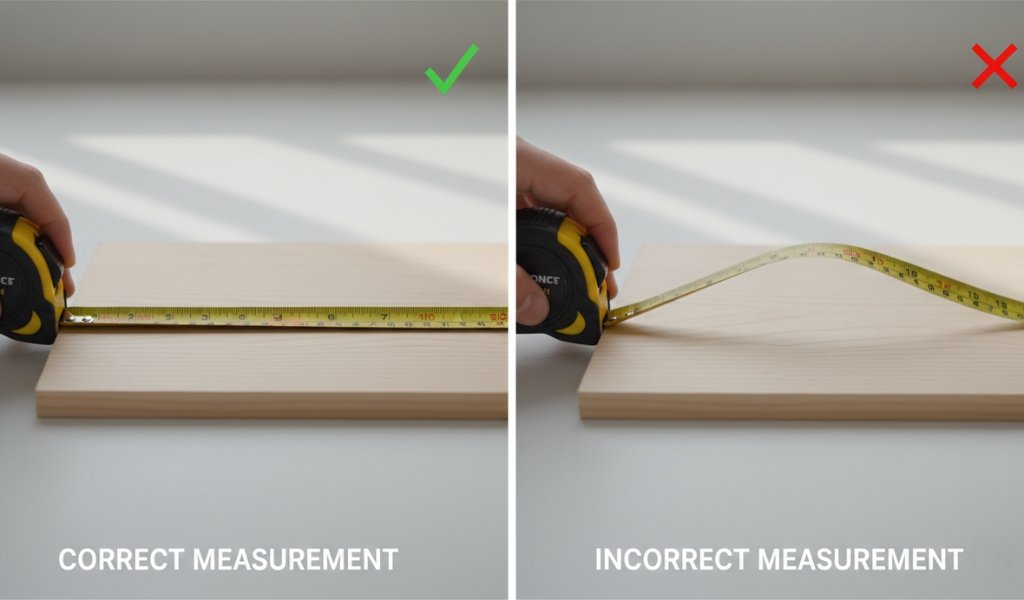
The “tape” itself is called the blade. High-quality blades are curved (concave). This curvature provides “stand-out,” which is the distance the tape can be extended before it buckles. To provide more explanation, this concave shape creates structural integrity; without it, the thin steel would be too floppy to use alone. The blade often includes a nylon or Mylar coating to protect the paint.
The thumb lock allows you to fix the blade at a specific length. This is vital when you are transferring a measurement. An additional explanation of the lock is that it doesn’t just “stop” the tape; it applies friction. The locking mechanism, with some offering a “pause” button on the bottom for temporary holds.
The metal tip at the end. You might notice it feels loose—don’t grab the pliers to tighten it! This “float” is a deliberate design feature. The hook often includes small serrated edges. To explain further, these edges allow you to “scribe” a mark into wood if you don’t have a pencil handy.
Learning how to read a tape measure is the most daunting part for beginners. To explain the difficulty, our brains often struggle to quickly process the varying lengths of the hash marks. The key is to recognize the “rhythm” of the lines.
Metric tapes are logically divided into precise increments:
Meters (m): Usually marked by a change in color.
Fractions: The lines represent halves, quarters, eighths, and sixteenths.
Why is my tape measure hook loose? The explanation is Accuracy. The hook’s thickness is usually exactly 1mm. This small gap allows the tape to give the same reading whether you are pulling against an edge or pushing against a wall.
To provide further explanation, if the hook were welded solid, your inside measurements would always be 1mm too long.Regarding the rivets are important; high-quality tapes use three rivets to ensure the float remains perfectly calibrated after years of use.
To get a professional result, follow this specific workflow. An explanation for this rigid process is that “drift” happens easily when you’re rushing.
This is the standard length check. Always verify that the hook isn’t catching on a splinter. An explanation for this is that even a tiny wood chip trapped under the hook can add 1mm to your result, ruining a “flush” fit.
Measuring a window frame is tricky because the tape has to bend into the corner. Details on the two methods:
The digital tape measure is the high-tech evolution of the tool. It uses a sensor to track the rotation of the internal reel.
Details on performance:
Technical Details to Consider:
Your tape measure is a precision instrument on keeping it in top shape:
Mastering how to use a tape measure transforms your DIY from guesswork to craft. By understanding the anatomy, the logic of the hook, and the importance of parallax, you eliminate the most common sources of error. Whether you stick with a traditional steel blade or upgrade to a digital tape measure, consistency is the true secret to accuracy.
Stand-out refers to how far the blade can extend horizontally without snapping. This is important for solo workers who need to reach across a room without help.
These are “truss marks” spaced at 19.2 inches. They are used by builders for specific framing layouts common in modern construction.
Class I is for engineering-level precision. Class II is the standard for construction. The rating is usually printed in a small circle near the hook.
No. Fabric tapes stretch. For timber and metal work, always use a rigid steel-bladed tape to ensure the distance remains constant.
That slot hooks onto a nail or screw head, allowing you to measure from a point when you don’t have a second person to hold the tape.