Physical Address
304 North Cardinal St.
Dorchester Center, MA 02124
Physical Address
304 North Cardinal St.
Dorchester Center, MA 02124

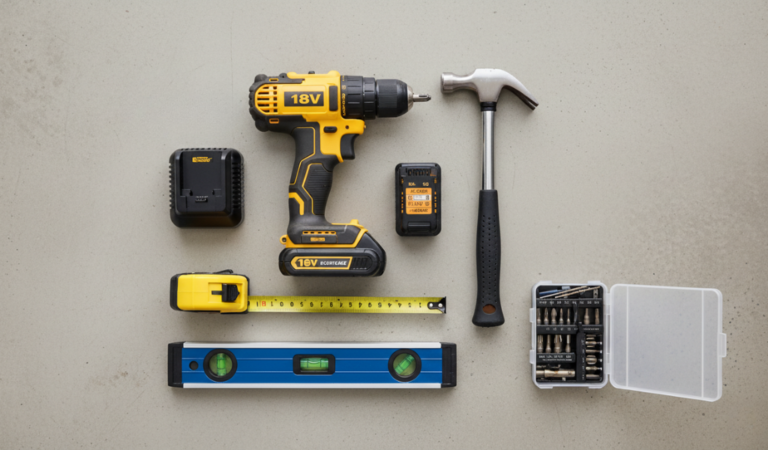
If you’re just stepping into the world of woodworking, a trim router might look small—but don’t let its size fool you. This compact power tool is incredibly versatile and perfect for beginners who want clean edges, smooth finishes, and professional-looking results without the intimidation of handling a bulky, three-horsepower machine.
In this complete guide, you’ll learn exactly how to use a trim router, what it’s best for, which router bits to choose, and how to use a trim router safely. Whether you’re shaping edges, trimming laminate, or adding decorative details to a DIY coffee table, this beginner-friendly walkthrough will make the process simple, practical, and highly rewarding. If you’re learning how to use a trim router for the first time, starting with basic edge trimming is the safest and easiest approach.
How to Use a Trim Router?
To use a trim router:
A trim router (also frequently called a palm router or compact router) is a specialized woodworking tool designed mainly for trimming, shaping, and detailing edges. Historically, these were developed for the cabinetry industry to flush-trim laminate on countertops, but they have evolved into a staple for trim router woodworking.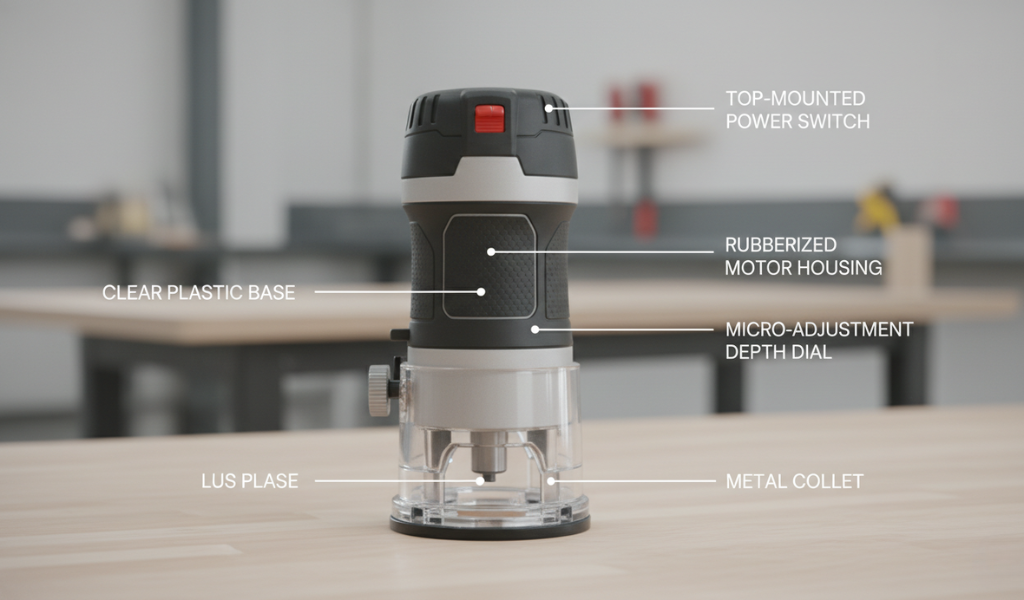
Think of it as the “precision pen” of the workshop compared to the “thick marker” of a full-size router. Because it is designed to be operated with one hand, it allows for a level of visibility and control that larger machines simply cannot match. It isn’t built for removing massive amounts of wood in a single pass, but for fine, detailed work, it is unrivaled.
When looking at a trim router for beginners, the most common question is: “Should I just buy the big one first?”
While a full-size plunge router has more power, the trim router wins on ease of use. A full-size router can weigh 15 pounds and require two hands to wrestle into position. A trim router weighs about 3 or 4 pounds. This weight difference makes a huge impact on how tired your arms get and how much you can actually “see” what you are doing.
| Feature | Trim Router | Full-Size Router |
| Weight | 3–4 lbs | 8–15 lbs |
| Horsepower | 1.0 – 1.25 HP | 2.25 – 3.5 HP |
| Grip | One-handed (Palm) | Two-handed (Knobs) |
| Collet Size | 1/4 inch | 1/4 inch & 1/2 inch |
Woodworking can be an expensive and space-consuming hobby. The trim router solves both of those problems while providing a low barrier to entry for high-quality results.
Before you flip the switch, you need to know the anatomy of your power tool. Most modern trim routers share these core components:
The router is just the engine; the router bit is what does the actual work. For trim router woodworking, you will primarily use 1/4-inch “shank” bits (the shank is the part that goes into the tool).

Safety is the most important part of learning how to use a trim router safely. These tools spin at speeds over 25,000 RPM. If something goes wrong, it happens very fast.
Preparation is where the quality of your work is decided. A sloppy setup leads to a sloppy finish. Ensure your workbench is free of debris. Even a small wood chip under the router base can tilt the tool and ruin your cut. Trace the path you intend to take with the router (while it’s off) to make sure your clamps won’t get in the way of the router’s base.
Many beginners make the mistake of “bottoming out” the bit. Here is the correct way:
When learning how to use a trim router, depth is your best friend and your worst enemy.
The Rule of Threes: If you need to cut a groove that is 3/8″ deep, don’t do it in one go. Make three passes at 1/8″ each. This prevents the motor from straining and keeps the wood from burning. Most trim routers have a small dial for “micro-adjustments.” Use it to test the depth on a piece of scrap wood first.
Ready to make some sawdust? Follow this workflow for a perfect result:
Clamp your wood to a stable surface. Ensure the part you are routing hangs slightly off the edge of the table so the bit doesn’t hit your workbench.
Place one hand firmly around the motor. If you have a second hand free, use it to help guide the base, but keep your fingers far away from the spinning bit.
Hold the router near the wood but not touching it. Flip the switch. Let the motor reach its full, high-pitched speed.
Gently move the bit into the wood. Start at a corner or one end of the board.
Move the router at a consistent speed. If you go too fast, the wood will splinter. If you go too slow, the friction will create black burn marks. Listen to the motor—it should sound steady.
Once you reach the end, pull the router away from the wood before turning it off. Wait for the bit to stop spinning completely before setting the tool down.
Edge trimming is the heart and soul of trim router woodworking. It’s used to clean up “overhang.” For example, if you glue a thin strip of wood onto a piece of plywood, the strip will likely be slightly taller than the plywood. The trim router makes it perfectly level in seconds.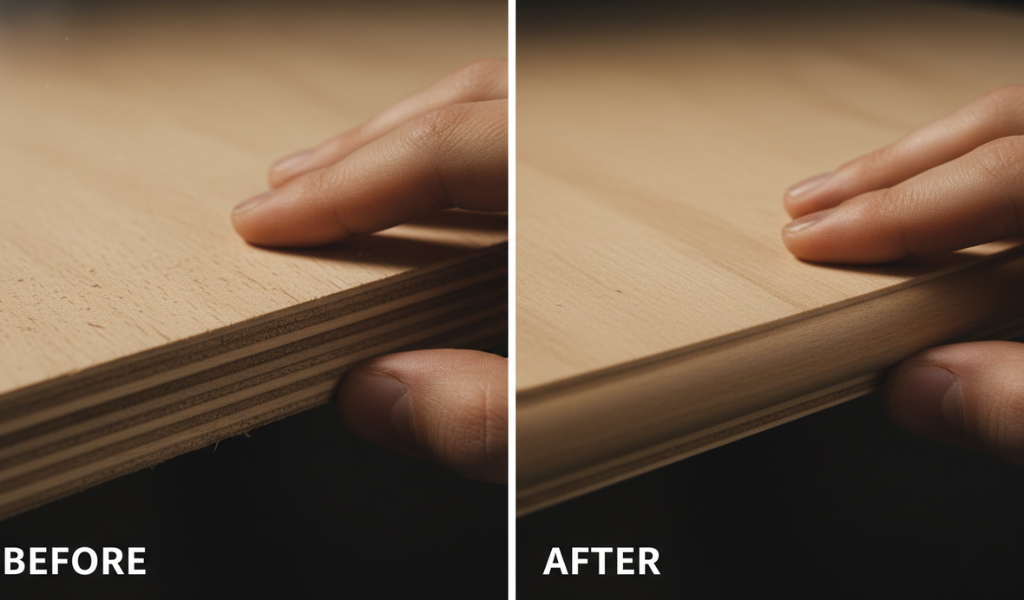
Flush Trimming: This uses a bit with a pilot bearing. The wheel rides along a “template” or the finished surface, while the blades cut the extra material to match perfectly.
Rounding Over: This is the most satisfying task for a trim router for beginners. Taking a sharp, dangerous corner on a stool and turning it into a soft, smooth curve makes the project look like it came from a high-end store.
While a full-size router is better for huge bookshelves, a trim router is perfect for box making (cutting slots for the bottom panel) or adding “inlays.” You can also use an Ogee bit to create an “S” shaped curve often seen on fancy picture frames. Because these decorative bits remove more wood, move slightly slower.
A power tool is an investment. Use compressed air to blow dust out of the motor vents after every project.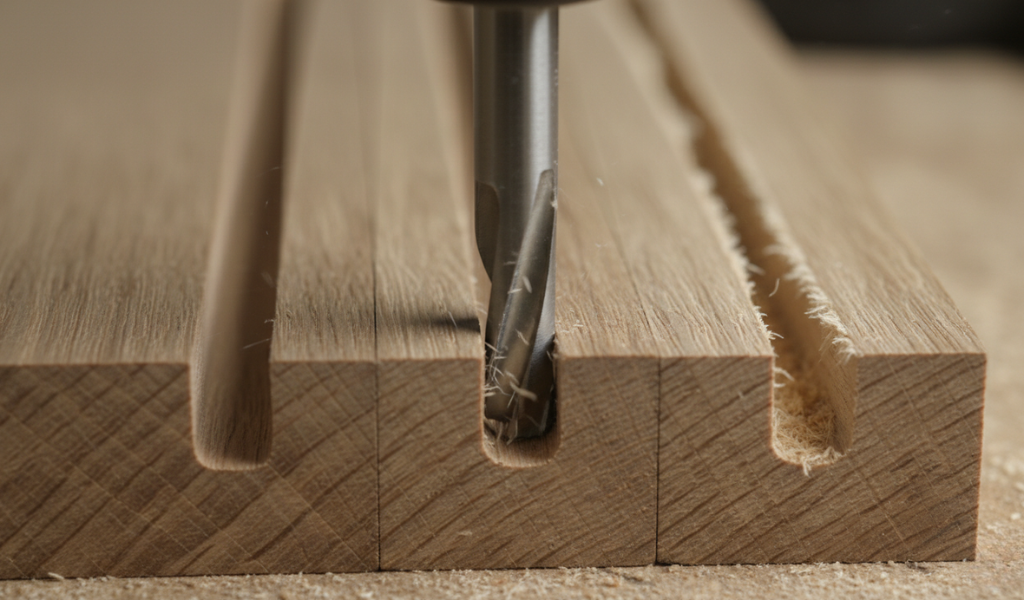 Sawdust inside the motor can cause it to burn out early. Also, check your bits. If a bit looks dark or “burnt,” it’s dull. Throw it away or get it sharpened. Dull bits are dangerous because they require more force to cut.
To truly master how to use a trim router, consider these add-ons:
The trim router is the best “first” router for any woodworker. It’s small, affordable, and provides instant gratification. By following the steps in this guide, you can take a basic piece of lumber and transform it into a professional-grade piece of furniture. Start with a simple round-over on a scrap piece of wood. Feel how the tool resists, how it cuts, and how the wood reacts. Once you get the “feel” for it, there is no limit to what you can build.
Not entirely. While a trim router is great for edges and light work, it lacks the power for massive jobs like flattening a huge slab of wood or cutting deep, wide holes for heavy furniture legs.
A 1/4″ Round-over bit with a bearing is the best starter bit. It is easy to use, very safe, and provides an immediate improvement to almost any project.
Burning is caused by friction. This happens if your bit is dull, you are moving too slowly, or you are trying to cut too much wood in one pass. Try taking two shallow passes instead of one deep one.
Cordless routers offer amazing freedom, but they are more expensive and can be “top-heavy” because of the battery. For a first tool, a corded model is often more balanced and better for your budget.
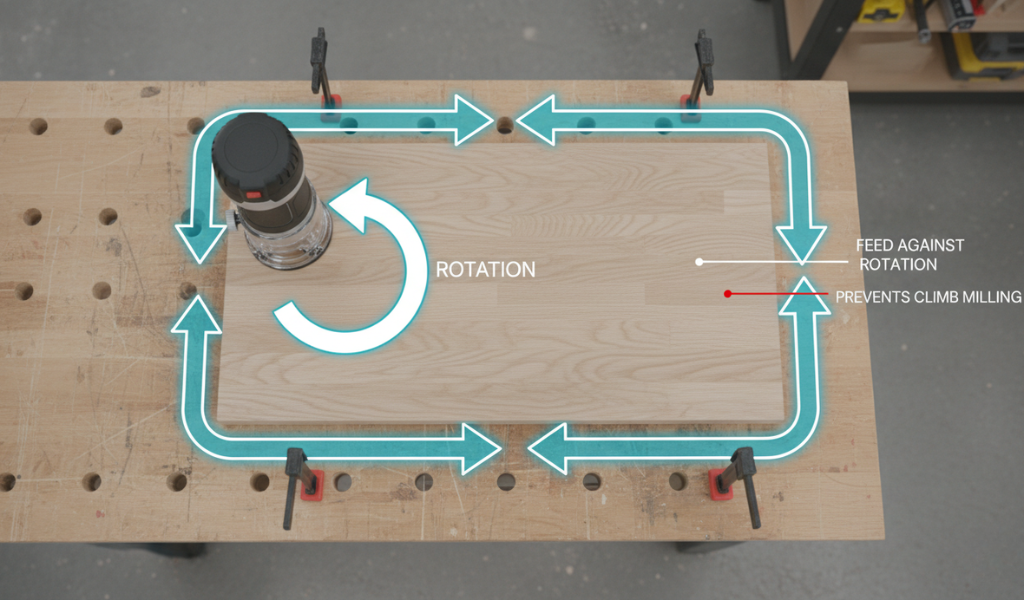
For the outside of a board, move Counter-Clockwise. If you are routing the inside of a frame (like a picture frame), move Clockwise. A good rule is: “Always push against the rotation.”
Yes! You can buy or make a “circle cutting jig.” This is a long piece of plastic that attaches to your router and spins around a center point, allowing you to cut perfect circles for stools or small tables.