Physical Address
304 North Cardinal St.
Dorchester Center, MA 02124
Physical Address
304 North Cardinal St.
Dorchester Center, MA 02124

Woodworking is an ancient craft defined by the removal of material to reveal a functional or artistic form. At the centre of this transformation is the wood chisel. Whether you are a weekend DIYer or an aspiring luthier, learning how to use a wood chisel is a fundamental skill that separates rough construction from fine, heirloom-quality craftsmanship.
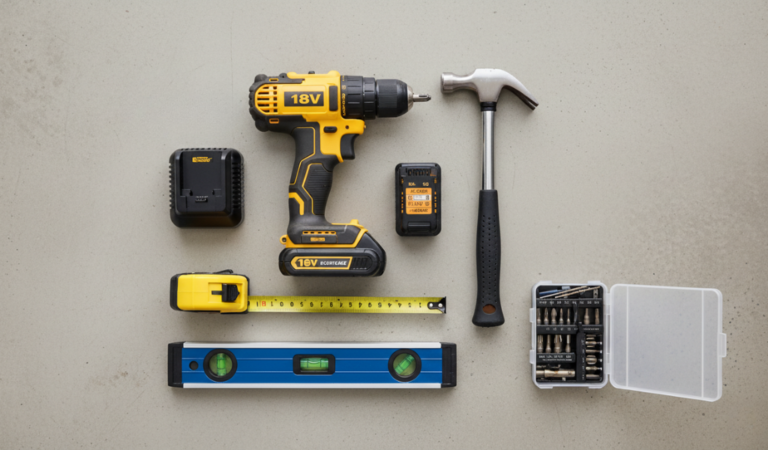
From fitting door hinges to carving intricate patterns, the versatility of a high-quality wood chisel set is unmatched. In this comprehensive guide, we will explore the anatomy, the various types of woodworking chisels, and the specific techniques required to master these essential tools.

A wood chisel is a hand tool featuring a characteristically shaped metal blade with a sharp cutting edge at one end. It is designed to be driven into wood—either by hand pressure or by the strike of a mallet—to carve, pare, or chop away material.
Unlike a saw, which removes a “kerf” (a width of sawdust), a chisel shears the wood fibers, allowing for incredibly smooth surfaces and tight-fitting joints. It is the primary tool used for creating joinery like mortise-and-tenon joints, dovetails, and housing grooves. In the world of woodworking chisels, the tool acts as both a precision surgical instrument for fine shaving and a heavy-duty demolition tool for bulk material removal.
Before you make your first cut, you must understand the anatomy of your tool.
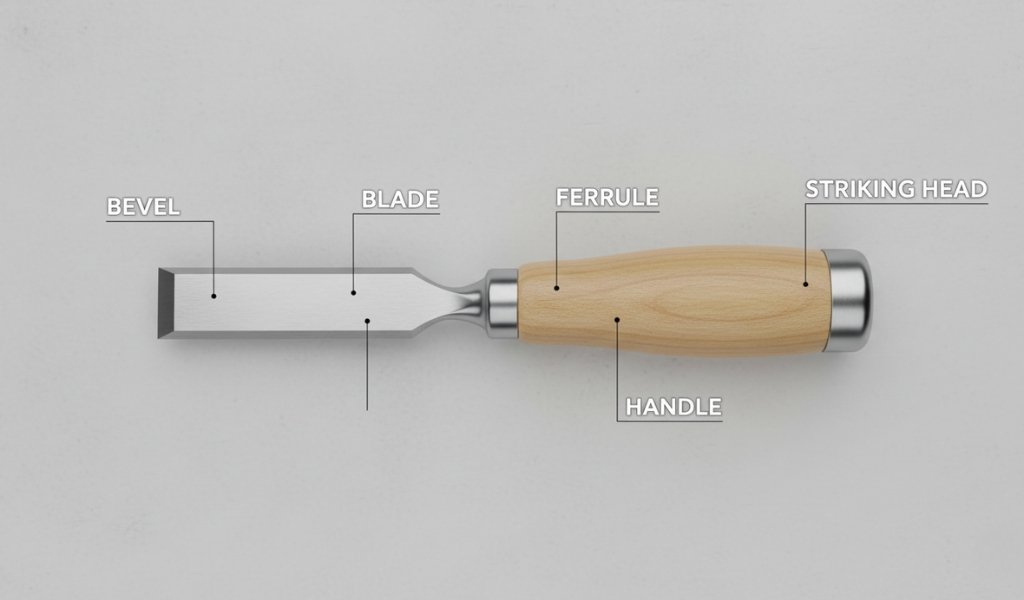
Each part is engineered to manage the physics of impact and the geometry of a clean cut.
While they may appear similar, woodworking chisels and wood carving chisels are built for different physics and artistic outcomes.
These are the structural workhorses of the shop. They are primarily used for joinery—creating the interfaces where two pieces of wood meet. They are built to withstand heavy strikes and to maintain a perfectly flat reference face.
A wood carving chisel is an artistic tool. These tools, often called “gouges,” are used to create 3D shapes, curves, and textures. Unlike flat woodworking chisels, carving tools often have curved blades to “scoop” wood rather than slice it flat.
Selecting the right tool from your wood chisel set depends on the depth and delicacy of the task.
| Chisel Type | Best For | Key Feature |
| Beveled-Edge | All-around joinery | The sides are angled, allowing the blade to get deep into tight 90° corners. |
| Butt | Hinges & tight spots | A short, “stumpy” blade that offers maximum control for shallow recessing. |
| Mortising | Heavy-duty deep holes | Extra-thick, rigid blades designed to be hammered deep into wood to create holes for tenons. |
| Paring | Finishing & shaving | Very long, thin blades. These are “hand-pressure only” tools meant for shaving off paper-thin layers. |
| Firmer | Bulk removal | These have a rectangular cross-section for maximum strength, used for heavy shaping. |
For artistic flair, you need specialized geometry. A standard wood carving chisel set will include several “sweeps” or degrees of curvature:
The material of your handle dictates the tool’s lifespan and your comfort. Wooden handles provide a traditional, warm feel and offer organic shock absorption that reduces hand fatigue. However, they can “mushroom” or split over decades of use. Plastic or Composite handles are virtually indestructible and are the better choice for heavy site work where you might be using a heavier mallet.
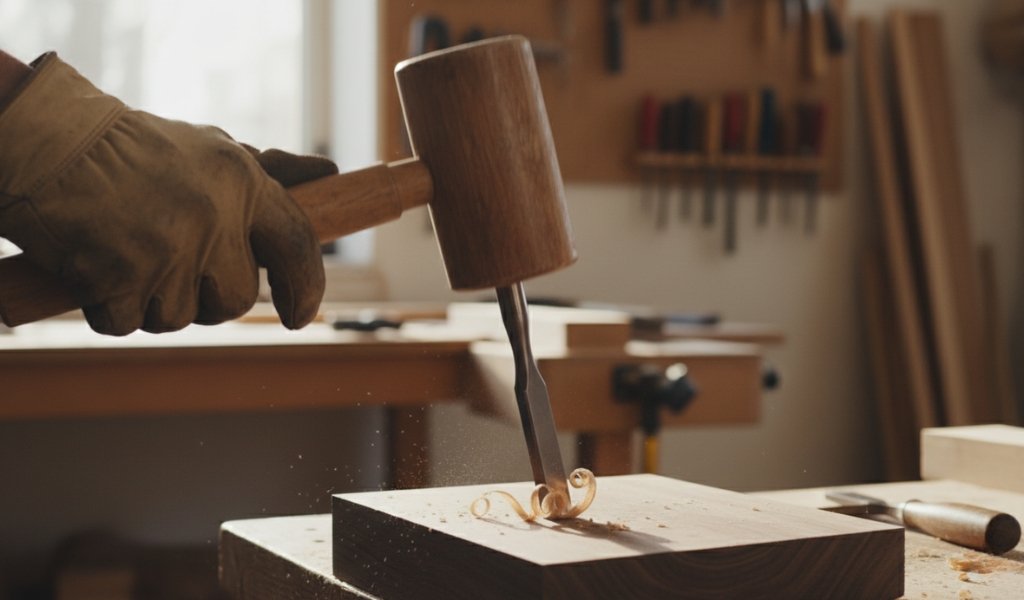
Never use a metal carpenter’s hammer on a wooden chisel handle. The hard steel of a hammer will shatter the wood or deform the plastic head almost instantly. Always use a wooden, rubber, or urethane mallet. The mallet’s face is designed to deform slightly upon impact, which “pushes” the chisel into the wood with a controlled force rather than a sharp, damaging shock.
Basic Techniques: How to Use a Wood Chisel
Mastering how to use a wood chisel requires understanding grain direction. If you chisel “against the grain,” the wood will split unpredictably.
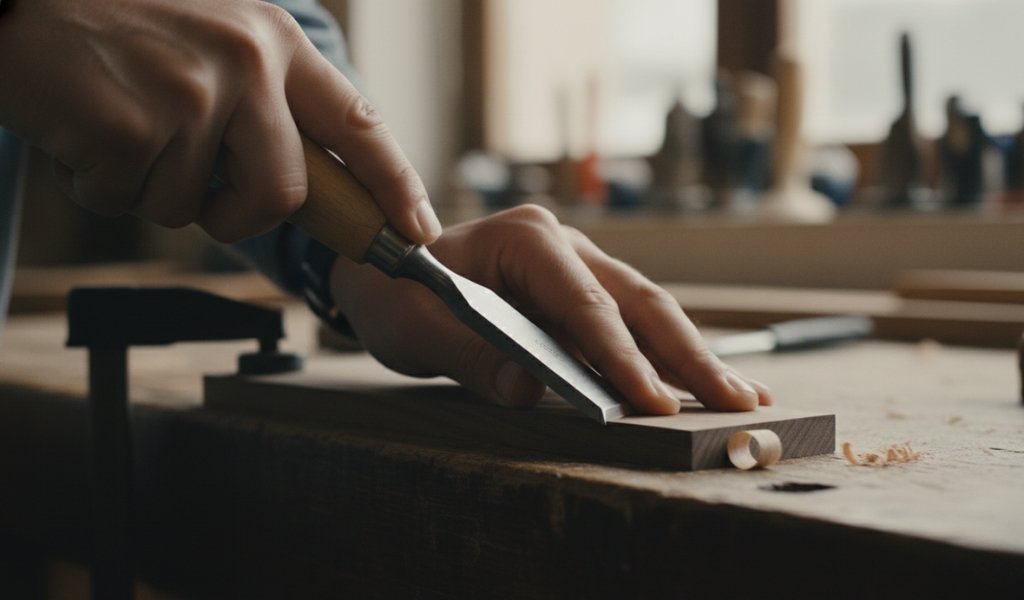
If a surface is slightly uneven or has dried glue, hold the chisel at a 90° angle (perpendicular) to the wood. Pull the blade toward you with the flat face facing you. This “burnishes” the wood and removes high spots without the risk of digging too deep.
Recessing a hinge (creating a mortise) is a staple home improvement task.
Grooves (or rabbets) are essential for drawer bottoms. Start by sawing the two outer edges of the groove to the desired depth. Use your woodworking chisel to “pop” out the waste material between the saw cuts. Finish by paring the bottom of the groove until it is smooth and level.
A sharp chisel is a safe chisel. A dull blade requires excessive force, which leads to the tool slipping and causing injury.
The wood chisel is the ultimate bridge between raw timber and finished art. It requires patience to master, but once you understand the relationship between the steel edge and the wood fiber, you can build almost anything. Keep your tools sharp, your hands safe, and your cuts deliberate.
Q: What is the most important safety rule when working with wood chisels?
A: Always chisel away from your body and keep both hands behind the sharp edge. Ensure your workpiece is firmly clamped so you don’t have to use your hand to steady it near the blade.
Q: What to do with a mushroomed chisel head? Can I still use it?
A: A mushroomed head is dangerous as pieces of material can fly off when struck. Trim the excess material back with a file or saw. If it’s a wooden handle, consider replacing it or adding a metal ferrule to the top.
Q: What else can I use to make perfect square holes?
A: You can use a mortising machine attachment for a drill press, which combines a drill bit with a square chisel.
Q: Why does the bevel face down sometimes and face up at other times?
A: “Bevel-down” is used for heavy chopping or when you want the tool to pivot out of a cut. “Bevel-up” (flat side down) is used for pairing to ensure a perfectly flat result.
Q: How often should I sharpen my wood chisel?
A: You should “strop” or hone your chisel the moment you feel it resisting the wood. A truly sharp chisel should be able to shave the hair on your arm with ease.