Woodworking Hacks: Your Guide on How to Attach Plexiglass to Wood

Looking to bring transparency and craftsmanship together in your projects? That’s where “How to attach plexiglass to wood” comes in! This guide is your secret sauce to seamlessly bonding the strength of wood with the clarity of plexiglass. Whether you’re a DIY enthusiast or a seasoned woodworker, this simple yet essential skill opens up a world of possibilities.

From creating stunning furniture accents to crafting display cases, we’ve got you covered. No need for complex jargon or hours of frustration – we’ll break it down step by step. So, grab your tools and let’s dive into the art of marrying these two materials like a pro! 

Key Summary: How to Attach Plexiglass to Wood?

Attach plexiglass to wood securely using adhesives or mechanical fasteners. The process typically takes under an hour. Ensure proper ventilation and protective gear for safety. Regular cleaning with mild solutions maintains the bond and clarity, ensuring a lasting fusion of strength and transparency.

Hand Tools Suggestion for Your Home

Explaining Plexiglass and Wood Compatibility

Plexiglass, a versatile transparent acrylic material, and manufactured wood, a classic and widely-used building material, can cohesively come together to create exceptional projects. The key to a successful partnership lies in understanding their compatibility and the right approach to their combination.

Adhesive Selection: The Foundation of Compatibility

Selecting the appropriate adhesive is paramount to achieving a strong and enduring bond between plexiglass and wood. Acrylic adhesives are often the best choice, specially formulated to adhere effectively to plexiglass while also bonding well with wood. Following the adhesive manufacturer’s guidelines regarding application and curing is critical for a secure and lasting connection.

Surface Preparation: A Vital Step

Preparing the surfaces of both materials is a crucial step in enhancing their compatibility. Ensuring that the surfaces are clean, smooth, and free of any impurities or contaminants is essential. Lightly sanding both the wood and plexiglass surfaces promotes better adhesion.

Accounting for Material Behavior: Expansion and Contraction

Considering the differential behavior of wood and plexiglass due to temperature and humidity changes is vital. Wood tends to expand and contract with variations in these factors, while plexiglass remains relatively stable. To accommodate this difference and maintain the bond, leaving a slight gap or utilizing a flexible adhesive is recommended.

Mechanical Reinforcement: Strengthening the Bond

In certain applications, incorporating mechanical fasteners such as screws or bolts alongside the adhesive can bolster the bond’s strength and stability. Strategically placing these fasteners ensures an even distribution of stress, reducing the risk of cracking or splitting.

Aesthetic Integration: Designing with Harmony

Beyond the technical aspects, integrating plexiglass and wood offers exciting design possibilities. Careful consideration should be given to ensuring that the adhesive and attachment methods complement the overall aesthetics, enhancing the visual appeal of the final project.

Achieving compatibility between plexiglass and wood involves a thoughtful approach, considering adhesion methods, surface preparation, material behaviors, mechanical reinforcement, and design aesthetics. By understanding the unique properties of both materials and adhering to best practices, you can successfully combine plexiglass and wood, resulting in durable, visually pleasing, and innovative projects.

Step-By-Step Attachment Process: How to Attach Plexiglass to Wood

Plexiglass, a lightweight and versatile acrylic material, offers clarity and durability, making it a popular choice for various applications. Attaching plexiglass to wood requires precision and the right approach to ensure a secure and lasting bond. Here’s a step-by-step guide to walk you through the process:

Step 1: Gather Materials and Tools

Materials

  • Plexiglass sheet of desired size and thickness
  • Wooden surface or object for attachment
  • Acrylic-compatible adhesive
  • Sandpaper or a sanding block
  • Cleaning solution and cloth
  • Clamps

Tools

  • Measuring tape
  • Pencil
  • Saw (for cutting the plexiglass and wood, if needed)
  • Screwdriver (if using mechanical fasteners)
  • Safety goggles and gloves

Step 2: Prepare the Plexiglass and Wood

Measure and Mark

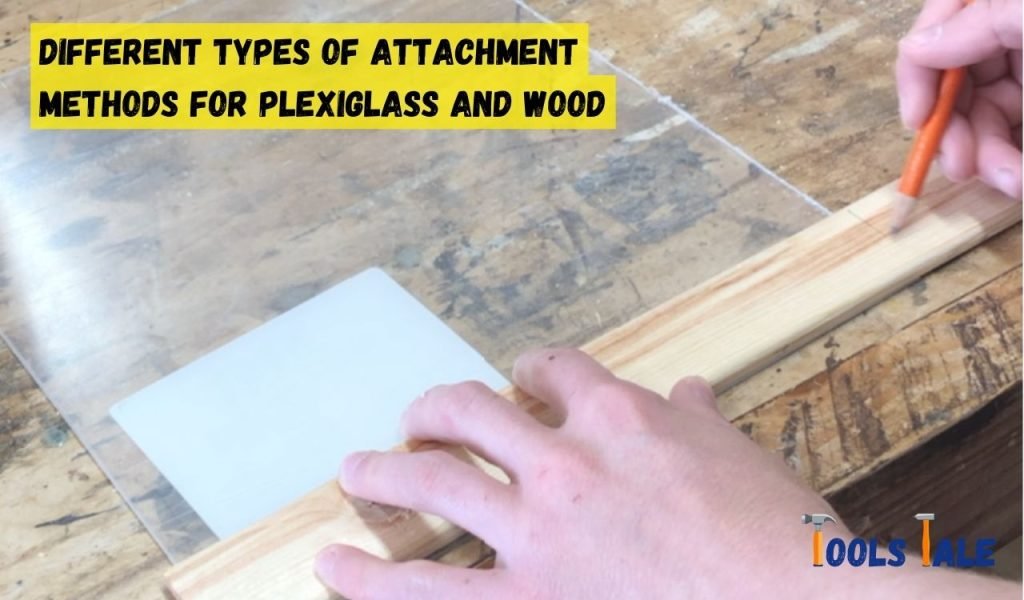
Measure and mark the desired dimensions on both the plexiglass and wood using a measuring tape and pencil. Ensure precision in measurements for a seamless fit.

Cut the Plexiglass

Carefully cut the plexiglass along the marked lines using a saw or appropriate cutting tool. Employ a fine-toothed saw to prevent chipping and maintain a clean edge.

Sand the Edges

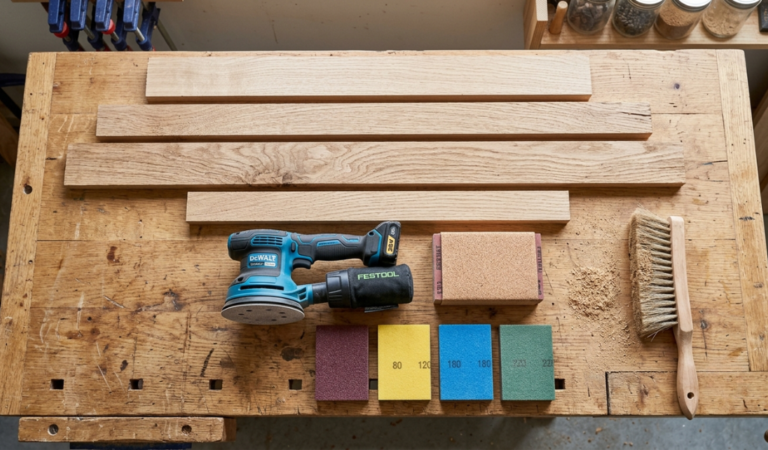
Use sandpaper or a sanding block to smooth the edges of the cut plexiglass. Gently sand in one direction to avoid creating rough spots.

Sand the Wood Surface

If the wood surface is rough or uneven, sand it to create a smooth and clean surface for attachment. Remove any splinters or imperfections.

Clean Surfaces

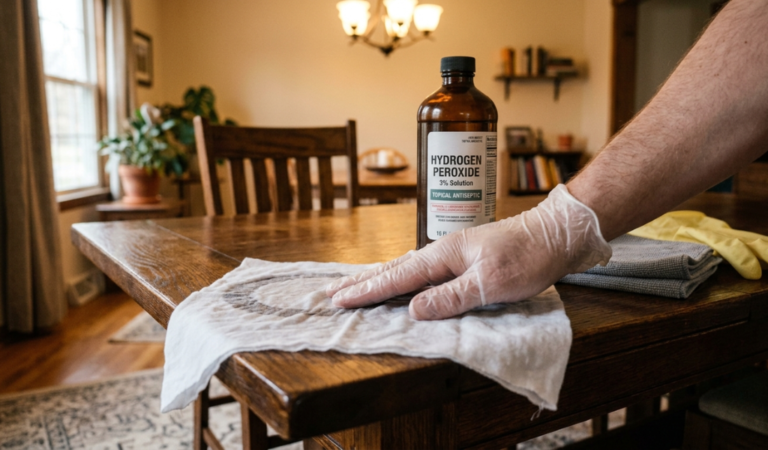
Clean both the plexiglass and wood surfaces with a cleaning solution and cloth to remove any dust, dirt, or residues that might hinder adhesion.

Step 3: Choose the Right Adhesive

Select an Acrylic Adhesive

Choose an adhesive specifically designed for bonding acrylic materials. Opt for a clear and strong adhesive that ensures a secure attachment.

Step 4: Apply the Adhesive

Apply Adhesive on Plexiglass

Apply a thin, even layer of the selected adhesive on the side of the plexiglass that will attach to the wood. Avoid applying too much adhesive to prevent it from seeping out when pressure is applied.

Position Plexiglass on Wood

Carefully position the plexiglass on the desired location on the wood surface, aligning it according to your earlier markings.

Press and Hold

Apply even pressure on the plexiglass to ensure a strong bond. Use clamps to hold the plexiglass securely in place while the adhesive cures. Follow the adhesive manufacturer’s recommended curing time.

Step 5: Secure the Plexiglass to Wood

Check Alignment

Ensure that the plexiglass is aligned correctly and adjust its position if needed before the adhesive sets.

Mechanical Fasteners (Optional)

If additional support is desired, consider using screws or bolts as mechanical fasteners. Pre-drill holes through the plexiglass into the wood, then secure with screws or bolts.

Remove Excess Adhesive

If any adhesive has seeped out, carefully remove it using a damp cloth before it dries.

Step 6: Allow for Drying and Finishing Touches

Drying Time

Allow the adhesive to fully cure according to the manufacturer’s instructions before moving or using the attached plexiglass and wood.

Inspect and Finish

Inspect the attachment to ensure a secure bond. If satisfied, you can further finish the wood or plexiglass to enhance the overall appearance.

Attaching plexiglass to wood involves careful preparation, selection of appropriate materials, and meticulous application of adhesive. By following this step-by-step guide, you can achieve a secure and durable bond between plexiglass and wood for your desired projects.

Different Types of Attachment Methods for Plexiglass and Wood

Different Types of Attachment Methods for Plexiglass and Wood

Attaching plexiglass to wood requires choosing an appropriate attachment method that ensures a secure and lasting bond. Here are various methods to achieve this connection:

Adhesive Bonding

  • Description: Using adhesives designed for bonding acrylics, a strong and clear bond can be achieved. Acrylic adhesives ensure a seamless connection between plexiglass and wood.
  • Advantages: Provides a smooth surface finish, evenly distributes stress, and maintains transparency.
  • Considerations: Requires careful surface preparation and alignment; curing time is crucial for a strong bond.

Mechanical Fasteners

  • Description: Bolts, screws, nuts, or rivets can be used to mechanically secure plexiglass to wood by creating a tight joint.
  • Advantages: Offers additional support, particularly for heavier or load-bearing applications.
  • Considerations: Pre-drilling holes is necessary to prevent cracking; may slightly mar the appearance of the plexiglass.

Double-Sided Tape

  • Description: Specialized double-sided tapes with strong adhesive properties can provide a quick and temporary attachment solution.
  • Advantages: Fast and easy to apply; suitable for lightweight applications or temporary fixings.
  • Considerations: Not ideal for heavy loads or long-term use.

Clamping

  • Description: Using clamps to hold the plexiglass and wood together while the adhesive cures, providing even pressure for a secure bond.
  • Advantages: Allows for precise alignment and consistent pressure during the curing process.
  • Considerations: Clamps should be appropriately sized and positioned for effective bonding.

Channeling and Bolting

  • Description: Creating a channel in the wood and securing the plexiglass within it using bolts or screws.
  • Advantages: Provides a flush and seamless attachment, especially for framed structures.
  • Considerations: Requires precise cutting and alignment; visible fasteners may affect aesthetics.

Hinge Attachments

  • Description: Using hinges to attach the plexiglass to wood, allowing for movable parts or access to enclosed areas.
  • Advantages: Enables movement or access while maintaining a secure connection.
  • Considerations: Hinges must be appropriately sized and aligned for smooth movement.

Choosing the right attachment method depends on the specific application, load-bearing requirements, aesthetic preferences, and the level of permanence desired. By considering these options, you can effectively and securely attach plexiglass to wood for a wide range of projects.

Safety Precautions When Working with Plexiglass

Working with plexiglass, a versatile and durable acrylic material, requires proper safety measures to ensure a safe and accident-free working environment. Here are essential precautions to follow:

Wear Safety Gear

  • Eye Protection: Always wear safety goggles or a face shield to protect your eyes from potential flying debris or particles during cutting, drilling, or sanding.
  • Hand Protection: Use gloves, preferably made of nitrile, to protect your hands from cuts, abrasions, and exposure to adhesives or chemicals.

Work in a Well-Ventilated Area

  • Ensure proper ventilation in your workspace to minimize exposure to fumes, especially if using adhesives or working with heated plexiglass.

Use the Right Tools

  • Cutting Tools: Employ appropriate cutting tools such as a fine-toothed saw, plexiglass scoring tool, or a specialized plexiglass cutter to ensure smooth and precise cuts.
  • Drilling Tools: Use high-speed drill bits designed for acrylic materials to avoid cracking or splintering.

Secure the Work Surface

  • Ensure that the wood or worktable is stable and securely holds the plexiglass to prevent slips or accidents during cutting or attaching processes.

Handle with Care

  • Avoid Dropping: Handle plexiglass panels with care to prevent cracks, chips, or breaks. Always place them on a flat, padded surface.
  • Remove Protective Film: Remove the protective film on the plexiglass only after the attachment is complete to prevent scratches or damage during handling.

Mind Temperature Control

  • Heating Plexiglass: If using heat for bending or shaping, follow proper temperature guidelines and avoid overheating, which can cause deformation or damage to the material.

Store Safely

  • Store plexiglass sheets vertically or flat to prevent warping, bending, or cracking.

Dispose Properly

  • Dispose of plexiglass waste responsibly according to local regulations. Do not burn or incinerate it.

Read and Follow Instructions

  • Adhere to the manufacturer’s instructions for any adhesives, solvents, or other chemicals used with plexiglass.

Emergency Preparedness

  • Have a first-aid kit accessible and know the location of the nearest eye wash station or emergency shower in case of accidental exposure.

Prioritizing safety when working with plexiglass is crucial for preventing injuries and ensuring a successful and enjoyable project. By following these safety precautions, you can create your plexiglass projects with confidence and minimize any potential risks associated with handling this versatile material.

Common Issues and Challenges That May Arise During Attachment of Plexiglass

When attaching plexiglass to various surfaces, several common challenges can emerge, potentially affecting the outcome of the project. Being aware of these issues and understanding how to address them is essential for a successful attachment process. Here are some of the most prevalent concerns and ways to overcome them:

Improper Surface Preparation

  • Issue: Insufficient or improper preparation of the plexiglass and the attaching surface can hinder adhesion.
  • Solution: Thoroughly clean and dry both surfaces, ensuring they are smooth and free of any contaminants or residues. Sanding the surfaces lightly can improve adhesion.

Incompatible Adhesives

  • Issue: Using an adhesive that is not suitable for bonding plexiglass and wood can lead to a weak or ineffective bond.
  • Solution: Choose an adhesive specifically designed for bonding acrylics and wood. Follow the manufacturer’s recommendations for optimal results.

Excessive Adhesive Application

  • Issue: Applying too much adhesive can result in seepage, a messy appearance, and compromised transparency.
  • Solution: Apply a thin, even layer of adhesive, following the recommended application guidelines. Remove excess adhesive immediately before it dries.

Inadequate Curing Time

  • Issue: Not allowing the adhesive to cure for the recommended duration can weaken the bond.
  • Solution: Adhere strictly to the curing time specified by the adhesive manufacturer. Avoid any stress on the bond during this period.

Poor Alignment and Positioning

  • Issue: Misalignment of plexiglass during attachment can result in an unsightly finish or structural issues.
  • Solution: Ensure accurate alignment before securing the plexiglass. Use clamps to hold it in place while the adhesive cures.

Cracking or Splintering

  • Issue: Plexiglass can crack or splinter if not handled or drilled correctly, especially near the edges.
  • Solution: Use appropriate cutting and drilling tools, ensuring proper techniques to avoid stress concentrations that lead to cracking.

Bubbling or Clouding of Plexiglass

  • Issue: The adhesive may cause bubbles or clouding on the plexiglass surface.
  • Solution: Apply the adhesive evenly, avoiding over-application. Use an adhesive that is known to have a minimal impact on plexiglass clarity.

Warped or Distorted Plexiglass

  • Issue: Plexiglass can warp or distort due to excessive heat during the attachment process.
  • Solution: Use controlled heating techniques, and avoid exposing the plexiglass to high temperatures for prolonged periods.

Adhesive Failure Over Time

  • Issue: The adhesive bond may weaken or fail over time due to exposure to environmental factors or inadequate bonding.
  • Solution: Choose a high-quality, durable adhesive suitable for long-term applications. Consider reinforcing the bond with mechanical fasteners.

Understanding and addressing these common attachment challenges is essential for achieving a successful and long-lasting connection between plexiglass and other surfaces.

By following proper preparation, using suitable adhesives, ensuring accurate alignment, and being cautious with temperature and application, you can mitigate these issues and achieve a secure and aesthetically pleasing attachment of plexiglass in your projects.

Finishing Touches and Maintenance for Plexiglass Attachments

Finishing Touches and Maintenance for Plexiglass Attachments

Completing a successful attachment of plexiglass to wood involves careful consideration of finishing touches and ongoing maintenance to ensure durability, aesthetics, and longevity. Here are essential steps and tips for these crucial aspects:

Smoothing and Polishing

  • Smoothing Edges: After the attachment is complete, carefully sand the edges of the plexiglass to remove any roughness or sharp edges. This provides a finished look and ensures safety.
  • Polishing Surface: Use a plastic polish or a mild abrasive to further smoothen the surface of the plexiglass. This enhances clarity and maintains a glossy appearance.

Painting and Coating (if desired)

  • Choosing Suitable Paint: If color or specific aesthetics are desired, use acrylic-specific paints or coatings. Ensure the paint is compatible with plexiglass to prevent damage.
  • Applying Paint Carefully: Apply paint or coating evenly and in thin layers to maintain transparency and prevent drips or uneven patches.

Sealing the Attachment

  • Applying Sealant (optional): Consider applying a clear sealant along the edges of the attachment to create a watertight seal, enhancing durability and preventing moisture intrusion.

Regular Cleaning

  • Gentle Cleaning Solutions: Clean the plexiglass using a mild soap or a designated plastic cleaner. Harsh chemicals or abrasive cleaners can damage the surface.
  • Soft Cloth or Sponge: Use a soft cloth or sponge to avoid scratches. Gently wipe in a circular motion to remove dirt or debris.

Avoiding Damaging Agents

  • Chemical Exposure: Avoid contact with harsh chemicals, such as acetone, alcohol, or ammonia-based cleaners, as they can cause clouding or surface damage.
  • Abrasive Materials: Refrain from using abrasive materials like steel wool or rough paper towels that can scratch the plexiglass.

Protecting from Sunlight

  • UV Protection: If exposed to sunlight, consider applying a UV-protective film to the plexiglass. This helps prevent yellowing or degradation caused by UV rays.

Regular Inspection

  • Check for Damage: Periodically inspect the attachment for any signs of damage, cracks, or loose edges. Promptly address any issues to prevent further deterioration.

Avoiding Excessive Force

  • Be Gentle: When handling or cleaning the attached plexiglass, use caution and avoid excessive force to prevent accidental detachment or damage.

Reapplying Adhesive (if needed)

  • Assess Bond Strength: If you notice any weakening of the bond between plexiglass and wood, consider reapplying adhesive to reinforce the attachment.

Applying the finishing touches and implementing proper maintenance practices are vital for preserving the quality and aesthetics of plexiglass attachments. By adhering to gentle cleaning techniques, protecting against damaging agents, and conducting regular inspections, you can enjoy a lasting and attractive plexiglass attachment that enhances your project’s overall appearance and functionality.

Final Word

Attaching plexiglass to wood demands precision, suitable materials, and cautious application. Follow steps diligently, opt for the right adhesive, and prioritize safety. A seamless bond, smoothed edges, and proper maintenance ensure a durable, aesthetically pleasing collaboration.

Whether crafting for practicality or artistry, this fusion of plexiglass and wood can elevate projects, offering transparency and structural integrity. Embrace the art and science of attachment, and your creations will stand as a testament to this harmonious combination. Happy crafting!

Frequently Asked Questions

Can plexiglass be glued to wood?

Yes, plexiglass can be glued to wood effectively. The key is using specialized acrylic adhesives designed to create a strong and lasting bond between plexiglass and wood. Proper surface preparation, ensuring the surfaces are clean and dry, is crucial for achieving a reliable attachment. Additionally, align the plexiglass carefully with the wood before applying the adhesive for the best results.

What is the best way to attach plexiglass?

The best method is using acrylic-compatible adhesives designed for bonding plexiglass to various surfaces. Follow the manufacturer’s instructions for optimal results.

How to attach plexiglass to woodworking?

Attaching plexiglass to woodworking involves employing acrylic-compatible adhesives. These adhesives are designed to adhere well to both plexiglass and wood. Ensuring the surfaces are clean, smooth, and dry before applying the adhesive is crucial. Following the adhesive manufacturer’s guidelines for application and curing is essential to achieve a secure bond.

Is epoxy glue suitable for gluing plexiglass to wood?

Yes, epoxy glue can be suitable for attaching plexiglass to wood, provided it’s compatible with both materials. Ensure the epoxy is transparent and formulated for acrylic bonding.

Do you need to add acetone when gluing plexiglass to wood?

No, adding acetone when gluing plexiglass to wood is not recommended. Acetone can damage plexiglass and is not necessary for achieving a strong bond between plexiglass and wood. It’s best to use adhesives specifically designed for bonding acrylics, following the manufacturer’s instructions for surface preparation and application to ensure a secure and reliable attachment.

Can you use hot glue to attach plexiglass to wood?

Hot glue is not the most ideal choice for bonding plexiglass to wood. Hot glue may not provide a strong and durable bond, and it may not effectively adhere to plexiglass. Opt for specialized acrylic adhesives that are designed to bond plexiglass and wood, ensuring a lasting and secure attachment.

What is the best wood glue to use for attaching plexiglass to wood?

For attaching plexiglass to wood, the best choice is a clear, acrylic-based wood glue. This type of wood glue is designed to bond well with both wood and acrylic materials. It provides a strong and transparent bond, ensuring a seamless attachment between the plexiglass and the wood. Always check for compatibility and follow the manufacturer’s instructions for the best results.

Share your love!
Tools Tale

Tools Tale

Disclaimer: This site is owned and operated by Tools Tale. toolstale.com is a participant in the Amazon Services LLC Associates Program, an affiliate advertising program designed to provide a means for sites to earn advertising fees by advertising and linking to Amazon.com. This site also participates in other affiliate programs and is compensated for referring traffic and business to these companies.

Articles: 179