Hey there! Ever found yourself stuck with a stubborn castle nut and no wrench in sight? Fret not! I’ve got the lowdown on how to tackle that pesky nut without the traditional tool. In this quick guide on ‘How to remove castle nut without wrench,’ I’ll spill the beans on nifty tricks and hacks that’ll save your day.
Imagine breaking free from that bolt without a wrench in hand—it’s possible and easier than you think. No need to stress about missing tools; I’ve got you covered with some crafty, unconventional methods. So, stick around, and I’ll show you how to conquer that castle nut challenge like a pro!
Key Summary: How to Remove Castle Nut Without Wrench?
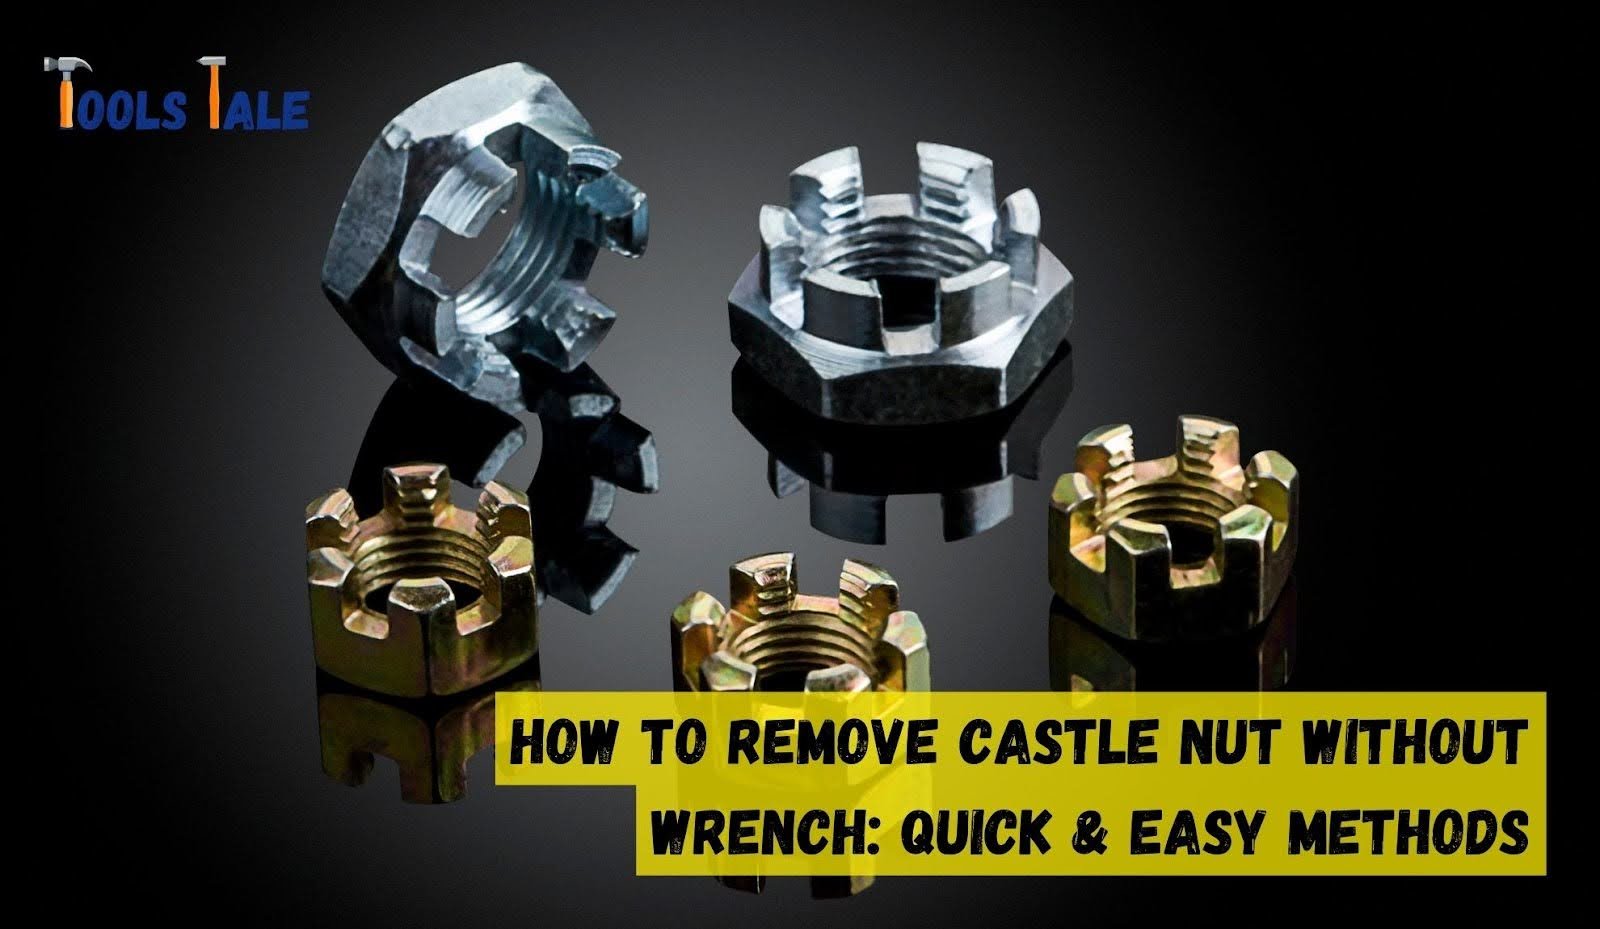
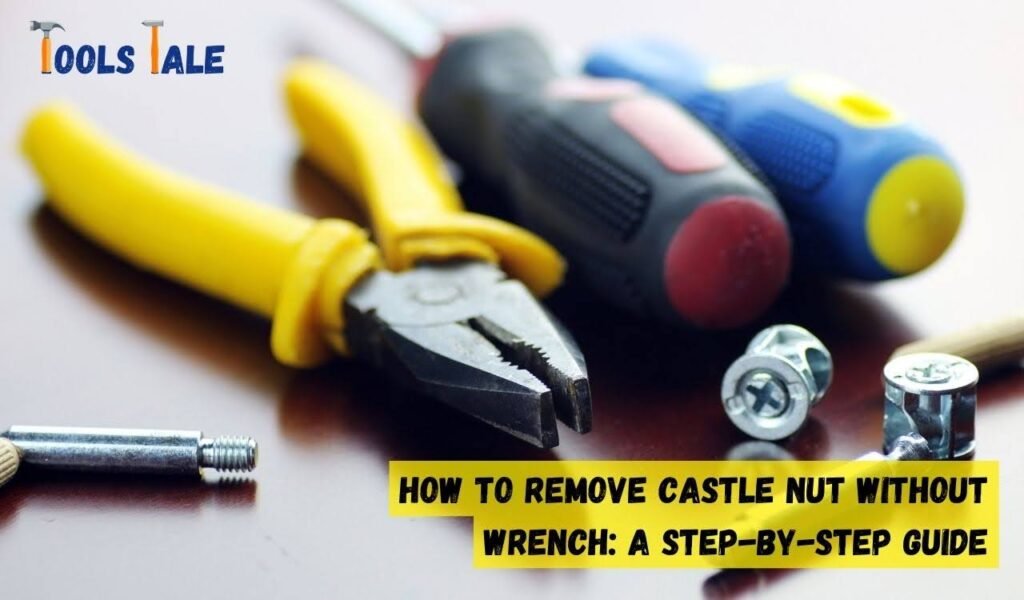
You can remove a castle nut without a wrench by using a hammer and a chisel or a punch. The process takes around 5-10 minutes. First, secure the nut and tap the grooves with the chisel or punch to rotate it off the bolt. Carefully repeat until the nut loosens and can be removed by hand.
Understanding Castle Nuts and Their Mechanical Function
Castle nuts, also known as slotted nuts or castellated nuts, are essential components in various mechanical systems. Their design and application serve critical functions in securing threaded fasteners while allowing for additional safety measures.
What are Castle Nuts?
Castle nuts are specialized nuts characterized by their distinct appearance. They possess multiple slots or grooves (resembling the battlements of a castle), typically cut into one end of the nut. These slots allow for the insertion of a cotter pin or split pin through the nut and the bolt or stud it secures.
Functions and Applications
Secure Fastening: The primary function of a castle nut is to secure threaded fasteners, such as bolts or studs, in place. They are commonly used in conjunction with a threaded shaft or bolt, often in applications where vibration or movement might occur.
Preventing Loosening: Castle nuts play a crucial role in preventing the loosening of fasteners due to vibrations or external forces. The slots in the nut accommodate a secondary securing device, such as a cotter pin, which acts as a locking mechanism to prevent the nut from backing off the bolt unintentionally.
Safety and Reliability: By incorporating a cotter pin or split pin through the slots in the castle nut and the drilled hole in the bolt or stud, an additional layer of safety is provided. This safety measure ensures that even if the nut were to become loose, the cotter pin prevents it from completely disengaging, maintaining the integrity of the assembly.
Common Applications
Castle nuts find extensive use in various industries and applications, including but not limited to:
Choosing the correct size and thread pitch of a castle nut is essential for proper installation. The nut must match the corresponding bolt or stud’s diameter and thread size to ensure a secure fit.
Align the slots of the nut with the hole in the bolt or stud.
Insert the cotter pin or split pin through the aligned slots and the hole, securing it in place.
Castle nuts play a fundamental role in ensuring the stability, safety, and reliability of mechanical assemblies. Their unique design, coupled with the use of cotter pins or split pins, offers an effective means of preventing unintended loosening of fasteners, thereby enhancing the overall integrity of mechanical systems.
How to Remove Castle Nut Without Wrench: A Step-by-Step Guide
Sometimes, tackling mechanical tasks without the right tools can be a challenge. However, removing a castle nut without a wrench is feasible with a few alternative methods. Whether you’ve misplaced your wrench or find yourself in a pinch, here’s a step-by-step guide to successfully removing a castle nut without a wrench.
Assess the Situation: Before diving in, assess the castle nut’s condition. If it’s rusted or seized, consider applying a penetrating oil like WD-40 or PB Blaster to loosen it. Let the oil sit for a while to enhance its effectiveness.
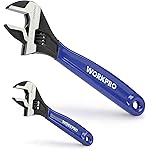
Use Pliers: Start by utilizing a sturdy pair of locking pliers. Place the jaws of the pliers around the castle nut’s flats, ensuring a secure grip. Apply steady pressure while turning counterclockwise. The locking pliers provide the necessary leverage to loosen the nut.
Try a Screwdriver and Hammer: If pliers aren’t effective, a screwdriver and hammer can be your allies. Position a sturdy flathead screwdriver against one of the slots on the castle nut. Tap the screwdriver’s handle gently with a hammer to rotate the nut counterclockwise. Repeat this process, alternating between slots if needed, until the nut starts to loosen.
Create a Homemade Tool: If you’re feeling crafty, you can fashion a makeshift tool using a metal rod or sturdy piece of flat stock. Cut a notch at one end to mimic the slots on the castle nut. Insert this homemade tool into the slots and use a hammer to turn it counterclockwise. This method might require some patience and precision, but it can be effective in freeing a stubborn castle nut.
Utilize Vice Grips: Vice grips, known for their locking ability, can serve as an excellent substitute for a wrench. Clamp the vice grips onto the castle nut’s flats, ensuring a tight grip. Apply steady pressure while turning counterclockwise. The adjustable nature of vice grips allows for a customizable fit, making it easier to grab onto the nut securely.
Heat the Nut: In situations where the castle nut remains unyielding, applying heat can expand the metal, aiding in its removal. Use a heat gun or a propane torch to apply heat directly to the castle nut, focusing on its base and surrounding area. Be cautious not to overheat the nut, as excessive heat might damage the surrounding components. Once heated, attempt to loosen the nut using the previously mentioned methods.
Alternate Techniques: If all else fails, consider unconventional methods like using a chisel and hammer to create small indentations on the castle nut’s edges. These indentations can provide grip for a screwdriver or another tool, allowing you to turn the nut counterclockwise. However, exercise caution to prevent damage to the threaded shaft.
Safety Precautions: Throughout the process, prioritize safety. Wear appropriate protective gear, such as gloves and safety goggles, to shield yourself from potential hazards. Additionally, take care to avoid damaging the components surrounding the castle nut while attempting to remove it without a wrench.
Seek Professional Assistance: If despite your efforts the castle nut remains stubbornly in place, it might be best to seek assistance from a professional mechanic. They have access to specialized tools and expertise that can safely tackle challenging situations like these without risking damage to the assembly.
Removing a castle nut without a wrench demands resourcefulness and patience. By employing alternative methods and exercising caution, you can successfully loosen and remove the nut, allowing you to proceed with your mechanical endeavors.
Safety Guidelines and Additional Tips for Castle Nut Removal
When engaging in mechanical tasks such as removing a castle nut without a wrench, prioritizing safety is paramount. Additionally, incorporating some additional tips can streamline the process and minimize the risk of accidents or damage. Here are comprehensive safety guidelines and extra insights to facilitate a smoother castle nut removal:
Safety Gear: Before initiating any task involving tools and machinery, ensure you’re equipped with the necessary safety gear. Wear protective gloves to shield your hands from sharp edges and potential injuries. Safety goggles or glasses are essential to protect your eyes from debris or particles that may dislodge during the removal process. Furthermore, avoid loose clothing that might get caught in moving parts or tools.
Stability and Support: Ensure that the equipment or part from which you’re removing the castle nut is adequately supported and stable. Use appropriate jacks, stands, or blocks to provide stability and prevent unexpected movements or shifts that could cause accidents.
Penetrating Oil Application: Before attempting to remove a stubborn castle nut, apply a penetrating oil such as WD-40 or a similar product. This helps in loosening rusted or seized nuts, making them easier to remove. Allow sufficient time for the oil to penetrate and work its way into the threads.
Avoid Overexertion: When using alternative tools like pliers, vice grips, or improvised tools, apply steady and controlled force. Avoid exerting excessive pressure, as it might lead to slipping or the tool losing its grip, potentially causing injury or damage.
Heat Application: If employing heat to aid in loosening the castle nut, exercise caution. Use a heat gun or propane torch judiciously to avoid overheating the nut or surrounding components. Prolonged exposure to high heat could damage nearby parts or cause burns, so apply heat intermittently and check for progress frequently.
Patience and Persistence: Removing a castle nut without a wrench can be a test of patience. If initial attempts prove unsuccessful, be patient and persistent. Alternate between different methods, reapply penetrating oil, or allow more time for the oil to work its way into the threads. Sometimes, persistence pays off in loosening a stubborn nut.
Preventing Damage to Threads: Throughout the removal process, take care not to damage the threads on the bolt or stud to which the castle nut is attached. Damaged threads can make subsequent reassembly difficult or compromise the fastening strength.
Professional Assistance: Know when it’s time to seek professional help. If despite your efforts, the castle nut remains firmly in place or if you’re concerned about potentially damaging surrounding components, it’s advisable to consult a professional mechanic. They possess specialized tools and expertise to handle challenging situations safely and efficiently.
Clean and Inspect: Once the castle nut is removed, clean the threads on the bolt or stud and inspect them for any damage or wear. Cleaning ensures that subsequent reassembly is smooth and free from debris that could affect the connection.
Documentation and Organization: If disassembling multiple parts or components, consider documenting the removal process or organizing the parts systematically. This can aid in reassembly by providing a reference for the sequence and orientation of parts.
Safety should always be a priority when tackling mechanical tasks. Employing safety gear, utilizing proper support, applying techniques cautiously, and knowing when to seek professional help are key elements in successfully removing a castle nut without a wrench. With patience, persistence, and adherence to safety guidelines, the task can be accomplished effectively while minimizing risks.
Knowing When to Seek Professional Help for Castle Nut Removal
Handling mechanical tasks like removing a castle nut without a wrench can be a rewarding challenge, but there are instances where seeking professional assistance becomes essential. Recognizing when the situation surpasses your capabilities or tools is crucial for both safety and the preservation of your equipment. Here’s a comprehensive guide on when to seek professional help:
Stubborn or Rusted Nuts: If the castle nut is severely rusted, seized, or stubborn despite your best efforts and the application of penetrating oil, it might require professional intervention. Professionals have access to specialized tools and techniques that can effectively handle heavily corroded or stuck nuts without risking damage to the surrounding components.
Lack of Proper Tools: Removing a castle nut without a wrench demands improvisation and alternative methods. However, if you lack the necessary tools or improvised solutions aren’t proving effective, it might be time to consult a professional. They possess a wide array of specialized tools designed for various scenarios, ensuring a safer and more efficient removal process.
Concerns about Damage to Surrounding Components: During the removal process, if you’re worried about damaging other components or parts connected to the castle nut, it’s prudent to seek professional help. Mechanics have the expertise to dismantle intricate assemblies without causing unintended damage, ensuring a smoother reassembly process later on.
Safety Risks: If the removal process poses significant safety risks due to the complexity of the setup, use of high heat, or precarious positioning, it’s advisable to let professionals handle the task. They are trained to navigate potentially hazardous situations while minimizing risks to themselves and your equipment.
Time and Expertise Constraints: Sometimes, the sheer complexity of a task or a lack of experience in handling specific components can lead to inefficiency and wasted time. Seeking professional assistance saves time and ensures that the job is completed accurately and swiftly by individuals with the necessary expertise.
Potential Cost Savings: While it might seem counterintuitive, seeking professional help early in the process can sometimes save you money in the long run. Attempting a challenging removal without the right tools or expertise could lead to accidental damage, resulting in higher repair or replacement costs.
Preserving the Integrity of the Equipment: Mechanical assemblies often require delicacy and precision during disassembly. If you’re uncertain about the correct procedure or lack confidence in maintaining the integrity of the equipment, it’s wise to entrust the task to professionals who have experience handling similar components.
Complex Systems and Multiple Components: In situations involving intricate systems or assemblies with multiple interconnected components, seeking professional assistance is beneficial. Professionals understand the relationships between various parts and can dismantle and reassemble them efficiently, reducing the risk of errors during reassembly.
Advisability for Novices: For individuals with limited experience in mechanical work, seeking professional help is advisable. Attempting complex tasks without the requisite knowledge or understanding of the equipment can lead to accidents, injuries, or further damage.
In essence, recognizing the limitations of your knowledge, tools, and experience is crucial in determining when to seek professional help for removing a castle nut without a wrench. While DIY efforts can be rewarding, knowing when to enlist the expertise of professionals ensures the task is completed safely, efficiently, and without compromising the integrity of your equipment.
Navigating Challenges in Castle Nut Removal without a Wrench: Troubleshooting Tips
Removing a castle nut without a wrench can present several challenges, demanding creative solutions and troubleshooting approaches. Here’s a comprehensive guide on potential hurdles and how to navigate them effectively:
Rust and Corrosion
Challenge: Rusted or corroded castle nuts can tightly seize onto bolts or studs, making them incredibly difficult to remove.
Troubleshooting: Begin by applying a penetrating oil generously to the nut’s threads. Allow sufficient time for the oil to penetrate and loosen the rust. Reapply the oil as needed. Using heat judiciously can expand the metal, aiding in breaking the rust’s grip. If necessary, alternate between methods like pliers, vice grips, or improvised tools, applying gradual force to loosen the nut.
Limited Grip or Accessibility
Challenge: Achieving a secure grip on the nut flats or dealing with limited access around the castle nut can impede its removal.
Troubleshooting: Opt for tools like locking pliers, vice grips, or even improvised tools fashioned from sturdy materials that offer better grip and control. Adjust the positioning of the tool to maximize contact with the nut flats. In cases of restricted space, partial disassembly of surrounding components can create more room for maneuvering and provide better access.
Damaged or Stripped Threads
Challenge: Threads on the nut or bolt can become damaged or stripped during removal attempts, complicating the extraction process.
Troubleshooting: Cease attempts to remove the nut if you notice any damage to the threads. Continued efforts might worsen the situation. Seek professional assistance to evaluate the damage and employ specialized techniques for extracting the nut without further harm to the bolt or stud.
Complex Assemblies and Components
Challenge: Castle nuts situated within intricate assemblies with multiple components can pose challenges in disassembly and reassembly.
Troubleshooting: Document the disassembly process by taking pictures or notes. Keep removed components organized, noting their order and orientation for easier reassembly. Refer to manuals or online resources for assembly diagrams or seek professional guidance if unsure about component placement.
Safety Precautions
Challenge: Safety risks may arise due to improvised tools, use of heat, or awkward work positions during the removal process.
Troubleshooting: Prioritize safety at all times. Wear appropriate safety gear, including gloves and safety goggles, to protect against potential hazards. Use heat cautiously and sparingly to avoid burns or damage. If safety concerns persist or the task becomes precarious, consider seeking professional assistance.
Persistent Stubbornness
Challenge: Despite various attempts and troubleshooting methods, the castle nut remains unyielding.
Troubleshooting: If all efforts fail to remove the nut, it might be time to seek professional help. Experienced mechanics have access to specialized tools and techniques to handle even the most stubborn nuts without causing damage to the surrounding components.
Troubleshooting challenges encountered while removing a castle nut without a wrench involves employing different strategies, prioritizing safety, and recognizing when professional expertise is necessary. Adapting methods to specific challenges, exercising caution, and seeking help when needed are vital in successfully overcoming hurdles during the removal process.
Final Word
In the world of mechanical challenges, removing a castle nut without a wrench can test your resourcefulness. Patience, perseverance, and a bit of ingenuity are key. From penetrating oil to improvised tools, troubleshooting rust, limited access, or damaged threads demands adaptability.
Prioritize safety, know when to seek professional help, and document the process for reassembly. Remember, it’s not just about the nut-it’s about the journey of problem-solving that makes the task rewarding and educational.
Frequently Asked Questions
Is it possible to remove a castle nut without a wrench?
Absolutely! While a wrench is the conventional tool, alternative methods can effectively remove a castle nut. Pliers, vice grips, screwdrivers, and improvised tools offer leverage to turn the nut counterclockwise for removal.
What can I do if the castle nut is rusted or seized?
Rusted nuts can be stubborn. Apply penetrating oil generously and allow time for it to work into the rusted threads. Heat from a heat gun or torch can expand the metal, aiding in loosening the nut.
Are there risks of damaging the threads while removing the castle nut?
Yes, excessive force or using improper tools can damage the threads. It’s crucial to use tools that fit the nut’s flats snugly to avoid slippage, which can lead to thread damage.
Can I reassemble the components after removing the castle nut without a wrench?
Yes, reassembly is possible. However, document the disassembly process, organize components systematically, and refer to manuals or seek guidance to ensure correct reassembly and alignment.
Are there risks associated with DIY castle nut removal?
DIY removal without proper knowledge or tools can lead to personal injury, damage to components, or increased repair costs if mishandled. Proceed with caution and seek help if unsure.
What can I use in place of a castle nut without a wrench?
In lieu of a castle nut without a wrench, alternatives include locking pliers, vice grips, threaded fasteners like bolts, specialized retaining clips, jam nuts, or cotter pins. These alternatives provide varying levels of securing components, though suitability depends on the specific application and required security.
Share your love!
Tools Tale
Disclaimer: This site is owned and operated by Tools Tale. toolstale.com is a participant in the Amazon Services LLC Associates Program, an affiliate advertising program designed to provide a means for sites to earn advertising fees by advertising and linking to Amazon.com. This site also participates in other affiliate programs and is compensated for referring traffic and business to these companies.