304 North Cardinal St. Dorchester Center, MA 02124
To provide the best experiences, we use technologies like cookies to store and/or access device information. Consenting to these technologies will allow us to process data such as browsing behavior or unique IDs on this site. Not consenting or withdrawing consent, may adversely affect certain features and functions.
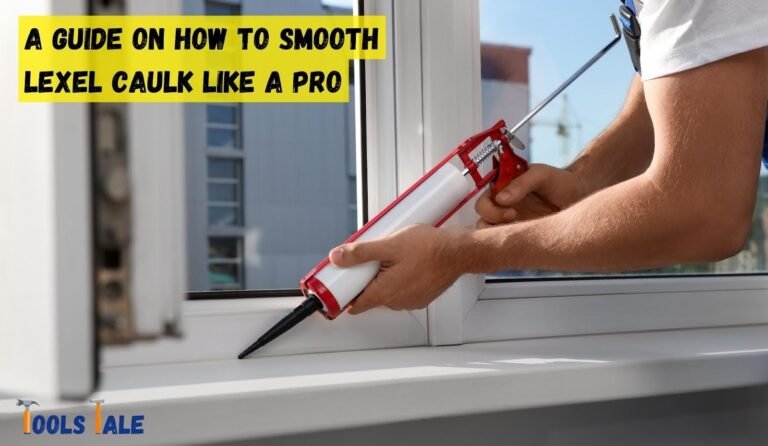
Can You Sand Caulk After It Dries? Exploring Post-Caulking Finishing
Can you sand caulk after it dries? Absolutely! It’s like giving that final touch to a masterpiece. Ever wondered how to get that smooth, flawless finish? We’ve got the lowdown for you. Sanding caulk post-drying is that secret sauce for a pro look. Whether you’re working with wooden surfaces, silicone caulk, or prepping for a fresh coat of paint, this guide has you covered.
Discover the right techniques, when to sand, and why it’s crucial for a polished finish. We’ll even spill the beans on removing dried caulk if things don’t go as planned. Ready to dive into the nitty-gritty? Let’s unveil the art of perfecting your caulk job!
Key Summary: Can You Sand Caulk After It Dries?
Sand caulk after it dries to smooth and blend with the surface. Wait for the caulk to fully cure, then lightly sand using fine-grit sandpaper for desired results. Ensure caulk is completely dry before attempting to sand.
Hand Tools Suggestion for Your Home
[amazon_auto_links id=”11426″]
Understanding Caulk Drying Process
View Expert Video from Spencer Colgan Wallpaper & Paintingon Can You Sand Caulk After It Dries
Sanding caulk is a critical step in achieving a professional and aesthetically pleasing finish in various sealing and renovation projects. While caulk typically cures rather than “dries” like other substances, the term “drying” is often used colloquially to describe the process of caulk becoming fully solid and ready for further treatment, including sanding.
Caulk Curing: Caulk curing involves a chemical transformation that converts the caulk from a pliable paste to a solid, resilient substance. During this process, the caulk’s polymers crosslink, creating a bond and forming the desired seal. The time required for full curing varies depending on the type of caulk used, ranging from a few hours to several days.
Sanding After Curing: Once the caulk is fully cured, it is suitable for sanding to achieve a smooth and even surface. Sanding helps blend the caulk seamlessly with the surrounding areas, providing a polished appearance. The process involves using appropriate grit sandpaper, typically starting with a finer grit and progressing to a smoother grit for a refined finish.
Precautions: It’s essential to ensure the caulk is completely cured before sanding to prevent damage. Using gentle, even pressure during sanding and avoiding excessive force is crucial to avoid gouging or removing the caulk.
Understanding the caulk curing and sanding process is vital for a successful home improvement project. By allowing the caulk to fully cure before sanding and following proper techniques, you can achieve a professional finish that enhances the appearance and durability of your caulking work.
Factors Influencing Sanding After Caulk Dries
Sanding caulk after it has dried is a crucial step in achieving a polished and professional finish. The effectiveness of this process is influenced by various factors, each playing a vital role in determining the final outcome of the project.
Caulk Type and Composition: The type of caulk used significantly impacts how it sands after drying. Different caulks, such as silicone-based, acrylic-based, or latex caulks, have distinct compositions, affecting their sanding properties. Silicone-based caulks, for instance, can be more challenging to sand due to their elasticity and resilience.
Drying Time and Curing Period: Allowing the caulk to fully dry and cure is essential before attempting to sand it. Drying time varies based on the caulk type, environmental conditions, and manufacturer recommendations. Attempting to sand caulk that hasn’t dried completely can result in an uneven surface or damage to the caulk.
Surface Preparation: The condition and preparation of the surface to be sanded play a vital role. A clean, smooth, and dry surface allows for easier and more effective sanding. Any debris, dust, or irregularities on the surface can hinder the sanding process and affect the finish.
Sanding Tools and Grit Selection: The choice of sanding tools and grit greatly influences the outcome. Coarser grits (lower grit numbers) are used to remove larger imperfections, while finer grits (higher grit numbers) provide a smoother finish. Starting with a coarser grit and progressing to finer grits ensures a gradual and refined sanding process.
Technique and Pressure Applied: The technique used during sanding is critical. Applying even pressure and using smooth, consistent motions during sanding helps achieve a uniform surface. Too much pressure or erratic movements may lead to an uneven finish or damage to the caulk.
Skill and Experience: Skill and experience in sanding are valuable factors. Experienced individuals understand the nuances of sanding different caulk types and surfaces. They can adapt their technique and grit selection to achieve the desired finish effectively.
Safety Precautions: Prioritizing safety is paramount. Wearing appropriate safety gear such as goggles, a dust mask, and gloves ensures protection during the sanding process, preventing any potential harm.
Understanding and considering these factors when sanding caulk after it dries will contribute to a successful and professional-looking finish, enhancing the overall appearance and longevity of your caulking project.
Can You Sand Caulk After It Dries? Step-By-Step Guide
Yes, you can indeed sand caulk after it dries to achieve a smooth, polished finish. Sanding is a crucial step in ensuring the caulk blends seamlessly with the surrounding surface, improving both aesthetics and functionality. Here’s a step-by-step guide to help you navigate through the process effectively.
Step 1: Allow Proper Drying Time
Before proceeding to sand, ensure the caulk has thoroughly dried and cured. Drying time varies based on the type of caulk used, humidity, and temperature. Refer to the manufacturer’s instructions for specific drying durations.
Step 2: Gather the Necessary Tools and Materials
Sandpaper: Choose appropriate grits of sandpaper based on the caulk type and the desired smoothness of the finish. Start with a coarser grit (around 150-220) and progress to finer grits (320-400) for a polished look.
Safety Gear: Put on safety goggles, a dust mask, and gloves to protect yourself during the sanding process.
Sanding Block: Using a sanding block provides even pressure and facilitates consistent sanding.
Step 3: Prepare the Surface
Ensure the caulked area is clean, dry, and free from any debris or loose particles. A well-prepared surface allows for smooth and effective sanding.
Step 4: Start Sanding with a Coarser Grit
Begin sanding with a coarser grit sandpaper. Hold the sandpaper or use a sanding block and apply gentle, even pressure over the caulked area. Use smooth, circular or back-and-forth motions to sand the caulk.
Step 5: Check Progress and Adjust Grit
Periodically check the progress to determine if you need to move to a finer grit. The goal is to smooth out any rough or uneven spots left by the caulk. Gradually switch to finer grits as you progress for a refined finish.
Step 6: Achieve a Smooth Finish
Continue sanding with progressively finer grits until you achieve the desired level of smoothness. Each finer grit will help eliminate the marks left by the previous coarser grit, resulting in a polished and seamless surface.
Step 7: Clean the Area
Once sanding is complete, use a damp cloth or sponge to wipe away any sanding residue, ensuring the surface is clean and ready for further treatment, such as painting or sealing.
Step 8: Optional – Paint or Seal
Depending on the project, you can either paint over the sanded caulk for a seamless look or apply a clear sealant to protect the caulk and maintain its appearance.
By following this step-by-step guide, you’ll successfully sand caulk after it dries, achieving a professional, smooth finish. Properly sanded caulk not only enhances the aesthetic appeal of your project but also contributes to its durability and longevity.
Safety Precautions and Best Practices
Sanding caulk, although a common practice for achieving a smooth finish, requires adherence to safety precautions and best practices to ensure a successful and accident-free process:
Protective Gear: Wear safety goggles to shield your eyes from dust and debris. A dust mask or respirator is essential to prevent inhaling harmful particles. Additionally, use gloves to safeguard your hands during the sanding process.
Ventilation: Work in a well-ventilated area to minimize dust inhalation. Open windows, use exhaust fans, or work outdoors to ensure proper air circulation and reduce exposure to airborne particles.
Allow Proper Drying: Ensure the caulk is completely dry and cured before sanding. Sanding uncured caulk can damage the surface and compromise the caulking job.
Appropriate Sandpaper: Select the right grit sandpaper for the job. Coarser grits (lower numbers) are suitable for initial sanding to remove imperfections, followed by finer grits for a smooth finish.
Even Pressure: Apply even pressure while sanding to avoid uneven surfaces. Excessive pressure can damage the caulk or the underlying surface.
Regular Inspection: Pause periodically to inspect the sanded area and monitor progress. Adjust your technique and sandpaper grit as needed to achieve the desired smoothness.
Clean Work Area: Regularly clean the work area to remove dust and debris. A clean workspace ensures a more effective and safe sanding process.
Dispose of Waste Safely: Properly dispose of used sandpaper and any waste materials generated during the sanding process following local regulations.
Seek Professional Help: If you are unfamiliar with sanding caulk or working with certain caulk types, consider consulting a professional to ensure safety and the best possible results.
Prioritizing safety through the use of protective gear, proper ventilation, and adherence to best practices contributes to a successful sanding process, enhancing the overall quality and appearance of your caulking project while protecting your well-being.
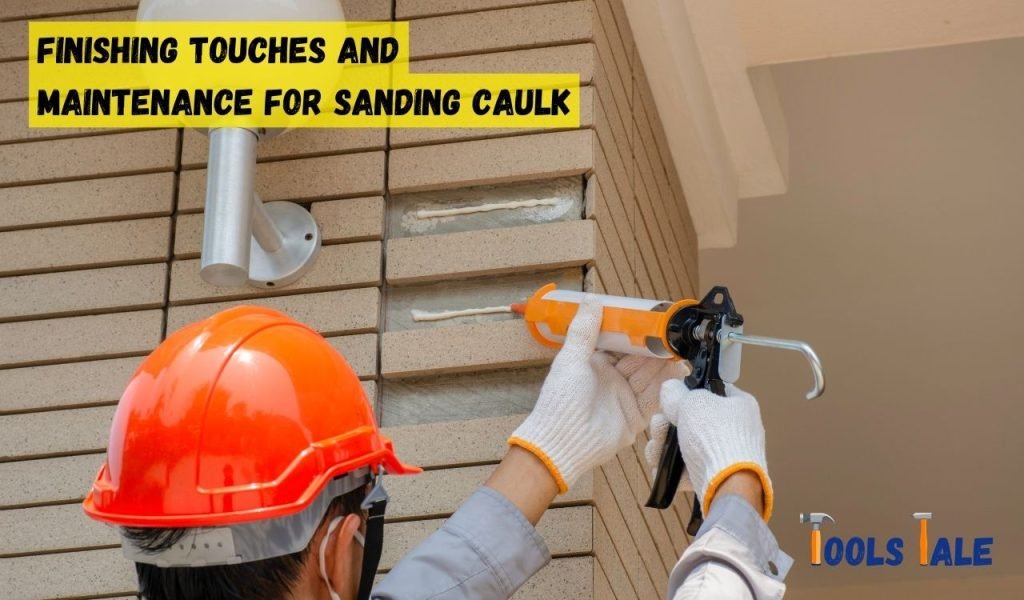
Finishing Touches and Maintenance for Sanding Caulk
After sanding caulk to achieve a smooth finish, applying finishing touches and implementing proper maintenance measures are crucial for long-lasting results and an aesthetically pleasing outcome:
Inspect the Finish: Once the caulk is sanded, inspect the finish to ensure it meets your expectations. Look for any remaining rough spots or inconsistencies that may require further sanding or touch-ups.
Painting or Sealing: Depending on your project, you may choose to paint over the sanded caulk to match the surrounding surface or apply a clear sealant for added protection and durability.
Cleanup: Thoroughly clean the sanded area to remove any dust or debris from the sanding process. A clean surface is essential for proper adherence of paint or sealant.
Regular Maintenance: Periodically inspect the caulked area to ensure it remains intact and in good condition. Address any signs of wear, cracks, or gaps promptly to maintain the effectiveness of the caulk.
Preventative Measures: Take proactive measures to prevent damage or wear, such as avoiding excessive water exposure in bathrooms or using coasters to protect caulked edges in kitchens.
Reapply Caulk as Needed: Over time, caulk may wear out or become discolored. When necessary, remove the old caulk, prepare the surface, and reapply new caulk to maintain a polished look and effective seal.
Regular Cleaning: Clean the caulked area regularly to remove dirt, grime, and mold. Use mild cleaners and a soft brush to maintain the appearance and cleanliness of the caulk.
Consult a Professional: If you encounter significant issues or are unsure about maintenance procedures, consult a professional for guidance and assistance.
By incorporating these finishing touches and following proper maintenance practices, you’ll extend the life of the caulk, preserve the smooth finish, and ensure your caulking job remains both functional and visually appealing over time.
Alternative Techniques and Considerations
In addition to traditional sanding, alternative techniques and considerations can provide effective solutions for achieving a smooth finish and enhancing the appearance of caulked surfaces:
Wet Sanding: Wet sanding involves using water to lubricate the sandpaper, reducing friction and providing a smoother finish. It is particularly useful for achieving a polished surface and preventing clogging of sandpaper.
Use of Caulk Smoothers: Caulk smoothers or finishing tools are designed to level and smooth caulk lines. These tools can help achieve a professional finish without the need for extensive sanding.
Polishing Compounds: Polishing compounds, typically used in automotive refinishing, can be applied to the sanded caulk to further enhance its appearance. They can provide a glossy finish and remove any remaining imperfections.
Caulk Softeners: For silicone caulk, caulk softeners can be used to make the material more pliable and easier to smooth. This can simplify the finishing process.
Heat Gun Technique: Applying controlled heat with a heat gun can soften and smooth caulk, helping to blend it seamlessly with the surface. Caution and control are essential to prevent damage.
Consider Hybrid Caulks: Hybrid caulks often have a smoother texture, reducing the need for extensive sanding. Consider using these caulks for projects where achieving a polished finish is critical.
Testing on Scrap Material: Before applying any alternative technique to the actual surface, conduct tests on scrap pieces of caulk to ensure the desired result without damaging the surface.
Environmental Considerations: Consider the environmental impact of the techniques used. Opt for eco-friendly caulk and finishing materials to minimize harm to the environment.
Each technique has its own set of advantages and considerations. Depending on the project, the type of caulk used, and personal preferences, selecting the most suitable alternative technique can contribute to achieving a flawless finish and ensuring the longevity of the caulking job.
Final Word
Absolutely, sanding caulk after it dries is a proven method to refine and perfect its appearance. Whether it’s achieving a smooth texture or seamlessly blending it with the surrounding surface, sanding is a critical step. Exercise patience, use the right tools and techniques, and always prioritize safety.
A well-sanded caulk not only elevates the aesthetics of your project but also adds to its durability and overall professional finish. So, yes, go ahead and sand that caulk to perfection!
Frequently Asked Questions
Can you sand caulk after it dries on wood?
Yes, you can sand caulk after it dries on wood. Ensure it’s fully cured, then use fine-grit sandpaper to achieve a smooth, polished finish on wooden surfaces.
How long can you sand silicone caulk after it dries?
For silicone caulk, it’s advisable to wait at least 24 hours after it dries before attempting to sand it. However, the curing time can vary based on factors such as humidity, temperature, and the thickness of the caulk bead. To ensure it’s fully cured and won’t be damaged during sanding, waiting 24-48 hours is a common recommendation.
Should I sand caulk before painting?
Yes, it’s advisable to sand caulk before painting to create a seamless, uniform surface. Sanding helps the paint adhere better, providing a professional and polished look to your project.
How do you remove dried caulk?
To remove dried caulk, start by using a caulk removal tool or a putty knife. Carefully scrape along the caulk to loosen and remove it. If the caulk is stubborn, you can apply a caulk remover or rubbing alcohol to soften it, making it easier to scrape away. Be patient and gentle to avoid damaging the underlying surface.
Why is it important to sand caulk after it dries?
Sanding caulk after it dries is crucial as it smoothens the surface, creating an even and aesthetically pleasing finish. It helps blend the caulk seamlessly with the surrounding area.
How long can you sand caulk after it dries?
You can sand caulk at any time after it has fully dried, but it’s essential to ensure it’s fully cured. Waiting for 24-48 hours after drying is generally recommended before sanding.
Can you sand silicone caulk after it dries?
Yes, you can sand silicone caulk after it dries. When sanding silicone caulk, use fine-grit sandpaper and apply gentle pressure to achieve a smooth finish. This process is particularly useful when you need to blend the silicone caulk with the surrounding surface or remove any imperfections. Be cautious while sanding to avoid damaging the caulk or the underlying material.
Share your love!
Tools Tale
Disclaimer: This site is owned and operated by Tools Tale. toolstale.com is a participant in the Amazon Services LLC Associates Program, an affiliate advertising program designed to provide a means for sites to earn advertising fees by advertising and linking to Amazon.com. This site also participates in other affiliate programs and is compensated for referring traffic and business to these companies.