Physical Address
304 North Cardinal St.
Dorchester Center, MA 02124
Physical Address
304 North Cardinal St.
Dorchester Center, MA 02124

Ready to boost your home’s appearance and protection effortlessly? Look no further! Discover how to caulk siding in a few simple steps. This quick guide will help you tackle gaps, prevent moisture and drafts, and give your home’s exterior a professional finish. From selecting the right caulk to those final touch-ups, we’ve got you covered. It’s time to enhance your home’s curb appeal while ensuring it’s well-protected. Let’s dive in!
Key Summary: How to Caulk Siding?
To caulk siding effectively, start by preparing the area. Clean it thoroughly, remove any old caulk, and gather the necessary tools. Choose the right caulk, apply it to gaps and seams, then smooth and let it dry. This simple process ensures a weatherproof home, protecting it from the elements.
[amazon_auto_links id=”11426″]
Caulking siding isn’t just a cosmetic upgrade; it’s a practical necessity for several compelling reasons. Let’s delve into the motivations behind caulking your home’s siding:
Caulking plays a critical role in weatherproofing your home. By sealing gaps and joints in your siding, you prevent water, air, and pests from infiltrating your home’s exterior. This barrier is instrumental in maintaining the structural integrity of your house and enhancing its energy efficiency.
Water intrusion is a homeowner’s nightmare. When moisture finds its way into your siding and walls, it can lead to rot, mold growth, and structural damage. Properly applied caulk acts as a moisture barrier, safeguarding your home from these devastating effects.
Caulking significantly impacts your home’s energy efficiency. A well-sealed exterior prevents drafts and air leaks, reducing the workload on your heating and cooling systems. As a result, you’ll enjoy a more comfortable indoor environment and lower energy bills.
While the functional benefits of caulk are undeniable, it also has aesthetic advantages. Caulking can improve the appearance of your home’s exterior by creating smooth, seamless lines and enhancing the overall look. It’s a simple yet effective way to refresh your home’s curb appeal.
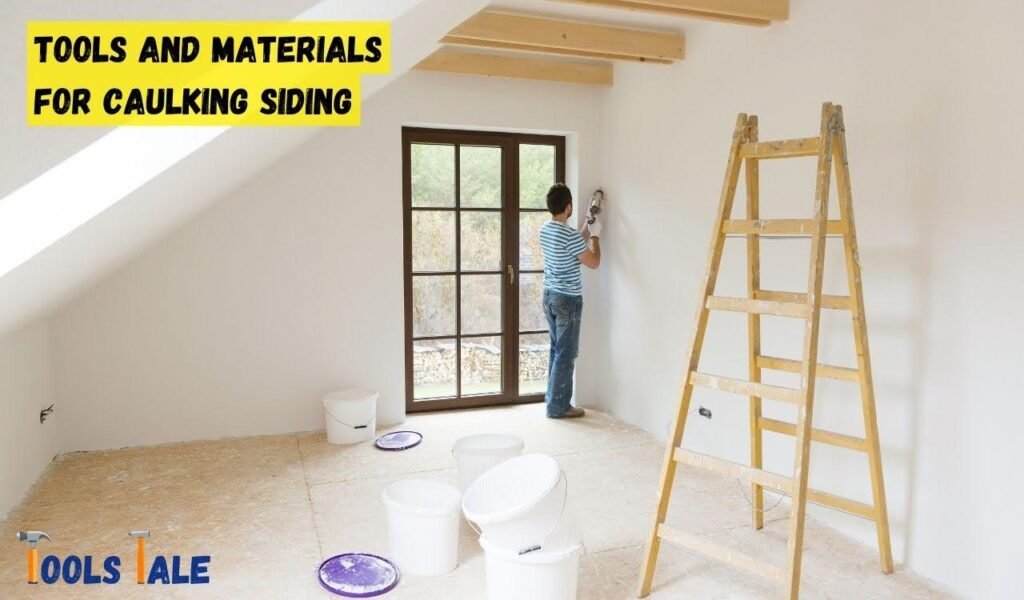
Caulking your siding is a project that requires the right tools and materials to ensure a successful and long-lasting result. Here, we’ll provide an in-depth overview of the tools and materials you’ll need:
By ensuring you have the right tools and materials for your siding caulking project, you’ll be well-equipped to complete the job effectively and with professional results. Proper preparation and the use of the right tools and materials are key to the success and longevity of your caulk seal.
Before you start applying caulk to your siding, proper preparation is essential. Let’s look at the steps you should take to ensure that your surface is ready for caulking:
Selecting the correct caulk for your siding project is a critical decision that can significantly impact the success of your caulking job. The choice of caulk depends on several factors, including the type of siding, the specific application, and environmental considerations. In this comprehensive guide, we’ll explore the various factors to consider when choosing the right caulk for your siding project.
The first step in choosing the right caulk is to identify the type of siding you have. The compatibility of the caulk with your siding material is essential for a secure and long-lasting seal. Common siding materials include:
The application of the caulk plays a crucial role in your choice. Different caulks are formulated for specific applications, and using the right one is essential for the best results. Consider the following applications:
Environmental factors, such as exposure to sunlight, moisture, and extreme temperatures, can affect the performance of caulk. It’s important to select a caulk that can withstand the specific environmental conditions of your location. Consider the following:
Temperature Extremes: In regions with extreme temperature fluctuations, opt for a caulk that can handle both hot and cold conditions. Polyurethane caulks are known for their ability to perform well in varying temperatures.
Consider whether you plan to paint over the caulk. If you want the caulk to blend seamlessly with your siding or trim, choose a caulk that is paintable. Acrylic latex caulk is a popular choice for paintable applications, as it can be painted after drying.
Finally, consider the longevity and durability of the caulk. High-quality caulks are designed to last for many years. Read product labels and reviews to assess the caulk’s durability and longevity.
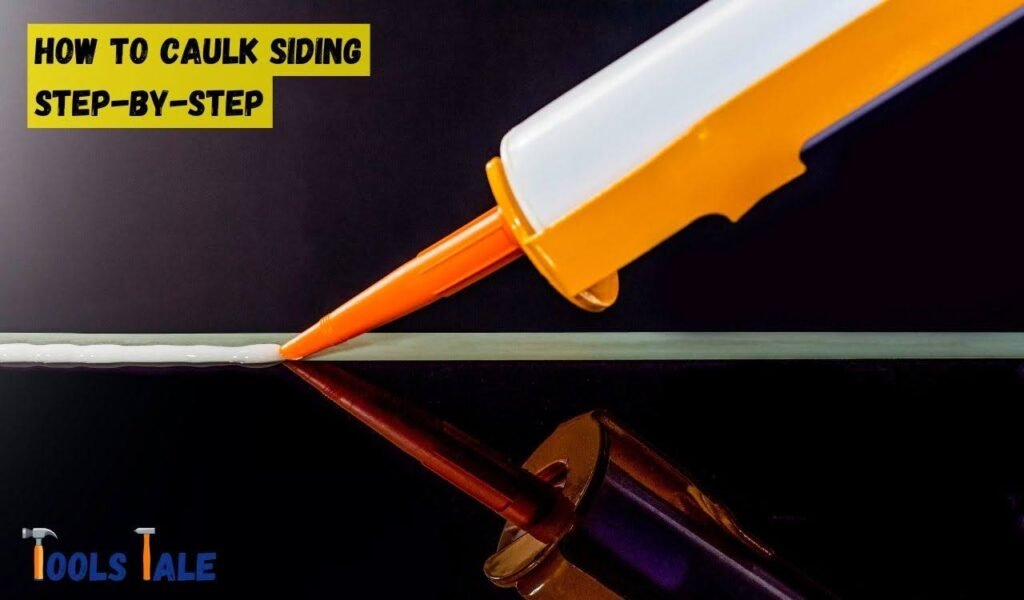
Caulking your siding is a step-by-step process that, when done correctly, can significantly enhance the appearance and durability of your home’s exterior. Let’s break down the steps involved:
Loading the caulking gun is the crucial first step in any siding caulking project. To start, use a utility knife to cut the tip of the caulk tube at a 45-degree angle. This cut should align with the width of the gap you plan to caulk. Next, insert the prepared caulk tube into the caulking gun, ensuring it’s securely in place.
The cut tip allows for precise application, and by loading it correctly, you’re ready to dispense the caulk smoothly and evenly along the siding gaps. This step sets the foundation for a successful caulking job, promoting both function and aesthetic appeal.
Commencing the caulking process is a pivotal step in enhancing the appearance and durability of your siding. As you prepare to start caulking, position the caulk tube’s tip at one end of the gap or seam you intend to seal. Squeeze the caulking gun’s trigger gradually to dispense a continuous, even bead of caulk along the entire length of the gap.
Ensure consistent pressure on the trigger as you move the gun, promoting a seamless application. By methodically following this step, you lay the foundation for a professionally executed caulking job, effectively sealing gaps and seams in your siding.
The “Smooth and Shape” step is a critical aspect of caulking your siding, ensuring a professional and lasting finish. As you apply the caulk, use a putty knife or a specialized caulking tool to carefully smooth and shape the freshly applied caulk. This step serves several purposes:
By meticulously smoothing and shaping the caulk, you’re not only enhancing the appearance of your siding but also optimizing its functionality and longevity.
Continuing along the gap is a pivotal phase in your siding caulking project. Once you’ve initiated the caulk application and smoothed the initial portion, it’s essential to maintain your pace and precision.
As you proceed along the entire length of the gap or seam, your goal is to preserve a consistent bead of caulk. This ensures that the seal is both thorough and uniform. Pay close attention to making certain that the caulk adheres seamlessly to the siding, resulting in a clean and even finish.
By diligently following this step, you complete your caulking process with an effective and professional seal along your siding’s gaps and seams.
The “Remove Excess” step is crucial in achieving a clean and professional look after caulking your siding. When the caulk is still soft, use a putty knife or a damp cloth to carefully eliminate any surplus caulk. This serves several vital purposes:
By taking the time to remove excess caulk, you not only enhance the visual appeal of your siding but also optimize its performance and longevity.
Allowing the caulk to dry is a critical step in the siding caulking process. After completing the application and finishing touches, it’s essential to follow the manufacturer’s recommended drying time, which typically ranges from a few hours to a full day, depending on the type of caulk used and environmental conditions.
This crucial step ensures that the caulk sets and forms a secure seal, providing protection against moisture and drafts. During the drying period, it’s important to exercise patience and avoid any contact with the caulk to prevent smudging or disruptions in the seal. Proper drying guarantees the effectiveness and durability of your siding caulking.
Inspecting your work is the final and essential step in the siding caulking process. Once the caulk has completely dried, conduct a thorough examination to ensure that your caulking job is both effective and visually pleasing. Here’s what to look for during the inspection:
By thoroughly inspecting your work, you can identify and rectify any issues, guaranteeing that your siding is not only well-protected but also visually appealing.
Completing the siding caulking project with a proper cleanup is a crucial final step in ensuring a job well done. Here’s what you need to do during the cleanup phase:
Proper cleanup not only maintains the integrity of your tools but also contributes to a safe and organized work environment for future projects. It’s the finishing touch that ensures your siding caulking project is a success.

Caulking your siding is a valuable home improvement project, but it’s essential to be aware of common mistakes that can compromise the quality and longevity of your work. By steering clear of these pitfalls, you can ensure a professional and effective result.
One of the most significant errors is failing to prepare the siding adequately. Skipping the cleaning and, if necessary, repairing steps before caulking can lead to poor adhesion. Dust, debris, or damaged surfaces can prevent the caulk from adhering securely, resulting in an ineffective seal.
Selecting the incorrect type of caulk for your specific siding material and the prevailing weather conditions can be a costly mistake. Using a caulk that is not compatible with your siding or climate can result in premature deterioration. It’s crucial to choose the right caulk to ensure long-lasting performance.
Improper application of caulk can lead to problems. Applying too little caulk may result in an insufficient seal, allowing moisture and drafts to infiltrate. Conversely, using excessive caulk can create a messy, unprofessional look that can be challenging to rectify.
Failing to take the time to smooth and shape the caulk properly is a common error. Inadequate shaping can lead to an uneven appearance and may reduce the caulk’s performance and lifespan. Properly shaping the caulk ensures a professional and tidy finish.
After caulking, it’s essential to inspect your work thoroughly. Ignoring gaps, uneven spots, or issues can leave your siding vulnerable to moisture infiltration and drafts. Regular touch-ups and inspections can help maintain the effectiveness of your caulking job.
Proper maintenance is essential to ensure that your caulked siding remains effective over time. By regularly attending to your siding, you can extend its lifespan, uphold its aesthetic appeal, and ensure it continues to protect your home from the elements. Here are key steps for maintaining caulked siding:
Periodically inspect your caulked siding for signs of wear, damage, or gaps. Pay special attention to areas where different siding materials meet, as these junctions are susceptible to gaps and movement. If you discover any issues during your inspection, address them promptly to prevent further damage.
Regular cleaning is essential to prevent dirt, dust, and debris from accumulating on your siding. Use a soft-bristle brush, a mild detergent, and a garden hose to gently clean the surface. Avoid using abrasive materials that could damage the caulk or siding. Cleaning not only maintains the appearance of your siding but also helps prolong the life of the caulk.
If you notice gaps, cracks, or areas where the caulk has deteriorated, reapply caulk to those sections. It’s crucial to keep your siding well-sealed to protect your home from moisture infiltration, drafts, and pests. Promptly addressing any issues can prevent more extensive damage.
If your siding is painted, keep touch-up paint on hand to cover any paint loss on caulked areas. This not only helps maintain the visual appeal but also provides an additional layer of protection against the elements. Be sure to match the paint color precisely to ensure a seamless touch-up.
By diligently maintaining your caulked siding, you can enjoy the benefits of a well-protected home exterior that not only looks appealing but also contributes to energy efficiency. These simple steps can help ensure the longevity and effectiveness of your siding caulking project.
In conclusion, mastering how to caulk siding is a valuable skill for any homeowner. It’s a simple yet effective way to elevate your home’s appearance and safeguard it from the elements. With the right knowledge and tools, you can tackle this DIY project with confidence. Whether you’re sealing gaps, preventing drafts, or enhancing curb appeal, siding caulking offers numerous benefits.
So, roll up your sleeves, follow the steps, and enjoy the lasting rewards of a well-caulked home exterior. Don’t hesitate to get started and transform your home today!
Siding should be caulked when gaps or cracks appear, typically every 5-10 years. However, frequent inspections are key. If you notice issues, caulk promptly to prevent damage.
Caulking siding serves two main purposes: it seals gaps, preventing moisture and drafts from entering, and enhances the appearance of your home.
For wood siding, use a paintable acrylic caulk. Vinyl and metal siding benefit from a silicone-based caulk. Always choose a caulk compatible with your siding material.
You’ll need a caulking gun, caulk, putty knife, safety gear, and a utility knife. It’s essential to have these tools for a successful siding caulking project.
The amount of caulk needed for siding depends on the length of gaps or seams you’re sealing. A standard caulk tube typically covers around 10 linear feet. Measure the areas to be caulked for an accurate estimate.
Caulk on siding generally lasts 5-10 years. The exact lifespan varies based on factors like climate, caulk quality, and maintenance. Regular inspections and timely touch-ups can extend its longevity.
To repair siding, identify gaps or damaged caulk, remove the old caulk, clean the area, and apply new caulk. Ensure a smooth finish, and the repair will restore both functionality and appearance.
Common mistakes include neglecting surface preparation, choosing the wrong caulk, improper application, failing to smooth and shape the caulk, and overlooking inspection and touch-ups. Avoiding these pitfalls is essential for a successful siding caulking project.