Physical Address
304 North Cardinal St.
Dorchester Center, MA 02124
Physical Address
304 North Cardinal St.
Dorchester Center, MA 02124

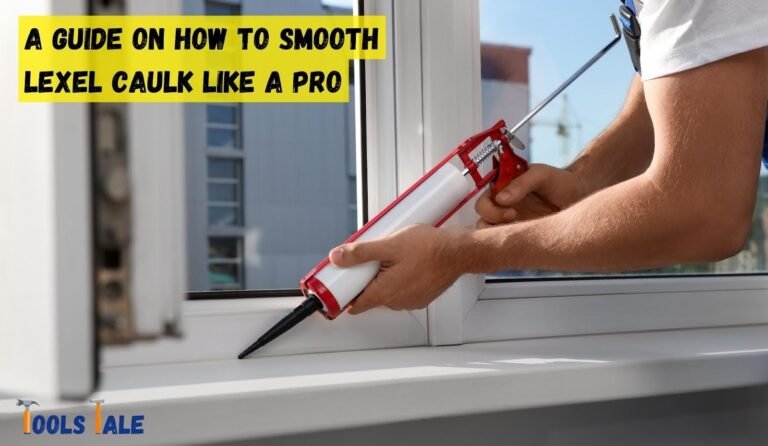
How to use a caulking gun for the first time? Don’t worry, we’ve got you covered! If you’re a newbie to caulking, fear not – we’ll walk you through the steps with ease. Get ready to tackle those gaps and cracks like a pro! From loading the caulk to achieving smooth lines, we’ll spill the secrets for a pro-level finish. So, grab that caulking gun, and let’s dive in!
Key Summary: How to Use a Caulking Gun for the First Time?
Beginner’s guide to using a caulking gun: Load caulk tube, cut nozzle at 45-degree angle. Insert tube, apply even pressure on trigger while moving. Smooth bead with finger/tool, wipe off excess. Practice for neat finish.
[amazon_auto_links id=”11426″]
A caulking gun, also known as a caulk gun or sealant gun, is a hand-held tool used in construction and home improvement projects. It is designed to dispense caulk or sealant with precision and control, making it easier to seal gaps, joints, and cracks in various surfaces. Caulk is a flexible and waterproof material that effectively fills voids and prevents the entry of water, air, dust, and insects, creating a tight barrier.
The caulking gun typically consists of a frame, a trigger, a plunger rod, a carriage, and a nozzle. When the trigger is pressed, the plunger rod moves forward, pushing the caulk towards the nozzle, allowing for a consistent flow of caulk during application.
Caulking guns come in different types, including manual caulking guns and battery-powered caulking guns. Manual ones require users to apply pressure to the trigger, while battery-powered ones automate the dispensing process, reducing hand strain.
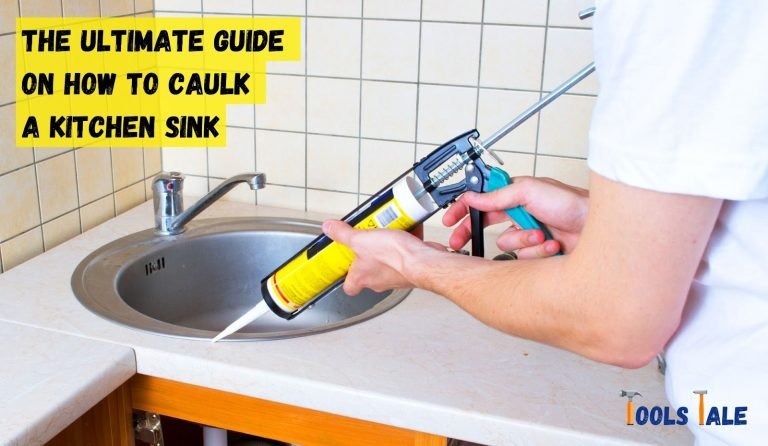
These versatile tools find applications in sealing gaps around windows, doors, plumbing fixtures, and more. Properly applied caulk improves energy efficiency, prevents water damage, and enhances the appearance of structures. Whether you’re a professional or a DIY enthusiast, a caulking gun is an essential tool for achieving precise and durable seals in your projects.

Before diving into the caulking process, it’s crucial to choose the right caulking gun for your specific project. Caulking guns come in various sizes and styles, including manual guns and battery-powered ones. For small, occasional projects, a manual caulking gun will suffice, but for larger and more frequent jobs, investing in a battery-powered caulking gun can make your life much easier.
Once you’ve got the right caulking gun in hand, it’s time to load it with the caulk of your choice. Here’s a step-by-step guide to get you started:
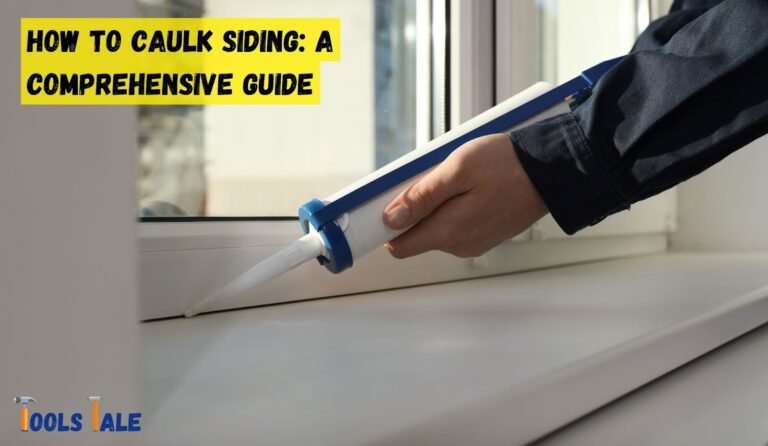
Proper surface preparation is crucial to ensure a successful caulking job. Follow these steps to prepare the surface like a pro:
Now comes the exciting part—using the caulking gun! Follow these tips for precise application:
Achieving a smooth and professional-looking caulk line requires a few extra steps:
You’re almost done! Just a few more steps to wrap up your caulking project:
Congratulations! You’ve successfully used a caulking gun for the first time. With practice, you’ll become a caulking expert and tackle more advanced projects around your home.
Remember these key takeaways:
Now go forth and conquer your caulking projects with confidence!
While using a caulking gun is a relatively simple process, first-timers often make some common mistakes that can affect the quality of their caulking job. Here are the top pitfalls to avoid:
Selecting the right caulking gun is crucial for a successful caulking project. Manual caulking guns require more hand effort, making them suitable for smaller projects. On the other hand, battery-powered caulking guns offer automation and are ideal for larger tasks. Choose the appropriate caulking gun based on the size and complexity of your project.
Improperly loading the caulk tube into the caulking gun can lead to messy results. Ensure the caulk tube is firmly and securely placed in the gun. Align the nozzle at the front, and the plunger at the back. This alignment ensures the caulk will flow smoothly when you start dispensing.
Caulking is not a race; it requires patience and precision. Rushing through the process can result in uneven and sloppy caulk lines. Take your time to apply the caulk evenly, and avoid sudden jerks or stops to maintain a consistent flow.
After caulking, always clean up any excess caulk immediately. Leaving caulk residue on the caulking gun or the surface can lead to difficulties in future caulking tasks. Use a caulk remover or a damp cloth to wipe off any excess caulk.
Applying caulk too quickly or with inconsistent pressure can result in uneven caulk lines that affect the aesthetics and effectiveness of the seal. Use steady and consistent pressure on the caulking gun’s trigger, moving it smoothly along the gap to achieve uniform caulk lines.
Over-applying caulk is wasteful and can make the cleanup process more challenging. To avoid this, only apply enough caulk to fill the gap or joint adequately. Use a caulk smoothing tool or your wet finger to shape the caulk neatly.
Neglecting to smooth the caulk line can leave behind a messy finish. Once you’ve applied the caulk, use a caulk smoothing tool or your wet finger to create a clean and professional-looking caulk line.
Using old or expired caulk can result in poor adhesion and compromised sealing properties. Always check the expiration date before use.
Caulk may not adhere properly in extreme temperatures or high humidity. Check the manufacturer’s recommendations for the ideal application conditions, and avoid caulking in adverse weather conditions.
A clean and dry surface is crucial for proper caulk adhesion. Before caulking, ensure the surface is free from dust, debris, and old caulk. If necessary, use a caulk remover to remove old caulk residues.
Properly using the caulking gun’s trigger is essential for precise application. Squeeze the trigger gently and consistently to control the caulk flow. Practice on a scrap piece of material to get comfortable with the trigger’s sensitivity.
Different caulks are designed for specific applications, such as indoor or outdoor use, and various materials like wood, metal, or plastic. Ensure you select the right type of caulk that matches your project’s requirements.
If you’re new to caulking, consider practicing on a scrap piece of material before tackling your main project. This will help you get a feel for using the caulking gun and achieving even lines.
By being mindful of these common mistakes and applying the recommended techniques, you’ll elevate your caulking skills and achieve professional-looking results in your home improvement projects.
In conclusion, mastering how to use a caulking gun for the first time opens up a world of DIY possibilities. Armed with the right techniques and expert advice, you can confidently tackle caulking projects around your home. Remember to load the caulk properly, maintain steady pressure, and achieve smooth lines.
With practice, you’ll be sealing gaps like a pro, enhancing your home’s aesthetics, and ensuring its protection against the elements. So, grab your caulking gun and get ready to embark on a journey of DIY success.
To use a caulking gun for the first time, start by cutting the tip of the caulk tube at a 45-degree angle. Insert the tube into the gun with the nozzle facing outward. Squeeze the trigger gently while applying consistent pressure to dispense the caulk. Practice on a disposable surface before tackling your project.
Attaching a caulking gun is straightforward. Slide the metal rod into the hole at the back of the gun, ensuring it’s aligned with the plunger. Press the rod in until it’s securely seated. Now you’re ready to load the caulk tube and start your project.
Yes, using a caulking gun is relatively easy with a bit of practice. The key is to maintain steady pressure on the trigger while moving the gun smoothly along the joint you’re caulking. Don’t rush, and remember that precision improves over time.
To open and load a caulking gun, pull back the rod handle and release the pressure. Open the gun’s cradle by pushing the metal plate. Insert the caulk tube with the nozzle facing out, and then push the rod through the tube and into the gun’s plunger. Release the rod handle, and you’re set to go.
Caulk tubes are designed for single use due to the risk of drying out or clogging. Once opened, it’s best to finish the contents. If you have leftover caulk, cover the nozzle tightly with plastic wrap and secure it with a rubber band to prolong its shelf life.
Yes, caulking guns are versatile tools. They can be used for tasks beyond applying caulk, such as dispensing adhesive or sealant. Just ensure the product’s viscosity is suitable for the gun’s mechanism, and clean the gun thoroughly between different uses.
Regular cleaning is essential to maintain the caulking gun’s functionality. Clean the nozzle and plunger after each use to prevent dried caulk from clogging the mechanism. For thorough cleaning, disassemble the gun and remove excess caulk before reassembly.
If the caulk isn’t dispensing smoothly, check if the nozzle is clear of dried caulk. You can use a thin wire or a nail to clear the nozzle’s opening. Also, ensure the tube is loaded correctly, and the plunger mechanism is engaged properly. Adjust your hand pressure on the trigger for a steady flow.