Ready to give your car a fresh start? Say hello to ‘How to sand a car,’ your ticket to a sleeker, revamped ride. In this concise guide, we’ll unveil the secrets of automotive transformation.
No fancy tools or prior experience required – just your enthusiasm and a few insider tips. So, if you’re ready to roll up your sleeves and discover how to make your car shine, let’s hit the gas and dive into the world of car sanding!
Begin sanding with coarse grit sandpaper, then progressively switch to finer grits. Always sand in the direction of the car’s contours. Repair any dents or imperfections as you go. Finish with a final fine-grit sanding for a smooth surface. Don’t forget to clean and prime before painting.
View Expert Video from Paint Societyon How to Sand a Car
Your journey into the world of car sanding begins with a paramount concern: safety. Sanding a car involves various risks, from exposure to harmful dust and chemicals to potential physical hazards. Ensuring your safety and well-being should be your top priority.
Eye on Safety Gear
Safety Glasses: Invest in high-quality safety glasses that provide protection against flying debris, dust, and potential eye injuries.
Respirator Mask: A respirator mask with appropriate filters is essential to shield your lungs from dust particles and harmful fumes.
Gloves: Always wear durable gloves to protect your hands from abrasive materials, chemicals, and potential cuts.
Ear Protection: To reduce noise pollution from sanding, consider using earplugs or earmuffs for hearing protection.
Ventilation Matters
Work in a Well-Ventilated Area: Ensure your workspace is adequately ventilated to minimize exposure to dust and fumes. Proper ventilation is key to maintaining air quality.
Respiratory Health: If you have pre-existing respiratory conditions or allergies, consult a healthcare professional before embarking on a sanding project to assess potential health risks.
By adhering to these safety precautions, you significantly reduce the likelihood of accidents and health hazards during car sanding.
Essential Tools and Materials for Sanding a Car
Now that you’re safety-savvy, let’s dive into the exciting world of tools and materials that will help you transform your car’s surface.
Tools of the Trade
Sanding Blocks: These come in various shapes and sizes and are ideal for achieving precision on flat or curved surfaces.
Electric Sander: For larger areas, consider using an electric sander to expedite the sanding process without compromising on quality.
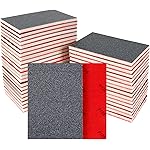
Sandpaper: Stock up on sandpaper with various grit levels, ranging from coarse (around 80-120) to fine (over 400). Different stages of sanding require different grits.
Masking Tape and Plastic Sheeting: Use masking tape and plastic sheeting to protect areas you don’t want to sand, such as windows, trim, and lights.
Spray Bottle: Fill a spray bottle with water to keep the sandpaper wet during sanding. This minimizes dust and enhances the sanding process.
Clean Rags: You’ll need an abundance of clean rags for wiping down surfaces and maintaining a tidy workspace.
Safety Gear (Reiterated): Ensure you have your safety glasses, respirator mask, gloves, and ear protection within easy reach throughout your sanding project.
Materials for Prep
Cleaner and Degreaser: Begin by thoroughly cleaning your car’s surface to remove dirt, grease, and contaminants that could interfere with the sanding process.
Primer and Paint: Depending on your refinishing plans, you may require automotive primer and paint in your desired color. These materials will help you achieve a professional finish.
By having these essential tools and materials at your disposal, you’re well-prepared to embark on your car sanding journey with confidence and efficiency.
Choosing the Right Sandpaper for the Job
The selection of sandpaper plays a pivotal role in determining the success of your car sanding project. Understanding grit levels and their applications is essential for achieving the desired results.
Deciphering Grits
Coarse Grits (80-120): Start with coarse grit sandpaper to tackle heavy-duty tasks like removing old paint, rust, or imperfections. Think of it as the heavy lifting phase of sanding.
Medium Grits (150-220): Transition to medium grit sandpaper to refine surfaces, remove scratches from the coarse sanding, and prepare for a smoother finish.
Fine Grits (320-400+): Finish your sanding journey with fine grit sandpaper to achieve a polished, smooth surface that’s ready for the next phase of your project.
Tips for Sandpaper Selection
Surface Assessment: Carefully inspect your car’s surface and assess its condition. Is it rough, scratched, or relatively smooth? This assessment will guide your choice of grit.
Progressive Grits: Plan your sanding process with progressive grits. Start with coarse grits and progressively move to finer grits for a seamless transition between sanding phases.
Test a Small Area: If you’re uncertain about the appropriate grit, conduct a test on a small, inconspicuous area to observe how it performs and whether it yields the desired results.
Stock Up: Ensure you have an adequate supply of sandpaper with various grit levels to cover the entire sanding process and address any unforeseen challenges.
With a solid understanding of sandpaper grits and their applications, you’re well-equipped to embark on your car sanding journey with confidence and precision. Proper grit selection is the key to achieving that flawless finish you’ve been dreaming of.
The Art of Sanding: How to Sand a Car?
Sanding a car is a meticulous process that requires precision, patience, and attention to detail. In this comprehensive guide, we’ll delve into the art of sanding, step by step, to help you achieve a flawless finish on your car.
Step 1: Surface Preparation
Thorough Cleaning: Start by ensuring that your car’s surface is impeccably clean. Remove any dirt, grease, or contaminants that might hinder the sanding process. A clean canvas is essential for achieving outstanding results.
Masking Off: To protect areas of the car that you don’t intend to sand, such as windows, trim, lights, and other delicate components, use masking tape and plastic sheeting. This careful masking ensures that only the intended surfaces are subjected to sanding.
Step 2: Coarse Grit Sanding
Choosing the Right Grit: Begin your sanding journey with coarse grit sandpaper, typically in the range of 80-120. This initial stage involves heavy lifting—it’s where you tackle the removal of old paint, rust, or imperfections. Remember to keep the sandpaper wet during this phase to minimize dust.
Masterful Technique: When using coarse grit sandpaper, it’s crucial to find the right balance between pressure and finesse. Hold the sandpaper firmly but avoid applying excessive force. Sand in straight, overlapping strokes, following the natural contours of your car. This technique ensures an even and consistent removal of imperfections.
Step 3: Transition to Medium Grit
Smoothing Out Imperfections: As you progress, transition to medium grit sandpaper, typically in the range of 150-220. This phase is dedicated to refining the surface further, smoothing out any remaining imperfections, and preparing it for a smoother finish. Similar to the previous steps, ensure the sandpaper remains wet for optimal results.
Step 4: Finish with Fine Grit
Polishing for Excellence: The final leg of your sanding journey involves fine grit sandpaper, often exceeding 400 in grit level. This step is all about achieving a polished, smooth surface that’s ready for the next phase of your refinishing project. During this phase, periodically wipe away excess water to inspect the surface for any lingering imperfections. It’s your opportunity to make any final adjustments.
Step 5: Rinsing and Drying
Clean and Rinse: After completing each sanding phase, thoroughly clean the surface and rinse it to remove any debris or remnants from the sanding process.
Complete Drying: Ensure the car’s surface is entirely dry before moving on to the next grit or the subsequent phase of your refinishing project. Proper drying prevents issues like water spotting.
How to Handle Common Sanding Hurdles
During your car sanding journey, you may encounter common challenges that require special attention and techniques. Here’s how to address these hurdles effectively:
Dealing with Rust
Rust Removal: If rust spots appear, consider using a rust remover or a wire brush to eliminate them before sanding.
Primer Application: After rust removal, apply a rust-inhibiting primer to prevent the return of rust.
Addressing Dents and Imperfections
Filler Putty: For minor dents and imperfections, use filler putty to create an even surface before sanding.
Spot Sanding: Tackle problematic areas with spot sanding, focusing on those spots until they blend seamlessly with the surrounding surface.
Handling Uneven Surfaces
Block Sanding: Achieve even pressure distribution by using sanding blocks, particularly on large, flat surfaces.
Hand Sanding: For curves and contours, turn to hand sanding with the appropriate grit to maintain precision.
Avoiding Over-Sanding
Progress Checks: Regularly inspect the surface to ensure you’re not over-sanding or creating uneven patches.
Prompt Corrections: If you identify any issues, promptly correct them using the appropriate grit and technique.
Proper Cleanup and Next Steps
Before you step back to admire your beautifully sanded car, there’s one critical task left: proper cleanup. Here’s how to tidy up and prepare for the exciting phases ahead:
Cleaning Up
Dust and Debris Removal: Use clean rags and compressed air to remove dust and debris from the sanded surface.
Thorough Car Wash: Give your car a thorough wash to eliminate any remaining contaminants.
Final Surface Inspection: Take a final look at the sanded surface to ensure it’s smooth and ready for the next phase.
Preparing for the Next Steps
Primer Application: If your refinishing plan involves repainting, apply an automotive primer to create a smooth base for the new paint.
Painting or Refinishing: Proceed with your chosen refinishing plan, whether it’s applying a fresh coat of paint, clear coat, or a custom finish.
Final Touches: Once your car’s new look is complete, don’t forget to add any finishing touches, like trim or detailing.
Conclusion
In conclusion, the process of learning “how to sand a car” may seem daunting at first, but with the right guidance and a bit of practice, it becomes a rewarding and achievable skill. Whether you’re looking to restore your car’s shine or preparing it for a fresh look, the steps outlined in this guide can help you achieve the results you desire.
Remember, safety should always come first, and a well-executed sanding job can make a significant difference in your car’s appearance. So, grab your tools, follow the tips and techniques, and embark on your car sanding journey with confidence. Your vehicle is waiting to shine like new!
Frequently Asked Questions
What is the purpose of sanding a car?
Sanding a car serves multiple purposes. Primarily, it prepares the surface for refinishing by removing old paint, rust, or imperfections. It also ensures a smooth canvas for a new paint job, making your car look fresh and flawless.
What safety precautions should you take when sanding a car?
Safety is paramount in car sanding. Always wear safety glasses, a respirator mask, gloves, and ear protection. Work in a well-ventilated area to minimize dust inhalation, and keep a fire extinguisher nearby for added safety.
What tools do you need to sand a car?
To effectively sand a car, gather essential tools such as sanding blocks, electric sanders, various grit sandpapers (coarse to fine), masking tape, plastic sheeting, a spray bottle with water, and clean rags. These tools ensure precise and efficient sanding.
How do you choose the right sandpaper grit for car sanding?
Selecting the right sandpaper grit is crucial. Coarse grits (80-120) are ideal for heavy material removal, while medium grits (150-220) are for refining the surface. Fine grits (320-400+) are used for achieving a polished finish. Choose based on the specific task and desired outcome in your car sanding project.
How many hours does it take to sand a car?
The time required to sand a car depends on factors like the car’s size, condition, and the extent of sanding needed. Generally, it can take anywhere from 20 to 40 hours or more for a comprehensive sanding and refinishing job.
Is sanding bad for car paint?
Sanding is not inherently bad for car paint when done correctly. Proper techniques and the right grit sandpaper can remove imperfections and old paint without damaging the underlying surface. However, improper sanding or using the wrong tools can harm the paint.
What are the next steps after sanding a car?
After sanding, you can apply an automotive primer to create a smooth base for the new finish. Then, proceed with your chosen refinishing plan, which may involve painting, clear coating, or other custom finishes. These steps ensure a polished and rejuvenated car surface.
Share your love!
Tools Tale
Disclaimer: This site is owned and operated by Tools Tale. toolstale.com is a participant in the Amazon Services LLC Associates Program, an affiliate advertising program designed to provide a means for sites to earn advertising fees by advertising and linking to Amazon.com. This site also participates in other affiliate programs and is compensated for referring traffic and business to these companies.