Physical Address
304 North Cardinal St.
Dorchester Center, MA 02124
Physical Address
304 North Cardinal St.
Dorchester Center, MA 02124

Learning how to use a jigsaw correctly helps beginners cut curves, shapes, and detailed patterns in wood, plastic, or metal.
If you are stepping into the world of home improvement, the jigsaw is often the first power tool that makes you feel like a true maker. While a circular saw is built for brawn and straight lines, the jigsaw is the artist of the workshop. It is a versatile woodworking tool designed to navigate tight curves, internal cutouts, and intricate shapes that other saws simply cannot touch.
In this comprehensive guide, we will break down everything you need to know about this essential cutting tool, from selecting the right blade to mastering the “orbital” settings that often confuse beginners.
At its core, a jigsaw is a hand tool powered by electricity (corded) or a battery (cordless). It features a thin, reciprocating blade that moves rapidly up and down. Because the blade is narrow, it allows the user to turn the tool while cutting, making it the premier choice for curved geometry.
While it is a multi-talented saw, it isn’t always the right tool for every job.
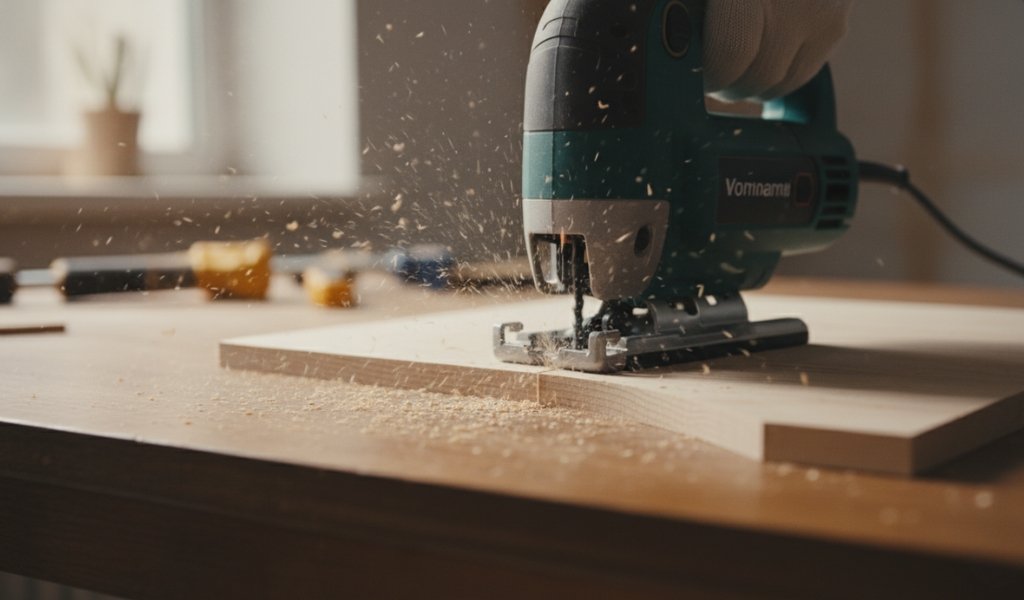
Before pulling the trigger, you need to know what the different dials and levers do. Most modern jigsaws feature the following:
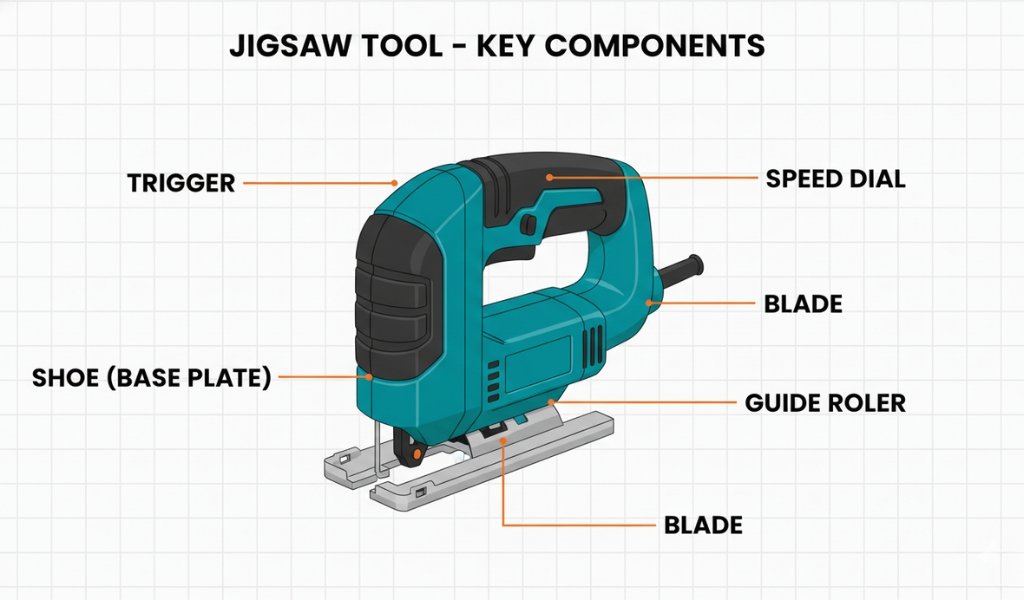
A jigsaw is only as good as its blade. If you use a wood blade on metal, you’ll ruin the tool; if you use a coarse blade on laminate, you’ll shatter the finish.
| TPI Count | Best Use Case | Finish Quality |
| 6 – 10 TPI | Rough construction timber, fast cuts | Rough / Splintered |
| 10 – 14 TPI | General woodworking, hardwoods | Medium / Clean |
| 18 – 24 TPI | Metals, plastics, thin PVC | Very Clean / Slow |
| Reverse Tooth | Laminate flooring, kitchen worktops | No chips on the top surface |
Pro Tip: Look for “U-shank” or “T-shank” blades. Most modern jigsaws use T-shanks because they don’t require a tool to change them, offering a more secure “click-in” fit.
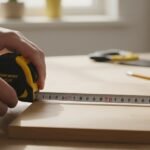
Accuracy starts before you even plug the tool in.
Use a carpenter’s pencil for rough cuts or a fine-tip marker for precision. If you are cutting a dark material, blue painter’s tape is a lifesaver—place the tape down first, then draw your line on the tape. This also helps prevent the wood from splintering.
Never try to hold the wood with one hand and the saw with the other. Use G-clamps or quick-release clamps to fix the material to a workbench. Ensure the area directly beneath your cut line is “empty space” so you don’t accidentally saw your table in half!
Wear safety goggles. Jigsaws kick up a lot of “swarf” (fine dust and chips) right at eye level. If you are cutting MDF, a dust mask is mandatory due to the glues used in the material.
Disconnect the power. Insert the blade into the chuck. Give it a gentle tug to ensure it is locked. Ensure the back of the blade is resting in the groove of the guide roller.
Place the front of the jigsaw’s shoe firmly on the edge of the material. The blade should NOT be touching the wood yet.
Step 4: The “Soft Start”
Squeeze the trigger. Let the motor reach its full set speed. Once the blade is humming, slowly move the saw forward until the blade engages the wood.
Guide the saw with firm downward pressure. Do not push the saw forward with force; let the teeth nibble the wood at their own pace. If the motor sounds like it’s straining, you are pushing too hard.
As you reach the end of the board, keep the saw level. Don’t let it tilt as it leaves the wood, or you’ll get a jagged “exit wound.” Let the scrap piece fall, then release the trigger and wait for the blade to stop completely before lifting the tool.
Standard jigsaws move straight up and down. An orbital jigsaw adds a forward-and-back motion.
Most jigsaws have a base plate that can tilt.
Tighten it back up.
A well-maintained power tool can last decades.
Once you understand how to use a jigsaw properly, it becomes one of the most versatile tools in any DIY workshop.
The jigsaw is the ultimate “problem solver” in your DIY arsenal. It’s a hand tool at heart with the muscles of a power tool. By taking it slow, choosing the right blade, and respecting the tool’s limits, you can move from simple straight cuts to complex woodworking projects in no time.
Q: Can a jigsaw cut a straight line? A: Yes, but it requires help. Because the blade is thin and flexible, it naturally wants to “wander.” To get a perfectly straight cut, clamp a guide (like a straight board) to your workpiece and keep the jigsaw shoe pressed against it.
Q: Why is my jigsaw splintering the top of the wood? A: Standard jigsaw blades cut on the upstroke, which pulls wood fibers upward and causes splintering on the “good” side. To fix this, you can either cut the board with the back side facing up, use blue painter’s tape over the cut line, or buy “Reverse Tooth” blades.
Q: Is a cordless jigsaw better than a corded one? A: Cordless offers amazing maneuverability for curves. However, jigsaws are power-hungry. If you are cutting thick timber or working all day, a corded model (like an 800W version) provides consistent power without the weight of a battery.
Q: How thick of wood can a jigsaw cut? A: Most DIY jigsaws can handle up to 2 inches (50mm) of softwood. Any thicker and the blade is likely to bend, resulting in a crooked vertical cut. For heavy beams, a circular saw or reciprocating saw is a better choice.
Q: Can I use a jigsaw to cut kitchen tiles? A: Yes, but you must use a “carbide grit” blade. These don’t have teeth; they have a rough coating that grinds through ceramic. Use a slow speed and a little water to keep dust down.