How to Sharpen Drill Bits Like a Pro. The Ultimate Guide to Restoring Your Edge.
Learning how to sharpen drill bits properly is an essential skill for anyone who wants to keep their tools efficient, safe, and long-lasting.
There is a specific, guttural groan that every DIYer and professional trades-person knows: the sound of a drill motor straining against a piece of wood or metal that refuses to yield.
You apply more pressure, the drill gets hotter, smoke begins to curl from the hole, and yet, you’ve barely made a dent. It is the universal signal that your tool has failed you. Or rather, you have failed to maintain your tool.
Drill bits allow you to drill selected and correctly-sized holes, making them the unsung heroes of the toolbox. From hanging a simple picture frame to structural steel fabrication, they are the tip of the spear. However, even the most expensive twist drills eventually lose their factory edge. While many people treat bits as disposable consumables, learning how to maintain them is a hallmark of a true craftsman. This guide will walk you through the art of the “re-grind,” ensuring your tools stay sharp, safe, and cost-effective.

When to Sharpen Your Drill Bits
The sharp tip of a drill bit doesn’t last forever. Not all drill bits are made strong, but almost all of them share the common trait of losing sharpness eventually. Understanding the “Red Flags” of a dull bit can save your project and your drill’s motor.
The Warning Signs
- Reduced Cutting Speed: If a task that normally takes five seconds is now taking thirty, your cutting lips are rounded.
- Physical Force: You shouldn’t have to put your entire body weight behind a drill. If the bit is sharp, the geometry of the twist should pull the bit into the material with minimal assistance.
- Audible Distress: A sharp bit makes a “swishing” or “curling” sound as it carves through material. A dull bit produces a high-pitched, unsettling screeching noise—the sound of metal-on-metal friction.
- Discoloration: Take a close look at the tip. Has it turned blue, purple, or black? This is a sign of “burning” the steel. Once the temper is gone, the metal becomes soft and will never hold an edge again until that section is ground away.
- Shiny Edges: Under a bright light, look directly at the cutting lip. If you see a “sparkle” or a reflection along the edge, it means the edge is rounded. A truly sharp edge is so thin it doesn’t reflect light—it looks like a dark, crisp line.
What Affects a Drill Bit’s Performance?
Before you start grinding away, it’s vital to understand the factors that dictate how a bit interacts with material.
1. Material Composition
High-quality drill bits are often made from Cobalt or High-Speed Steel (HSS).
- HSS: The standard for most DIYers. It stays hard even at high temperatures and is easy to sharpen.
- Cobalt: These are HSS bits with 5–8% cobalt added. This isn’t just a coating; the alloy is consistent throughout the bit. They are incredibly heat-resistant and ideal for stainless steel.
- Carbide: These are the “diamonds” of the tool world. They stay sharp for a very long time but are brittle. They require specialized diamond wheels to sharpen.
2. Protective Coatings
Coatings are designed to reduce heat and friction, which are the primary causes of dulling.
- Black Oxide: Provides lubricity and rust resistance.
- Titanium Nitride (TiN): The familiar gold-colored coating. It increases surface hardness.
- Titanium Carbonitride (TiCN): Usually a blueish-grey, this is even harder than TiN and used for high-speed industrial applications.
Note: When you sharpen a coated bit, you are removing the coating from the cutting edge. However, the coating on the flutes still helps with chip evacuation and heat reduction.
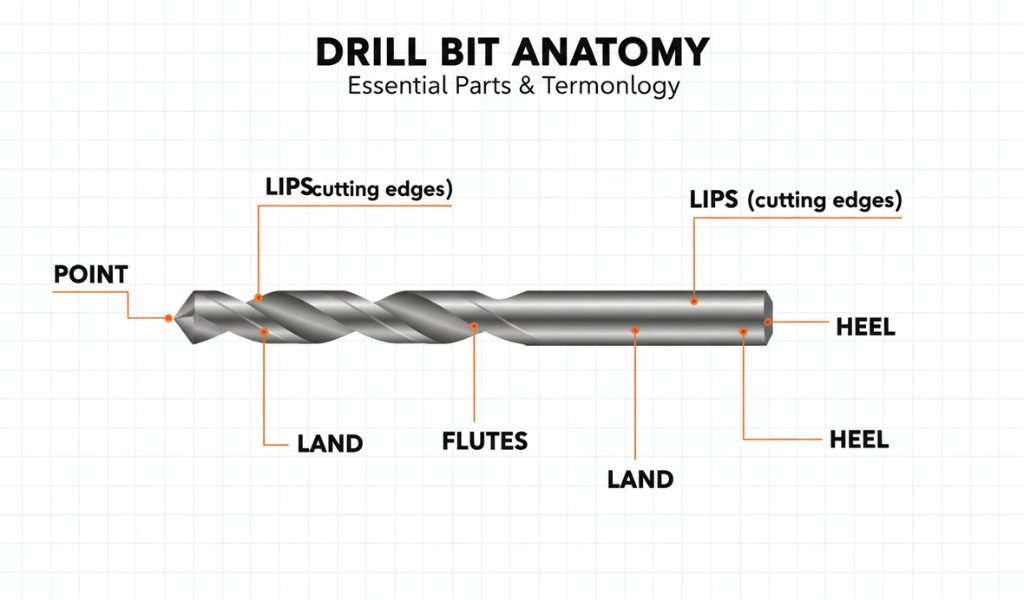
The Anatomy of a Twist Drill
To sharpen a bit, you must understand its geometry.
If you change these angles, the bit won’t work.
- The Point: The very tip where the two cutting lips meet.
- The Lips: The actual cutting edges that carve the material.
- The Land: The portion of the bit that isn’t cut away by the flutes.
- The Flutes: The spiral grooves that allow chips to escape the hole.
- The Heel: The back edge of the cutting face.
- Clearance Angle: This is the most important part of sharpening. The “heel” must be lower than the “lip.” If the heel is higher, it will rub against the material and prevent the lip from touching the work surface.
Safety Gear Needed When Sharpening
Sharpening involves high-speed friction, sparks, and metal removal. This is not the time to be casual about safety.
- Safety Goggles: Not just “glasses.” You need side-shield protection. Tiny metal shards (swarf) and abrasive grit fly off the wheel at high speeds.
- Face Shield: If using a heavy-duty bench grinder, a face shield provides an extra layer of protection against wheel breakage.
- Mask/Respirator: Grinding wheels are made of bonded abrasives. As they wear down, they release fine dust. Inhaling stone and metal dust is a health hazard.
- Gloves: This is a debated topic. Heavy gloves can get caught in a spinning wheel, which is dangerous. However, thin, tight-fitting mechanic gloves can protect your skin from “grinder burn” and the extreme heat generated in the bit.
- Ear Protection: Constant grinding noise can lead to long-term hearing fatigue.
How to Sharpen Drill Bits Step by Step
Sharpening drill bits can be done using several different methods depending on the tools you have available. Whether you prefer traditional hand sharpening with a file, the precision of a bench grinder, or the convenience of a dedicated drill bit sharpener, the goal is always the same—restore the cutting edge and maintain the correct angle of the drill bit.
Method 1: How to Sharpen Drill Bits with a File
Learning how to sharpen drill bits by hand saves you from specialized tools. This is the “old school” way, often used for large bits, auger bits, or when you are on a job site without power.
Step-By-Step Hand Sharpening:
- Clean the Bit: Use a wire brush or a rag with solvent to remove any pitch, wood resin, or cutting oil.
- Secure the Bit: Place the drill bit in a bench vise. The tip should be pointing up and slightly toward you. Do not over-tighten the vise, or you may crack the bit.
- The Angle: Most twist drills have a 118-degree point. This means your file should be at roughly 59 degrees relative to the center axis of the bit.
- The Motion: Using a small mill file, stroke across the cutting lip. Move from the edge toward the heel.
- Count Your Strokes: This is crucial for balance. If you do 10 strokes on one lip, you must do 10 on the other. If the lips are uneven in length, the drill will wobble.
- De-burr: Use a piece of leather or a fine Arkansas stone to remove the microscopic “wire edge” left by the file.
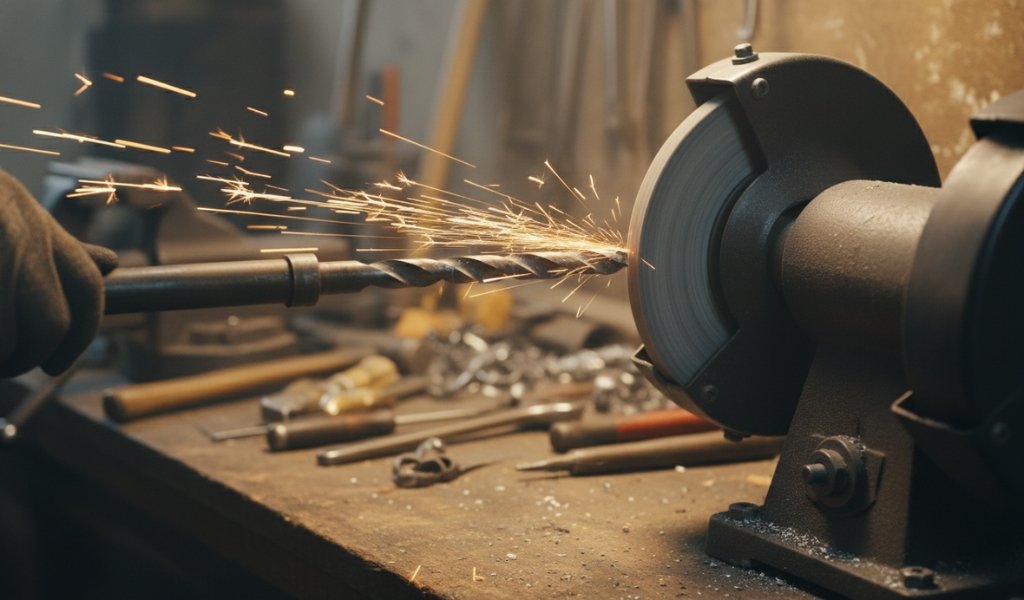
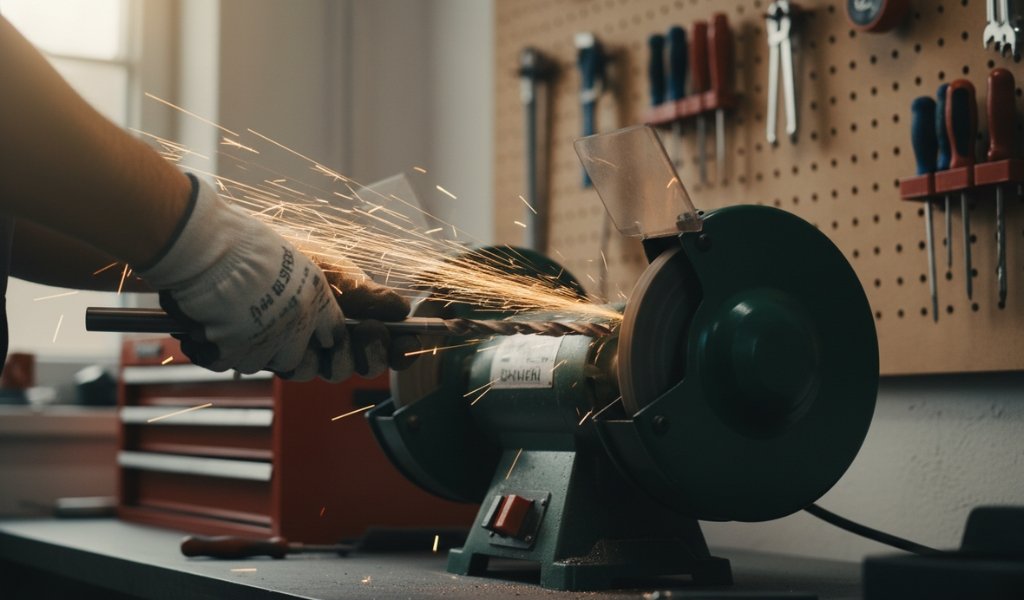
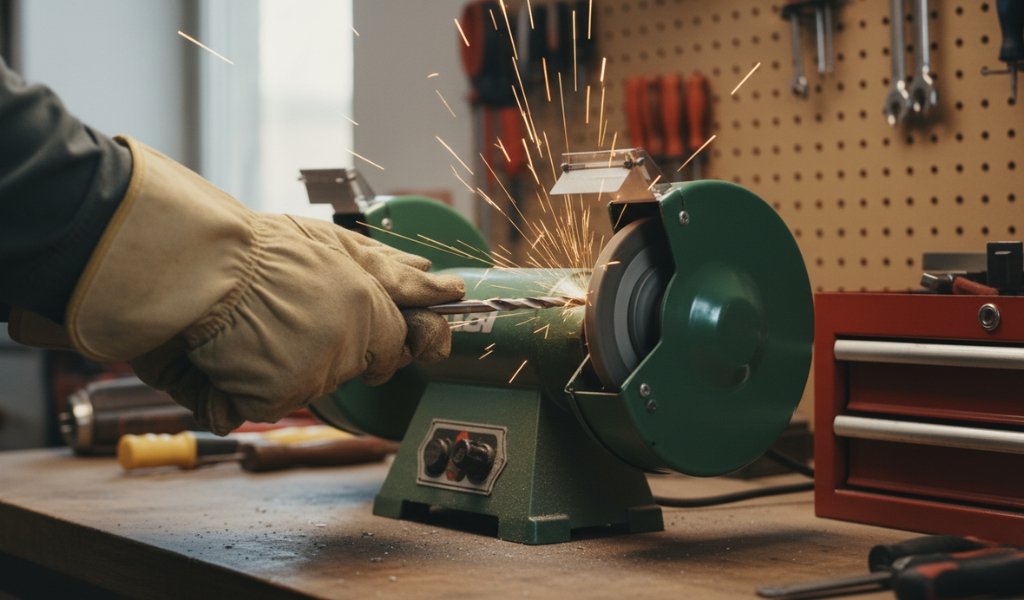
Method 2: How to Sharpen a Drill Bit with a Bench Grinder?
The bench grinder is the most common way to sharpen tools, but it requires the most “finesse.”
A slow, steady hand is required to avoid damaging the metal.
Equipment Setup
Here the torque and stability needed. Ensure your grinding wheel is “dressed” (flat and clean) and that the tool rest is exactly 1/8 inch from the wheel.
The Grinding Technique:
- The Grip: Hold the bit with both hands. Your dominant hand should be near the tip, using your index finger as a guide against the tool rest.
- The Approach: Bring the bit to the wheel at a 60-degree angle.
- The “Sweep”: As the lip touches the wheel, slowly rotate the bit clockwise and simultaneously drop the shank (the back end) down. This motion creates the necessary “relief” or “clearance” behind the cutting edge.
- Cooling (Crucial): Every 2 seconds of grinding generates enough heat to ruin the steel’s hardness. Have a cup of water ready. Dip the bit frequently. If the water sizzles, you’ve waited too long.
- Check Your Work: Use a drill point gauge (a cheap metal tool) to ensure both lips are the same length and angle.
Method 3: How to Sharpen Drill Bits with a Drill Bit Sharpener?
A dedicated drill bit sharpener is the quickest and most efficient way to sharpen drill bits accurately. For most people, this is the best path to success.
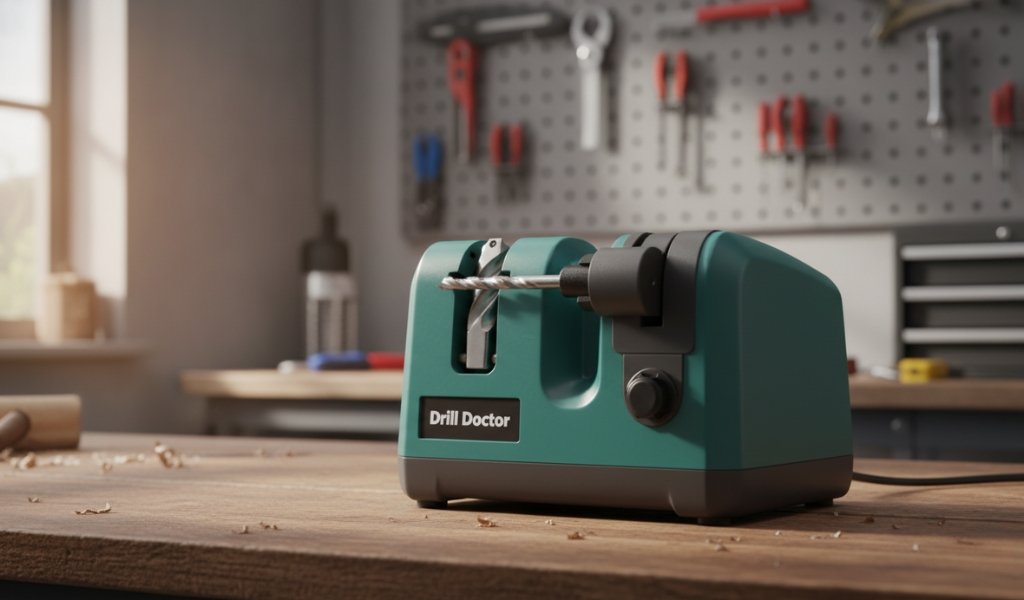
The Professional’s Choice: The Drill Doctor
It combines the precision of a machinist with the ease of a pencil sharpener.
Why it works:
- Consistency: It holds the bit at the exact angle every time.
- Versatility: It can sharpen HSS, Cobalt, TiN-coated, and even Masonry bits.
- Split Pointing: It can turn a standard bit into a “split point” bit, which doesn’t “walk” when you start a hole.
How to use it:
- Alignment: Slide the bit into the chuck. The machine has an alignment port that ensures the “shoulders” of the bit are positioned correctly relative to the grinding wheel.
- Tighten: Lock the chuck.
- Sharpen: Insert the chuck into the sharpening port. Turn the chuck an even number of half-turns. The machine’s cam action automatically creates the perfect relief angle.
- Hone: If needed, move the chuck to the “split point” port to sharpen the very centre of the drill bit.
Alternative Tools: Belt Sanders and Dremels
Sometimes you have to work with what you have.
- Belt Sanders: Many professionals actually prefer a belt sander with a fine-grit (120-180) belt over a bench grinder. The flat surface of the belt makes it easier to see the angle of the bit. The process is identical to the bench grinder method: touch, twist, and drop.
- Dremel Rotary Tools: For very small bits (under 1/8″), a Dremel with a small grinding stone can work. It requires a very steady hand, as the high RPMs can melt a small bit in a fraction of a second.
The Chemistry of Cutting: Why Heat is the Enemy
When you drill into a piece of 1/4″ steel, the friction generates temperatures that can exceed 500°C. At these temperatures, the carbon in the steel can begin to migrate, softening the metal.
This is why cutting oil is non-negotiable for metalwork. It acts as both a lubricant (reducing friction) and a coolant (carrying heat away). If you see smoke, stop. Add oil. Let the bit cool. If you sharpen a bit and it immediately goes dull again, you likely “burned” the tip during the sharpening process itself.
How Can You Keep Your Drill Bits Sharp Longer?
If you hate sharpening, the best strategy is to avoid dulling your bits in the first place.
- Speed Control: Most people run their drills too fast. For metal, slower is better. Use a “slow and heavy” approach—high pressure, low RPM.
- Clearing the Flutes: When drilling deep holes, especially in wood or plastic, pull the bit out every inch to “clear the chips.” If the chips get packed in the flutes, they create friction and heat.
- Use the Right Bit: Don’t use a wood bit (like a spade bit) on metal, and avoid using high-speed steel on masonry. Match the tool to the task.
- Proper Storage: Tossing bits into a loose metal tray causes the sharp edges to knock against each other, creating micro-chips. Use a drill index or a magnetic strip.
Economics: The Cost of Sharpening vs. Replacing
Is it actually worth your time?
- Cheap Bits: A 29-piece set of “budget” bits costs about $20. It is rarely worth the time to sharpen these unless you are in a pinch.
- Premium Bits: A high-quality Cobalt or TiN-coated set can cost $100–$250. Replacing a single 1/2″ Cobalt bit can cost $15.
- The Sharpener: A Drill Doctor 750X costs around $150.
If you go through two sets of high-quality bits a year, the sharpener pays for itself in less than six months. Furthermore, you save the “hidden cost” of driving to the hardware store every time a bit goes dull mid-project.
The Final Word: Sharp Tools, Superior Results
Mastering the art of sharpening drill bits is more than just a money-saving hack; it is a fundamental skill that elevates your craftsmanship. Whether you choose the Zen-like precision of hand-filing, the raw power of a bench grinder, or the foolproof accuracy of a dedicated drill bit sharpener, the result is the same: cleaner holes, less strain on your power tools, and a safer working environment.
A dull tool is a dangerous tool. It requires more force, which leads to slips and accidents. By taking the time to maintain your twist drills, you are investing in the quality of your work and your own safety. Sharpen, use, repeat—this is not a drill. It’s a trade secret.
Frequently Asked Questions (F.A.Q.)
1. Can you sharpen masonry bits?
Yes, but you cannot use a standard file or a standard bench grinder wheel. Masonry bits have carbide tips, which are harder than the abrasive in a standard wheel. You must use a diamond wheel or a “green” silicon carbide wheel to grind them.
2. Is it worth sharpening small bits (under 1/8 inch)?
Generally, no. Bits smaller than 1/8 inch are incredibly difficult to see and hold. Even with a dedicated sharpener, the margin for error is so small that it’s usually more practical to replace them.
3. What is the difference between a 118-degree and a 135-degree point?
- 118-degree: The standard angle. It’s steeper and better for wood, plastic, and soft metals.
- 135-degree: A flatter angle often found on “split point” bits. It is designed for hard metals because it puts more of the cutting edge in contact with the material immediately, preventing the bit from “skating” or “walking.”
4. Why does my drill bit turn blue when I sharpen it?
This is called “blueing.” It happens when the steel reaches approximately 300°C. At this temperature, the steel is essentially “annealed” or softened. If this happens, that specific part of the bit is ruined. You must grind past the blue section until you reach shiny, silver steel. To prevent this, dip the bit in water every few seconds.
5. Can I sharpen a stepped drill bit (Uni-bit)?
Yes. However, you do not sharpen the “steps.” You only sharpen the flat vertical face of the flute. By grinding a small amount of material off the flat face, you create a new, sharp edge for every step simultaneously.