Physical Address
304 North Cardinal St.
Dorchester Center, MA 02124
Physical Address
304 North Cardinal St.
Dorchester Center, MA 02124

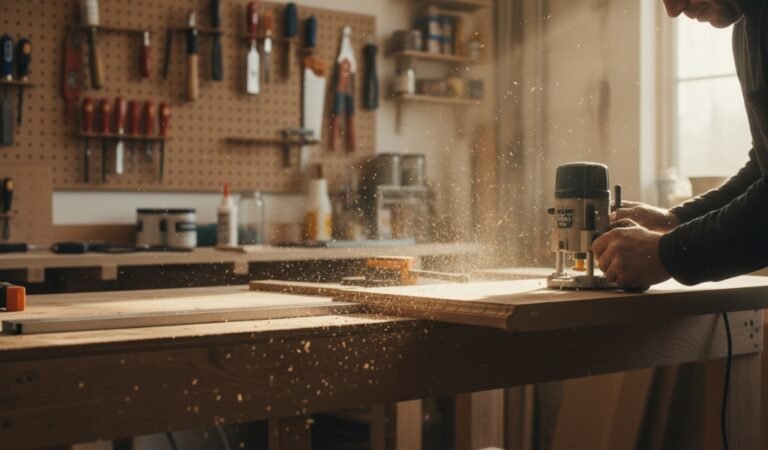
Ever wondered how to remove a wood dowel effortlessly? Picture this: a seamless extraction, preserving your wood’s integrity. Whether you’re a woodworking pro or a DIY enthusiast, freeing a stuck dowel is a skill worth mastering. In this guide, we’re spilling the beans on effective dowel removal methods.
Get ready to tackle your projects with confidence as we unveil the secrets to hassle-free dowel removal. Are you excited to liberate your woodworking projects? Let’s roll up our sleeves and dive into the art of dowel removal!
Key Summary: How to Remove a Wood Dowel?
Removing a wood dowel involves assessing, loosening, and extracting the dowel. Prioritize safety, preserving wood integrity, and exercise patience throughout the process. The duration varies based on the dowel size and technique, typically ranging from a few minutes to an hour.


A wood dowel is a cylindrical rod or pin typically made of wood, serving various practical and structural purposes in woodworking and furniture making. This simple yet versatile wooden peg is a fundamental component in carpentry and DIY projects. In essence, a wood dowel is used to join two or more pieces of wood securely.
Its cylindrical shape allows for precise alignment and a snug fit. Carpenters often create holes in the wood pieces they intend to join and insert the dowel into these holes. The dowel acts as a peg, holding the pieces together once inserted, forming a strong bond. Wood dowels come in various diameters and lengths, providing options for different project requirements.
The choice of dowel size depends on the thickness and weight-bearing capacity needed for the specific woodworking task. Common applications of wood dowels include furniture construction, cabinetmaking, shelving units, joinery, and even in craft projects. They enhance structural integrity and stability by creating reliable connections that endure stress and weight over time.
Additionally, wood dowels can be utilized for decorative purposes. They can be stained, painted, or polished to match the aesthetics of the wood pieces they are incorporated into, offering a seamless and attractive finish. A wood dowel is a small yet crucial element in woodworking, offering simplicity and effectiveness in creating strong and lasting connections in various wood-related projects. Its versatility and ease of use make it an essential tool for both amateur DIYers and professional woodworkers.
In woodworking, the process of joining and connecting pieces of wood often involves the use of dowels. These small cylindrical rods play a vital role in reinforcing joints and creating strong bonds in various wooden structures. However, understanding the importance of proper dowel removal is equally essential, as it impacts the quality, appearance, and structural integrity of the woodwork.
When it comes to disassembling or altering a wooden project that involves dowels, precision is key. Proper dowel removal ensures that the wooden pieces can be separated without causing damage or compromising the wood’s integrity. Here’s why it matters:
Proper dowel removal techniques help in preserving the integrity of the wood. Careless or hasty removal can cause splintering, cracking, or chipping of the wood, leading to irreparable damage. By removing dowels carefully, the wood maintains its structural strength and appearance.
In woodworking, reusing or repurposing wood is a sustainable and eco-friendly practice. Proper dowel removal allows for the salvaging of dowels and wood pieces, making them available for future projects. This not only saves resources but also reduces waste.
When a dowel is removed meticulously, the surface where it was placed remains smooth. This is crucial for achieving a seamless finish if the wood is to be refinished, painted, or stained. A rough surface resulting from improper dowel removal can mar the overall aesthetics of the woodwork.
Woodworking projects may require modifications or repairs over time. Precise dowel removal facilitates easier repairs or alterations. Whether you need to resize or reconfigure a structure, removing dowels accurately ensures that the wood remains in a suitable condition for further work.
Utilizing proper dowel removal methods saves time and money. Reckless removal can damage not only the dowel but also the surrounding wood, necessitating costly repairs or replacements. Careful extraction minimizes the risk of errors, reducing the overall project expenses.
Attention to detail in dowel removal exemplifies craftsmanship. A well-executed removal process demonstrates the skill and precision involved in woodworking. It showcases a commitment to quality, which is essential in woodworking projects.
Understanding and implementing proper dowel removal techniques is an essential aspect of woodworking. It ensures that the wood’s integrity is maintained, allows for eco-friendly practices through reusability, facilitates a smooth finishing process, enables ease of repairs and alterations, saves time and costs, and ultimately enhances the overall craftsmanship of woodworking projects.
Whether for a hobbyist or a professional woodworker, precise dowel removal should be an integral part of the woodworking skill set, contributing to the success and longevity of woodworking endeavors.
Wood dowels are crucial components in woodworking, offering structural stability and reinforcement in various projects. However, there are instances where you need to remove or replace a wood dowel.
Whether you’re repurposing wood or making alterations to a project, knowing how to remove a wood dowel correctly is essential. This comprehensive guide presents a step-by-step process to ensure efficient and damage-free dowel removal.
To begin the dowel removal process, gather the following tools and materials:
Examine the dowel and the area around it. Assess its size, depth, and the type of wood. Understanding these aspects will help you determine the best approach for removal.
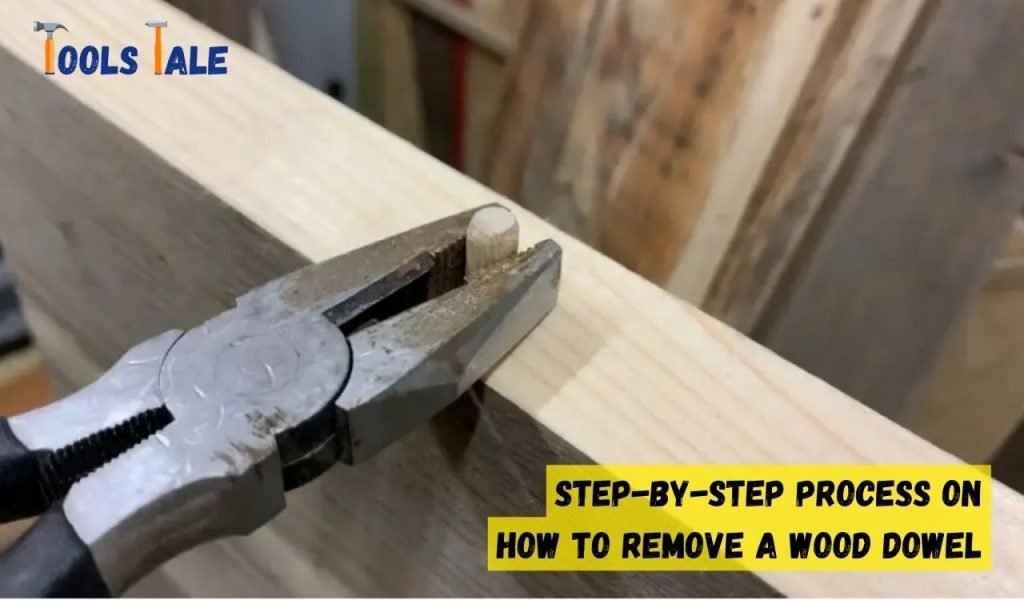
Use a hammer and gently tap the exposed end of the dowel. Gradually increase the force to loosen the dowel. If the dowel is deeply embedded, tap around its perimeter to loosen the wood fibers.
If the dowel is still difficult to remove, use a drill to create a hole in the center of the dowel. Choose a drill bit slightly smaller than the dowel’s diameter. Drill carefully, ensuring you don’t damage the surrounding wood.
For glued dowels, you can apply heat to soften the glue. Use a hairdryer or a heat gun to warm the area around the dowel. The heat will soften the glue, making it easier to remove the dowel.
If the dowel is resistant to tapping or drilling, you may need to cut or split it. Use a chisel to cut along the length of the dowel carefully. Alternatively, you can split the dowel by making a cut and then using a screwdriver to pry it apart.
Once the dowel is loosened, use pliers or a screwdriver to extract it fully. Grasp the dowel firmly and pull it out. If the dowel is split, remove the pieces carefully.
After dowel removal, sand the area to smooth any rough surfaces left behind. Clean the hole or channel created to ensure it’s free from any debris or leftover wood particles.
Inspect the surrounding wood for any damage or splinters caused during the removal process. Make any necessary repairs or adjustments to restore the wood’s integrity.
If your project involves multiple dowels, repeat the steps for each dowel, taking care to assess and adjust your approach based on the dowel’s unique characteristics and position.
By following this step-by-step guide, you can effectively remove wood dowels from your projects, allowing for modifications, repairs, or repurposing of the wood. Ensuring precision and care in this process preserves the wood’s quality and integrity, contributing to the success and longevity of your woodworking endeavors.
Mastering the art of dowel removal enhances your skills as a woodworker and empowers you to handle a wide range of woodworking projects with confidence.
Safety is paramount when undertaking any woodworking task, including removing wood dowels. This process involves the use of various tools and techniques, and taking proper safety precautions is crucial to prevent accidents and injuries. Here, we outline important safety measures to adhere to during wood dowel removal, ensuring a secure and incident-free woodworking experience.
Prioritize safety by wearing the appropriate Personal Protective Equipment (PPE). This should include safety goggles to protect your eyes from flying debris, gloves to shield your hands from potential injuries, and hearing protection if the removal process involves loud noises from machinery.
Ensure proper ventilation in your workspace. Wood dust and fumes can be hazardous to your respiratory system. Work in areas with adequate airflow or consider using respiratory protection such as a dust mask or respirator.
Before using any tool, understand its function, operation, and potential hazards. Read the tool’s manual and follow safety guidelines provided by the manufacturer. Improper tool usage can result in accidents, so use tools only for their intended purpose.
Keep your work area clean and organized to minimize the risk of tripping or falling. Ensure that cords and tools are properly stored when not in use. A clutter-free workspace contributes to a safer working environment.
When removing dowels, secure the wood piece firmly. Use clamps or a vise to stabilize the workpiece, preventing it from moving during the dowel removal process. A stable wood piece reduces the risk of accidents caused by unexpected movements.
Exercise extreme caution when using sharp tools like chisels or drills. Ensure proper handling and storage to avoid accidental cuts or injuries. Always cut away from your body and maintain a safe distance from others while using sharp tools.
Arrange your workbench or working surface at a height that is comfortable and appropriate for the task at hand. Working at the correct height reduces strain on your back and neck, contributing to a safer and more comfortable working experience.
Wood dowels, when being removed, can cause splinters. Take caution to prevent splinters from entering your hands or other parts of your body. Wear gloves and handle the wood and dowel carefully to minimize the risk of splinters.
Maintain focus on the task at hand and avoid distractions. Woodworking demands concentration to operate tools safely and accurately. Distractions can lead to accidents, so ensure a focused and attentive approach during the dowel removal process.
Always have a well-stocked first aid kit readily available in your workspace. In case of minor injuries or accidents, immediate access to basic first aid supplies can make a significant difference in managing the situation effectively.
Adhering to these safety precautions is fundamental to creating a safe woodworking environment. Prioritize safety at all times during wood dowel removal and other woodworking activities. By doing so, you not only ensure your well-being but also contribute to a culture of responsible and safe woodworking practices.

Successfully removing a wood dowel is only half the job done; the post-removal care and finishing touches are equally crucial to ensure a polished and professional outcome. This guide provides valuable insights into the steps and considerations required after dowel removal, emphasizing the importance of proper care and finishing in woodworking projects.
After dowel removal, clean the wood surface meticulously. Use a soft brush or vacuum to remove any wood particles, dust, or debris left from the dowel removal process. A clean surface is essential for applying finishes and treatments effectively.
Carefully inspect the area where the dowel was removed for any damage, splinters, or rough spots. Address any imperfections by sanding the area gently, ensuring a smooth and even surface for finishing.
Even if the area seems smooth, lightly sand the surface with fine-grit sandpaper. This smooths out any remaining imperfections and prepares the wood for the finishing process.
Choosing the right finish is crucial to the wood’s appearance, durability, and protection. Depending on the project, opt for oil-based finishes, varnishes, paints, or stains. Apply the finish using a brush, cloth, or spray, following the manufacturer’s instructions for the best results.
Each type of finish has specific application guidelines regarding drying times, layers, and techniques. Adhere to these guidelines to ensure the finish sets properly and provides the desired appearance and protection.
For optimal results, multiple coats of finish may be required. Allow each coat to dry thoroughly before applying the next one. Check the manufacturer’s recommendations on the number of coats for the chosen finish.
Once the final coat is dry, buff the surface gently with a soft cloth to enhance the shine and smoothness of the finish. Polishing gives a professional and lustrous look to the woodwork.
Inspect the finished woodwork for any irregularities or areas that need further attention. Make any necessary touch-ups to ensure a flawless and consistent finish.
After completing the finishing process, allow the woodwork to dry completely. This ensures that the finish sets well and provides the desired durability and aesthetic appeal.
Once the finishing process is complete, protect the finish by avoiding exposure to excessive heat, moisture, or harsh chemicals. Regular maintenance, such as gentle cleaning and occasional reapplication of finish, will help preserve the wood’s beauty and longevity.
By following these steps and guidelines for post-dowel removal care and finishing, you’ll ensure that your woodwork not only looks impressive but also stands the test of time. The effort and attention you invest in this phase contribute significantly to the overall quality and beauty of your woodworking projects.
Wood dowel removal can be a straightforward process when everything goes smoothly, but challenges and common issues can arise that require troubleshooting. This guide delves into troubleshooting techniques to overcome obstacles that may occur during dowel removal, ensuring a successful and frustration-free woodworking experience.
Navigating these troubleshooting scenarios and common issues in dowel removal enhances your woodworking skills and ensures successful project outcomes. By approaching challenges with patience and the appropriate techniques, you can overcome obstacles and achieve the desired results in your woodworking endeavors.
Mastering how to remove a wood dowel is a fundamental skill for woodworking enthusiasts. By following precise steps and exercising caution, you can efficiently and safely extract dowels, facilitating repairs, alterations, or repurposing of wood pieces. Remember, patience and proper technique are key to a successful dowel removal, preserving the wood’s integrity and ensuring the seamless continuation of your woodworking projects.
Removing a tight dowel requires a delicate approach. Begin by tapping the dowel gently with a hammer to break the initial seal. If the dowel remains snug, apply heat to the surrounding area using a hairdryer or heat gun to expand the wood fibers, aiding in loosening. Afterward, twist the dowel while pulling gently, gradually increasing the pressure as needed.
To cut a wooden dowel, use a fine-tooth saw or a hacksaw. Secure the dowel firmly and make precise, even cuts. Alternatively, a rotary tool with a cutting wheel can also be effective.
To avoid breaking wooden dowels during removal, use penetrating oil or a lubricant to loosen the wood fibers. Apply gentle, consistent pressure while twisting and pulling the dowel slowly and steadily.
If pliers are unavailable, use a pair of vise grips or strong tweezers as an alternative. Grip the dowel firmly with the vise grips or tweezers and twist while pulling gently to remove the dowel. If the dowel is stuck, applying a lubricant can aid in easing its extraction without the need for pliers.
Removing a wooden dowel from the wrong hole can be tricky. Use a drill bit slightly larger than the dowel diameter to carefully drill around the dowel. This weakens its grip, making removal easier.
To hammer wooden dowels, place the dowel in the hole and ensure it’s flush with the surface. Use a hammer and gently tap the exposed end of the dowel until it’s securely in place, providing a strong joint.