Physical Address
304 North Cardinal St.
Dorchester Center, MA 02124
Physical Address
304 North Cardinal St.
Dorchester Center, MA 02124
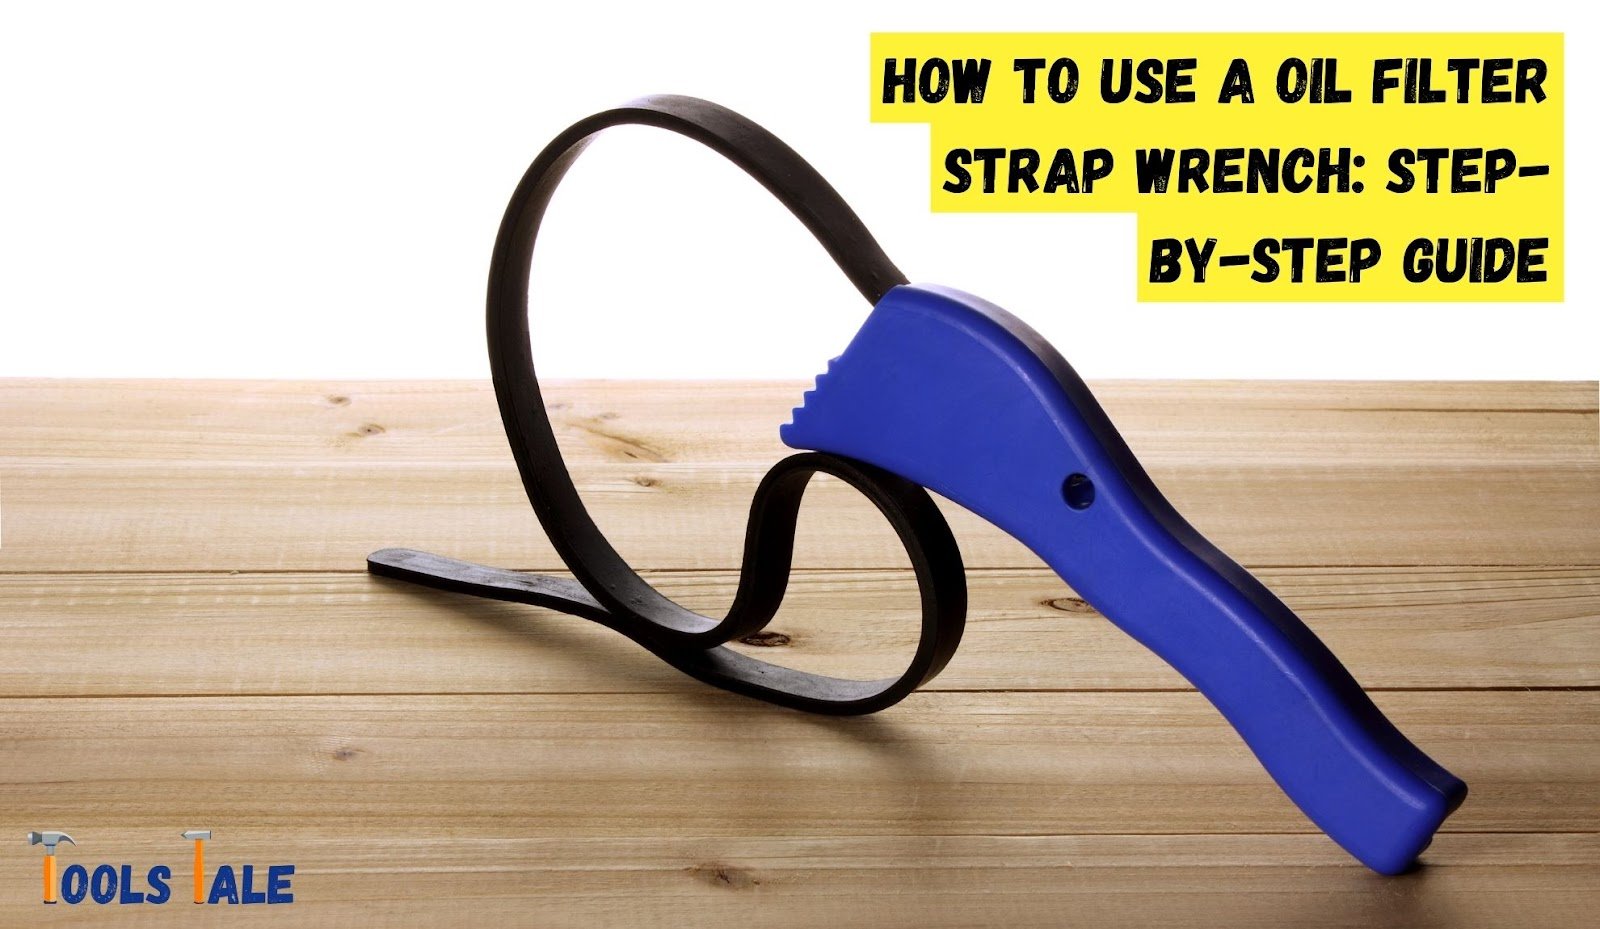
Curious about how to use a oil filter strap wrench? You’re in the right place! This handy tool can be your best friend during oil changes, making the seemingly tricky task of removing an oil filter a breeze. In just a few simple steps, you’ll be equipped with the knowledge to tackle this job like a pro.
Whether you’re a DIY enthusiast or a seasoned mechanic, our quick guide will demystify the process and have you changing oil filters with confidence. Let’s dive in and master the art of using an oil filter strap wrench!
Key Summary: How to Use a Oil Filter Strap Wrench?
Using an oil filter strap wrench is simple! Wrap the strap around the filter, adjust it snugly, and turn counterclockwise. The strap grips tight, providing leverage for easy removal. Remember, lefty loosey, righty tighty! Safely dispose of the old filter and replace with a new one.
[amazon_auto_links id=”11426″]
Before diving into the practical aspects of using an oil filter strap wrench, it’s essential to understand the significance of this tool in your automotive endeavors.
Imagine you’re in the midst of an oil change, ready to tackle the oil filter replacement. However, there’s a catch – the old oil filter is stubbornly stuck in place. This is where the oil filter strap wrench comes into play, as the unsung hero in your toolkit. Its primary purpose is to provide a secure grip on oil filters, simplifying their removal. But why opt for an oil filter strap wrench over other tools?
The versatility of the strap wrench is its standout feature. Unlike traditional filter wrenches designed for specific filter sizes, the strap wrench can adapt to various diameters and shapes. This adaptability makes it a favorite among both DIYers and professional mechanics, as it eliminates the need for multiple specialized tools.
To embark on your journey of mastering the oil filter strap wrench, you’ll need to assemble the essential tools for the job. Here’s a checklist to ensure you have everything you need:

With your tools gathered, it’s time to prepare your workspace for the oil filter replacement process. This stage sets the foundation for a successful operation.
Selecting the appropriate location for your work is crucial. Opt for a level and secure workspace where you can comfortably access the oil filter. If necessary, use a jack to elevate your vehicle slightly for better reach. Ensuring your surroundings are hazard-free and stable is vital for a safe and efficient oil change.
Organizational skills are key to a smooth and hassle-free oil filter replacement. Arrange your tools in an organized manner, within arm’s reach. This proactive approach minimizes the chances of scrambling with oily hands, searching for that elusive flare nut wrench or socket.
Before diving into the oil filter replacement, it’s essential to prepare your vehicle appropriately:
These preparatory steps ensure that your oil change operation proceeds smoothly, efficiently, and safely.
Before you can master the art of using an oil filter strap wrench, it’s crucial to identify the location of your vehicle’s oil filter. Here’s how to do it:
Now that you’ve located the oil filter, take a moment to inspect it. This step is essential, especially if you suspect any issues with your vehicle’s engine.
If you want to minimize oil spillage when removing the filter, consider using an oil filter drain tool. This handy device allows you to drain the oil from the filter before taking it off completely.

With your oil filter identified and any excess oil drained, you’re now ready to master the art of using an oil filter strap wrench. This versatile tool will help you safely and effectively remove the old filter, making way for the new one.
Position yourself comfortably under the vehicle, ensuring you have a clear and safe access point to the oil filter. If necessary, use a jack to lift the vehicle slightly for better reach. Once you have a good angle, you’re ready to wield your strap wrench.
One of the key features of the oil filter strap wrench is its adaptability. Before wrapping it around the filter, adjust the strap to fit snugly. The goal is to have a secure but not overly tight grip to avoid damaging the filter.
With the strap adjusted, place it around the oil filter as close to the top as possible. This is where you’ll have the best leverage. Once the strap is in position, insert the loose end through the wrench’s mechanism.
Now comes the crucial part. Hold the handle of the strap wrench firmly and start turning it counterclockwise. As you turn, the strap will tighten around the filter. Maintain steady, even pressure as you proceed.
If the filter proves resistant to turning, you can employ a bit of leverage. A short piece of pipe slid over the wrench’s handle can provide that extra oomph. Remember, it’s all about consistent pressure, not sudden force.
As you continue turning the strap wrench, you’ll feel the filter gradually loosening. Keep going until it’s completely free. Once it’s loose, carefully unscrew it the rest of the way by hand to prevent any oil spills.
By mastering these steps, you’ve successfully used an oil filter strap wrench to remove the old filter, clearing the path for a new one. With your old filter out of the way, you can proceed with confidence to complete your oil change.
When it comes to the crucial task of removing the oil filter during an oil change, there are specific steps you should follow to do it effectively and safely.
Begin by using the oil filter strap wrench that you’ve carefully selected to match the size of your oil filter. This versatile tool is designed to provide a secure grip on the filter, making its removal a breeze. As you start turning the strap wrench counterclockwise, you’ll feel the filter gradually loosening from its housing. Maintain steady and even pressure throughout this process, avoiding sudden jerks or forceful movements.
Once the filter is loose, take over manually. Carefully unscrew the filter the rest of the way by hand. Remember to maintain a firm grip to prevent any accidental spills or drops during this step. As you remove the filter, be prepared for a few residual drips of oil. To catch these, keep a rag or paper towels handy. This not only prevents a mess but also ensures a clean workspace.
As the old filter comes off, take a moment to inspect the rubber gasket or O-ring located at the top of the filter. Ensure it’s in good condition and hasn’t become stuck to the engine. A damaged or missing gasket could lead to oil leaks when you install the new filter, so it’s essential to address this before proceeding.
With the oil filter removed, your work isn’t quite done. Proper cleanup and disposal are essential for safety and environmental reasons.
Begin by removing any used rags or paper towels from your workspace. Wipe down the area to ensure there are no oil spills or debris left behind. A clean workspace is a safe workspace, and it prevents slipping hazards.
Proper disposal of the old oil filter is critical. Most auto parts stores and service centers accept used oil filters for recycling. To dispose of it safely, place the old filter in a sealable plastic bag to prevent leaks and take it to your nearest recycling center. Never toss it in the regular trash.
Dispose of the used oil in an eco-friendly manner. Many auto parts stores also accept used motor oil for recycling. Store the used oil in a sealed container and transport it safely to the recycling location. Do not pour it down drains or onto the ground.
After completing your oil change, start the engine and let it run for a few minutes. This allows the new filter’s gasket to properly seat and the oil to circulate. Check for any oil leaks around the new filter and the oil drain plug. If you spot any, address them immediately to prevent further issues.
By following these steps for removing the oil filter and practicing safe cleanup and disposal, you not only ensure a clean finish to your oil change but also contribute to environmental responsibility. It’s a satisfying end to a job well done.
In conclusion, understanding how to effectively use an oil filter strap wrench is a valuable skill for anyone involved in car maintenance. This tool simplifies the process of removing oil filters, making routine tasks more manageable.
By following our step-by-step guide and expert advice, you can confidently approach oil filter changes, ensuring the smooth operation of your vehicle. So, grab your oil filter strap wrench and take control of your car’s maintenance needs.
An oil filter strap wrench is a versatile tool designed to help you securely grip and remove oil filters from vehicles. You need one to make the oil filter removal process easier, especially when filters are stuck or tightly secured.
An oil filter strap wrench works by wrapping a flexible strap around the oil filter and then using a handle to apply torque. As you turn the handle counterclockwise, the strap tightens around the filter, allowing you to loosen and remove it.
Yes, oil filter strap wrenches come in various sizes to accommodate different filter dimensions. It’s essential to choose the right size that matches your oil filter for optimal performance.
Yes, you can reuse an oil filter strap wrench multiple times as long as it remains in good condition. Regularly inspect the strap and handle for wear and tear.
An oil-filter wrench offers a secure grip on oil filters, making removal easier. It prevents filter damage, saves time, and reduces frustration during oil changes, especially when filters are stuck.
Failure to tighten the oil filter properly can lead to oil leaks, loss of oil pressure, engine damage, and even catastrophic engine failure. It’s crucial to ensure a snug and secure fit during installation.
To use an oil filter strap wrench, adjust the strap for a snug fit, wrap it around the filter, and insert the loose end through the wrench’s mechanism. Turn it counterclockwise to loosen the filter, providing excellent leverage for removal.