304 North Cardinal St. Dorchester Center, MA 02124
To provide the best experiences, we use technologies like cookies to store and/or access device information. Consenting to these technologies will allow us to process data such as browsing behavior or unique IDs on this site. Not consenting or withdrawing consent, may adversely affect certain features and functions.
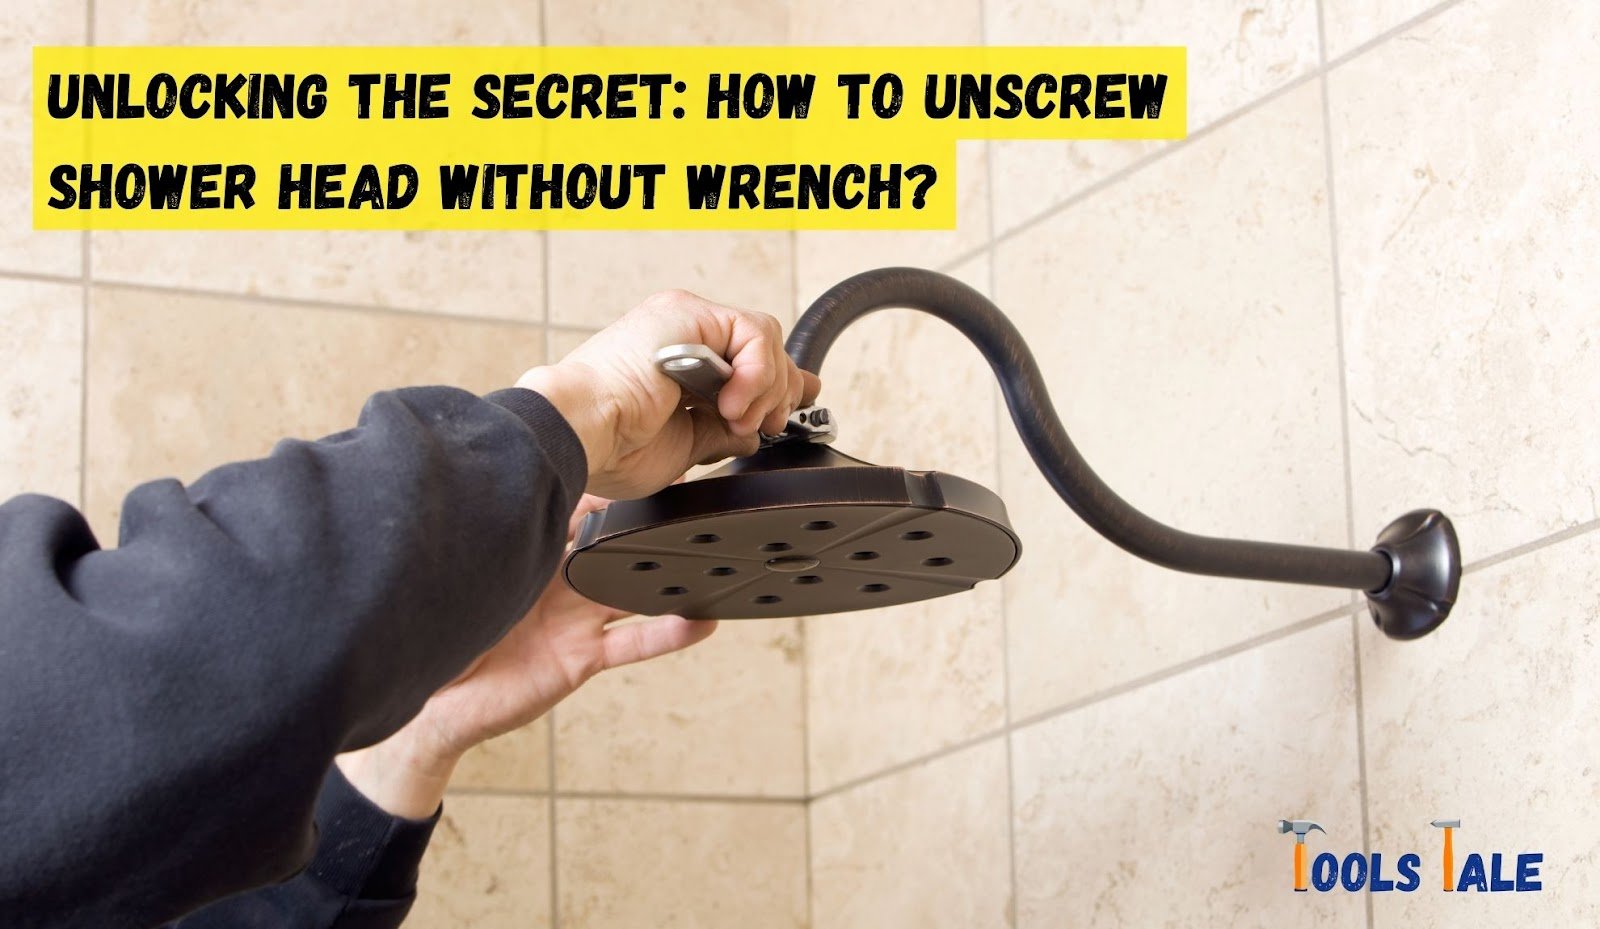
Unlocking the Secret: How to Unscrew Shower Head Without Wrench?
Looking to upgrade your bathroom or replace a stubborn shower head but don’t have a wrench on hand? No worries! Our quick guide on “How to unscrew shower head without wrench” has got your back. Say goodbye to the frustration of stuck fixtures and hello to a refreshing DIY adventure.
Whether you’re a plumbing pro or a novice DIY enthusiast, we’ve got your back. With a few clever tricks and household tools, you’ll have that shower head off in no time. Let’s dive in and make your bathroom upgrade a breeze!
Key Summary: How to Unscrew Shower Head Without Wrench?
To unscrew a shower head without a wrench, try using pliers or a strap wrench for a firm grip. Apply clockwise force to loosen, then twist counterclockwise to remove. Don’t forget to turn off the water supply first!
Hand Tools Suggestion for Your Home
[amazon_auto_links id=”11426″]
Gather Your Necessary Tools and Materials
Before embarking on your shower head removal journey, it’s essential to ensure you have the right tools and materials at your disposal. The good news is that you won’t need a fancy toolbox; most of these items can be found around your home. Here’s a quick rundown of what you’ll need:
Adjustable Pliers: These will be your go-to tool for gripping and turning the shower head. Ensure they’re in good working condition, as a firm grip is crucial.
Rubber Strap Wrench: If you have one, a rubber strap wrench can make the job even easier. It provides a strong grip without damaging the fixture.
Cloth or Rag: Having a cloth or rag on hand is handy for a couple of reasons. It can be used to protect the shower head’s finish from scratches during removal and to help with your grip on the fixture.
Penetrating Lubricant: If your shower head has been in place for a while or shows signs of rust, a penetrating lubricant can be a lifesaver. It helps loosen stuck threads, making removal smoother.
Bucket or Container: To catch any water that may drip from the shower head when you remove it, place a bucket or container beneath it.
Safety Gear: Don’t forget to prioritize safety. Wear gloves to protect your hands, especially when dealing with rust or tight fixtures.
With these tools and materials gathered, you’re well-equipped to tackle the task of removing your shower head without a wrench. Each item plays a crucial role in ensuring a smooth and hassle-free process. Now that you’re prepared, let’s dive into the step-by-step instructions to get that shower head off.
Step-By-Step Guide on How to Unscrew Shower Head Without Wrench
A stuck or outdated shower head doesn’t have to be a source of frustration. Whether you don’t have a wrench on hand or you simply prefer a more DIY approach, removing a shower head without a wrench is entirely possible with the right tools and techniques. In this step-by-step guide, we’ll walk you through the process, ensuring a smooth and hassle-free experience.
Step 1: Gather Tools and Materials
Before you begin, make sure you have all the necessary tools and materials at your disposal. These will serve as your primary tool for gripping and turning the shower head. Ensure they are in good working condition for a strong grip. If available, a rubber strap wrench can be a valuable addition, providing a firm grip without the risk of damaging the fixture.
To protect the shower head’s finish from scratches and enhance your grip, have a cloth or rag on hand. If your shower head is old or shows signs of rust, a penetrating lubricant will help loosen stuck threads, making removal easier. Position a bucket or container below the shower head to catch any dripping water during the removal process. Prioritize safety by wearing gloves to protect your hands, especially when dealing with rust or tight fixtures.
Step 2: Turn Off the Water Supply
Safety is paramount when working with plumbing fixtures. Start by turning off the water supply to the shower. Locate the shut-off valve, which is typically found near the shower or in the basement. Turn it clockwise to shut off the water flow completely.
Step 3: Prepare the Area
To prevent any accidents or water leakage, it’s crucial to prepare the workspace:
Lay a towel or old cloth in the shower to catch any water that may spill during the process.
Position your bucket or container beneath the shower head to collect any remaining water.
Step 4: Remove the Shower Head Using Pliers
Now, let’s get down to the removal process:
Begin by using the adjustable pliers to grip the shower head firmly. Position the pliers’ jaws around the base of the shower head where it connects to the shower arm.
With a steady grip, turn the pliers counterclockwise (left) to loosen the shower head. Apply consistent, gentle pressure to avoid damaging the fixture.
As you turn the shower head, you’ll feel resistance initially, but as the threads start to loosen, it should become easier to rotate.
Continue turning until the shower head is completely detached from the shower arm.
Step 5: Remove the Shower Head Using a Rubber Strap Wrench
If you have a rubber strap wrench on hand, here’s how to use it for shower head removal:
Wrap the rubber strap of the wrench around the shower head’s base, ensuring a snug fit.
Apply gentle pressure on the wrench and turn it counterclockwise (left) to loosen the shower head.
The strap wrench provides a secure grip without scratching the fixture, making the removal process smoother.
Keep turning until the shower head is free from the shower arm.
Step 6: Create a DIY Strap Wrench (Alternative Method)
No strap wrench? No worries. You can craft a DIY strap wrench using common household items:
Find a strong and flexible material, such as an old bicycle inner tube, a piece of rubber, or a sturdy fabric belt.
Cut a length of the material, ensuring it’s long enough to wrap around the shower head’s base.
Wrap one end of the material around the shower head’s base and hold it securely.
With your other hand, use the free end of the material to create tension. Turn it counterclockwise (left) to loosen the shower head.
The DIY strap wrench provides the grip needed to unscrew the shower head without damaging it.
Step 7: Troubleshooting – Dealing with Stuck or Rusty Shower Heads
Sometimes, shower heads can be stubborn due to rust or years of sediment buildup. If you encounter resistance during removal:
Apply a Penetrating Lubricant: Spray a generous amount of penetrating lubricant on the threads and allow it to sit for 15-20 minutes. This will help loosen the grip.
Use Pliers or Strap Wrench: If the shower head remains stuck, apply more pressure with pliers or a strap wrench. Ensure your grip is secure and steady.
Apply Heat: If the shower head remains stuck, carefully use a heat source, such as a hair dryer, to heat the metal slightly. The expansion from the heat may help loosen the threads.
Seek Professional Help: If all else fails, or if you’re uncomfortable proceeding, it’s advisable to contact a professional plumber for assistance.
Step 8: Safety First
Throughout the process, prioritize safety:
Wear gloves to protect your hands from sharp edges and potential rust.
Always turn off the water supply before attempting any plumbing work.
Be cautious when using tools to avoid injury.
Step 9: Wrapping Up
With the shower head successfully removed, you’ve taken a significant step towards a refreshed bathroom experience. Now you can proceed with installing a new shower head or making any necessary repairs.
Removing a shower head without a wrench is a feasible DIY task with the right tools and techniques. By following this step-by-step guide and troubleshooting tips, you can accomplish the task efficiently while preserving the integrity of your fixtures. Enjoy your refreshed shower experience!
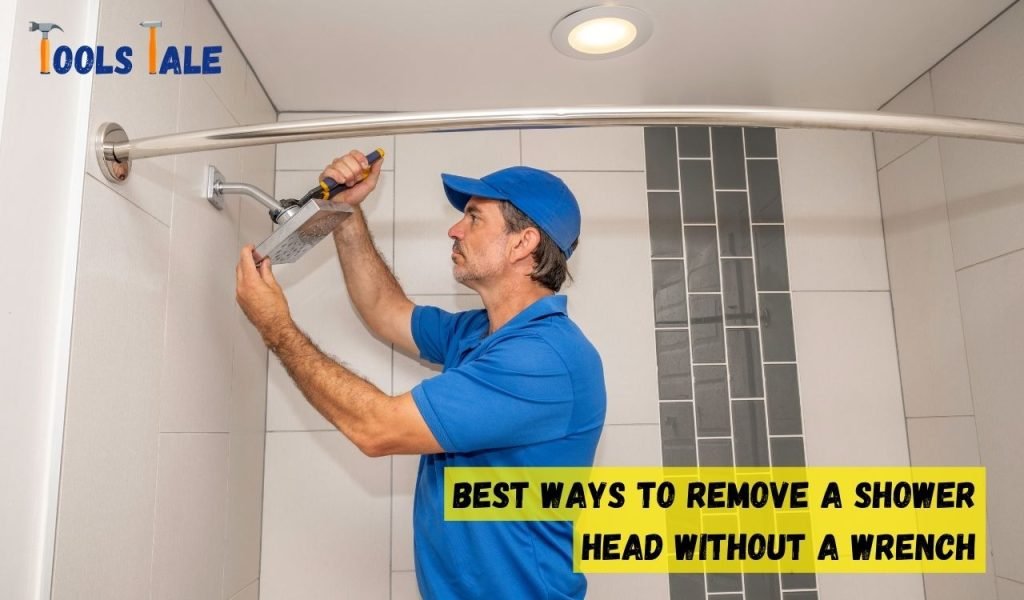
Best Ways to Remove a Shower Head Without a Wrench
A stuck or outdated shower head can be a nuisance, but fear not if you find yourself without a wrench. There are effective ways to remove a shower head using everyday tools and techniques. In this guide, we’ll explore the best methods for tackling this DIY task without the need for a wrench.
Use Adjustable Pliers
Tools Needed: Adjustable pliers, cloth or rag
Step 1: Turn Off the Water Supply: Always begin by turning off the water supply to the shower. Locate the shut-off valve, typically found near the shower or in the basement, and turn it clockwise to shut off the water.
Step 2: Prepare the Area: Lay a towel or old cloth in the shower to catch any water that may spill during the process.
Step 3: Grip and Turn: Position the adjustable pliers’ jaws around the base of the shower head where it connects to the shower arm. Grip the pliers firmly and turn counterclockwise (left) to loosen the shower head. Apply steady, gentle pressure to avoid damaging the fixture. Initially, you may encounter resistance, but as the threads start to loosen, it should become easier to rotate. Continue turning until the shower head is completely detached from the shower arm.
Craft a DIY Strap Wrench
Tools Needed: Strong, flexible material (e.g., old bicycle inner tube, rubber, fabric belt), cloth or rag
Step 1: Create the Strap: Find a strong and flexible material, such as an old bicycle inner tube, a piece of rubber, or a sturdy fabric belt. Cut a length of the material, ensuring it’s long enough to wrap around the shower head’s base.
Step 2: Position and Grip: Wrap one end of the material around the shower head’s base and hold it securely. With your other hand, use the free end of the material to create tension. Turn it counterclockwise (left) to loosen the shower head. The DIY strap wrench provides the grip needed to unscrew the shower head without damaging it. Ensure you grip firmly and apply steady pressure.
Employ a Rubber Strap Wrench
Tools Needed: Rubber strap wrench, cloth or rag
Step 1: Apply the Wrench: Wrap the rubber strap of the wrench around the shower head’s base, ensuring a snug fit.
Step 2: Secure Grip and Turn: Apply gentle pressure on the wrench and turn it counterclockwise (left) to loosen the shower head. The strap wrench provides a secure grip without scratching the fixture. Keep turning until the shower head is free from the shower arm.
Penetrating Lubricant for Stubborn Heads:
Tools Needed: Penetrating lubricant, adjustable pliers, cloth or rag
Step 1: Spray Lubricant: If your shower head is old, rusty, or particularly stubborn, start by spraying a generous amount of penetrating lubricant on the threads. Allow it to sit for 15-20 minutes to loosen the grip.
Step 2: Use Adjustable Pliers: After applying the lubricant, follow the steps outlined in the “Use Adjustable Pliers” method mentioned earlier. Grip the shower head with adjustable pliers and turn it counterclockwise (left) to remove it. The lubricant should make the process smoother.
Step 1: Apply Heat: If the shower head remains stuck despite your efforts, use caution and apply heat to the metal slightly. A hair dryer or similar heat source works well. The expansion from the heat may help loosen the threads. Be careful not to overheat the fixture or use an open flame, as this could cause damage.
Step 2: Use Adjustable Pliers: After applying heat, proceed with the “Use Adjustable Pliers” method as described earlier. Grip the shower head with adjustable pliers and turn it counterclockwise (left) to remove it. The heat should have made the process easier.
Safety Note: Always prioritize safety by wearing gloves to protect your hands from sharp edges and potential rust. Additionally, turn off the water supply before attempting any plumbing work, and be cautious when using tools to avoid injury.
Removing a shower head without a wrench is entirely feasible with these effective methods and a few readily available tools. By following these steps, you can tackle the task with confidence and restore your shower to its full glory. Enjoy your refreshed bathing experience!
Safety Precautions When Removing Shower Heads Without a Wrench
Removing a shower head without a wrench is a practical DIY task, but it’s important to prioritize safety throughout the process. Here are essential safety precautions to keep in mind when tackling this plumbing project:
Turn Off the Water Supply
Before you start any work on your shower head, locate and turn off the water supply. The shut-off valve is typically found near the shower or in the basement. Turning it clockwise will shut off the water flow. This step is crucial to prevent accidental water leakage or spraying during the removal process.
Gather Essential Tools
Ensure you have all the necessary tools and materials at hand before beginning the removal process. These typically include adjustable pliers, rubber strap wrench, a cloth or rag, penetrating lubricant, and a bucket or container to catch any dripping water.
Wear Protective Gloves
Always wear protective gloves when working on plumbing fixtures. Gloves not only protect your hands from sharp edges but also provide a barrier against any potential rust or residue on the shower head.
Use Eye Protection (Optional)
While not always necessary, wearing safety goggles or protective eyewear is a good idea, especially when dealing with older shower heads that may have accumulated debris or rust. This extra precaution can shield your eyes from any unexpected particles or splashes.
Secure the Workspace
Lay down a towel or old cloth in the shower to catch any water that may spill during the removal process. Additionally, position your bucket or container beneath the shower head to collect any remaining water. Keeping the workspace dry is essential for your safety.
Apply Caution with Tools
Exercise caution when using tools like adjustable pliers or strap wrenches. Grip them firmly but avoid overexertion, which could lead to slipping or accidents. Keep a steady hand while turning the shower head counterclockwise to prevent damage to the fixture.
Avoid Open Flames
If you choose to apply heat to loosen a stubborn shower head, use a hair dryer or similar heat source, but avoid open flames or torches. Open flames pose a fire hazard and can damage plumbing fixtures or surrounding materials.
Seek Professional Help When Necessary
If you encounter extreme resistance, corrosion, or any difficulties beyond your comfort level, do not hesitate to seek the assistance of a professional plumber. Professionals have the expertise and tools to handle complex plumbing issues safely.
Keep Electrical Appliances Away
If you’re using electrical tools or appliances, such as a hair dryer for applying heat, ensure that they are kept dry and away from water sources. Electrical safety is paramount when working near water.
Tips for Inspecting and Maintaining the Shower Head
Regular inspection and maintenance of your shower head can ensure it functions optimally and extends its lifespan. Here are some valuable tips to help you keep your shower head in top shape:
Visual Inspection:
Periodically examine your shower head for any visible signs of wear, corrosion, or mineral buildup. Check for leaks or drips around the connections.
Look for mineral deposits, often caused by hard water, which can clog the nozzles and reduce water flow.
Cleaning
Remove mineral buildup by soaking the shower head in a mixture of equal parts white vinegar and water. Submerge it in the solution for a few hours or overnight, then scrub away loosened deposits with a brush.
Alternatively, use a toothbrush or small brush to clean individual nozzle openings. Be gentle to avoid damaging the nozzles.
Regular cleaning can help maintain water pressure and prevent blockages.
Check for Leaks
Turn on the shower and check for any leaks or drips around the shower head’s connection to the shower arm. Tighten any loose connections.
If you notice persistent leaks or dripping, it may be time to replace the shower head’s rubber washer or the entire shower head.
Address Hard Water Issues
If you live in an area with hard water, consider installing a water softener or a shower head with built-in water filtration to reduce mineral buildup.
Periodic descaling treatments using vinegar can also help combat mineral deposits.
Inspect the Swivel Joint
If your shower head has a swivel joint that allows adjustment of the spray angle, check it for smooth operation. Lubricate the joint if it becomes stiff or squeaky.
Gasket and Washer Replacement
Over time, the gasket or washer inside the shower head’s connection may deteriorate, leading to leaks. Replace these components as needed to maintain a watertight seal.
Preventative Maintenance
To prevent mineral buildup, consider using a water softening system for your entire home, which can benefit both your shower head and other plumbing fixtures.
If your shower head has a removable flow restrictor, clean it periodically to ensure optimal water flow.
Consider Upgrades
If your shower head is showing signs of significant wear or is outdated, consider upgrading to a more efficient and modern model. Newer shower heads often offer water-saving features and improved performance.
Professional Maintenance
If you’re unsure about how to perform maintenance or notice persistent issues, seek the assistance of a professional plumber or handyman. They can diagnose and address any underlying problems.
By following these tips and incorporating regular inspection and maintenance into your routine, you can prolong the life of your shower head, maintain water efficiency, and enjoy a consistently refreshing shower experience. A well-maintained shower head not only enhances your daily routine but also conserves water and reduces potential plumbing issues.
Final Word
Learning how to unscrew a shower head without a wrench empowers you to handle a common household task with confidence. By using alternative tools, practicing safety, and troubleshooting any challenges, you can successfully remove and maintain your shower head.
Regular inspection and care contribute to a refreshing shower experience and the longevity of your fixtures. Whether you’re upgrading your shower head or addressing maintenance, these skills are valuable for every DIY enthusiast. Enjoy the satisfaction of a job well done and a revitalized bathroom.
Frequently Asked Questions
How do you unscrew a tight shower head without a wrench?
To unscrew a tight shower head without a wrench, you can use adjustable pliers or create a DIY strap wrench using materials like an old bicycle inner tube or a fabric belt. These tools provide a strong grip for turning the shower head counterclockwise.
What tool can I use to unscrew a shower head?
You can use adjustable pliers, rubber strap wrenches, or DIY strap wrenches made from materials like rubber or fabric to unscrew a shower head effectively. These tools provide the necessary grip to turn the shower head counterclockwise.
How to remove shower head ball joint without a wrench?
To remove a shower head ball joint without a wrench, you can use adjustable pliers or a DIY strap wrench made from materials like rubber or fabric. Grip the ball joint firmly and turn it counterclockwise to detach it from the shower arm.
Is it hard to remove a shower head without a wrench?
Removing a shower head without a wrench can be challenging if it’s tightly secured. However, with the right tools like adjustable pliers or strap wrenches, along with proper techniques, it’s possible to remove it without excessive difficulty.
How do I prevent damaging the shower head while removing it?
To prevent damaging the shower head, wrap a cloth or rag around it before using tools like pliers or strap wrenches. This protects the fixture’s finish and minimizes the risk of scratches or dents during removal.
Are there any safety precautions to consider when unscrewing a shower head without a wrench?
Yes, ensure safety by turning off the water supply, wearing protective gloves, and securing the workspace to catch any water or drips. When using tools or applying heat, exercise caution to avoid injury and damage to the fixture.
Share your love!
Tools Tale
Disclaimer: This site is owned and operated by Tools Tale. toolstale.com is a participant in the Amazon Services LLC Associates Program, an affiliate advertising program designed to provide a means for sites to earn advertising fees by advertising and linking to Amazon.com. This site also participates in other affiliate programs and is compensated for referring traffic and business to these companies.