Physical Address
304 North Cardinal St.
Dorchester Center, MA 02124
Physical Address
304 North Cardinal St.
Dorchester Center, MA 02124

Why is my spray paint bubbling? Ever had that frustrating surprise? Picture this: you’ve meticulously sprayed your project, but bubbles play spoilsport. It’s like the finale of a magic show gone wrong. But fear not, we’ve got the lowdown on what causes this annoyance and how you can kiss those bubbles goodbye.
In this quick guide, we’re going to spill the secrets and share the tricks to nail that smooth, flawless finish you’ve been dreaming of. We know you’ve got that project itching to be perfected. Stay tuned, because painting problems are about to meet their match! So, let’s dive in and banish those pesky paint bubbles once and for all.
Key Summary: Why is My Spray Paint Bubbling?
Spray paint bubbling occurs due to moisture, contaminants, or improper technique. To fix it, sand the surface, use primer, and spray with correct distance and technique. Prevent future issues by cleaning surfaces, choosing the right conditions, and mastering spray painting techniques.
[amazon_auto_links id=”11426″]
Understanding spray paint bubbles is crucial to achieving a smooth, professional finish on your project. When those pesky bubbles appear, it’s usually due to several factors related to the environment, surface, or the application process. Moisture is a common culprit. Even minimal moisture on the surface or in the air during painting can cause bubbles to form.
When the paint encounters moisture, it reacts and forms tiny bubbles, disrupting the evenness of the coat. Contaminated surfaces are another issue. Dust, grease, or residues on the surface can interfere with the paint’s adhesion and cause bubbles during drying. Properly cleaning and preparing the surface before painting can significantly reduce the likelihood of bubbles.
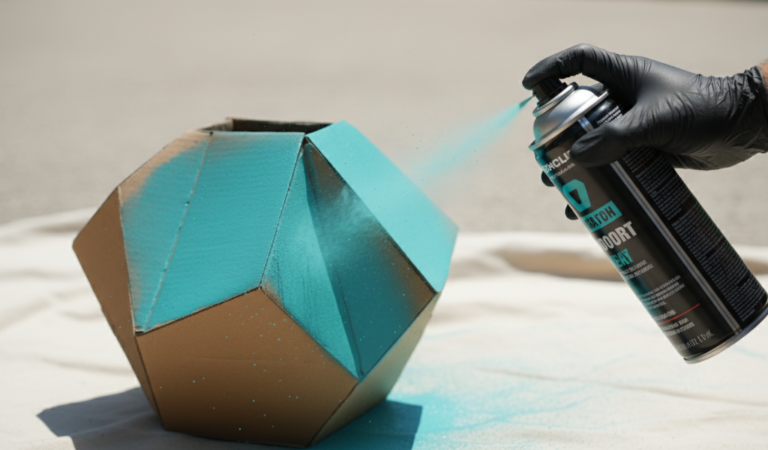
Inadequate surface preparation is a major cause of spray paint bubbling. If the surface is not cleaned, sanded, or primed appropriately, the paint may not adhere uniformly, resulting in bubbles and an uneven finish. Applying spray paint too thickly or too quickly can also cause bubbles. When the paint is applied in a heavy coat, it may not dry evenly, leading to the formation of bubbles as the paint cures.
Maintaining the correct spray distance and technique is vital to prevent this. Preventing spray paint bubbles starts with thorough surface preparation. Clean the surface meticulously, ensuring it’s free of any contaminants that could interfere with paint adhesion. Sand the surface lightly to create a good base for the paint.
Using a high-quality primer designed for the specific surface you’re painting can also work wonders. Priming helps create a smooth, even surface for the paint to adhere to, minimizing the chances of bubbles. Proper application technique is key. Hold the spray can at the recommended distance from the surface and spray in smooth, even strokes. Avoid applying too much paint at once—multiple thin coats are better than one thick coat.
Lastly, consider the environmental conditions. Choose a dry day with moderate temperature and low humidity to paint. High humidity can increase the chances of moisture interfering with your paint job.
Spray paint bubbling is a common issue caused by moisture, contaminated surfaces, inadequate preparation, and incorrect application. Understanding these factors and taking preventive measures like proper surface preparation, using primer, and mastering application technique can help you achieve a bubble-free, flawless spray paint finish.
Discovering bubbles in your spray-painted project can be frustrating and disheartening, especially after putting effort into a smooth and flawless finish. The appearance of bubbles on your painted surface is a common issue that many encounter, and understanding the underlying causes is the first step towards effectively addressing and preventing this problem.
Moisture is a primary factor causing spray paint to bubble. When you spray paint in a humid environment or on a surface with moisture, the water vapor can get trapped under the paint as it dries, forming bubbles. It’s essential to choose a dry day with low humidity for your painting projects.
Painting on a surface that’s not adequately cleaned and prepared can lead to bubbling. Contaminants like dust, oil, grease, or residues can interfere with the paint’s adhesion and drying process, causing bubbles to form as the paint tries to adhere to the surface irregularities.
Proper surface preparation is crucial to achieving a smooth paint finish. Skipping essential steps like cleaning, sanding, or priming the surface can prevent the paint from adhering evenly, resulting in bubbles during the drying process.
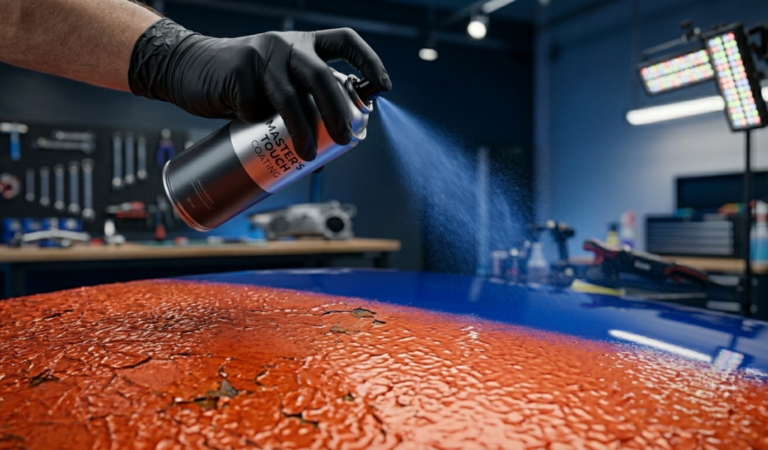
Applying the spray paint too thickly or too quickly can cause bubbling. A heavy application of paint overwhelms the surface and can lead to uneven drying, resulting in the formation of bubbles as the paint cures. It’s important to maintain the recommended spray distance and technique to ensure a uniform coat.
Extreme surface temperatures can contribute to the formation of bubbles. Painting a surface that’s too hot or too cold can affect the way the paint dries, potentially leading to bubbling. Aim for moderate surface temperatures when spray painting.
Using expired or improperly stored spray paint can also cause bubbling issues. Paint that has gone beyond its shelf life or has not been stored according to the manufacturer’s recommendations may not perform as intended, resulting in undesirable texture and bubbles.
Using low-quality spray paint or mismatched products (e.g., using an incompatible primer or clear coat) can cause adhesion problems and bubbling. Always ensure that you’re using compatible and quality products for a seamless paint job.
Understanding the common causes of spray paint bubbling is essential for achieving a flawless and professional finish. By taking preventive measures and following proper painting techniques, you can enjoy a smooth, bubble-free paint job that showcases your projects in the best light.
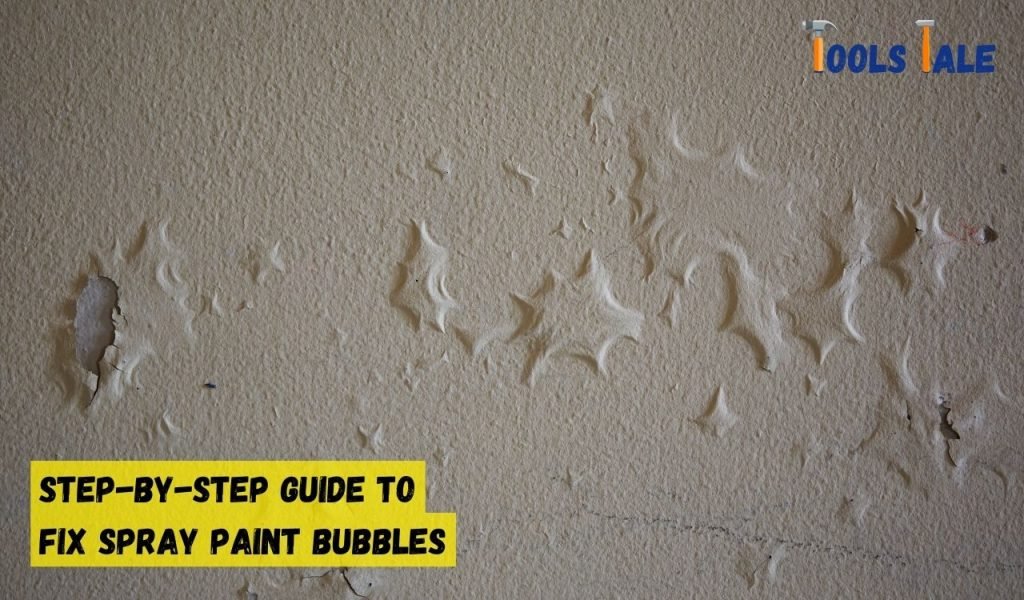
Discovering bubbles in your freshly spray-painted project can be disheartening, but fear not, for there are effective ways to rectify this issue and achieve the smooth, flawless finish you desire.
Fixing spray paint bubbles involves a systematic approach, starting from identifying the cause and then taking appropriate steps to remedy the problem. Here’s a step-by-step guide to help you fix spray paint bubbles and restore your project to its intended glory.
By following this step-by-step guide and adhering to best practices, you can effectively fix spray paint bubbles and achieve the flawless finish you desire for your projects. Happy painting!
Achieving a professional and flawless finish with spray paint requires not only effective fixing techniques but also preventive measures to eliminate the occurrence of bubbles. Prevention is indeed better than cure, and when it comes to spray paint bubbling, taking proactive steps can save time, effort, and frustration. Here’s a comprehensive guide outlining solutions to prevent spray paint bubbling in your projects.
Ensure that the surface you’re painting is clean, dry, and free of any contaminants such as dust, grease, or residues. Clean the surface thoroughly and lightly sand it to create a smooth base for the paint to adhere to.
Invest in high-quality spray paint, primers, and clear coats. Quality products are formulated to provide a smoother finish and are less likely to cause bubbling. Check for compatibility between the paint, primer, and any other products you intend to use.
Pay attention to the weather and environmental conditions when spray painting. Choose a day with moderate temperature, low humidity, and minimal wind. High humidity can cause moisture to interfere with the drying process and contribute to bubbling.
Follow the manufacturer’s instructions regarding the recommended spray distance. Holding the spray can too close to the surface or spraying from too far away can affect the application and result in bubbles.
Instead of applying a thick coat of paint, use multiple thin coats. Allow each coat to dry completely before applying the next one. Thin coats of paint dry more evenly, reducing the risk of bubbles forming during the drying process.
Patience is key in preventing bubbles. Allow each coat of paint to dry thoroughly before adding another layer. Rushing this process can trap solvents, leading to bubbles as the paint cures.
Shaking the spray paint can is important to mix the contents, but excessive shaking can introduce air bubbles into the paint. Shake the can as directed on the label to prevent unnecessary bubbles.
Using an appropriate primer for the surface you’re painting can make a significant difference. Primer helps the paint adhere evenly, providing a smooth base and reducing the likelihood of bubbling.
Practice your spray technique on a scrap surface to ensure you’re comfortable with the can’s nozzle and the way the paint is released. Maintain even strokes and overlap each pass slightly to achieve an even coat without bubbles.
If possible, opt for high-quality nozzles that provide a consistent and smooth spray pattern. Cheap or malfunctioning nozzles can cause uneven application and potentially lead to bubbling.
Store your spray paint cans properly according to the manufacturer’s recommendations. This typically involves keeping them in a cool, dry place and away from direct sunlight or extreme temperatures.
After each use, clean the nozzle of the spray paint can by holding it upside down and spraying until only propellant comes out. This prevents dried paint from clogging the nozzle, ensuring a smooth spray in future use.
By incorporating these preventive measures into your spray painting process, you can significantly reduce the likelihood of encountering spray paint bubbles. Consistency and attention to detail are key; practice these techniques regularly to master the art of achieving a flawless and professional finish with spray paint.

Fixing spray paint bubbling is a common task in various DIY and home improvement projects. While addressing this issue can help restore the appearance of your painted surfaces, it’s essential to prioritize safety throughout the process. To ensure your well-being, here are important safety precautions to keep in mind when fixing spray paint bubbling:
Always work in a well-ventilated area, preferably outdoors or in a space with good airflow. Proper ventilation helps dissipate fumes and reduces the risk of inhaling harmful paint particles or solvents. If you’re working indoors, consider using fans or opening windows to improve air circulation.
Wear an appropriate respirator or mask designed for use with spray paint. These masks are equipped with filters that capture paint particles and fumes, protecting your respiratory system. Ordinary dust masks are insufficient for this purpose.
Shield your eyes from potential splatters or overspray by wearing safety goggles or glasses. Spray paint can easily cause eye irritation or injury, so protective eyewear is crucial.
Cover exposed skin by wearing long-sleeved clothing and gloves. Some spray paints can irritate the skin or cause allergic reactions. Gloves provide an additional layer of protection and prevent direct contact with paint and chemicals.
Working on spray paint projects can be physically demanding, especially in warm weather. Stay hydrated by drinking plenty of water throughout the process. Proper hydration helps maintain your energy levels and overall well-being.
Familiarize yourself with the labels on spray paint cans and any other products you’re using. Pay attention to safety warnings, instructions, and recommended protective measures. Additionally, consult the Material Safety Data Sheets (MSDS) for detailed information about the products you’re working with.
Spray paint and its fumes are highly flammable. Never smoke while working with spray paint, and keep open flames, including pilot lights, away from the work area to prevent fire hazards.
Store spray paint cans in a cool, dry place, away from direct sunlight or extreme temperatures. Ensure they are tightly sealed and stored upright to prevent leakage. When disposing of empty cans, follow local regulations for proper disposal of hazardous materials.
Keep your workspace clean and organized. Dispose of used materials, empty cans, and any debris properly to minimize the risk of accidents or contamination. A clutter-free workspace is safer and more efficient.
Always be prepared for unforeseen situations. Have a first-aid kit on hand with supplies for addressing minor injuries. Familiarize yourself with the location of emergency exits and safety equipment in case of accidents or emergencies.
If you encounter stubborn bubbling issues or have concerns about your safety, don’t hesitate to seek professional assistance. Professional painters or restoration experts have the expertise and equipment to handle complex paint problems safely.
By adhering to these safety precautions, you can confidently address spray paint bubbling while minimizing the risks associated with working with spray paint and related products. Prioritizing safety ensures a successful and harm-free project.
In the world of spray painting, encountering bubbles need not be a source of frustration. Armed with knowledge about their causes and armed with preventive measures and effective solutions, you can confidently tackle your projects.
Remember, patience and practice are your allies, and the more you refine your technique and embrace best practices, the closer you’ll come to achieving that flawless, professional finish you desire. So, why is your spray paint bubbling? With the right approach, it won’t be for long.
To fix bubbling spray paint, start by letting the paint dry completely. Sand the affected area lightly, then repaint using thin, even coats. Ensure proper surface preparation and ideal weather conditions for a successful fix.
Prevent air bubbles by properly cleaning and preparing the surface, using thin coats of paint, and maintaining the correct spray distance. Avoid overly humid or windy conditions, and shake the can thoroughly before spraying.
Paint may bubble after spraying due to moisture, contaminants, or incorrect application techniques. The presence of moisture or impurities on the surface, or applying paint too thickly or quickly, can cause bubbles during the drying process.
To fix spray paint bubbles on metal, sand the affected area, clean the surface, and apply a suitable primer. Repaint using thin coats, allowing ample drying time between each coat. Properly preparing the metal surface is essential.
Fixing spray paint bubbles on wood involves sanding the affected area, cleaning the surface, and applying a wood primer. Repaint using thin, even coats, and ensure proper drying between each coat to achieve a smooth finish.
To prevent bubbles when spray painting, ensure a clean and dry surface, apply thin coats of paint, and maintain the right spray distance and technique. Optimal weather conditions and proper can shaking also contribute to a bubble-free finish.
Spray paint can bubble on metal due to surface contaminants, inadequate drying time between coats, or unfavorable weather conditions. Ensuring a clean, dry surface and using appropriate paint application techniques can help prevent this issue.