304 North Cardinal St. Dorchester Center, MA 02124
To provide the best experiences, we use technologies like cookies to store and/or access device information. Consenting to these technologies will allow us to process data such as browsing behavior or unique IDs on this site. Not consenting or withdrawing consent, may adversely affect certain features and functions.
How to Straight Wire a Cooling Fan? A Comprehensive Guide
How to straight wire a cooling fan: Tired of your engine running hot when it should be cool as a cucumber? We’ve got the inside scoop on a game-changing technique. Straight wiring your cooling fan is like giving your engine a breath of fresh air. Say goodbye to the factory controls that sometimes leave you in a hot spot.
With this guide, you’ll become the master of your fan’s destiny, ensuring your engine stays chill. Buckle up; we’re about to embark on a journey to cooler rides and smoother drives.
Key Summary: How to Straight Wire a Cooling Fan?
Straight wiring a cooling fan involves bypassing the fan’s built-in controls and connecting it directly to a power source for optimal performance. This can provide a constant, uninterrupted airflow for better cooling in certain situations, such as overclocking or custom setups.
Hand Tools Suggestion for Your Home
[amazon_auto_links id=”11426″]
What Is Straight Wiring for a Cooling Fan?
Straight wiring for a cooling fan involves bypassing the factory electrical setup and directly connecting the fan to a power source, typically the vehicle’s battery or another power supply. This modification ensures the fan runs at a constant speed, providing efficient cooling without relying on the manufacturer’s built-in controls.
In a standard setup, cooling fans are integrated into the vehicle’s cooling system and are controlled by a relay, thermostat, or engine control unit. However, these controls can sometimes result in the fan running at variable speeds based on engine temperature or other factors. Straight wiring eliminates this variability, allowing the fan to operate at a steady speed determined by the power source.
The process begins by identifying the appropriate power source and selecting the right gauge of wire for the fan’s power requirements. After disconnecting the battery to ensure safety, the existing wiring and relay are bypassed, and new wiring is connected directly from the fan to the power source. This setup allows the fan to run at full speed whenever the power source is active, typically when the vehicle is running.
Straight wiring offers benefits such as improved cooling efficiency, especially in modified vehicles or high-performance setups where consistent fan speed is crucial. Additionally, it simplifies the wiring system by removing unnecessary components and potential points of failure.
It’s important to approach straight wiring with caution, ensuring proper electrical connections and considering safety measures to prevent electrical mishaps or damage to the cooling fan. Beginners may find guidance and instructions helpful to successfully and safely straight wire a cooling fan.
Precautionary Measures and Safety Tips to Be Followed Before Straight Wiring a Cooling Fan
Prior to straight wiring a cooling fan, observing precautionary measures and following safety guidelines is paramount to ensure a safe and successful electrical modification. Here’s a detailed overview of the precautionary measures and safety tips:
Disconnect the Battery: Begin by disco
nnecting the vehicle’s battery to eliminate any electrical power to the fan. This prevents accidental electrical shocks during the wiring process.
Wear Safety Gear: Use appropriate safety gear, including gloves and safety glasses, to protect your hands and eyes from potential hazards like cuts, sparks, or debris.
Identify the Power Source: Identify a suitable power source, such as the vehicle’s battery, that can provide the necessary power to run the cooling fan efficiently.
Select the Right Gauge of Wire: Choose the correct gauge of wire based on the power requirements of the cooling fan. Using the appropriate wire gauge ensures efficient power transmission and minimizes the risk of overheating or electrical issues.
Use Insulated Tools: Utilize insulated tools for cutting, stripping, and connecting wires. Insulated tools reduce the risk of electrical shocks and short circuits during the wiring process.
Secure Proper Grounding: Ensure the fan is properly grounded to prevent electrical malfunctions. A secure ground connection helps maintain a stable electrical flow.
Check Wire Integrity: Inspect the wires for any signs of damage, cuts, or exposed conductors. Replace any compromised wires to maintain a safe electrical connection.
Avoid Working Alone: If possible, have someone nearby while working on the wiring. In case of an emergency or accident, having assistance readily available can be crucial.
Follow a Step-by-Step Guide: Adhere to a well-structured step-by-step guide or tutorial specific to straight wiring a cooling fan. Clear instructions will minimize errors and enhance safety.
Double-Check Connections: Before connecting the wires, double-check the connections and ensure they are accurate and secure. Loose or incorrect connections can lead to electrical issues and potential damage to the fan.
Test the Setup Safely: After completing the wiring, test the setup cautiously. Keep a safe distance and be prepared to turn off the power source in case of any unexpected issues or malfunctions.
Insulate Exposed Wires: Use electrical tape or heat shrink tubing to insulate exposed wires and connections. Proper insulation prevents electrical shorts and enhances overall safety.
Consult a Professional if Unsure: If you are uncertain about any aspect of the wiring process, consider consulting a professional electrician or an automotive expert for guidance and assistance.
By following these precautionary measures and safety tips, you can mitigate risks and ensure a secure environment while straight wiring your cooling fan, ultimately achieving a successful and safe modification.
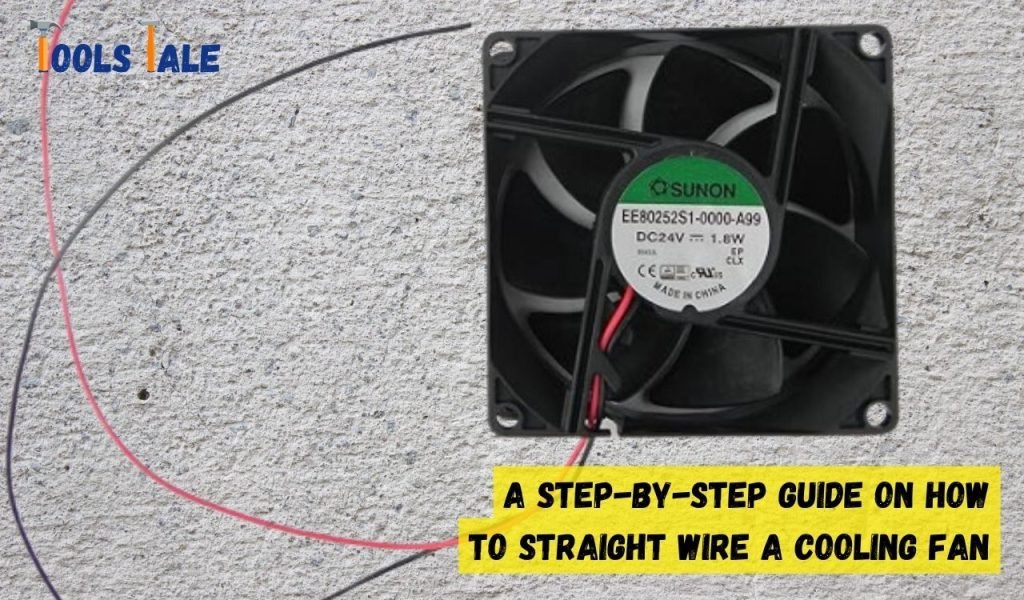
A Step-By-Step Guide on How to Straight Wire a Cooling Fan
Straight wiring a cooling fan is a moderate-level DIY task that allows you to bypass the factory controls and connect the fan directly to a power source. This ensures a constant fan speed, which can enhance cooling efficiency, especially in modified vehicles or performance applications. Here’s a step-by-step guide to straight wire a cooling fan safely and effectively:
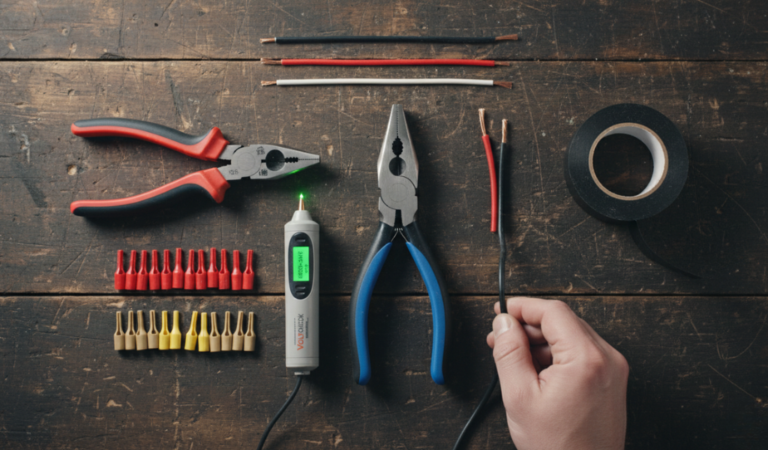
Gather the Necessary Tools and Materials: Ensure you have the required tools and materials, including wire cutters, wire strippers, electrical tape, a relay (if desired), appropriate gauge wires, connectors, heat shrink tubing, and a power source like the vehicle’s battery.
Disconnect the Battery: For safety, disconnect the vehicle’s battery to eliminate any electrical power to the fan and prevent accidental electrical shocks during the wiring process.
Identify a Suitable Power Source: Identify an appropriate power source, such as the vehicle’s battery. Choose a source that can provide the necessary power to run the fan efficiently without overloading the system.
Determine the Wire Gauge: Select the appropriate wire gauge based on the cooling fan’s power requirements. Refer to the fan’s specifications or the manufacturer’s guidelines to determine the correct wire gauge.
Locate the Fan Wiring: Locate the existing wiring of the cooling fan. This usually connects to a relay, temperature sensor, or the vehicle’s ECU (Engine Control Unit).
Remove Existing Connections: Carefully remove the existing connections between the fan and the relay, temperature sensor, or ECU. Disconnect any factory wiring associated with the fan.
Prepare the Wires: Using wire cutters and strippers, prepare the wires for straight wiring. Cut the wires to the desired lengths and strip off a small portion of the insulation from the ends to expose the conductors.
Connect the Wires to the Power Source: Connect one wire from the fan to the positive terminal of the power source (e.g., vehicle battery). Connect the other wire from the fan to the negative or ground terminal of the power source.
Insulate the Connections: Use electrical tape or heat shrink tubing to insulate the connections. Proper insulation prevents electrical shorts and ensures a safe and secure wiring setup.
Test the Setup: With the battery reconnected, turn on the power source to test the cooling fan. Ensure the fan operates at the desired speed and functions correctly.
Add a Switch (Optional): If desired, install a switch in the circuit to control the fan manually. Connect the switch between the power source and the fan to enable manual fan control.
Secure Wiring and Components: Secure the wiring and components using zip ties or clamps to prevent them from moving or interfering with other vehicle parts.
Conduct a Final Test: Perform a final test to ensure the fan operates consistently and that the wiring connections are secure.
By following this step-by-step guide, you can straight wire a cooling fan effectively, achieving a consistent fan speed and potentially enhancing the cooling efficiency in your vehicle. Always prioritize safety and double-check your connections to ensure a successful wiring setup.
Different Ways to Straight Wire a Cooling Fan
Straight wiring a cooling fan involves bypassing the factory controls to connect the fan directly to a power source, ensuring a constant fan speed for optimal cooling. Here are the different ways to straight wire a cooling fan:
Direct Wiring to the Battery: Connect the positive wire from the fan to the positive terminal of the vehicle’s battery and the negative wire to the negative terminal. This ensures a continuous power supply to the fan, running it at a constant speed.
Using a Relay: Install a relay between the fan and the power source. Connect the fan to the relay, and trigger the relay using a switch or ignition source. This allows control over when the fan operates, providing an efficient straight wiring method.
Adding a Manual Switch: Wire a manual switch in-line with the fan’s positive connection. The switch allows you to turn the fan on or off at your discretion, providing manual control over the fan’s operation.
Utilizing a Temperature Sensor Switch: Incorporate a temperature sensor switch into the circuit. The switch activates the fan when the temperature reaches a certain level, ensuring the fan operates when needed for cooling.
Linking to an Ignition Source: Wire the fan to an ignition source within the vehicle. This setup ensures the fan operates whenever the vehicle is running, providing continuous cooling as long as the ignition is on.
Selecting the appropriate method depends on your specific needs and preferences. Directly wiring to the battery offers a simple and continuous operation, while utilizing a relay or switch provides control over the fan’s functionality.
Incorporating a temperature sensor switch enhances efficiency by automating the fan based on the engine’s temperature. Choose the method that best suits your requirements for efficient and reliable cooling.
Common Challenges and Troubleshooting Tips
When straight wiring a cooling fan, certain challenges may arise. Here are some common challenges and troubleshooting tips to help address them:
Fan Not Operating: Check the wiring connections and ensure they are securely connected to the power source. Verify that the power source is functional and providing power.
Fan Runs Continuously: Inspect the relay connections. If using a relay, ensure it’s properly wired and that the trigger source (e.g., ignition or switch) is functioning correctly.
Erratic Fan Speed: Confirm that the wire gauge used is appropriate for the fan’s power requirements. Inadequate wire gauge can lead to inconsistent fan speed.
Fuse Keeps Blowing: Check for short circuits or overloaded wiring. Ensure the correct fuse amperage is used and that all connections are properly insulated to prevent short circuits.
Inconsistent Fan Activation: If using a temperature sensor switch, verify the switch’s functionality and its placement. Adjust the temperature settings on the sensor as needed.
Fan Vibrations or Noises: Ensure the fan is securely mounted and aligned. Vibrations or noises may occur if the fan is not properly installed.
Burnt or Melted Wires: Check for overloaded wires, inadequate wire gauge, or loose connections. Use the appropriate wire gauge to handle the fan’s power requirements.
Switch or Relay Malfunctions: Test the switch or relay for defects using a multimeter. Replace any faulty components with new ones to ensure proper operation.
Fan Overheating: Confirm that the fan blades are not obstructed and can rotate freely. If the problem persists, the motor may be faulty and in need of replacement.
Interference with Other Electronics: Reroute the wiring to minimize interference and avoid overlapping with other electronic components.
By addressing these common challenges through proper troubleshooting and attention to wiring and component details, you can ensure a successful straight wiring process for your cooling fan, optimizing its performance and functionality.
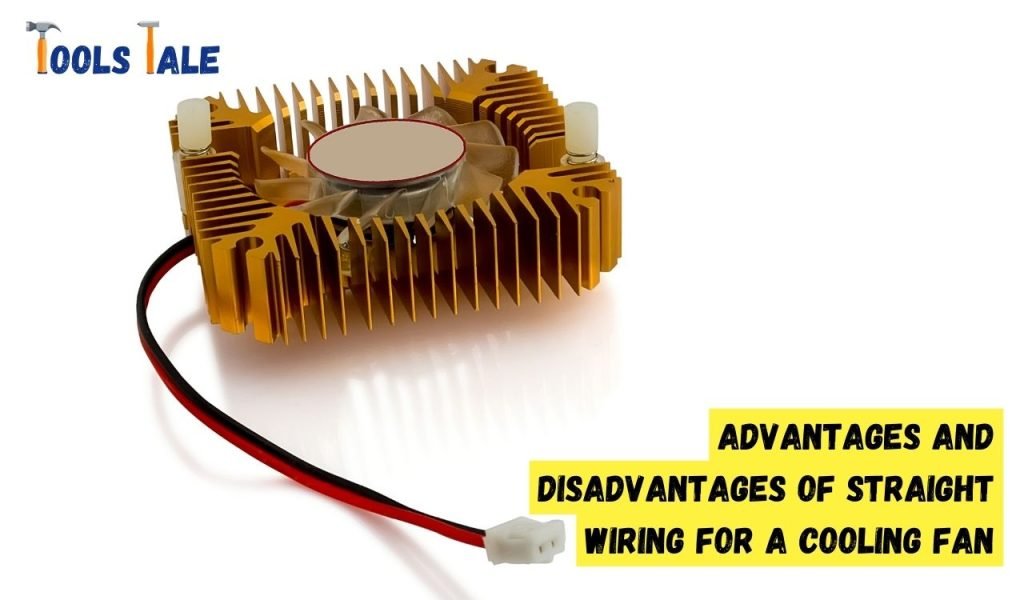
Advantages and Disadvantages of Straight Wiring for a Cooling Fan
Straight wiring a cooling fan involves connecting the fan directly to a power source without using the factory controls or relays. This method has both advantages and disadvantages, and understanding them is crucial before opting for this modification.
Advantages of Straight Wiring
Consistent Fan Speed: Straight wiring ensures a continuous and consistent fan speed, providing efficient and reliable cooling for the engine. This is particularly beneficial in high-performance vehicles or during prolonged use, maintaining a stable operating temperature.
Simplified Wiring Setup: Removing the factory controls simplifies the wiring setup, reducing potential points of failure and making the overall electrical system more straightforward and easier to troubleshoot.
Enhanced Cooling Efficiency: By eliminating the variability in fan speed caused by factory controls, straight wiring allows the fan to operate at its maximum potential, optimizing cooling efficiency and preventing engine overheating.
Reduced Electrical Load: Bypassing the factory controls reduces the load on the vehicle’s electrical system. This can result in improved performance and efficiency, especially in older vehicles or those with a limited electrical capacity.
Cost-Effective Solution: Straight wiring is a cost-effective alternative to replacing faulty factory controls or relays. It provides a reliable method of ensuring fan functionality without the need for expensive replacements.
Disadvantages of Straight Wiring
Loss of Control Features: Straight wiring removes any automated control features provided by the factory settings, such as temperature-dependent fan activation. This can potentially lead to inefficient fan operation, especially if manual control is not implemented.
Risk of Overheating or Overuse: Without automated controls, there’s a risk of the fan running continuously, potentially draining the battery or causing unnecessary wear on the fan motor. This can be mitigated with the addition of manual controls or temperature sensors.
Voided Manufacturer Warranty: Straight wiring may void the manufacturer’s warranty as it involves modifications to the original electrical system. It’s essential to consider the warranty implications before proceeding with this modification.
Additional Safety Risks: Straight wiring requires careful consideration of safety measures and proper insulation to prevent electrical hazards. Inadequate insulation or incorrect wiring can pose safety risks, including electrical fires or shocks.
Potential for Inaccurate Temperature Control: In certain setups, especially when using manual switches, maintaining the ideal operating temperature may become challenging. Automated controls often ensure precise fan operation based on real-time engine temperature.
Straight wiring a cooling fan offers consistent fan speed and enhanced cooling efficiency, simplifying the wiring setup and potentially reducing electrical load. However, it does come with the loss of automated control features and some inherent risks that need to be carefully managed to ensure safe and efficient operation. Always weigh the advantages and disadvantages based on your specific needs and circumstances.
Tips for Maintaining and Optimizing Your Cooling Fan Setup
Maintaining and optimizing your cooling fan setup is essential for efficient engine cooling, especially if you’ve straight-wired the fan. Here are some tips to ensure the longevity and effectiveness of your cooling fan modification:
Regular Inspection: Conduct routine visual inspections of the fan, wiring, and connections to detect any signs of wear, damage, or loose connections. Address any issues promptly to prevent further damage.
Clean the Fan Blades: Periodically clean the fan blades to remove dust, dirt, or debris that can accumulate and hinder airflow. Clean blades ensure the fan operates at its optimal performance.
Check for Proper Mounting: Ensure the fan is securely mounted to prevent vibrations or misalignment. Loose mounts can cause noise, inefficiency, or even damage to the fan.
Monitor Temperature Levels: Keep an eye on your vehicle’s temperature gauge to ensure the fan activates at appropriate temperatures. If using a temperature sensor switch, verify its settings and functionality.
Maintain Insulation: Regularly check the insulation on the wiring to ensure it remains intact and effective. Proper insulation prevents electrical issues and potential hazards.
Lubricate Fan Motor (if applicable): If your fan has a motor that requires lubrication, follow the manufacturer’s guidelines to lubricate it at recommended intervals. A well-lubricated motor operates efficiently and prolongs the fan’s lifespan.
Test the Fan Operation: Regularly test the fan operation by turning on the ignition and observing the fan’s speed and responsiveness. Address any irregularities immediately.
Keep Electrical Components Dry: Ensure all electrical components remain dry to prevent short circuits or damage. If exposed to water or moisture, thoroughly dry the components and insulate them before using the fan.
Monitor Power Source: Check the power source (e.g., battery) regularly to ensure it’s in good condition and providing consistent power to the fan. Replace or recharge the power source as needed.
Upgrade if Necessary: If you experience consistent issues or the need for manual controls becomes apparent, consider upgrading to a more advanced temperature control system or a higher-quality fan for optimal performance.
Consult a Professional: If you’re unsure about any aspect of maintaining or optimizing your cooling fan setup, seek advice or assistance from a qualified automotive professional.
By following these tips and maintaining a proactive approach to cooling fan upkeep, you can ensure that your straight-wired fan setup remains efficient, reliable, and contributes to optimal engine cooling.
Final Word
Straight wiring a cooling fan offers a direct path to consistent and efficient cooling. By bypassing factory controls and connecting the fan directly to a power source, you achieve a stable fan speed crucial for maintaining ideal engine temperatures, especially in high-performance setups.
Remember, safety is paramount—follow guidelines carefully, opt for appropriate wiring methods, and periodically inspect and maintain the setup to ensure lasting performance and a cool-running engine. Stay informed, stay cool.
Frequently Asked Questions
How do you connect a cooling fan directly?
To connect a cooling fan directly, bypass the factory controls and wire the fan to a power source like the vehicle’s battery. Connect the positive and negative wires of the fan to the corresponding terminals on the power source.
What is straight wiring a cooling fan, and why is it necessary?
Straight wiring a cooling fan involves connecting the fan directly to a power source, bypassing factory controls. This ensures a constant fan speed, enhancing cooling efficiency, crucial in high-performance setups or modified vehicles.
Can I use a switch to control a straight-wire cooling fan?
Yes, you can wire a switch in-line with the fan’s positive connection. This allows manual control over the fan, enabling you to turn it on or off as needed, adding flexibility to the setup.
How does a 3 wire cooling fan work?
A 3-wire cooling fan typically consists of power, ground, and a third wire for fan speed control. The third wire is controlled by the vehicle’s engine control unit, adjusting fan speed based on engine temperature.
How to wire a cooling fan with a relay and switch?
To wire a cooling fan with a relay and switch, connect the fan to the relay and the relay to a power source. Then, connect a switch to the relay, allowing manual control over when the fan operates.
Can I straight wire multiple cooling fans together?
Yes, it’s possible to straight wire multiple cooling fans together by connecting them in parallel to a power source. Ensure the power source can handle the combined load of all the fans to prevent overloading.
Share your love!
Tools Tale
Disclaimer: This site is owned and operated by Tools Tale. toolstale.com is a participant in the Amazon Services LLC Associates Program, an affiliate advertising program designed to provide a means for sites to earn advertising fees by advertising and linking to Amazon.com. This site also participates in other affiliate programs and is compensated for referring traffic and business to these companies.