Physical Address
304 North Cardinal St.
Dorchester Center, MA 02124
Physical Address
304 North Cardinal St.
Dorchester Center, MA 02124
Looking to take your kitchen from mundane to magnificent? The process of learning “how to caulk a kitchen sink” might not sound like a glamorous upgrade, but it’s a transformative DIY project that can work wonders for your kitchen’s aesthetics and functionality. With just a few simple steps, you can elevate your kitchen game, prevent potential water damage, maintain a cleaner space, and give your kitchen that polished, professionally finished look. The best part?
You don’t need to break the bank or rely on professional help. With our comprehensive guide, you’ll gain the skills and knowledge to tackle this task like a seasoned pro. So, if you’re ready to unlock the secrets of successful sink caulking and elevate your kitchen’s appeal, keep reading. We’re here to guide you through the process, step by step.
Key Summary: how to caulk a kitchen sink?
Caulking your kitchen sink is a simple process. Gather your tools and materials, follow safety precautions, and use our step-by-step guide for a professional-quality finish. Keep your kitchen sink sealed and protected from water damage with ease.


To caulk a kitchen sink, start by cleaning the sink and surrounding area, then use painter’s tape to mask off the sink’s edges. Cut the caulk tube nozzle at a 45-degree angle and load it into the caulking gun. Apply a continuous bead of caulk along the gap between the sink and countertop, then smooth it using a caulking tool or your finger.
Wipe away excess caulk and allow it to cure for about 24 hours. After curing, carefully remove the painter’s tape to reveal clean caulk lines, ensuring a watertight seal and a polished appearance for your kitchen sink. Regular maintenance and recaulking as needed will help keep your sink in top condition.

Let’s embark on a journey to discover the art of caulking a kitchen sink. With the right tools and materials at your disposal, you’ll be well-prepared to tackle this home improvement project like a pro.
To caulk a kitchen sink effectively, you’ll need a set of essential tools. Here’s a quick rundown to ensure you’re fully equipped:
The success of your kitchen sink caulking project also depends on the quality of materials you choose. Here’s what you’ll need:
With the right tools and materials, you’re now well-equipped for your kitchen sink caulking project. But before we dive into the nitty-gritty of the process, let’s talk about safety, a crucial aspect of any DIY endeavor.
Caulking is a fantastic way to seal gaps and enhance the appearance and functionality of your kitchen sink. However, it’s essential to follow safety precautions to ensure your project goes off without a hitch.
By following these safety precautions, you’re not only protecting yourself but also ensuring that your kitchen sink caulking project is a smooth and worry-free experience. Safety is the foundation for success in any DIY endeavor.
As we wrap up our discussion on tools, materials, and safety, you’re now equipped with the knowledge to kickstart your kitchen sink caulking project. Remember, your safety is paramount, and having the right tools and materials will set you on the path to a successful outcome. Stay tuned for the next steps in our journey, where we’ll delve into the actual caulking process and share some pro tips to make your kitchen sink caulking project shine.
Caulking your kitchen sink is an essential DIY skill that can help maintain your sink’s condition, prevent water damage, and enhance its overall appearance. This step-by-step guide will provide a comprehensive overview of the process, from the initial preparation to achieving a professional finish.
Begin by thoroughly cleaning the sink and its surroundings. Remove any old caulk, debris, or residue using a utility knife. The surface should be dry and free from dust or grease to ensure proper adhesion.
To achieve clean and well-defined caulk lines, use painter’s tape to mask off the areas around the sink that you don’t intend to caulk. This simple yet crucial step prevents excess caulk from spreading where it shouldn’t and gives your project a polished appearance.
For even application, cut the nozzle of the caulk tube at a 45-degree angle with an opening matching the gap’s width. This accurate cut is the key to achieving a professional look.
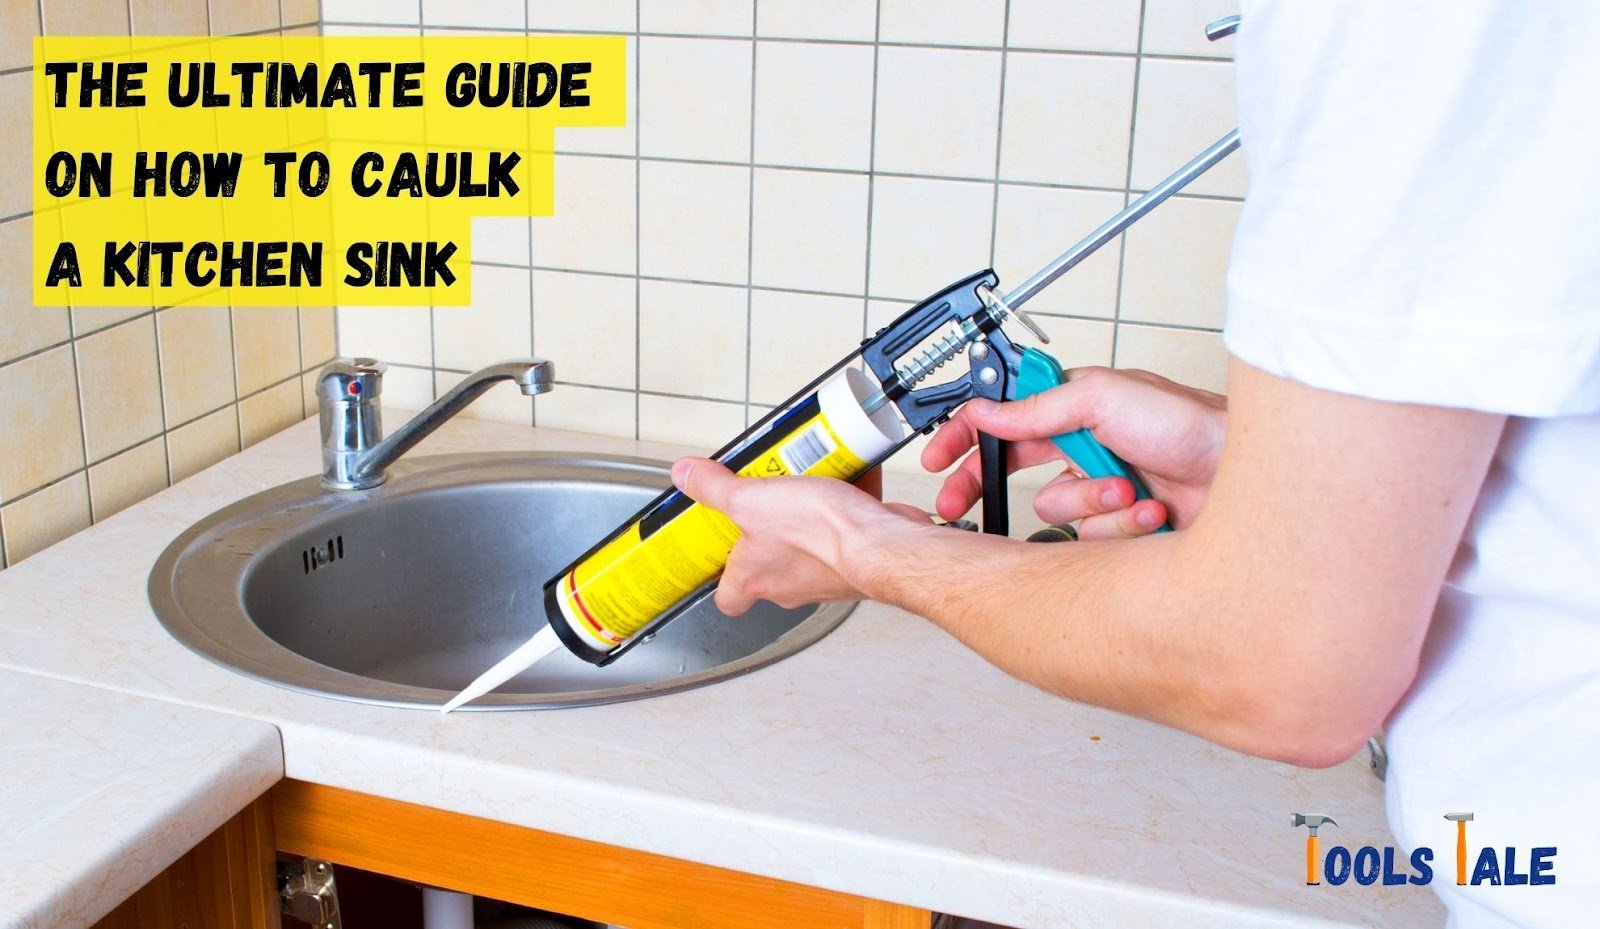
Insert the caulk tube into the caulking gun and secure it in place. This is the tool that will allow you to smoothly and accurately apply the caulk along the gap between the sink and the countertop.
Hold the caulking gun at a 45-degree angle and gently squeeze the trigger to apply a smooth, continuous bead of caulk along the entire gap. This process is vital for creating a watertight seal, preventing water from infiltrating unwanted areas.
After applying the caulk, use a caulk smoothing tool or even your finger to create a neat and even finish. This step is not just about aesthetics; it’s about ensuring that the caulk is evenly distributed, leaving no gaps or inconsistencies.
Utilize a rag or paper towel to carefully wipe away any excess caulk. It’s essential to clean both the area around the sink and the caulk lines for a polished and professional look.
Caulk needs time to cure effectively. Follow the manufacturer’s instructions, which typically recommend allowing the caulk to set for about 24 hours. During this curing period, avoid using the sink or exposing it to water to ensure the caulk’s integrity.
Once the caulk has fully cured, carefully remove the painter’s tape. This final step reveals clean and straight caulk lines, providing an attractive and watertight seal that not only enhances your sink’s appearance but also prevents water damage.

Caulking your kitchen sink becomes more manageable with some tips and tricks:
Consider the caulk type (silicone or latex) based on your sink’s material. Silicone is more durable and waterproof, making it an excellent choice for most kitchen sinks.
Using a caulking gun for application provides precision and control, resulting in neater caulk lines.
Wet your finger for a smoother finish. This method allows you to control the caulk’s distribution and create a professional look.
Regular maintenance and periodic recaulking can extend the life of your sink’s seal. Check for signs of wear and recaulk as needed to prevent water damage.
Avoid these common pitfalls when caulking your kitchen sink:
Neglecting to clean the area thoroughly can hinder proper caulk adhesion. Make sure the surface is clean and dry.
Not using painter’s tape can lead to messy caulk lines. Masking off the area ensures that you achieve clean, well-defined lines.
Applying caulk too thickly or thinly can result in an uneven and unprofessional finish. Follow the steps carefully for even application.
Don’t rush the curing process. Follow the manufacturer’s recommended time for curing to ensure that the caulk is fully effective.
In conclusion, mastering the art of “how to caulk a kitchen sink” is a valuable skill for any DIY enthusiast or homeowner. This simple yet effective process not only enhances the aesthetics of your kitchen but also plays a crucial role in preventing water damage and maintaining the overall functionality of your sink.
By following the step-by-step guide and adhering to safety precautions, you can achieve professional-quality results that will stand the test of time. The choice of the right materials, tools, and caulk type is essential for creating a watertight seal that protects your kitchen from potential moisture-related issues.
Regular maintenance and recaulking as needed will keep your sink in excellent condition, ensuring its long-term durability. So, whether you’re looking to refresh your kitchen’s appearance or safeguard it from water damage, learning how to caulk a kitchen sink is a skill well worth mastering.
Caulking a kitchen sink is essential for preventing water damage, maintaining cleanliness, and providing a finished look. It helps create a watertight seal that keeps moisture from seeping into unwanted areas.
Caulking kitchen sinks is necessary to prevent water damage to countertops and cabinets. It also helps in maintaining a clean and hygienic kitchen environment by sealing gaps and preventing water intrusion.
Caulking is highly important for kitchen sinks. It not only ensures the longevity of your sink by preventing water damage but also enhances the sink’s appearance, creating a polished and finished look.
For kitchen sinks, it’s best to use silicone caulk. Silicone is waterproof, durable, and suitable for use in areas that are exposed to moisture.
The amount of caulk you need depends on the size of the gap you’re caulking. A standard 10-ounce tube should be sufficient for most kitchen sink caulking projects.
To open a tube of caulk, use a utility knife or a caulk gun with a built-in puncture tool. Cut the nozzle at a 45-degree angle to the desired size, and you’re ready to apply the caulk.
To remove old caulking, use a caulk removal tool or a utility knife to carefully cut and scrape it away. Make sure to clean the area thoroughly before applying new caulk.
Caulk is used to seal gaps and joints in various surfaces. It’s applied in a continuous bead along the gap and then smoothed with a tool or your finger for a neat finish.
To apply caulk to a kitchen sink, follow these steps: clean the area, mask off with painter’s tape, cut the nozzle, load the caulk gun, apply a continuous bead, smooth the caulk, wipe away excess, allow it to cure, and remove painter’s tape for clean, watertight caulking.