304 North Cardinal St. Dorchester Center, MA 02124
To provide the best experiences, we use technologies like cookies to store and/or access device information. Consenting to these technologies will allow us to process data such as browsing behavior or unique IDs on this site. Not consenting or withdrawing consent, may adversely affect certain features and functions.
Achieve Perfection: How to Remove Silicone Caulk from Fiberglass Shower Stall?
Got pesky silicone caulk mucking up your fiberglass shower stall’s appearance? Say no more! Dive into our expert guide on how to remove silicone caulk from fiberglass shower stalls effortlessly. We’ll walk you through step-by-step, making sure that outdated caulk doesn’t stand a chance.
No need to stress about tedious processes; we’ve streamlined everything for you. Time to roll up those sleeves and let’s rescue your shower from that stubborn caulk. You’ll be amazed by the transformation. Let’s get started on your journey to a refreshed and sparkling shower!
Key Summary: How to Remove Silicone Caulk from Fiberglass Shower Stall?
To remove silicone caulk from a fiberglass shower stall, first, soften it with a caulk remover. Gently scrape it off using a plastic scraper. Ensure good ventilation and wear gloves and eye protection for safety. After removal, clean the area and consider resealing with appropriate caulk for maintenance.
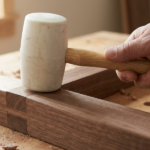
Hand Tools Suggestion for Your Home
[amazon_auto_links id=”11426″]
Understanding Silicone Caulk and Its Removal
Silicone caulk, a prevalent sealant in household applications, is prized for its flexibility, durability, and water-resistant properties. Often used in bathrooms and kitchens, it provides an effective seal for various surfaces.
However, over time, silicone caulk can deteriorate, discolor, or develop mold, necessitating its removal and replacement. This article offers a detailed understanding of silicone caulk and explains the significance of its proper removal.
What is Silicone Caulk?
Silicone caulk is a versatile and widely-used sealant employed in various applications, primarily for its excellent sealing properties. Composed of silicone, a synthetic material, silicone caulk is appreciated for its durability, flexibility, adhesion, and resistance to water and extreme temperatures.
Commonly utilized in bathrooms, kitchens, and areas prone to moisture, silicone caulk forms a waterproof and airtight seal in gaps and joints, preventing water leakage and air infiltration.
However, the necessity to remove silicone caulk arises due to various reasons, underscoring the importance of a proper removal process.
Reasons for Removing Silicone Caulk:
Deterioration over Time: Over time, silicone caulk can deteriorate and lose its effectiveness due to exposure to moisture, extreme temperatures, and general wear and tear. The deterioration can result in the seal breaking down, making it ineffective in preventing water leaks and air drafts.
Discoloration and Aesthetics: Exposure to moisture and environmental factors can cause silicone caulk to discolor and develop unsightly patches, negatively impacting the appearance of the sealed area. This discoloration can be aesthetically displeasing and prompt the need for removal.
Mold and Mildew Growth: Moisture accumulation in and around silicone caulk can create an ideal environment for mold and mildew growth. Besides being unsightly, mold and mildew can pose health risks and further deteriorate the caulk, necessitating its removal.
Renovation and Upgrades: During home renovations or upgrades, removing old or damaged silicone caulk is a crucial step in preparing surfaces for resealing. A clean and smooth surface ensures better adhesion and a professional finish for the new application of caulk.
Importance of Proper Removal
Effective Resealing: Proper removal of old silicone caulk ensures a clean and smooth surface, optimizing the adhesion of new caulk. An effective seal is crucial in preventing water leakage and maintaining the integrity of the structure.
Enhanced Aesthetics: Complete removal of discolored or deteriorated caulk improves the appearance of the sealed area. A fresh application of caulk provides a clean, uniform, and aesthetically pleasing finish.
Preventing Further Damage: Thorough removal helps in identifying any potential damage to the underlying surface. Addressing underlying issues and providing necessary repairs before resealing with new caulk is vital to prevent further deterioration.
Understanding silicone caulk and recognizing the signs that necessitate its removal is crucial for maintaining the effectiveness, aesthetics, and structural integrity of sealed areas. Proper removal, followed by effective resealing, ensures a robust, long-lasting, and visually appealing seal, contributing to the overall functionality and appearance of the surfaces.
How to Remove Silicone Caulk from Fiberglass Shower Stall: A Step-By-Step Removal Process
Silicone caulk is commonly used in fiberglass shower stalls to create a watertight seal around joints and seams. Over time, due to exposure to water, moisture, and cleaning agents, silicone caulk can deteriorate, discolor, or develop mold and mildew.
When this happens, it’s essential to remove and replace the old caulk to maintain the integrity and appearance of your fiberglass shower stall. In this step-by-step guide, we’ll walk you through the process of safely and effectively removing silicone caulk from your fiberglass shower stall.
Step 1: Gather the Necessary Tools and Materials
Before you begin the removal process, make sure you have all the required tools and materials ready:
Caulk remover solution: Purchase a high-quality caulk remover solution from your local hardware store. Ensure it is suitable for silicone caulk removal.
Plastic or silicone caulk scraper: You’ll need a gentle scraper to avoid damaging the fiberglass surface. Plastic or silicone scrapers work well for this purpose.
Utility knife: A utility knife with a sharp blade will help in cutting through stubborn sections of caulk.
Safety gear: Wear safety gloves and safety goggles to protect your hands and eyes during the removal process.
Step 2: Prepare the Area
Before you start removing the caulk, take a few minutes to prepare the area:
Ventilation: Ensure the bathroom is well-ventilated by opening windows and using an exhaust fan if available. Proper ventilation will help dissipate any fumes from the caulk remover.
Clean the area: Clean the shower stall and the surrounding area to remove any soap scum, residue, or loose debris. A clean surface will make the caulk removal process more effective.
Step 3: Apply the Caulk Remover Solution
Follow these steps to apply the caulk remover solution:
Read the instructions: Carefully read and follow the instructions on the caulk remover product. Pay attention to recommended safety precautions.
Apply the solution: Using the applicator or a brush provided with the caulk remover, apply a generous layer of the solution directly onto the old silicone caulk. Ensure that the caulk is completely coated with the remover.
Wait for the caulk to soften: Allow the caulk remover solution to work its magic. The time needed for the caulk to soften can vary depending on the product, so refer to the instructions for guidance. Typically, it may take anywhere from 2 to 24 hours.
Step 4: Gently Remove the Silicone Caulk
Once the caulk has softened, it’s time to remove it. Follow these steps carefully:
Use a plastic or silicone scraper: Begin by gently scraping the softened caulk with a plastic or silicone scraper. Hold the scraper at a low angle to the surface to avoid damaging the fiberglass.
Work in sections: Work on small sections at a time, focusing on one area before moving on to the next. This will ensure a more systematic and thorough removal process.
Use a utility knife (if necessary): If there are stubborn bits of caulk that won’t come off with the scraper alone, carefully use a utility knife to cut away the remaining caulk. Exercise caution to prevent any scratches on the fiberglass surface.
Continue until all caulk is removed: Repeat the scraping and cutting process until you’ve successfully removed all traces of old caulk from the seams and joints of the fiberglass shower stall.
Step 5: Clean the Area Thoroughly
After removing the silicone caulk, it’s crucial to clean the area thoroughly to prepare it for resealing. Here’s what to do:
Remove residue: Wipe down the cleaned areas with a damp cloth to remove any residue from the caulk remover solution and any remaining bits of caulk.
Dry the surface: Ensure the surface is completely dry before proceeding to the resealing step. Any moisture left behind can affect the new caulk’s adhesion.
Step 6: Apply New Silicone Caulk (Optional)
If you removed the old silicone caulk because it was deteriorated or damaged, you may want to apply a new caulk to ensure a watertight seal. Follow these steps for applying new silicone caulk:
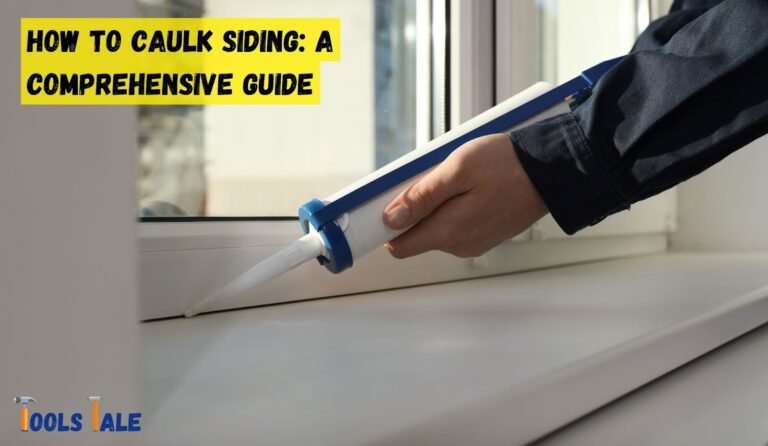
Choose the right caulk: Select a high-quality silicone caulk that is designed for wet environments and suitable for use in showers.
Prepare the caulk gun: Load the caulk tube into a caulk gun and cut the tip of the nozzle at a 45-degree angle to the desired bead size.
Apply the new caulk: Carefully apply a smooth, continuous bead of caulk along the seams and joints of the shower stall. Use a caulk smoothing tool or your finger to create a neat, even finish.
Let it cure: Allow the new caulk to cure according to the manufacturer’s instructions before using the shower. Typically, it takes 24-48 hours to fully cure.
By following this step-by-step removal process, you can effectively remove old silicone caulk from your fiberglass shower stall and prepare it for a fresh application if needed. Proper caulk removal and resealing ensure the longevity, appearance, and functionality of your shower stall.
Precautions and Safety Measures When Removing Silicone Caulk
Removing silicone caulk is a task that requires precision and caution to ensure a successful and safe process. Whether you’re a DIY enthusiast or a professional, following proper precautions and safety measures is paramount to protect yourself, the environment, and the surfaces you’re working on. In this comprehensive guide, we will outline essential precautions and safety measures to follow when removing silicone caulk.
Personal Protective Equipment (PPE)
Safety Gloves: Always wear appropriate safety gloves made of durable materials such as nitrile or latex to protect your hands from the caulk remover solution and any potential injuries while using scraping tools.
Safety Goggles or Glasses: Shield your eyes from potential splatters, caulk particles, or accidental contact with the caulk remover solution by wearing safety goggles or glasses.
Respiratory Protection: Consider wearing a mask or respirator, especially if you are sensitive to fumes or working in a confined space with inadequate ventilation.
Ventilation and Work Area Precautions
Adequate Ventilation: Ensure proper ventilation in the work area to disperse fumes from the caulk remover solution. Open windows and doors, and use exhaust fans if available.
No Smoking or Open Flames: Do not smoke or use open flames in the work area, especially when using chemical products like caulk remover solution.
Controlled Environment: Preferably work in a controlled, well-lit, and organized environment to minimize potential hazards.
Understanding and Using Chemicals Safely
Read and Follow Instructions: Thoroughly read and understand the instructions provided with the caulk remover solution and any other products you are using. Strictly adhere to guidelines and safety precautions outlined by the manufacturer.
Proper Storage: Store chemicals in a safe, well-ventilated area away from children and pets. Follow manufacturer recommendations for storage conditions.
Proper Disposal: Dispose of used caulk remover solution, old caulk, and any contaminated materials according to local regulations and environmental guidelines. Avoid improper disposal that can harm the environment.
Test in a Small Area
Before applying the caulk remover solution extensively, conduct a patch test in a small, inconspicuous area of the surface to ensure compatibility and to avoid any adverse reactions.
Sharp Tools Handling
Handle with Caution: Exercise caution when handling sharp tools such as utility knives. Use them carefully to avoid accidental cuts or injuries while removing old caulk.
Proper Storage: Store sharp tools safely, preferably in a designated container or a secure toolbox, to prevent accidents and injuries.
Protecting Sensitive Individuals
If you have known allergies or sensitivities to chemicals, fiberglass, or related materials, take extra precautions. Consider wearing a mask to minimize exposure and potential allergic reactions.
Avoid Overexertion
Take Breaks: Take regular breaks to rest and avoid overexertion, especially during prolonged or labor-intensive tasks. Fatigue can lead to accidents or injuries.
Stay Hydrated and Nourished: Stay hydrated and maintain a healthy diet during the process to keep your energy levels up.
Emergency Preparedness
First Aid Kit: Have a first aid kit readily available with basic supplies for handling minor accidents like cuts or scrapes.
Emergency Contacts: Keep emergency contact numbers accessible, including poison control and local emergency services.
Proper Communication
Communicate Your Actions: Inform others in your household or workspace about the task you’re undertaking, especially if it involves the use of chemicals or potentially hazardous tools.
Emergency Response Plan: Ensure everyone is aware of the emergency response plan in case of an accident or mishap.
Seek Professional Help When Needed
If you are unsure about any aspect of the caulk removal process, encounter unexpected difficulties, or are uncomfortable with any task involved, consider seeking assistance from a professional or an experienced individual.
When removing silicone caulk, safety should always be the top priority. Following these precautions and safety measures diligently will not only ensure a successful caulk removal process but also protect you from potential harm.
Remember to read and follow the instructions provided by the manufacturer of the caulk remover solution and other tools, and always dispose of chemicals and waste responsibly. Safety is key in any DIY project, and by observing these precautions, you contribute to a safe and secure caulk removal process.
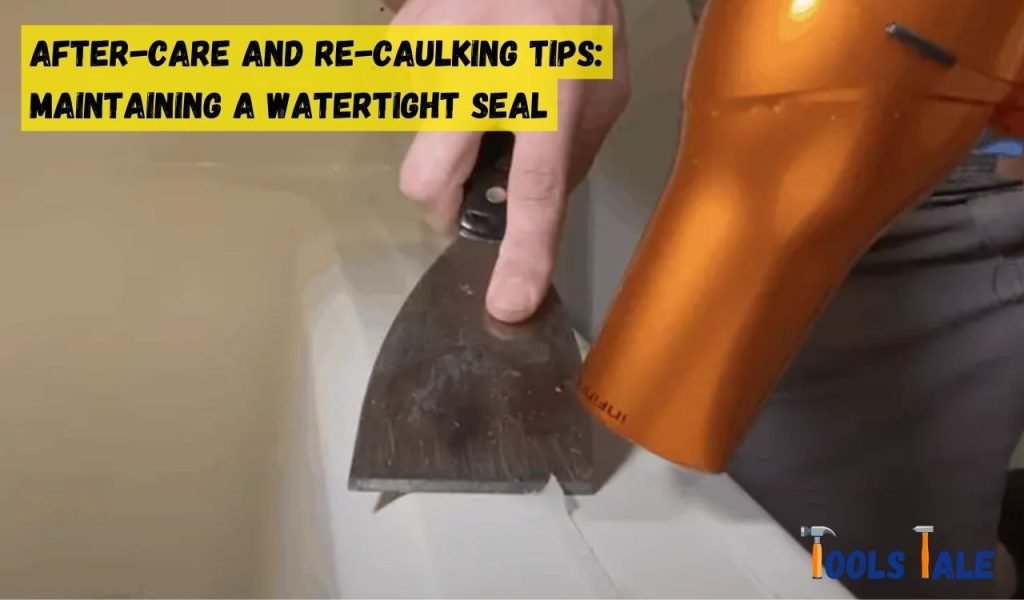
After-Care and Re-Caulking Tips: Maintaining a Watertight Seal
Once you’ve successfully removed the old silicone caulk and prepared the surface, it’s crucial to follow through with proper after-care and re-caulking to maintain a watertight and aesthetically pleasing seal in your bathroom or other areas. This section provides essential tips and recommendations for post-removal care and re-caulking.
Surface Inspection
After caulk removal, inspect the cleaned surface thoroughly to ensure it is free of any residue, debris, or caulk remnants. A clean, dry surface is essential for proper re-caulking.
Drying Time
Allow the cleaned surface to dry completely before proceeding with re-caulking. Moisture can interfere with the new caulk’s adhesion and performance.
Choosing the Right Caulk
Select a high-quality silicone caulk that is specifically designed for wet environments such as bathrooms and kitchens. Ensure it is compatible with the surface material (e.g., fiberglass) for optimal adhesion and longevity.
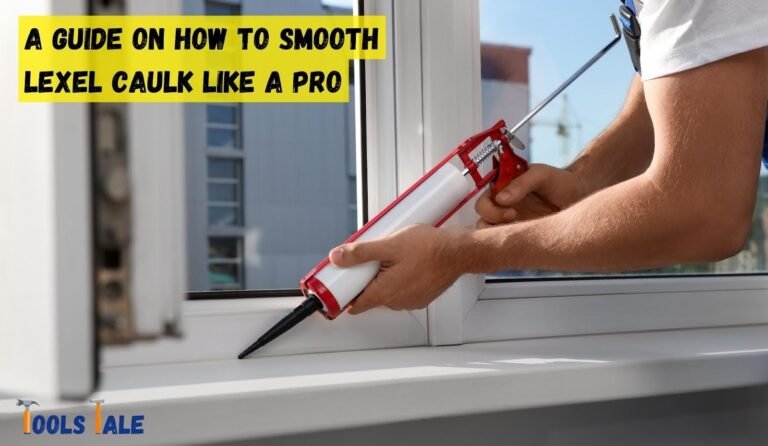
Caulking Techniques
Cutting the Nozzle: Cut the nozzle of the caulk tube at a 45-degree angle to achieve the desired bead size. Start with a smaller cut and enlarge if necessary.
Applying the Caulk: Apply a smooth, continuous bead of caulk along the seams and joints to be sealed. Maintain a consistent pace and pressure to ensure an even application.
Smoothing the Caulk: Use a caulk smoothing tool or your finger dipped in soapy water to smooth and shape the caulk bead for a neat finish.
Curing Time
Allow the new caulk to cure according to the manufacturer’s instructions. Typically, it takes 24 to 48 hours to fully cure. Avoid disturbing or exposing the caulk to moisture during this period.
Regular Maintenance
Inspect the caulked areas periodically for signs of wear, tear, or mildew. Promptly address any issues to prevent water leakage or damage.
Cleaning and Maintenance
Regular Cleaning: Clean the caulked areas regularly using a mild, non-abrasive cleaner to remove soap scum, dirt, or mold that might accumulate.
Mildew Prevention: To prevent mildew growth, keep the caulked areas dry and well-ventilated. Wipe down wet surfaces after use, especially in high-moisture environments like bathrooms.
Mildew Removal: If mildew develops, clean it using a mildew remover or a mixture of equal parts water and white vinegar. Rinse thoroughly and dry the area.
Addressing Damage or Wear
If you notice any cracks, gaps, or areas where the caulk has worn off, promptly remove the damaged caulk and re-caulk the affected area to maintain an effective seal.
Regular Re-Caulking
As caulk ages, it can shrink, crack, or lose its effectiveness. Consider re-caulking seams and joints every few years to maintain a reliable watertight seal.
After-care and re-caulking are essential aspects of maintaining a watertight and visually pleasing seal. By following these tips, you ensure the longevity and effectiveness of the caulked areas in your home, ultimately contributing to a well-maintained and functional living space. Regular maintenance and timely re-caulking will not only enhance the aesthetics but also protect your surfaces from potential water damage.
Common Mistakes to Avoid When Removing Silicone Caulk
Removing silicone caulk can be a meticulous task, and while it’s essential for maintaining a watertight seal, certain mistakes can complicate the process or lead to unsatisfactory results. Understanding these common errors and learning how to avoid them will help you successfully remove silicone caulk and achieve a clean, professional finish.
Insufficient Ventilation
Mistake: Neglecting proper ventilation during the removal process can lead to discomfort due to fumes and potentially harmful exposure to chemicals.
Prevention: Ensure the area is well-ventilated by opening windows, using fans, or working in an open space. Proper airflow will dissipate fumes and enhance safety during the caulk removal process.
Skipping Surface Preparation
Mistake: Neglecting to clean and dry the surface before caulk removal can hinder the effectiveness of the caulk remover solution.
Prevention: Thoroughly clean and dry the area to remove soap scum, debris, or moisture. A clean surface allows the caulk remover solution to penetrate effectively, simplifying the removal process.
Using the Wrong Tools:
Mistake: Using sharp or abrasive tools that can damage the surface or using inadequate tools that make caulk removal difficult.
Prevention: Use plastic or silicone scrapers and a utility knife with care. Select tools that are gentle on the surface but effective in removing caulk.
Rushing the Process:
Mistake: Rushing through the caulk removal process can result in incomplete caulk removal or damage to the surface.
Prevention: Take your time and work methodically, especially when scraping off caulk. Ensure you’ve removed all traces of caulk before proceeding to the re-caulking stage.
Not Allowing Sufficient Drying Time:
Mistake: Applying new caulk on a damp or inadequately dried surface can compromise the adhesion and longevity of the new caulk.
Prevention: Allow the cleaned surface to dry completely before applying a new caulk. Follow the manufacturer’s recommended drying time.
Using the Wrong Caulk:
Mistake: Choosing a caulk that is incompatible with the surface material or not suitable for wet environments.
Prevention: Select a high-quality silicone caulk designed for the specific surface and intended use, such as a caulk suitable for bathrooms or kitchens.
Overloading with Caulk
Mistake: Applying excessive caulk results in messy, uneven beads that are challenging to smooth and may not provide a secure seal.
Prevention: Apply a consistent and moderate amount of caulk to achieve a neat, even bead that is easier to smooth and provides an effective seal.
Neglecting Smooth Finishing:
Mistake: Not smoothing the caulk properly results in an unattractive finish and can compromise the caulk’s effectiveness.
Prevention: Use a caulk smoothing tool or your finger dipped in soapy water to achieve a smooth, professional finish. This also helps in better adhesion and a clean look.
Ignoring Regular Maintenance:
Mistake: Failing to inspect and maintain caulked areas can lead to mold growth, water leaks, and a deteriorated seal.
Prevention: Regularly inspect caulked areas, clean them, and address any damage or wear by re-caulking promptly to maintain an effective seal.
Avoiding Professional Help When Needed:
Mistake: Persisting with the caulk removal process despite challenges or lack of expertise can lead to errors and subpar results.
Prevention: If unsure or if the project seems too complex, seek assistance from a professional to ensure a successful caulk removal and re-caulking process.
By being aware of these common mistakes and taking preventative measures, you can enhance your caulk removal process and achieve a clean, professional finish. Attention to detail, proper tool usage, and adherence to safety precautions will contribute to a successful caulk removal and ultimately a durable and effective seal in your desired areas.
Expert Tips and Common Myths About Silicone Caulk: Debunked and Clarified
Silicone caulk removal is a meticulous task that requires careful consideration and execution. Alongside expert tips for a successful caulk removal, it’s important to address and debunk common myths surrounding silicone caulk. This guide aims to provide clarity and insights into both, ensuring an effective caulk removal process.
Expert Tips for Successful Silicone Caulk Removal
Use the Right Caulk Remover: Select a caulk remover specifically designed for silicone caulk. Ensure it is effective, safe, and suitable for the surface material you’re working on.
Prioritize Safety: Wear appropriate personal protective equipment (PPE) such as safety gloves and goggles to safeguard yourself during the caulk removal process.
Test in a Small Area: Before applying the caulk remover extensively, conduct a patch test in a small, inconspicuous area to ensure compatibility with the surface material.
Allow Adequate Dwell Time: Be patient and allow the caulk remover sufficient time to soften the caulk effectively. Rushing this step can complicate the removal process.
Gentle Scrape and Clean Thoroughly: Use plastic or silicone tools for caulk removal to prevent surface damage. After removal, thoroughly clean the surface to eliminate any residue.
Choose the Right Caulk for Reapplication: Select a high-quality silicone caulk suitable for the intended use and compatible with the surface material. Ensure a smooth and even application for an effective seal.
Follow Proper Curing Time: Adhere to the manufacturer’s recommended curing time for the new caulk to ensure it sets and performs as expected.
Common Myths about Silicone Caulk
Myth 1: Silicone Caulk Lasts Forever
Reality: While silicone caulk is durable, it doesn’t last indefinitely. Factors like exposure to elements, moisture, and cleaning agents can degrade silicone caulk over time.
Myth 2: You Can Caulk Over Old Caulk
Reality: While you can apply new caulk over old caulk, it’s not the best practice. Old caulk can prevent proper adhesion and cause the new caulk to fail.
Myth 3: Soap and Water Can Remove Silicone Caulk
Reality: Soap and water alone are ineffective in removing silicone caulk. A caulk remover specifically designed for silicone is necessary for successful removal.
Myth 4: All Caulk Removers Work the Same
Reality: Different caulk removers are designed for specific types of caulk. Using the wrong caulk remover can be ineffective or potentially damage the surface.
Reality: Proper caulking technique, including a steady hand and controlled caulk flow, is crucial for a neat and effective seal. Precision matters for a professional finish.
Myth 6: Silicone Caulk Doesn’t Need Maintenance
Reality: Silicone caulk requires regular inspection and maintenance to ensure its effectiveness and longevity. Neglecting maintenance can lead to issues over time.
By following expert tips and dispelling common myths, you can approach silicone caulk removal with confidence and accuracy. Prioritize safety, choose appropriate products, and dispel misconceptions to ensure a successful caulk removal and re-caulking process.
Final Word
Removing silicone caulk from a fiberglass shower stall requires patience, the right tools, and proper caulk remover. Always prioritize safety, follow expert tips, and choose quality caulk removers.
Dispelling common myths ensures an effective removal process. A clean, caulk-free surface readies you for re-caulking if necessary. Maintain the beauty and integrity of your fiberglass shower by approaching caulk removal diligently and efficiently.
Frequently Asked Questions
How do you remove silicone from a fiberglass shower?
To remove silicone from a fiberglass shower, start by applying a commercial silicone caulk remover. Follow the product’s instructions for application. Typically, you’ll need to let it sit for a specified time to soften the caulk. Once softened, use a plastic scraper or putty knife to gently lift and remove the softened caulk. Be cautious not to scratch the fiberglass surface. Afterward, clean the area thoroughly to remove any residue.
What dissolves silicone caulk?
Silicone caulk can be dissolved using isopropyl alcohol or denatured alcohol. Apply the alcohol to the caulk, let it sit to soften the silicone, then gently scrape it off with a plastic scraper.
How to remove silicone caulk without damaging paint?
To remove silicone caulk without damaging paint, use a caulk softener or isopropyl alcohol. Apply it carefully to the caulk, allowing it to soften, then gently scrape the caulk away without damaging the paint.
How to remove silicone caulk residue from the tub?
To remove silicone caulk residue from the tub, apply a silicone caulk remover or rubbing alcohol to a cloth. Gently rub the residue, and it should come off. Clean the area thoroughly afterward.
What is the best tool to remove silicone caulk from the shower stall?
The best tool for removing silicone caulk from a shower stall is a plastic or silicone caulk scraper. These tools are designed to effectively lift and remove caulk without scratching or damaging the surface. The flat edge of the scraper allows for precise scraping, making it easier to remove the caulk from corners and edges.
What is the best silicone caulk remover?
The best silicone caulk removers are commercial products specifically designed to soften and dissolve silicone caulk. Look for reputable brands and follow the manufacturer’s instructions for the best results.
How to remove silicone caulk from a fiberglass shower stall at home?
To remove silicone caulk from a fiberglass shower stall at home, follow these steps: Soften the caulk using a commercial caulk remover, gently scrape the softened caulk using a plastic scraper, clean the area thoroughly to remove any residue.
Share your love!
Tools Tale
Disclaimer: This site is owned and operated by Tools Tale. toolstale.com is a participant in the Amazon Services LLC Associates Program, an affiliate advertising program designed to provide a means for sites to earn advertising fees by advertising and linking to Amazon.com. This site also participates in other affiliate programs and is compensated for referring traffic and business to these companies.