Physical Address
304 North Cardinal St.
Dorchester Center, MA 02124
Physical Address
304 North Cardinal St.
Dorchester Center, MA 02124
How to chisel a door latch? Unlock the secrets to expertly crafting secure doorways! In this handy guide, we’ll walk you through the art of chiseling a door latch with precision. Get ready to master the technique, ensuring your doors not only function flawlessly but also add a touch of elegance to your living space.
From identifying the perfect locations to testing the fit, we’ve got you covered. Say goodbye to squeaky doors and embrace the satisfaction of a job well done. Let’s dive in and level up your DIY skills with this chiseling adventure!
Key Summary: How to Chisel a Door Latch?
Chiseling a door latch is a precise process for proper installation. Start by marking latch area on door edge. Use sharp chisel to make shallow cuts along marked area. Gradually deepen cuts, forming recess for latch plate. Test fit latch, adjust as needed. Secure plate. Smooth edges for neat finish.
[amazon_auto_links id=”11426″]
Before you embark on the journey of chiseling a door latch, it’s essential to gather all the necessary tools and materials. Having the right equipment at your disposal will ensure a smooth and successful chiseling process. Let’s explore the tools and materials you’ll need to achieve latch perfection.
With all the tools and materials at the ready, you’re now equipped to begin the chiseling process confidently.

Accurate measurements and markings are the backbone of a successful door latch chiseling. Before you start making any cuts, it’s crucial to identify the appropriate locations for the door latch and strike plate. Let’s dive into the essential steps of marking and measuring.
Grab your measuring tape, and let’s get to work. First, decide on the height placement of the latch, keeping in mind the door’s design and the most convenient height for everyday use. Once you’ve determined the height, mark it on the door edge with a pencil.
Next, you’ll need to establish the latch depth—the distance the latch will sit inside the door. Measure the latch length and mark its depth on the door edge. This step is crucial for ensuring that the latch and strike plate align perfectly when the door is closed.
For the strike plate, the process is slightly different. Close the door and latch it securely, then mark the strike plate’s position on the door frame. This way, you ensure a precise fit when the door is closed and latched.
With the appropriate locations marked and measured, you’re now ready to begin the chiseling process and bring the latch pocket to life.

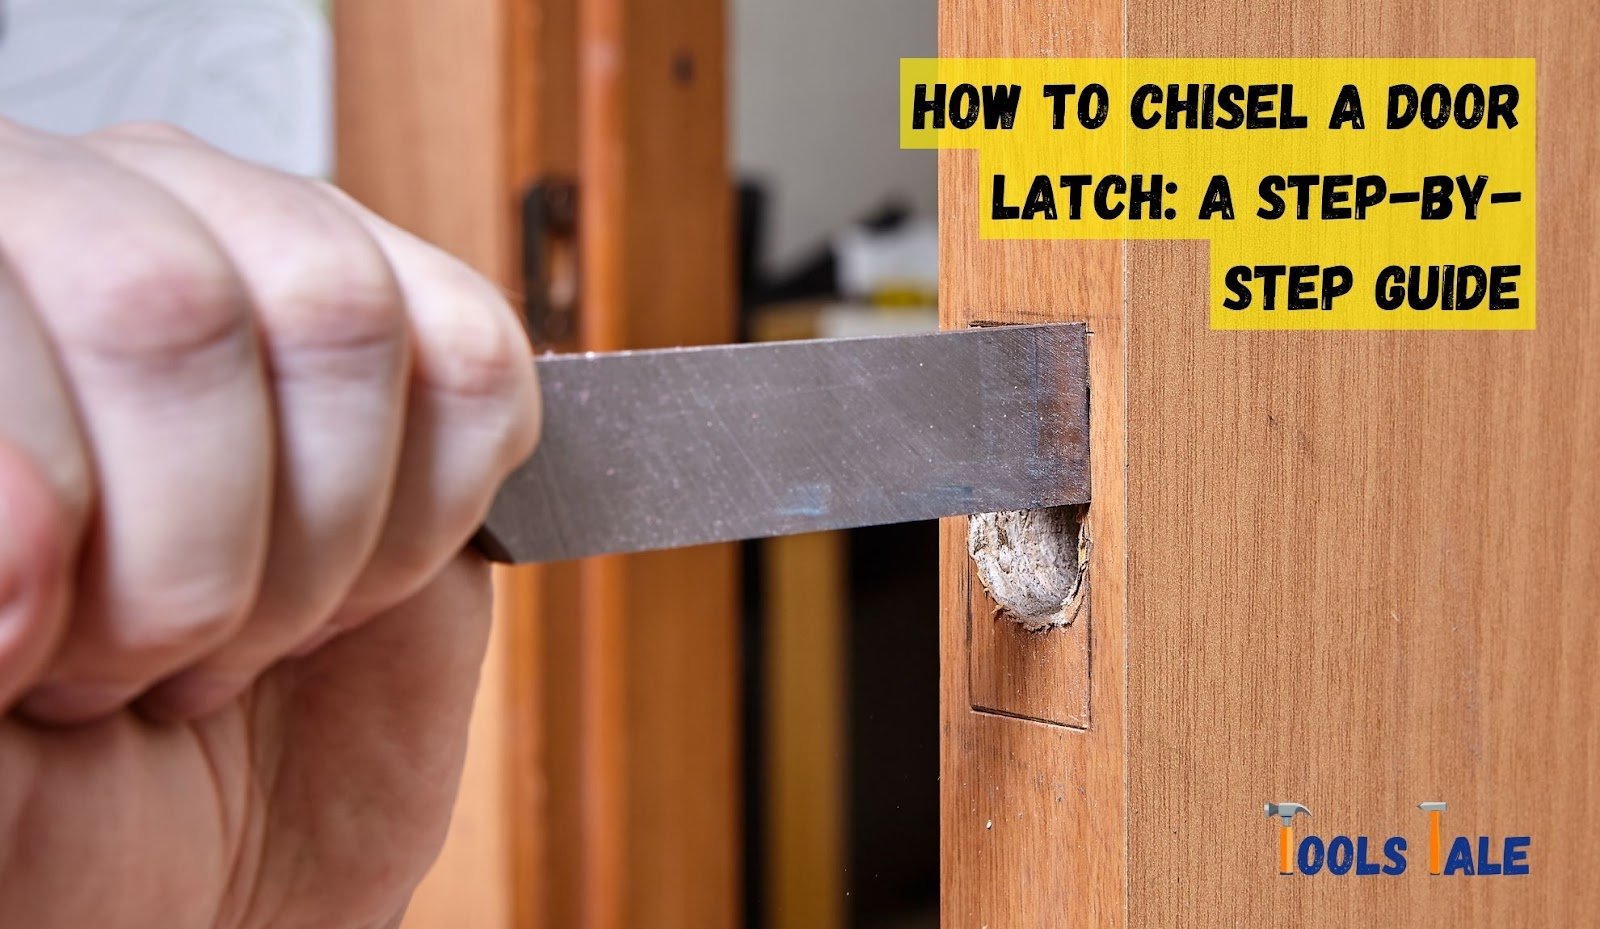
With our measurements and markings in place, it’s time to embark on the chiselling adventure. Take a deep breath, channel your inner craftsmanship, and follow this step-by-step guide to chisel a door latch with precision.
Before diving into chiseling, it’s essential to prepare your chisel for optimal performance. Ensure it’s sharp and ready to make clean cuts. Dull blades can lead to messy work and uneven surfaces, so take the time to sharpen the chisel if needed.
Now that your chisel is ready, carefully position it on the marked latch height and strike plate position. With a gentle tap of the hammer, make a small indentation in the wood to guide your chisel’s direction. This initial indent will prevent the chisel from slipping and help you maintain control during the process.
Once the indentation is made, hold the chisel firmly and begin chiseling out the latch pocket. Stay within the marked lines and take your time. Slow and steady progress is key to achieving precise results. Use light to moderate pressure on the chisel, allowing the sharp edge to do the work.
After completing the initial chiseling, it’s time to test-fit the latch and strike plate in their respective pockets. Gently insert the latch into the chiseled pocket. It should slide in smoothly and fit snugly without any wiggling or resistance. Ensure that the latch faceplate aligns perfectly with the door edge, leaving no gaps or protrusions.
Next, close the door slowly and observe how the latch meets the strike plate. The latch should slide into the strike plate’s opening effortlessly and securely. If the latch and strike plate do not align correctly, you may need to adjust the latch pocket’s depth or position slightly.
Open and close the door several times to test the latch’s functionality. It should operate smoothly and securely, providing a satisfying click when the door is closed. Pay attention to the latch’s engagement with the strike plate during both opening and closing. If the door sticks or doesn’t latch properly, you may need to re-check the latch pocket’s depth and make necessary adjustments.
During the test fitting, pay attention to any signs of friction or rubbing between the latch and the door frame. Ensure there’s enough clearance for the latch to move freely without any obstructions. Any rubbing or sticking may indicate a misalignment that needs to be addressed.
If the test fitting reveals any issues, don’t worry—fine-tuning the fit is part of the process. You can use the chisel to adjust the latch pocket’s depth or make slight modifications to ensure a perfect fit. Take your time and make incremental changes until you achieve the desired result.
After making adjustments, repeat the test fitting process to ensure the changes have resolved any previous issues. Continue fine-tuning until the latch fits precisely and operates flawlessly.
Once you’re satisfied with the fit and function of the door latch, give it one final test to confirm its performance. Open and close the door multiple times, paying attention to the latch’s engagement with the strike plate. If everything works smoothly, congratulations! You’ve successfully chiseled and installed a door latch that fits like a glove.
Remember, chiseling a door latch requires patience, precision, and attention to detail. By following this step-by-step guide, you’ll achieve a perfectly functioning door latch that adds both security and convenience to your door.
Chiseling a door latch is a rewarding endeavor, but the work doesn’t end once the latch is installed. To ensure the longevity and functionality of your newly chiseled latch, it’s essential to take proactive measures to prevent future problems. Here are some valuable tips to help you maintain your door latch and avoid potential issues down the road.
Perform regular inspections of your door latch to detect any signs of wear, misalignment, or damage. Check for loose screws, ensure the latch is securely in place, and verify that it engages smoothly with the strike plate. Early detection of minor issues allows you to address them promptly before they escalate into major problems.
Periodically lubricate your door latch to keep it operating smoothly. Use a silicone-based or graphite lubricant to prevent friction and ensure a seamless latch action. Lubrication also helps to protect the latch components from rust and corrosion, extending its lifespan.
If you notice any misalignment or sticking of the latch, address it immediately. Misalignments can lead to unnecessary strain on the latch, door, and frame, potentially causing damage over time. Adjust the latch pocket or strike plate as needed to achieve a proper fit and prevent undue stress on the latch mechanism.
Loose screws can affect the latch’s performance and compromise the door’s security. Regularly inspect the latch and strike plate screws and tighten them as necessary. Be careful not to overtighten, as this may strip the screws or damage the latch components.
Avoid slamming the door forcefully, as this can put undue stress on the latch and cause premature wear. Encourage gentle handling of the door to minimize the impact on the latch and prolong its lifespan.
Ensure your door and latch are appropriately weatherproofed to prevent moisture and debris from affecting the latch’s functionality. Use weatherstripping and a door sweep to seal gaps and protect the latch from exposure to harsh elements.
Educate everyone in your household about the proper use and care of the door latch. Instruct them on the importance of gently closing the door and not forcing the latch. Awareness and responsible usage can significantly contribute to the latch’s longevity.
If you encounter any latch issues or problems during your inspections, don’t delay in making necessary repairs. Addressing problems promptly can prevent further damage and ensure that your latch continues to operate smoothly and securely.
In conclusion, mastering the art of chiseling a door latch empowers you to create secure and elegant doorways. With precision and attention to detail, you can achieve flawlessly functioning doors that add a touch of sophistication to your living space. Embrace the satisfaction of a job well done as you elevate your DIY skills and enjoy the benefits of a professionally crafted latch.
Say goodbye to squeaky doors and welcome the confidence of a secure home. Chiseling a door latch is not just a practical skill; it’s an art form that enhances both security and aesthetics. So, get your tools ready and embark on this chiseling adventure to unlock the secrets of expert door latch installation.
Chiseling a door latch involves creating a recess to accommodate the latch and strike plate. It is essential as it ensures a secure and smooth operation of the door, providing both functionality and security.
Chiseling a door latch can be done as a DIY project. With the right tools and guidance, many homeowners can successfully chisel their door latch. However, if unsure, professional assistance is recommended.
To chisel a door latch, you’ll need a chisel set, hammer, door latch template, pencil, measuring tape, and protective gear like safety goggles.
Use a door latch template and measure the height and depth of the latch pocket based on the latch size and style to determine the appropriate locations.
To achieve precision, make small indentations with the chisel to guide its direction. Take your time and avoid rushing the process for clean chiseling.
After chiseling, insert the latch and strike plate into their pockets and check for proper alignment. Test the door’s action, ensuring a smooth latch engagement and secure closing.
If the latch doesn’t fit well, adjust the latch pocket’s depth or position. Fine-tune the fit until the latch operates smoothly and securely.
Regularly inspect and maintain your door latch to detect signs of wear or misalignment. Periodically lubricate it to ensure smooth operation and longevity.
Use a silicone-based or graphite lubricant to maintain smooth latch operation. Avoid oil-based lubricants as they may attract dust and debris.
Chiseling techniques may vary depending on the door and latch type. Follow manufacturer guidelines and adapt your technique accordingly for each specific application.