Physical Address
304 North Cardinal St.
Dorchester Center, MA 02124
Physical Address
304 North Cardinal St.
Dorchester Center, MA 02124

Wondering how to fix wood floor gaps? Well, you’re in the right place! Wood floor gaps can be a common annoyance, disrupting the beauty and functionality of your hardwood flooring. But fear not, because in this guide, we’re going to unravel the secrets of effortlessly filling those troublesome gaps.
Whether you’re a seasoned DIY enthusiast or just looking to tackle this issue head-on, we’ve got you covered. Say goodbye to those unsightly gaps and hello to a flawless wood floor finish! So, let’s dive in and discover the straightforward solutions to make your floors as good as new.
Key Summary: How to Fix Wood Floor Gaps?
Fixing wood floor gaps is crucial for aesthetics and preventing damage. The process involves choosing the right filler, applying, and smoothing it. Regular maintenance, including gap checks and refinishing, preserves the floor’s integrity, ensuring long-lasting, impeccable wood floors.
[amazon_auto_links id=”11426″]
Wood floor gaps, those spaces that emerge between floorboards, are a common concern with hardwood flooring. Gaining insight into what causes these gaps is crucial for effective repairs and long-term floor care.
Wood, being a natural material, reacts to its environment. During dry seasons, the moisture content diminishes, causing the wood to shrink and create gaps. Conversely, in humid conditions, the wood absorbs moisture, expanding and reducing gaps.
Improper installation practices contribute to gap formation. Failing to acclimate the wood to the environment before installation or not leaving enough space for wood expansion can lead to unsightly gaps. As wood ages, it can shrink or become more brittle, resulting in gaps. High-traffic areas or places exposed to direct sunlight are particularly susceptible.
Moisture imbalances within the subfloor or beneath the floorboards can cause the wood to swell or shrink unevenly, resulting in gaps. Proper moisture regulation is essential to prevent these imbalances. The quality of the wood is a significant factor. Lower quality or improperly dried wood is more prone to gaps as it lacks the stability and durability of well-prepared wood.
Understanding these causes is vital in effectively addressing wood floor gaps and preventing their recurrence. Regular maintenance and proactive measures during installation and acclimatization can significantly minimize the occurrence of these gaps, ensuring a beautiful and enduring wood floor.
In the next sections, we will delve into the tools and methods needed to address these gaps effectively, empowering you to restore the beauty of your wood floors.
Wood floor gaps, though common, are more than just cosmetic issues. They can indicate underlying problems and pose several significant concerns that make addressing them crucial for maintaining the integrity and beauty of your hardwood floors.
Wood floor gaps can mar the overall aesthetic appeal of your flooring. They disrupt the seamless look and feel of hardwood floors, making them appear unkempt and neglected. Addressing gaps restores the visual allure, enhancing the ambiance and elegance of your living space.
Even minor gaps can present safety hazards. They can catch heels, shoes, or even bare feet, potentially causing a person to trip or stumble. This is particularly hazardous for young children, the elderly, or anyone with mobility issues. Closing these gaps mitigates the risk of accidents and ensures a safer environment.
Gaps in wood flooring can become magnets for dust, dirt, and debris. Over time, this accumulation can be difficult to clean and may lead to hygiene issues. By filling these gaps, you create a smoother surface that’s easier to clean, maintaining a healthier indoor environment.
Gaps can impact the insulation properties of your flooring. They can allow cold or warm air to pass through, affecting the indoor temperature and reducing energy efficiency. Properly sealed and gap-free floors help in maintaining a more consistent indoor temperature, potentially reducing heating and cooling costs.
Wood floor gaps are often early signs of potential bigger problems. If left unattended, these gaps can worsen, affecting adjacent floorboards and the overall floor structure. Addressing them promptly can prevent more extensive damage, saving you significant repair costs in the long run.
Regular maintenance, including fixing gaps, significantly extends the lifespan of your wood floors. Properly maintained floors can last for decades, adding long-term value to your property. Neglecting these gaps can lead to the need for premature floor replacements, incurring substantial expenses.
Well-maintained wood floors are a valuable asset and a key selling point for potential buyers. Addressing gaps not only improves the look of your floors but also enhances the overall value of your property. It makes your home more attractive to potential buyers when you decide to sell.
Addressing wood floor gaps is not just about aesthetics; it’s about ensuring safety, hygiene, energy efficiency, and the longevity of your investment. Regular maintenance and timely gap repairs will keep your wood floors looking beautiful and functional for years to come.
Wood floor gaps can be unsightly and, if left unaddressed, can lead to further problems. Fortunately, fixing these gaps is a task that can be accomplished with some effort and the right tools. Follow this step-by-step guide to effectively repair wood floor gaps and restore the seamless beauty of your hardwood floors.
With this step-by-step guide, you can effectively fix wood floor gaps, whether they are small or larger in size. Remember, timely repairs and proper maintenance are key to preserving the beauty and longevity of your hardwood floors.
Wood floor gaps, a common issue with hardwood flooring, can detract from the aesthetics and functionality of your flooring. These gaps often occur due to various reasons, including changes in humidity, improper installation, or natural wood shrinkage over time.
Addressing these gaps promptly is crucial to maintain the beauty and longevity of your wood floors. Here are different effective methods to fix wood floor gaps, each suited for different types and sizes of gaps.
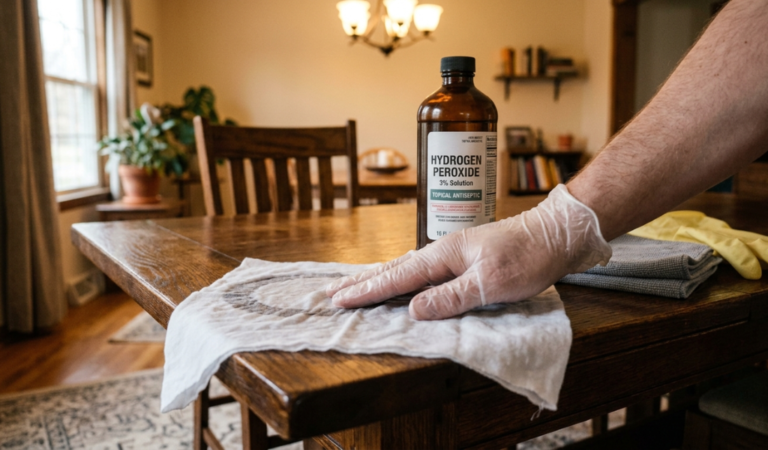
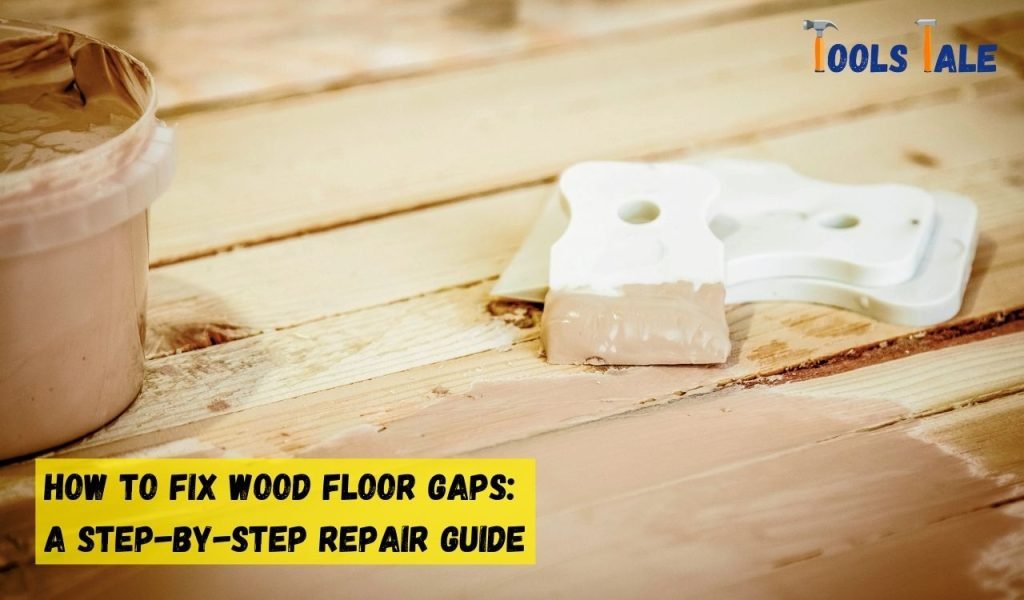
Using wood filler is a popular and effective method to address small to medium-sized gaps in wood floors. The process involves filling the gaps with a wood filler that matches the color of your floor. After cleaning the gaps, apply the wood filler generously using a putty knife or a caulk gun.
Smooth the surface with the putty knife, remove excess filler, and allow it to dry. Once dried, sand the filled gaps to ensure a smooth, level surface. Finally, apply a finish that matches your flooring to seamlessly blend the repaired area with the rest of the floor.
For minor gaps, using wood putty or wax sticks can be an effective solution. These fillers are available in various shades to match your wood floor. Clean the gaps thoroughly and apply the putty or wax sticks, pressing them firmly into the gaps. Use a putty knife to level the surface and remove any excess filler. Allow the filler to dry and harden. Once dry, sand the filled gaps to achieve a smooth finish.
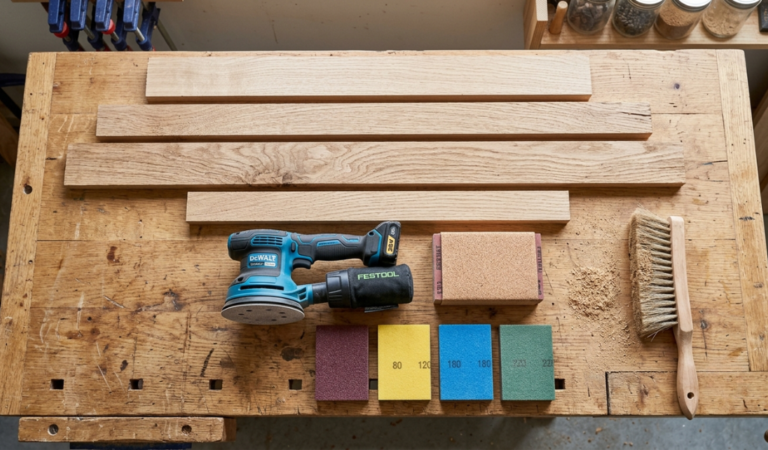
This method is suitable for larger gaps, typically more than 1/4 inch wide. Measure the gaps and cut wood strips or shims accordingly. Apply wood glue to the edges of the strips and insert them into the gaps. Secure the strips in place by nailing them to the subfloor. Allow the wood glue to dry and the strips to set in place. Sand the repaired area to make it even with the rest of the floor and apply a finish that matches your flooring.
Rebonding involves fixing gaps by reattaching the existing floorboards. Start by cleaning the gaps and removing any debris. Use a hammer and chisel to carefully remove a portion of the groove edge from the board alongside the gap. Apply wood glue to the modified groove edge and carefully fit it back into place.
Use clamps to hold the boards in position until the glue dries. This method helps to rebond the separated floorboards, closing the gaps and ensuring a sturdy, cohesive floor surface. Choosing the appropriate method to fix wood floor gaps depends on the size and nature of the gaps.
It’s important to assess the gaps carefully and select the method that suits your specific situation. Regular maintenance and timely gap repairs not only enhance the appearance of your wood floors but also contribute to their longevity and overall value.
When addressing wood floor gaps, it’s essential to approach the repair process with care and precision to achieve the best results. Avoiding common mistakes ensures that your repairs are effective, lasting, and enhance the overall appearance of your hardwood floors.
One of the biggest mistakes is neglecting routine maintenance of your wood floors. Regularly cleaning and inspecting your floors can help you identify gaps early on and prevent them from worsening. Addressing gaps in their early stages is easier and less time-consuming.
Choosing the wrong filling material is a significant mistake. Different gaps require different types of fillers. Small gaps are best filled with wood putty or filler, while larger gaps may need wood strips or shims. Using the incorrect filler can result in a repair that doesn’t last or doesn’t blend well with your flooring.
Failure to consider the moisture levels of the wood and the surrounding environment is a common error. Changes in moisture can cause the wood to expand or contract, affecting the gaps. Ensure your wood is adequately acclimated to its environment before attempting any repairs.
Rushing through the repair process is a mistake that can lead to subpar results. Take the time to properly clean, prepare, and fill the gaps. Allow fillers to dry or set completely before sanding or finishing the repaired area. Patience and attention to detail are key to a successful repair.
Inadequate sanding of the repaired area is a mistake that can leave an uneven or rough surface. Sand the filled gaps thoroughly, ensuring they are smooth and level with the rest of the floor. Proper sanding ensures a seamless transition between the repaired area and the original floor.
Selecting a finish that doesn’t match the rest of your flooring is a common mistake. The repaired area should blend seamlessly with the existing floor. Choose a finish that matches in color and sheen to create a cohesive look.
Attempting complex repairs without the necessary expertise is a mistake that can lead to further damage. If you’re unsure about the best approach or have extensive gaps, seeking professional help is advisable. Professional floor installers or carpenters have the knowledge and experience to handle various repair scenarios effectively.
Using putty to fill large gaps is not effective. Putty is suitable for smaller gaps, and using it for large gaps can lead to an uneven, weak repair. Larger gaps should be addressed with appropriate materials like wood strips or shims for a durable and aesthetically pleasing repair.
Not adequately preparing the gaps before filling them is a common mistake. Cleaning the gaps thoroughly and ensuring they are free of debris and old filler is crucial for a successful repair. Proper preparation ensures the filler adheres well and results in a lasting repair.
Achieving a successful wood floor gap repair involves avoiding these common mistakes and taking a patient, meticulous approach. From choosing the right filling material to ensuring proper preparation and finish, each step is vital for a lasting and visually appealing repair. By avoiding these errors, you’ll enhance the longevity and beauty of your hardwood floors.
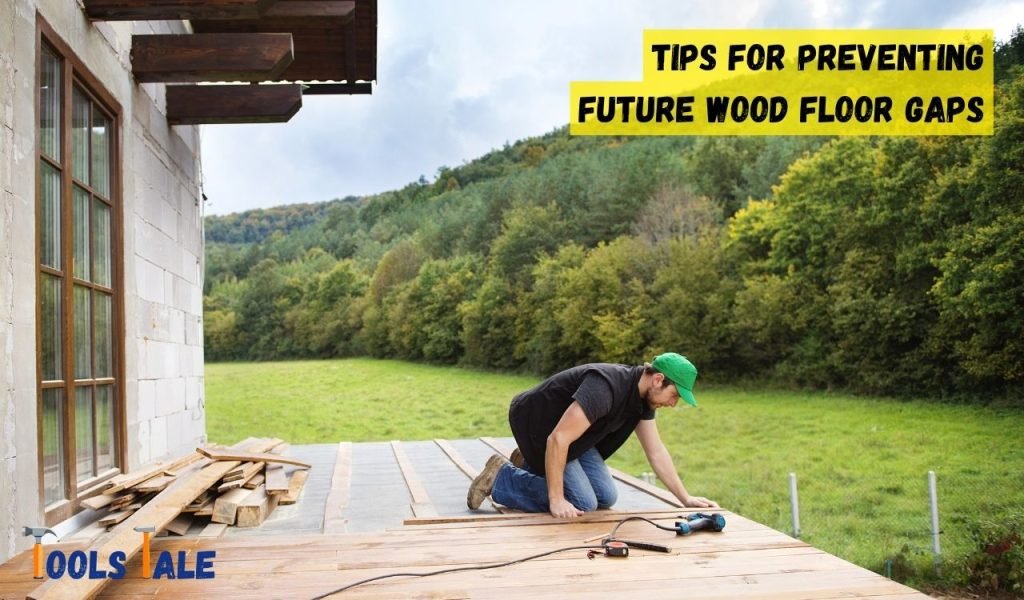
Wood floor gaps can be a frustrating issue, but with proactive care and preventative measures, you can minimize the likelihood of gaps developing in the future. Here are valuable tips to help you maintain a beautiful, gap-free wood floor.
Fluctuations in indoor humidity can cause wood to expand and contract, leading to gaps. Use a hygrometer to measure the humidity levels in your home. Maintain a consistent indoor humidity level between 30-50% to prevent excess shrinkage or expansion of the wood.
Depending on the climate you live in, investing in a humidifier during dry seasons and a dehumidifier during humid seasons can help maintain the ideal humidity levels for your wood floors.
Allow the wood flooring to acclimate to the indoor environment for a few days before installation. This allows the wood to adjust to the humidity and temperature of the room, reducing the risk of future gaps.
Opt for high-quality, well-seasoned wood that has been properly dried and treated. High-quality wood is less likely to develop gaps or other issues.
Ensure your wood floors are installed by professionals using correct installation techniques. Proper installation includes leaving sufficient expansion gaps around the edges of the room to accommodate any wood expansion.
Perform routine inspections of your wood floors, especially after extreme weather changes. Look for signs of gaps, cracks, or other issues. Catching these early allows for timely repairs and prevents the gaps from worsening.
Drastic temperature changes can stress the wood and lead to gaps. Keep your home’s temperature consistent and avoid sudden, extreme changes.
Place area rugs and mats in high-traffic areas to reduce wear and tear on the wood flooring. They also help prevent localized wood shrinkage or damage.
Direct sunlight can cause wood to expand and contract. Use curtains or blinds to limit exposure to direct sunlight, especially during peak hours.
Follow a regular floor maintenance routine, including sweeping, mopping, and using wood-friendly cleaning products. Clean up spills promptly to prevent water damage that could lead to gaps.
If you have pets, keep their nails trimmed to prevent them from scratching or denting the wood floors, potentially leading to gaps.
Attach felt or rubber pads to the bottom of furniture to avoid scratches and dents when moving or rearranging furniture. This protects the floor’s surface and prevents gaps caused by furniture movement.
Limit the use of excessive water when cleaning your wood floors. Damp mop rather than wet mop to prevent water seeping into the gaps and causing the wood to swell or warp.
Follow the manufacturer’s recommendations for refinishing or re-sealing your wood floors. Maintaining a protective finish helps prevent gaps and prolongs the life of your wood flooring.
If you notice significant gaps or are unsure about preventing future gaps, consult a flooring professional for expert advice and maintenance tips.
By implementing these preventative measures and being attentive to the needs of your wood flooring, you can enjoy a beautiful, gap-free floor for many years to come. Regular care and maintenance will go a long way in preserving the aesthetics and durability of your wood floors.
Addressing wood floor gaps requires attention to detail and the right techniques. Whether you choose to use wood filler, putty, wood strips, or other methods, it’s essential to approach the repair process meticulously. Regular maintenance and proactive measures, such as monitoring humidity levels and acclimating wood, can prevent gaps from forming in the first place.
By following the tips outlined, you can enjoy beautiful, gap-free wood floors that enhance the beauty and value of your home for years to come.
To fix gaps between hardwood floors, you can use wood filler or putty that matches the color of your flooring. Apply it generously into the gaps, smooth the surface, and let it dry before sanding and finishing.
Gaps in wood floors can be filled using wood filler, putty, or wood strips. Choose a filling material that matches the size of the gap. For larger gaps, wood strips or shims provide a more effective solution.
To fix floor spacing, utilize wood filler, putty, or wooden strips. Apply the chosen material into the gaps, ensuring a tight fit. After application, smooth the surface and finish it to match the rest of the floor.
For large gaps in laminate flooring, using wood strips or shims is the ideal solution. Measure and cut the strips to fit the gaps, apply wood glue, insert the strips, secure them, and finish to blend seamlessly with the laminate flooring.
Yes, small gaps are normal in hardwood floors as the wood expands and contracts with temperature and humidity changes. However, excessive or widening gaps should be addressed to maintain the floor’s appearance and structural integrity.
To fill floorboard gaps with wood strips, measure and cut the strips to fit the gaps. Apply wood glue, insert the strips, secure them in place, and then sand and finish the area to ensure a smooth, cohesive appearance.
Filling flooring gaps is recommended to maintain the floor’s aesthetics and prevent debris accumulation. Properly filled gaps enhance the longevity of the floor and provide a seamless, polished look. Choose the appropriate filler based on the gap size for effective results.