Physical Address
304 North Cardinal St.
Dorchester Center, MA 02124
Physical Address
304 North Cardinal St.
Dorchester Center, MA 02124
Looking to uncover the secrets of crafting stunning chiseled sandstone? “How to Make Chiseled Sandstone” holds the key to unlocking this ancient and fascinating art. From the essential tools to the intricate techniques, we’ve got you covered. Whether you’re a seasoned artisan or just starting your creative journey, this guide is your gateway to transforming raw sandstone into breathtaking works of art.
So, roll up your sleeves, grab your chisel, and let’s dive into the world of chiseled sandstone like never before. Your next masterpiece awaits!
Key Summary: How to Make Chiseled Sandstone?
Crafting chiseled sandstone involves placing sandstone slabs in a 2×2 pattern. Use the crafting table to arrange the slabs, creating a textured block for your builds. This Minecraft crafting guide simplifies the process, ensuring your structures stand out with chiseled sandstone details.


Chiseled sandstone is a popular choice for adding decorative elements to architectural designs, pathways, and landscaping. To create chiseled sandstone, you’ll need the right type of sandstone, quality tools, and proper techniques.
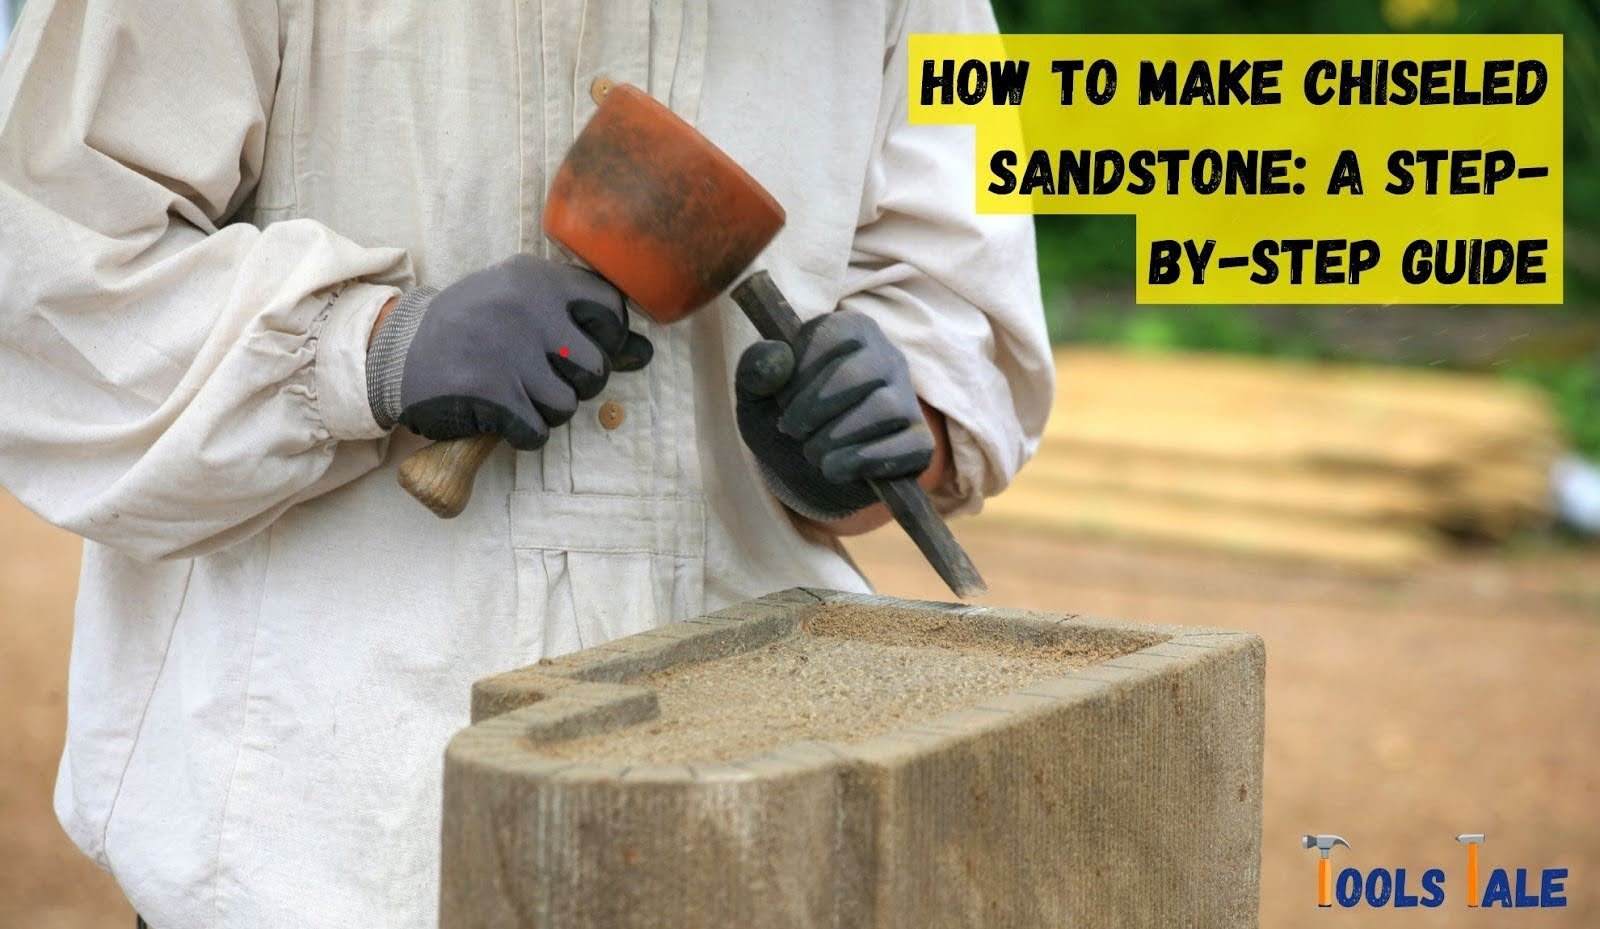
Begin by choosing the appropriate sandstone variety, considering factors like color and texture. High-quality sandstone without impurities or cracks is essential. Once you’ve selected your sandstone, gather the necessary tools, including chisels, mallets, safety gear, and a sturdy work surface.
Mark your design on the sandstone surface, then use various chisels to create the desired texture or pattern. Proper chiseling techniques involve controlled strikes and gradual force application. Remember to maintain safety by wearing protective gear and controlling dust.
After chiseling, smooth rough edges and enhance the texture as desired. You can also apply a protective sealer to preserve the sandstone’s appearance and longevity. Regular cleaning and maintenance will keep your chiseled sandstone looking its best.
Chiseling sandstone is a blend of skill and creativity, resulting in stunning, one-of-a-kind pieces for your projects. With the right materials and techniques, you can transform ordinary sandstone into a work of art.

Before you embark on your chiseling journey, it’s essential to gather the necessary tools and materials. Here’s what you’ll need:
Creating a clean and organized work area is a fundamental aspect of chiseling sandstone. A well-prepared workspace not only enhances your efficiency but also ensures safety and precision in your chiseling work. Here are detailed steps for setting up a clean and organized work area:
Selecting an appropriate location for your chiseling work is the first and most critical step. Consider the following factors when choosing the right place:
Once you’ve chosen the right location, it’s time to prepare your work area. Lay down a protective covering, such as a plastic sheet or a heavy-duty drop cloth, over your worktable. This serves multiple purposes:
Effective organization of your tools ensures efficiency and safety. Here’s how to do it:
Before you begin chiseling, prioritize safety:
Place your sandstone blocks on the worktable in a secure and stable manner. Ensure that they won’t wobble or shift as you chisel, as this could lead to imprecise work and potential accidents.
Throughout your chiseling work, periodically use your soft-bristle brush to remove stone chips and dust from both the sandstone surface and your worktable. Keeping the area clean allows you to see your progress clearly and make adjustments as needed.

When it comes to chiseling sandstone, choosing the right type of sandstone is a pivotal step. Here’s what you need to consider:
Sandstone comes in an array of colors, including warm yellows, rich reds, cool grays, and even blends of these hues. Your choice should harmonize with your project’s overall aesthetic. For example, warm-toned sandstone can create a cozy and inviting atmosphere, while cooler shades can evoke a sense of calm and sophistication.
Sandstone’s texture varies from fine to coarse grain, and this impacts the appearance of your chiseled design. Fine-grained sandstone allows for intricate details, while coarse grain may give a rugged, natural look. Consider the texture that complements your intended design.
The durability of sandstone can differ based on its type and source. If your chiseled creation will be exposed to the elements, it’s crucial to choose a type that can withstand weather conditions without eroding or deteriorating. High-quality, weather-resistant sandstone is essential for outdoor projects.
Sandstone is found in various locations worldwide, and each source can have unique characteristics. Think about the geographical source of the sandstone and whether it offers distinct qualities that align with your project. Some types may be renowned for their color, texture, or durability.
Remember, the right choice of sandstone is the foundation for a successful chiseling project, as it sets the stage for your design and the durability of the finished piece.
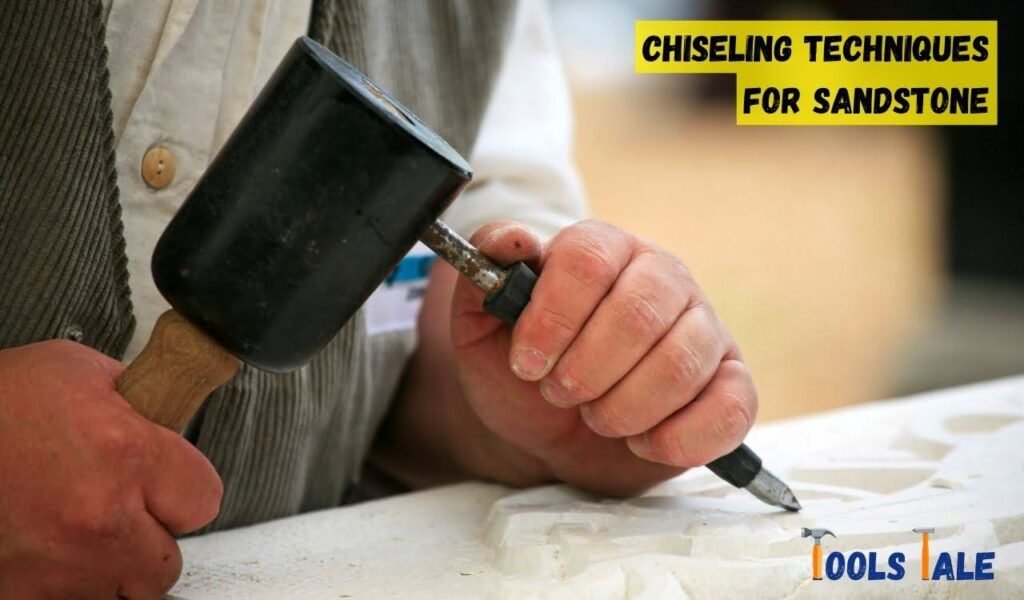
Chiseling techniques for sandstone are a combination of artistry and skill. Whether you’re a beginner or a seasoned artisan, mastering these techniques is essential to create intricate and captivating designs. Let’s explore a step-by-step guide to chiseling sandstone:
Safety should always be your top priority. Before you begin, ensure you have the necessary safety gear:
Choosing the right chisel is the foundation of your project. Select the chisel that aligns with your design goals:
The way you strike the chisel greatly influences the outcome. Here’s how to strike with precision:
For precise and straight chiseling, use a straight edge, such as a ruler or a metal guide. This maintains precision and consistency in your work by guiding the chisels along straight lines.
Chiseling techniques require patience and practice to master. Start with simpler designs and gradually progress to more intricate patterns as you gain confidence and skill. Practice on spare pieces of sandstone before tackling your main project.
Cleanliness is vital throughout the chiseling process. Use a soft-bristle brush to remove stone chips, dust, and debris from both the sandstone surface and your worktable. A clean workspace allows you to monitor your progress and make necessary adjustments.
Congratulations on creating your chiseled sandstone masterpiece! Now, it’s time to shift your focus from creation to preservation. Maintaining the beauty and longevity of your chiseled sandstone requires attention and care. In this guide, we’ll explore the steps and precautions you should take to ensure that your chiseled sandstone remains a testament to your craftsmanship for years to come.
Over time, dust and dirt can accumulate on the surface of your chiseled sandstone. Regular cleaning is essential to maintain its appearance. Follow these steps for effective cleaning:
Chiseled sandstone is often sealed to protect it from staining and the effects of weathering. However, the protective sealer can wear off over time. To ensure the longevity of your stone and maintain its resistance to environmental factors:
When cleaning or performing maintenance on your chiseled sandstone, it’s vital to avoid harsh chemicals and abrasive cleaning agents. These can harm the stone’s surface and its intricate patterns. Opt for mild detergents and natural cleaning solutions to protect your creation effectively.
Accidents can occur, leading to damage like chips or cracks in your chiseled sandstone. To prevent further deterioration and maintain the stone’s beauty, take the following steps:
In conclusion, “How to Make Chiseled Sandstone” is your comprehensive guide to unlocking the art and craft of transforming raw sandstone into beautiful creations. Whether you’re a novice or an experienced artisan, this guide equips you with the knowledge, techniques, and inspiration to embark on your chiseling journey.
From choosing the right tools to maintenance and care, you now possess the expertise to create stunning pieces of chiseled sandstone art. So, grab your tools, let your creativity flow, and start crafting – your chiseled sandstone masterpieces await!
Chiseling sandstone is a meticulous process involving the use of specialized tools like chisels and mallets to carve or shape the stone. It requires skill, patience, and safety precautions.
Sandstone is relatively soft and can be cut with the right tools and techniques. However, it still requires skill and care to achieve precise results without damaging the stone.
Yes, sandstone is a suitable material for carving. It’s commonly used in sculpture and architectural ornamentation due to its workability and the ability to create intricate designs.
Chiseled sandstone refers to sandstone that has been carefully carved or shaped with specialized tools to create patterns, textures, or intricate designs, often used in construction and art.
Essential tools for chiseling sandstone include chisels, mallets, safety gear, workbench, and, in some cases, power tools like pneumatic hammers for more efficient results.
Yes, you can chisel sandstone by hand. It requires manual chiseling using various chisel sizes and techniques, making it a precise but rewarding craft.