Physical Address
304 North Cardinal St.
Dorchester Center, MA 02124
Physical Address
304 North Cardinal St.
Dorchester Center, MA 02124

Looking to master resin art? You’re in the right place! “How to sand resin” is your gateway to creating stunning resin artwork. Whether you’re a seasoned artist or just starting, resin sanding is the secret sauce for that flawless finish. In this quick guide, we’ll spill the beans on the tips, tricks, and techniques you need to know. Get ready to turn your rough resin creations into polished masterpieces. Let’s dive in!
Key Summary: How to Sand Resin?
When sanding resin, start with safety gear like goggles and a mask. Begin with coarse sandpaper to shape your project, then progress to finer grits for a smoother finish. Use a gentle, circular motion to prevent overheating. Finish with a polishing compound for a glossy, flawless surface.
[amazon_auto_links id=”11426″]
Before we dive into the nitty-gritty of resin sanding, let’s lay a solid foundation. Understanding the basics is essential to mastering any art form, and resin art is no exception.
Resin art is all about creativity, and a smooth, polished finish can make your masterpiece truly shine. But to achieve that flawless look, you need to start with the right groundwork.
Proper resin sanding is a critical aspect of resin art that can significantly enhance the quality of your creations. Firstly, it plays a pivotal role in transforming your artwork from good to extraordinary. Achieving a polished finish elevates your masterpiece’s visual appeal, allowing it to shine and captivate viewers.
Additionally, resin art often involves intricate techniques like layering, pouring, and embedding various elements, which can introduce imperfections and unevenness to the surface. Sanding becomes the means to refine the surface, ensuring it’s flawlessly smooth and ready for presentation.
Think of resin sanding as a transformative process, akin to sculpting or polishing a rough gemstone to reveal its true beauty. Each stroke of sandpaper gradually removes imperfections, leaving behind a surface that reflects light and color with brilliance.
Precision and attention to detail are paramount in resin sanding. It’s not merely a technicality; it’s an art form in itself. As you sand, you have the opportunity to perfect every square inch of your artwork, ensuring it aligns precisely with your artistic vision.
Finally, embracing resin sanding as an integral part of your artistic journey is a step toward mastery in resin artistry. It’s an art form that, when perfected, allows you to fully realize your creative potential and bring your visions to life in captivating resin creations.
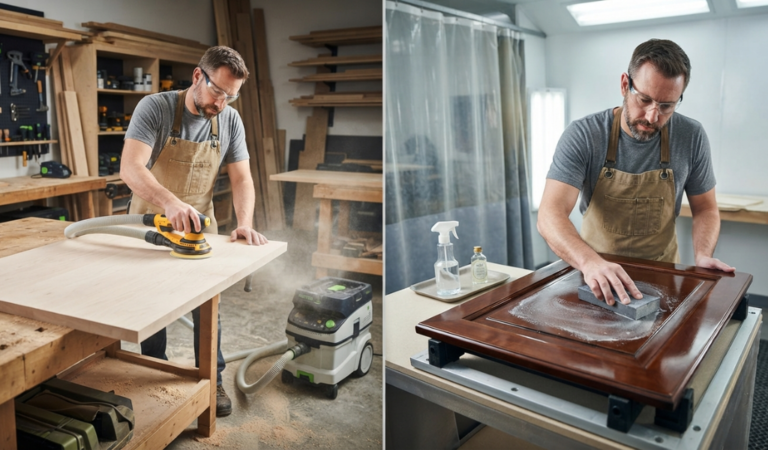
Now that you understand the importance of resin sanding, it’s time to gear up with the essential tools and materials that will set you on the path to success.
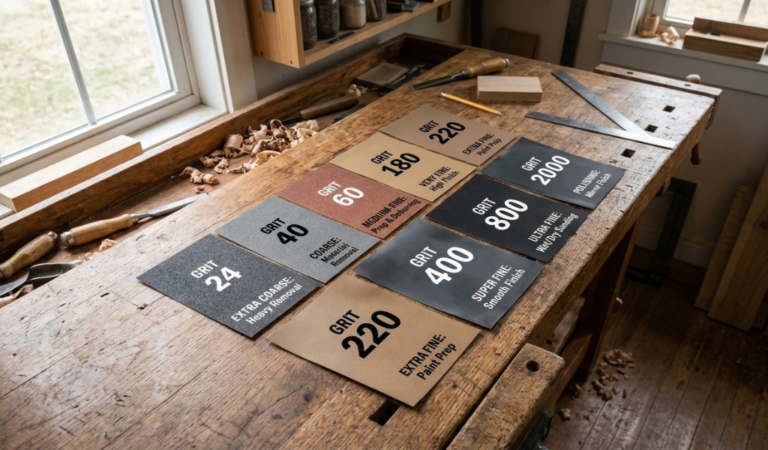
Sandpaper is the core tool for resin sanding. It comes in various grits, ranging from coarse to fine. The choice of grit depends on the condition of your resin surface and the level of smoothing required. Coarse grits (e.g., 80-120) are used for initial sanding to remove significant imperfections, while finer grits (e.g., 320-600) are employed for finishing to achieve a polished look.
Sanding blocks provide stability and even pressure while sanding. They come in various shapes and sizes, allowing you to work comfortably on both flat and curved resin surfaces.
Safety should always be a priority when working with resin. The following safety gear is crucial to protect yourself during the sanding process:
Ensuring proper ventilation in your workspace is essential. Sanding resin can release resin dust and fumes, which can be harmful when inhaled. Work in a well-ventilated area, such as near an open window or with an exhaust fan, to disperse fumes and maintain air quality. In cases where adequate ventilation is challenging to achieve, using a respirator with chemical cartridges is crucial to protect your lungs.
Keeping your workspace clean is essential for a smooth resin sanding experience. Microfiber cloths and a solvent suitable for removing resin residue are essential. Regularly clean the resin surface to remove dust and debris during the sanding process.

Safety is paramount when it comes to resin sanding. Working with resin can expose you to potentially harmful elements, including resin dust and fumes. To ensure a smooth and safe resin sanding experience, here are some crucial precautions:
Sanding resin is an art that demands precision and attention to detail. Whether you’re a beginner or an experienced artist, mastering the steps of resin sanding is essential to achieving a flawless finish. Let’s explore each step in detail:
Before you begin the sanding process, it’s crucial to prepare your workspace and the resin surface you intend to sand. Here’s how to do it:
Understanding the different grits of sandpaper is essential for achieving the desired finish. Here’s what you need to know:
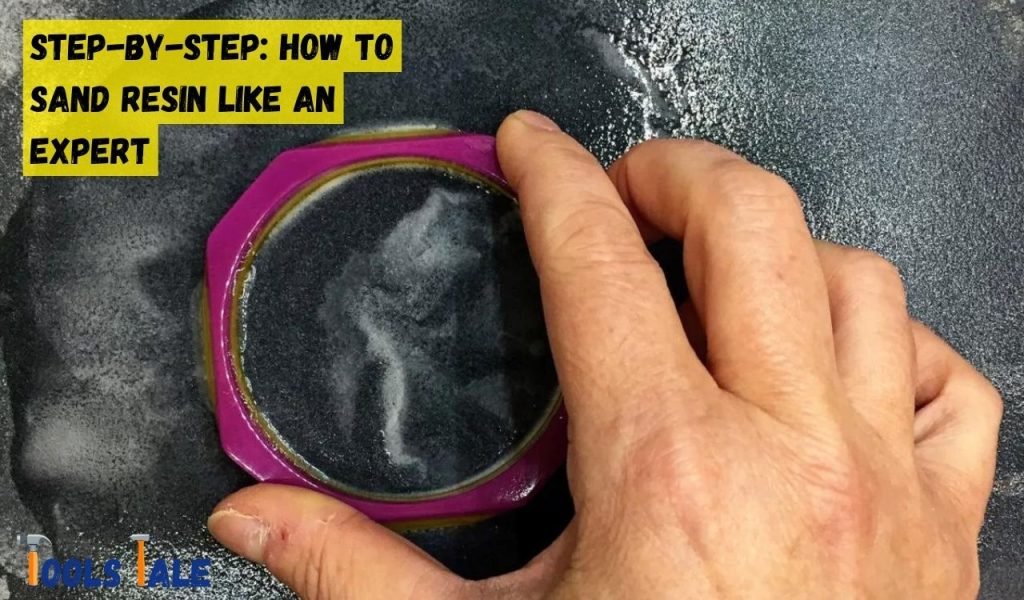
Now, let’s explore the techniques that will help you sand resin like a seasoned pro:
Achieving a perfect finish requires a gradual transition to finer grits:
Your journey to a flawless resin finish culminates in this step:
Whether you’re creating resin art as a hobby or a profession, mastering these techniques will help you unlock the full potential of your creative projects.
Mastering how to sand resin is the gateway to creating stunning and flawless resin artworks. With the right techniques, tools, and a touch of creativity, you can transform rough surfaces into polished masterpieces.
Whether you’re a beginner or an experienced artist, the journey to perfection in resin art begins with proper resin sanding. So, roll up your sleeves, embrace the artistry of sanding, and watch your resin creations shine.
Resin sanding is a crucial technique in art projects involving resin. It involves smoothing and refining the resin surface using abrasives. It’s necessary to eliminate imperfections, achieve a polished finish, and enhance the overall quality of resin artworks.
Yes, sanding resin is necessary for achieving a professional and flawless finish in resin art. It helps remove imperfections, unevenness, and roughness on the resin surface, ensuring that the artwork is visually appealing and reflective.
To get started with resin sanding, you’ll need several tools and materials, including specialized sandpaper with various grits, protective gear (such as gloves and a mask), a well-ventilated workspace, clean water for wet sanding, and cleaning materials for removing dust and debris.
Yes, you can sand resin by hand. Hand sanding allows for greater control over the process, especially for small or intricate resin pieces. It’s essential to use the appropriate grits of sandpaper and maintain consistent pressure to achieve a smooth finish.
Choosing the right sandpaper for resin is crucial. Wet/dry sandpaper with various grits, typically ranging from 400 to 3000, works well. Coarse grits (400-800) for initial leveling, and finer grits (1000-3000) for smoothing and polishing.
Yes, you can polish resin using oil. Many artisans use mineral oil or a resin-specific polishing compound to achieve a glossy finish. Applying oil and buffing gently can enhance the shine and clarity of the resin surface.
Sanding resin can produce fine dust particles that may be harmful if inhaled. It’s essential to wear appropriate protective gear, such as a mask, gloves, and eye protection, and work in a well-ventilated area to minimize health risks. Safety precautions are vital when sanding resin.