Physical Address
304 North Cardinal St.
Dorchester Center, MA 02124
Physical Address
304 North Cardinal St.
Dorchester Center, MA 02124

Unlocking the potential of electrical measurements begins with mastering a single tool: the clamp meter. In this guide, “How to use a clamp meter,” we unravel the secrets behind this versatile device. From deciphering currents without breaking circuits to diagnosing faults with finesse, we’re about to dive into a world where wires reveal their tales.
Whether you’re a curious DIYer or an aspiring electrician, this guide is your passport to accurate measurements and troubleshooting wizardry. So, let’s embark on a journey where currents come to life and circuits unfold their mysteries. Get ready to wield the clamp meter with confidence and unveil the hidden currents that power our world.
Key Summary: How to Use Clamp Meter?
Learn to use a clamp meter effectively: 1) Select AC/DC mode. 2) Open clamp and place around wire. 3) Read display for current measurement. 4) Ensure proper range setting. 5) Note polarity for DC. 6) Get accurate readings for electrical tasks.
[amazon_auto_links id=”11426″]
A clamp meter, often referred to as a current clamp or amp meter, operates on the principle of electromagnetic induction. Its ingeniously designed jaws can encircle a live wire without the need for direct contact, transforming the surrounding magnetic field into a readable measurement.
This ingenious concept not only simplifies the measurement process but also enhances safety by eliminating the need to break the circuit or make physical contact with the wires. At its core, a clamp meter consists of several vital components that work in harmony to provide accurate measurements without disruption.
The display screen acts as the window to the electrical world, presenting readings, modes, and settings in a clear and comprehensible manner. The function selector, akin to a conductor’s baton, enables you to choose the specific type of measurement you wish to make—whether it’s AC or DC current, voltage, resistance, or even frequency.
The trigger, located strategically near the jaws, serves as the gateway to initiate the clamp’s operation. As you squeeze the trigger, the jaws of the clamp meter open wide, eagerly awaiting to encircle the wire under examination. These jaws, the essence of the clamp meter’s uniqueness, are equipped with magnetic sensors that detect and capture the magnetic field generated by the current.
This captured magnetic field is then transformed into a numerical reading displayed on the screen, offering you insights into the current’s magnitude. Additionally, the input terminals play a crucial role in establishing the connection between the clamp meter and the circuit. These terminals welcome the insertion of test leads or probes, facilitating the seamless flow of data and electrical interaction.
To wield a tool effectively, one must first grasp its fundamental components and inner workings. A clamp meter, with its ingenious design, is no exception. Let’s delve into the intricate details of its components, unraveling the symphony of elements that come together to make this device a powerful ally in the world of electrical measurements.
Imagine the display screen as a portal to the electrical realm. This informative window presents more than just readings—it unveils insights. Through the screen, you’re offered a glimpse into the current’s magnitude, the measurement mode, and various settings. It’s a snapshot of the electrical activity under scrutiny, transforming complex data into easily comprehensible information.
Think of the function selector as the conductor’s baton in an orchestra. This multifunctional dial empowers you to orchestrate the type of measurement you’re about to perform. Whether it’s the evaluation of AC or DC current, voltage, resistance, or frequency, the function selector ensures that the clamp meter is poised to capture the specific aspect of the electrical dance you’re focusing on.
The trigger is your gateway to engagement. As you squeeze the trigger, you’re activating the clamp meter’s operation. It’s the moment of initiation, the point at which the jaws are prepared to embrace the wire. Just as a camera shutter captures a moment in time, the trigger sets the stage for the capture of electrical information.
At the heart of the clamp meter lies its defining feature—the jaws. These jaws resemble the mouth of an eager crocodile, ready to snap shut and make a connection. Yet, instead of teeth, these jaws are equipped with magnetic sensors.
Their purpose? To encircle the wire and capture the magnetic field generated by the flowing current. This ingenious interaction allows the clamp meter to “see” the invisible force that powers our world.
Think of the input terminals as connectors that facilitate a dialogue. These entry points welcome the insertion of test leads or probes, creating a seamless bridge between the clamp meter and the circuit under investigation. They serve as the conduits through which data flows, allowing you to communicate with the electrical domain.
Just as a painter readies their canvas and selects their palette before creating a masterpiece, preparing for measurements with a clamp meter is essential for accurate and meaningful results. This crucial step ensures that you’re equipped with the right knowledge and tools to embark on your electrical exploration. Let’s delve into the nuances of preparing for measurement with a clamp meter.
Before engaging in any measurement, prioritize safety above all else. Don your safety goggles and protective gloves as a shield against potential hazards. Always assume that the circuit is live unless confirmed otherwise. Double-check that the circuit you’re about to interact with is de-energized. A brief lapse in safety precautions can lead to severe consequences, making safety the cornerstone of your measurement process.
Every measurement has its purpose, and the function selector on the clamp meter is your compass in this journey. Choose the appropriate measurement mode that aligns with your task. Are you measuring alternating current (AC) or direct current (DC)? Voltage, resistance, or frequency? Ensure that the function selector is set to the specific mode that corresponds to your intended measurement.
Positioning is a critical aspect of accurate measurements. Imagine you’re aiming for a bullseye. Before clamping, make sure the jaws of the clamp meter are fully open and ready to embrace the wire. To achieve a stable grip, ensure that the wire rests at the center of the jaws. Proper positioning ensures that your measurements are as precise as an archer’s arrow hitting its target.
Acknowledge the environmental factors that can influence your measurements. Is the area well-lit, or do you need additional lighting to ensure accurate readings? Is the circuit in a cluttered space, potentially causing interference? Assess the surroundings and make adjustments as necessary to create an environment conducive to accurate measurements.
The test leads or probes you choose can impact the quality of your measurements. Ensure that your test leads are in good condition, with no frayed wires or damaged connectors. Connect the test leads securely to the input terminals of the clamp meter, creating a reliable link between the device and the circuit.
Just as a musical instrument requires tuning before a performance, your clamp meter benefits from occasional calibration. Regular calibration ensures that your measurements remain accurate over time. Follow the manufacturer’s guidelines for calibration intervals and procedures to maintain the integrity of your measurements.

Embarking on a journey of electrical measurements with a clamp meter is a thrilling endeavor, akin to a captivating adventure through uncharted territories. To ensure your expedition is as successful as it is educational, we present a comprehensive step-by-step guide. Follow these detailed instructions to confidently wield your clamp meter and unravel the mysteries of electrical currents.
Prepare for your measurement expedition by assembling your toolkit. Alongside your trusty clamp meter, make sure you have your test leads or probes at the ready. Each tool is a key player in your measurement symphony, contributing to the accuracy and precision of your readings.
Just as an explorer assesses their surroundings before embarking on a journey, perform a safety check to ensure a secure environment. Wear your safety goggles and gloves, safeguarding yourself from potential hazards. Double-check that the circuit you’re about to measure is indeed de-energized. Safety forms the foundation of every successful measurement endeavor.
Your clamp meter is a versatile companion, capable of performing various measurements. Select the function that aligns with your task. Are you delving into alternating current (AC) or direct current (DC)? Do you seek voltage, resistance, or perhaps frequency? Turn the function selector dial to the appropriate mode, setting the stage for accurate exploration.
Channel your inner gatekeeper as you gently pry open the jaws of the clamp meter. Just as a host extends an invitation, the open jaws beckon the wire into their magnetic embrace. Ensure the jaws are fully open and ready for interaction before proceeding.
Precision is key in accurate measurements. Position the open jaws around the wire, aiming for the bullseye—an alignment where the wire sits at the center of the jaws. This optimal placement ensures that the magnetic field generated by the current is captured effectively.
With the wire securely nestled within the jaws, initiate the interaction by gently closing them. Picture the jaws as a storyteller’s embrace, capturing the magnetic dance of electrons flowing through the wire. As the jaws close, the magnetic field is transformed into a readable measurement displayed on the screen.
Observe the digital narrative presented on the display screen. The numerical reading reflects the magnitude of the current, offering insights into the electrical activity within the wire. Record this measurement, akin to capturing a moment in time, ensuring you retain a snapshot of the electrical dance you’ve just witnessed.
Every measurement tells a story, and it’s your role to interpret it. Compare the reading to your expectations and project requirements. Is the current within the anticipated range? Does it align with the circuit’s demands? Your expertise transforms numerical values into actionable insights.
As a musician concludes a performance with a graceful bow, release the jaws from their magnetic embrace. Take a moment to reflect on the information you’ve gathered. Consider the implications of your measurement and how it contributes to your broader understanding of the electrical landscape.
Exploration often involves repetition. If your task demands multiple measurements, repeat the process as needed. Each repetition enhances your confidence and reinforces the accuracy of your readings.
The world of electrical measurements is a diverse landscape, and within it, clamp meters carve out a significant niche. These remarkable tools find application across a spectrum of industries and scenarios, each highlighting their versatility and indispensability.
In the comfort of our homes, clamp meters offer insights into energy consumption and circuit health. From measuring current drawn by appliances to detecting faulty wiring or overloaded circuits, clamp meters empower homeowners and electricians alike to ensure safe and efficient electrical systems.
In industrial settings, where efficiency and safety are paramount, clamp meters play a pivotal role. Engineers and maintenance personnel rely on them to monitor motor currents, troubleshoot electrical faults, and assess the performance of machinery. This real-time data aids in preventing downtime and optimizing operations.
Heating, ventilation, and air conditioning (HVAC) systems form the lifeline of comfort in various environments. Clamp meters step in as diagnostic companions, helping technicians assess motor currents, monitor compressor efficiency, and troubleshoot temperature control circuits, contributing to optimal HVAC performance.
Automotive mechanics delve into the realm of clamp meters to diagnose electrical issues in vehicles. By measuring current draw in various components, from starters to alternators, clamp meters provide insights into system health, aiding in timely repairs and ensuring reliable vehicle operation.
As sustainability gains prominence, clamp meters find a role in energy auditing. Professionals use them to measure current consumption in commercial and industrial settings, identifying areas of inefficiency and proposing solutions for optimized energy usage.
The rise of renewable energy sources brings new challenges and opportunities. Clamp meters assist in assessing solar panel output, wind turbine performance, and battery charging currents, enabling efficient harnessing of renewable energy.
From consumer electronics to complex circuit boards, clamp meters aid in pinpointing current irregularities. Technicians can identify faulty components, locate short circuits, and ensure proper functioning of intricate electronic systems.
In research and development environments, clamp meters contribute to experimentation and innovation. Engineers use them to study current fluctuations, measure power consumption, and analyze circuit behavior to refine designs and optimize performance.
Clamp meters serve as invaluable teaching tools, enabling educators to demonstrate electrical concepts and measurements in classrooms and labs. Students gain practical understanding by observing clamp meters in action during experiments and demonstrations.
In data centers, where precision and reliability are paramount, clamp meters help monitor electrical loads, assess power distribution, and ensure efficient cooling system operation, contributing to seamless data center management.
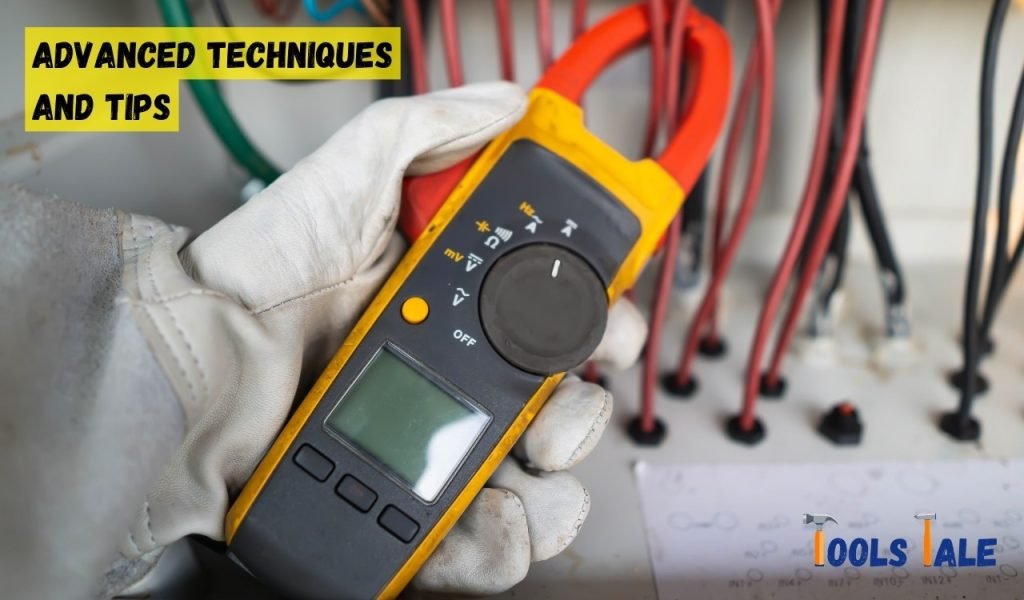
As you journey deeper into the realm of clamp meter usage, the path unveils a treasure trove of advanced techniques and insightful tips. These nuances transform your measurements from mere readings into comprehensive insights, enhancing your diagnostic capabilities and refining your approach.
Delve beyond mere current magnitude by analyzing the waveform itself. A clamp meter with waveform capabilities allows you to scrutinize the shape and characteristics of the current, identifying distortions, harmonics, and irregularities that might otherwise go unnoticed.
Capturing inrush current—the surge of current that occurs when a device is powered on—can provide insights into the health of electrical equipment. Utilize the peak hold function of your clamp meter to accurately measure and analyze inrush currents, aiding in equipment selection and protection.
Explore the realm of phase angles and power factors to gain a deeper understanding of AC circuits. Clamp meters equipped with phase angle and power factor capabilities allow you to assess the relationship between voltage and current, enabling efficient power utilization and load balancing.
In scenarios where balance is critical, differential current analysis becomes invaluable. By comparing currents in different phases of a three-phase system, you can identify imbalances and troubleshoot issues that might impact the performance of motors and machinery.
Some clamp meters offer the convenience of remote display connectivity. This feature allows you to view measurements on a separate device, offering flexibility in challenging or hazardous environments where direct access to the clamp meter might be restricted.
Extreme temperatures can influence measurement accuracy. Advanced clamp meters incorporate temperature compensation features to ensure reliable readings even in varying thermal conditions, making them ideal companions in diverse environments.
Embrace the digital age with clamp meters that offer Bluetooth connectivity. Wirelessly transfer measurements to your smartphone or tablet, enabling real-time data analysis, remote monitoring, and seamless documentation for future reference.
For transient events, such as motor starting currents or short-lived power surges, peak current capture is a game-changer. Some clamp meters can capture and display the highest instantaneous current value, aiding in diagnosing intermittent issues.
Transform your clamp meter into a data logger by opting for models with data storage capabilities. Record and analyze measurements over time to identify trends, anomalies, and patterns that might provide insights into long-term performance.
Maximize versatility by choosing a clamp meter with integrated multimeter functions. Seamlessly switch between current, voltage, resistance, and other measurements, consolidating your toolkit and simplifying complex tasks.
In an age of sophisticated electrical systems, harmonics analysis becomes indispensable. Advanced clamp meters can detect and analyze harmonics, allowing you to pinpoint distortions that might affect equipment efficiency and reliability.
Customize your clamp meter’s settings to align with your specific needs. Adjust display units, measurement ranges, and alert thresholds to create a personalized measurement experience tailored to your preferences.
Just as a craftsman cares for their tools, ensuring the longevity and accuracy of your clamp meter requires thoughtful maintenance and proper storage practices. These considerations not only preserve the integrity of your measurements but also contribute to a seamless and reliable experience throughout your clamp meter’s lifecycle.
Treat calibration as a ritual, performed at scheduled intervals. Regular calibration aligns your clamp meter’s readings with established standards, guaranteeing accurate measurements. Consult the manufacturer’s guidelines for recommended calibration frequency and seek professional calibration services when needed.
The jaws and input terminals of your clamp meter are the conduits through which electrical insights flow. Keep them clean and unobstructed, free from dust, debris, or corrosion. Periodically inspect and gently clean these components to maintain optimal conductivity and accuracy.
Temperature fluctuations can affect measurement accuracy. Be mindful of operating your clamp meter within the recommended temperature range. Extreme heat or cold can introduce errors, so avoid subjecting your instrument to conditions that might compromise its performance.
When not in use, house your clamp meter in its protective cocoon—a durable carrying case. This shield safeguards it from physical damage, exposure to elements, and potential contaminants that could impact its reliability.
If your clamp meter relies on batteries, provide them with tender loving care. Replace batteries promptly to avoid unexpected shutdowns during critical measurements. Remove batteries if your clamp meter will be idle for an extended period to prevent leakage and potential damage.
Treat your clamp meter with the same care you’d extend to delicate instruments. Avoid dropping it or subjecting it to undue stress. Gentle handling preserves internal components, ensuring consistent performance over time.
Stay attuned to your clamp meter’s digital well-being by checking for firmware updates provided by the manufacturer. These updates might introduce enhancements, features, or bug fixes that contribute to an optimized user experience.
If your clamp meter boasts a display screen, consider using protective screens or covers to shield it from scratches, impacts, and environmental elements. A well-protected screen ensures clear visibility and extends the lifespan of your instrument.
When not clamped around a conductor, coil the test leads or probes neatly. Improper coiling can cause kinks, twists, or stress points, potentially compromising their integrity and accuracy.
Select a storage environment that’s conducive to your clamp meter’s well-being. Avoid exposing it to excessive humidity, direct sunlight, or areas prone to temperature extremes. Opt for a clean, dry, and controlled space that promotes longevity.
Incorporate periodic inspection routines into your maintenance regimen. Regularly assess the physical condition of your clamp meter, looking for signs of wear, loose components, or damage. Address any issues promptly to prevent further deterioration.
Maintain a record of calibration dates, maintenance activities, and any noteworthy observations. This documentation provides a historical perspective of your clamp meter’s journey and aids in tracking its performance over time.
As you embark on your clamp meter journey, awareness of common pitfalls is your compass to ensure accurate measurements and a seamless experience. Steer clear of these potential traps to navigate the intricate currents of electrical measurements with confidence and precision.
Selecting the wrong measurement mode can lead to misleading readings. Ensure your function selector is set to the appropriate mode for your task—whether measuring AC or DC, voltage, current, or resistance—to obtain accurate results.
Accurate measurements hinge on proper jaw positioning. Failing to position the clamp around the wire correctly can result in skewed readings. Take care to center the wire within the jaws to capture the magnetic field accurately.
Neglecting regular calibration can introduce measurement errors over time. Follow the manufacturer’s recommended calibration schedule to ensure your clamp meter’s accuracy remains aligned with established standards.
Safety should always be paramount. Skipping safety gear or assuming a circuit is de-energized without verification can lead to hazardous situations. Prioritize safety protocols, donning protective equipment and confirming de-energization before measurement.
Misinterpreting or misconfiguring display units can result in incorrect readings. Ensure you understand the units displayed on your clamp meter’s screen and verify that they align with your measurement goals.
Before clamping around a conductor, zero your clamp meter to eliminate any residual magnetic field effects from previous measurements. This step ensures accurate baseline readings.
Clamp meters have a specified orientation for accurate readings. Clamping in the wrong direction or on a section of the wire that includes multiple conductors can lead to inaccurate results.
Secure test lead connection is paramount for reliable measurements. Ensure test leads are properly connected to both the clamp meter and the circuit under examination to maintain a solid electrical link.
Haste can compromise accuracy. Take your time during measurements, ensuring that the clamp is securely positioned, the display stabilizes, and the reading is captured before moving on to the next step.
Environmental conditions can influence measurements. Be aware of factors like electromagnetic interference, extreme temperatures, or poor lighting, which can impact measurement accuracy.
Misinterpreting measurements without considering the context can lead to incorrect conclusions. Take into account the circuit’s specifications, load characteristics, and expected values when assessing readings.
Damaged or worn test leads can compromise accuracy. Regularly inspect test leads for signs of wear, fraying, or damaged connectors, and replace them if needed.
Clamp meters are sensitive to inductive loads. When measuring current in circuits with inductive loads (e.g., motors), be aware of potential measurement discrepancies caused by magnetic fields.
In conclusion, mastering the use of a clamp meter is essential for accurate electrical measurements and ensuring safety. By following proper techniques such as selecting the appropriate range, properly clamping around the conductor, and interpreting the displayed values, users can confidently and efficiently measure current without disrupting the circuit.
Regular practice and adherence to manufacturer guidelines will empower individuals to harness the full potential of clamp meters while maintaining a secure and effective electrical work environment.
Using a clamp meter involves carefully placing its jaws around a conductor to measure current without breaking the circuit. Select the appropriate measurement mode and follow safety protocols for accurate readings.
A clamp meter is a versatile tool used to measure current in electrical circuits without physical contact. It finds application in troubleshooting, diagnosing faults, and assessing electrical system performance.
Yes, a clamp meter can measure both alternating current (AC) and direct current (DC) in electrical circuits. Ensure the meter is set to the correct mode for accurate readings.
Regular calibration is crucial for accurate measurements. Follow the manufacturer’s guidelines for calibration frequency, typically annually or as recommended by the manufacturer.
Indeed, a clamp meter is valuable for automotive diagnostics. It can measure current draw in various components, aiding in diagnosing electrical issues in vehicles.
Store your clamp meter in a protective case in a dry, controlled environment. Regularly clean the jaws and test leads, and adhere to calibration schedules for optimal performance.
While not always necessary, familiarizing yourself with the user manual and safety guidelines is essential. Proper training ensures accurate measurements and safe operation.
Absolutely, a clamp meter is useful for DIY enthusiasts. It aids in tasks like measuring current consumption in appliances, troubleshooting circuits, and ensuring electrical safety.
Prioritize safety by wearing appropriate gear, verifying de-energization, and following safety protocols. Avoid clamping on live conductors and ensure a solid connection with test leads.
Yes, you can use a clamp meter on live circuits, but caution is crucial. Follow safety measures, wear protective gear, and adhere to proper procedures to prevent accidents during measurements.