Physical Address
304 North Cardinal St.
Dorchester Center, MA 02124
Physical Address
304 North Cardinal St.
Dorchester Center, MA 02124
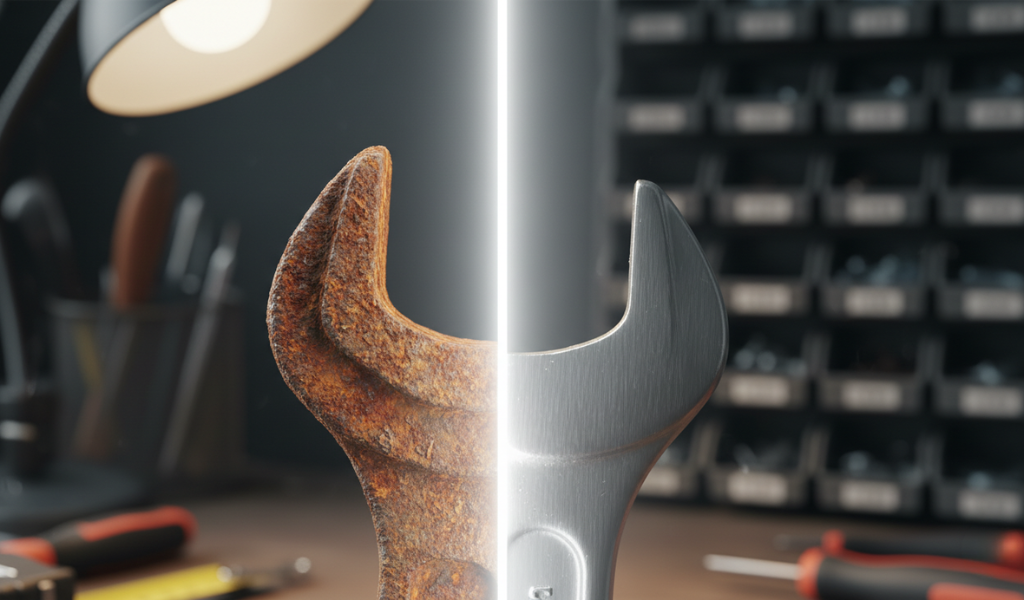
Metal surfaces often develop rust, scratches, oxidation, or uneven textures over time. Proper sanding helps remove imperfections, prepare metal for painting, and create a smoother finish. Different sanding methods and tools work better depending on the type of metal and the condition of the surface.
This guide explains how to sand metal step by step, including the best sandpaper for metal, power sanders, wet sanding techniques, rust removal, and surface preparation before painting.
Whether you are restoring old metal furniture, preparing automotive panels, smoothing welds, or refinishing decorative metal pieces, using the correct sanding process helps improve surface quality and coating durability.
To sand metal properly, start by cleaning the surface and removing grease, rust, or old paint. Use coarse-grit sandpaper like 80-grit for heavy removal work, then switch to medium and fine grits such as 150 and 220 for smoothing. Power sanders help speed up large projects, while hand sanding works better for corners and detail areas. After sanding, clean the surface thoroughly before applying primer or paint.
Before you pick up a tool, it helps to understand why this process is so vital across various industries and weekend DIY projects alike. Metal is durable, but its surface is highly reactive to environmental exposure and daily wear.
When mapping out your project, you have two primary routes: sanding by hand or using mechanical power sanders. Each has a distinct role to play.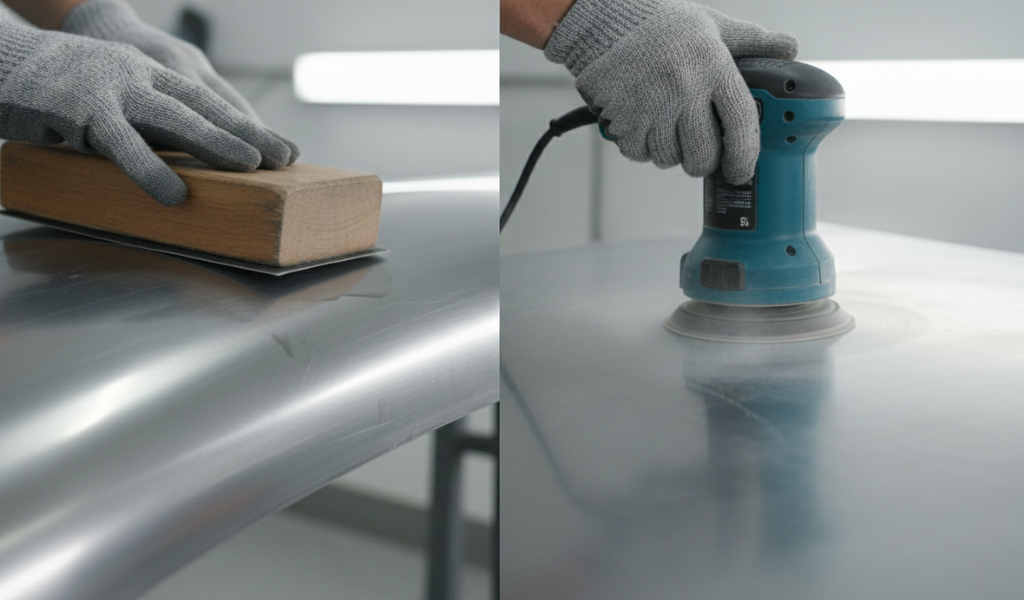
Sanding by hand gives you unmatched feedback. You can feel every tiny ridge, low spot, or leftover patch of rust through your fingertips. It is indispensable for delicate detail work, curved surfaces, or tight corners where a power tool might chew through too much material. Using a dedicated sanding block ensures that you apply even, flat pressure across the metal, preventing you from accidentally creating grooves or dips with your fingers.
If you are dealing with a large surface area—like an old iron gate, a metal door, or a car hood—hand sanding alone will leave you exhausted. Mechanical sanders bring speed, high efficiency, and consistent results to the table. They do the heavy lifting of stripping away tough old paint coatings and leveling out heavy rust pits in a fraction of the time. For a truly professional finish, a hybrid approach works best: use power tools for the initial bulk removal, and switch to hand sanding for the final micro-refinements.
You cannot use just any leftover piece of sandpaper from a woodworking project on metal. Wood sandpaper often wears down quickly on hard metal surfaces. For better durability and cutting performance, use sandpaper specifically designed for metal.
When searching for the ideal sandpaper for metal, look for sheets specifically rated as ‘wet or dry’ or made with durable grains like silicon carbide or premium zirconia alumina. These materials are engineered to fracture into sharp new edges as they wear down, keeping the paper cutting effectively rather than turning smooth.
Choosing your grit progress is critical. Because scratches in metal are significantly harder to remove than scratches in wood, you should never skip too many steps. If you jump straight from a coarse 60-grit paper to a fine 240-grit paper, the fine paper will merely polish the tops of the deep valleys left behind by the 60-grit, leaving your final finish looking hazy and scratched under the light.
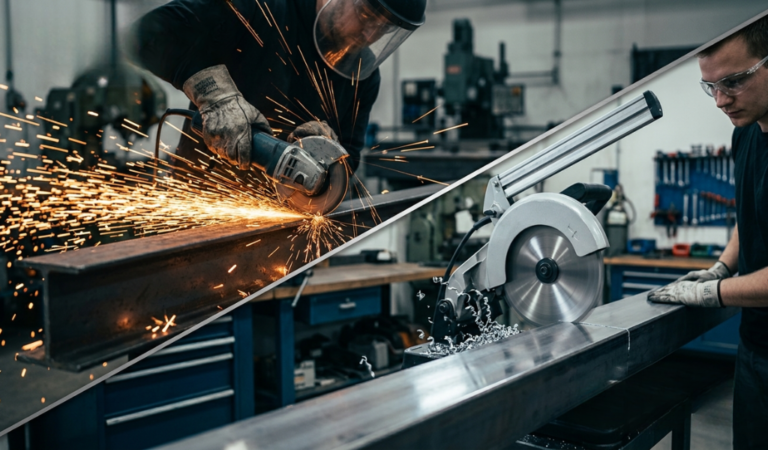
To execute the job flawlessly, matching the right mechanical tool to your specific task makes all the difference. Let’s look at the primary tools found in a well-equipped workshop.
The random orbital sander is the absolute workhorse of surface prep. By rotating and oscillating in an irregular pattern simultaneously, it minimizes the risk of leaving distinct, swirling scratch patterns behind on your metal. It is incredibly easy to control, fits comfortably in the palm of your hand, and can cover wide areas quickly, making it a stellar option for achieving an ultra-smooth finish right before priming.
Think of the belt sander as the heavy artillery of the hand-held tool world. Because it drives a continuous loop of abrasive paper at high speeds, it strips material aggressively. It is ideal for taking down massive weld crests, removing thick layers of flaking rust, or flattening out warped edges on heavy steel stock. Use it with a light touch, as it can gouge softer metals like aluminum if held in one spot for too long.
When you encounter intricate scrollwork on an iron bed frame, tight louvers, or narrow channels, a standard sander simply will not fit. This is where a finger or file sander shines. Equipped with a micro-thin motorized belt, this specialized tool sneaks into narrow spaces to clean up welds and remove rust from tight corners with ease.
A finishing sander moves in a predictable, high-speed back-and-forth pattern rather than an orbital one. It provides a lighter touch than an orbital sander, making it excellent for creating fine linear scratch patterns on specialty metals or scuffing up existing clear coats between paint applications.
Affectionately known by DIYers as the multi-tool, this device can be fitted with a triangular hook-and-loop pad. Its rapid micro-vibrations allow you to sand clean up to the very edge of interior 90-degree corners, making it a superb choice for detail work on metal furniture or decorative trim pieces.
When you want to know how to sand metal so that a fresh coat of paint looks like it rolled out of a commercial factory, you must approach the task in clear, distinct phases. Skipping any of these steps will almost guarantee that your paint will flake, peel, or blister later down the line.
Never start sanding a piece of dirty metal. If the metal has grease, engine oil, road tar, or sticky residue on it, the friction of your sander will heat up those contaminants and grind them deep into the microscopic pores of the metal.
Before touching any abrasive, wash the object thoroughly with a heavy-duty degreaser or mineral spirits. Wipe the surface completely dry with a clean, lint-free microfiber towel.
Once the metal is perfectly clean, it is time to tackle the rough stuff. Secure your piece firmly to your workbench using heavy clamps. If you are using an orbital sander, equip it with an 80-grit abrasive disc.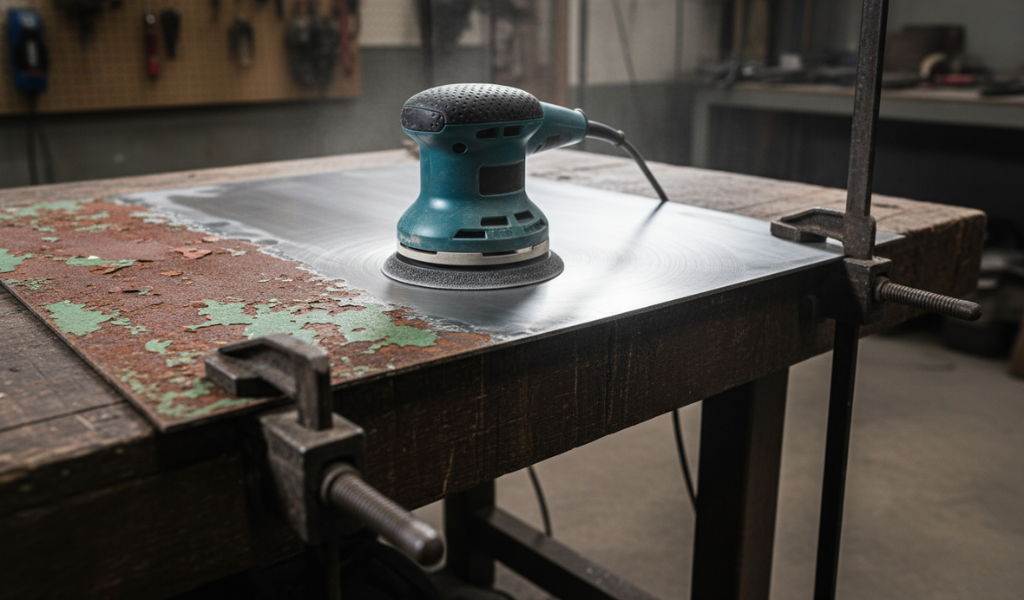
Move the tool across the surface in steady, deliberate, straight passes, overlapping each stroke by roughly 50 percent. Let the weight of the sander do the work; pressing down with all your body weight will only clog the paper and slow down the tool’s motor. Your goal in this phase is to break through old cracked paint, strip away patches of red rust, and bring the surface down to an even, uniform base.
Switch your abrasive to a medium 150-grit paper. This pass acts as a bridge, erasing the coarse, heavy scratches left by your 80-grit pass. As you work, you will see the metal shift from a rough, scored appearance to a satin, uniform texture. Periodically stop the tool and brush away the fine gray metal dust with a dry paint brush so you can inspect your progress.
For your final dry pass before paint prep, step up to a 220-grit or 320-grit paper. This creates an incredibly smooth surface that feels soft to the touch, while still leaving behind an incredibly fine microscopic profile (often referred to as mechanical ‘tooth’) for your self-etching primer to latch onto.
For stubborn projects where a standard sander takes too long, turning to industrial workshop machinery can save you hours of labor.
An angle grinder is traditionally known for cutting and heavy grinding, but when you swap out a rigid grinding wheel for a flexible flap disc, it transforms into an incredibly effective, high-speed sander. Flap discs consist of overlapping layers of coated abrasive cloth arranged radially like a fan.
A 40 or 60-grit flap disc on an angle grinder will effortlessly strip thick scale, flatten weld splatters, and shape rough iron edges. 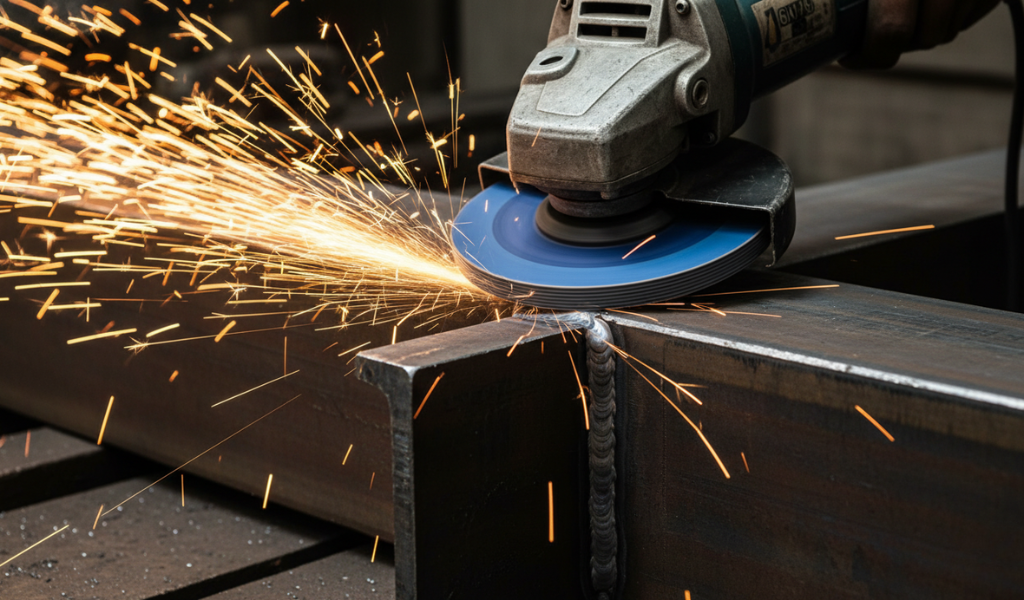 Keep the grinder moving dynamically at a shallow 15-to-20-degree angle relative to the workpiece to avoid creating flat spots on curved metal.
A bench grinder is a permanent fixture anchored firmly to a workshop table. Rather than bringing the tool to the metal, you bring the metal to the tool. This makes it an exceptional option for working on smaller, hand-held items like brackets, hinges, or old tools.
By equipping one side of your bench grinder with a structured abrasive wheel or a wire wheel, you can clean up small pieces rapidly. Always hold the metal firmly with both hands, use the machine’s tool rest for stability, and keep a bucket of cold water nearby to dip the metal into if it becomes too hot to comfortably hold.
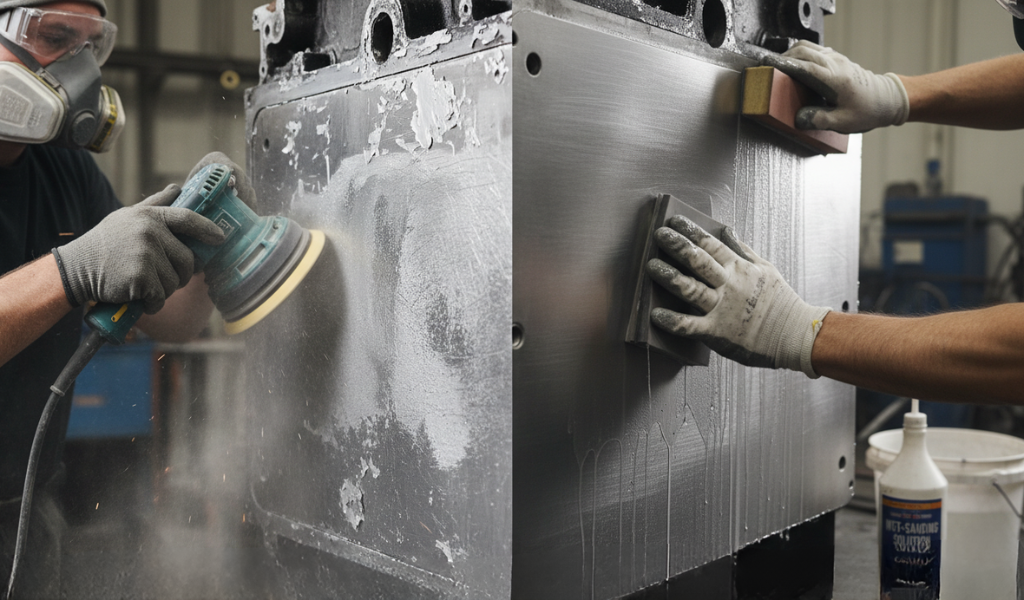
If your ultimate goal isn’t just applying basic paint, but achieving a flawless, mirror-like chrome or polished steel aesthetic, you must master the art of wet sanding.
Wet sanding uses water as a natural lubricant and flushing agent. When you dry sand metal with fine grits, the tiny particles of metal dust quickly get trapped in the grain of the paper. This buildup can create deep, unwanted rogue scratches. Water keeps the workspace clean by washing those microscopic particles away continually.
To wet sand, use high grits ranging from 600 up to 1500 or 2000. Use a soft sanding block to keep your pressure perfectly uniform. Work in straight lines, alternating the direction of your strokes by 90 degrees with every progressive grit change.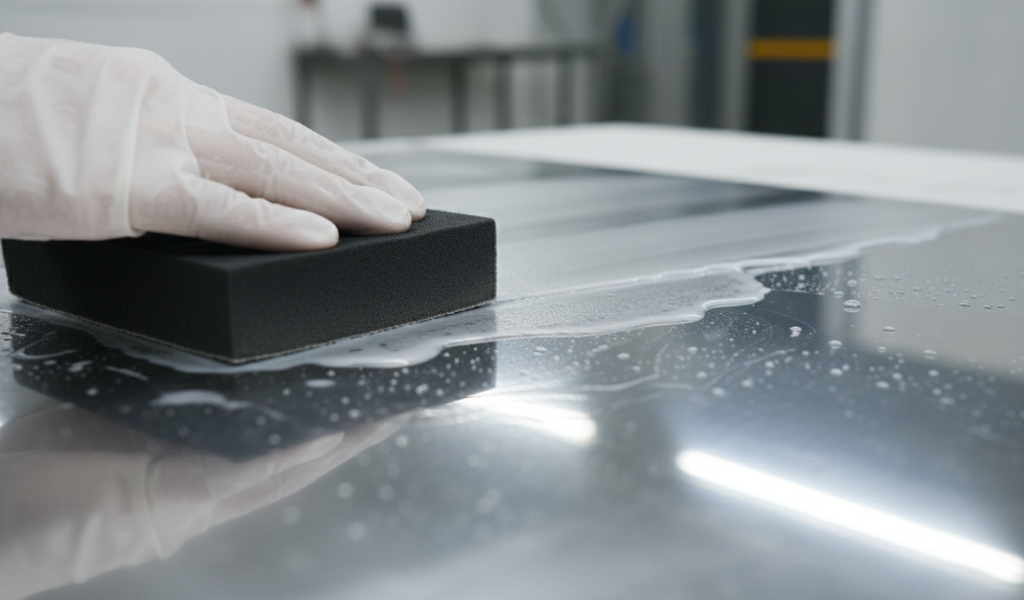
Once you finish with your finest wet paper, wipe the surface clean. You can then apply a premium polishing compound with a buffing wheel on your angle grinder or bench grinder to bring out a breathtaking, crystal-clear reflection.
The moment you finish your final pass, the clock starts ticking. Bare metal is highly vulnerable to moisture in the air. In humid environments, a freshly sanded steel piece can develop a microscopic layer of invisible rust—known as flash rusting—in less than an hour.
Blow off the residual dust: Use clean compressed air or a dry tack cloth to lift away any loose powder nestled in the pores of the metal.
Degrease a second time: Wipe down the entire surface using clean denatured alcohol or a dedicated wax and grease remover. This step ensures that any oils from your bare hands are completely neutralized.
Apply a rust converter (optional): If you were dealing with deeply pitted, old structural iron, applying a chemical rust converter will neutralize any microscopic trace amounts of iron oxide hidden deep inside the pits, converting it into a stable black protective barrier.
Prime immediately: Coat the bare metal with a high-quality self-etching primer or zinc-rich primer. This chemically bites into the sanded metal surface, providing a robust, rust-inhibiting seal that ensures your final colored topcoats will look spectacular and stay anchored for years.
Sanding metal creates unique hazards that you don’t typically encounter when working with softer materials like wood. Protecting your health should always be your top priority.
Mastering how to sand metal smoothly is a deeply satisfying skill that bridges the gap between rough DIY efforts and professional-grade fabrication. By taking the time to understand your materials, choosing the right sandpaper for metal, and operating your power sanders with steady patience, you can extend the lifespan of valuable items, reduce waste by recycling old components, and create beautiful workpieces.
Do not rush the process. Treat every grit stage with care, prioritize your workshop safety gear, and enjoy the transformation as you peel back the layers of time to reveal a brilliant, pristine finish.
Now that you have the knowledge, it is time to put it into action! Pick out a project item from your garage, gather your safety gear, select your abrasives, and start transforming your metal workpieces today.
You can use it in an absolute pinch, but it is highly inefficient. Standard wood sandpaper wears smooth almost immediately when used on hard metal surfaces. For real success, invest in silicon carbide or aluminum oxide paper rated explicitly for metal or labeled as ‘wet or dry’.
The surface should look completely uniform in color and texture, with no shiny patches of old clear coat or dark spots of rust left behind. When you run your bare hand over the metal, it should feel perfectly smooth, without any noticeable ridges, pits, or rough transitions.
A random orbital sander is excellent for flat sections, but an angle grinder equipped with a wire cup brush or a 60-grit flap disc is the ultimate combination for conquering heavy, flaking rust on intricate, structural outdoor ironwork.
Yes, but you must be gentle. Aluminum is a soft metal that scratches and gouges easily compared to steel. Additionally, aluminum dust is highly flammable in concentrated amounts. Use lighter pressure, clean your workspace regularly, and avoid mixing aluminum dust and steel sparks in the same area.
This is caused by flash rusting. When you strip metal down to its bare state, it reacts almost instantly with oxygen and ambient humidity. To stop this from happening, always wipe down and apply a protective primer coat immediately after you finish sanding.
No, wet sanding is generally reserved for high-end automotive work, clear coats, or when you intend to polish the bare metal to a bright shine. For standard utility painting, a dry sand up to 220 or 320-grit is perfectly adequate for a strong paint bond.