Physical Address
304 North Cardinal St.
Dorchester Center, MA 02124
Physical Address
304 North Cardinal St.
Dorchester Center, MA 02124

Walking into your living room only to notice an unsightly, bouncy hump in the middle of your beautiful floor is a heartbreaking moment for any homeowner. You stop, press your foot against it, and realize the worst: your sleek floor covering has begun to warp.
If you are currently staring at a buckled section of your floor, your first instinct might be panic. You might be wondering, do I have to rip out the entire room? or can wooden floor bubble up overnight?
Take a deep breath. Before you spend thousands of dollars calling in a professional flooring contractor, we have some good news for you. Learning how to repair laminated flooring is a highly approachable, budget-friendly DIY project. With a few simple tools, a little patience, and the right techniques, you can fix a swollen floor, close up annoying gaps, and make your laminate look brand new again.
In this comprehensive guide, we will break down exactly why laminate floors misbehave and provide a complete, step-by-step roadmap to fixing everything from minor scratches to severe moisture expansion.
Understanding Laminated Flooring: The Basics
To successfully fix a floor, you first need to understand how it is built. Unlike solid hardwood, laminated flooring is a synthetic, multi-layer product engineered to mimic the classic appearance of real wood.
The core of the laminate consists of High-Density Fiberboard (HDF), which is made from compressed wood fibers and resin. Because this core is fundamentally made of wood particles, it retains a natural characteristic: it reacts to environment and moisture.
Laminate planks are designed as a “floating floor” system. They are not nailed or glued down to the subfloor. Instead, they lock together like puzzle pieces using a specialized click-lock or ‘tongue and groove’ joinery design. This allows the entire floor covering to expand and contract as temperature and humidity levels shift throughout the seasons. However, when things go wrong with this movement, you end up with a swollen floor.
Before learning how to repair laminated flooring, you must act like a detective and discover why the issue happened in the first place. If you patch up the floor without fixing the underlying cause, the issue will inevitably return.
So, can wooden floor bubble up and warp out of nowhere? Not quite. There is always a hidden culprit. Here are the primary reasons your laminate floor is acting up:
Because floating floors expand and contract, they need breathing room. During installation, installers must leave a gap of about 1/4 to 1/2 inch between the edge of the flooring and the walls. This gap is hidden completely by your baseboards or skirting boards. If the installer pushed the planks tight against the wall, the expanding floor will have nowhere to go. It will push against itself, causing the planks to buckle, lift, and create a prominent bubble in the middle of the room.
Water is the natural enemy of HDF. While the top wear layer of laminate is highly water-resistant, the joints between the planks are vulnerable. If relative humidity levels climb beyond the ideal 30% to 60% range, or if water seeps into the seams, the core absorbs it like a sponge. This causes the edges to swell, resulting in a distinct cupped or bubbled appearance.
If your laminate is installed over a concrete subfloor (especially in a basement, ground floor, or converted garage), moisture naturally rises up through the porous concrete. Without a thick polyethylene moisture barrier laid down underneath the flooring underlayment, that rising vapor will become trapped directly beneath your laminate planks, warping them from the bottom up.
A slow, unnoticed leak from a dishwasher, a refrigerator water line, or an internal wall pipe can slowly pool water beneath your floorboards. By the time you notice a soft, springy spot or a swollen floor, the water damage underneath might already be extensive.
Did a pet knock over a water bowl while you were at work? Or perhaps someone tracked in heavy snow or spilled a large glass of water? If standing liquid sits on laminate seams for more than a few hours, it will bypass the protective top coat and ruin the fiberboard core.
When dealing with a damaged floor covering, you need to assess the total area affected to decide on your repair strategy.
| Damage Extent | Visual Signs | Recommended Action |
| Minor / Localized | A single bubbled joint, minor surface scratches, or a small gap between two planks. | Partial DIY Repair: Trim expansion gaps, apply filler, or replace only the specific damaged boards. |
| Moderate | Multiple warped boards in one specific corner or area due to a localized spill. | Sectional Replacement: Unclick the floor up to the damaged zone, replace affected planks, and reinstall. |
| Severe / Widespread | Buckling across the entire room, molding/mildew smells, or subfloor flooding. | Full Replacement: Strip the entire floor, fix subfloor moisture issues, and lay down new flooring. |
Pro Tip: Never rush into ripping out your whole floor. If the damage is limited to less than 20% of the room, you can almost always save money by opting for a strategic, localized repair.
Before starting your repair project, gather your gear. Having the right tools on hand will keep the job moving smoothly and prevent unintended damage to neighboring healthy planks.
Let’s dive into the practical solutions. Depending on the exact type of damage your floor has sustained, choose the appropriate walkthrough below.
If your floor has bubbled up into a small hill because it ran out of room to expand, you can often fix it without replacing a single board. The goal here is to relieve the structural tension by creating the missing expansion gap.
Walk from the peaked, bubbled area directly to the nearest wall. This is usually the direction the floor expanded toward.
Take your chisel and gently wedge it behind the baseboard or quarter-round molding. Tap it lightly with a hammer to pry the molding away from the wall. Be careful to apply pressure against the wall studs rather than the fragile drywall to avoid punctures.

Look down at the edge of the laminate. If the planks are pressed tightly against the drywall or framing studs, you have found your problem. The floor is under extreme pressure, which is forcing the center of the room to lift.
Mark a line roughly 3/8 of an inch away from the wall onto the flooring. Use an oscillating multi-tool or a specialized flush-cut saw to trim away the edge of the laminate boards along the wall.
Once the edge is cut and the tension is released, walk back to the bubbled area. Gently press down on the hump or walk over it. You should feel the floor settle back down into its flat, floating position. Place a few heavy books or a weighted box on the area overnight to encourage it to lie completely flat.
Reattach your baseboard molding using a brad nailer. Make sure you nail the molding into the wall, not into the laminate flooring. If you nail into the flooring, you will lock it in place and cause the bubbling issue to return next season.
What happens if a heavy object fell and cracked a plank in the exact center of your room, or if a severe spill caused one specific board to swell permanently? You cannot easily unclick the entire room to reach the middle. Instead, you need to surgically cut out the damaged board and drop a new one in.
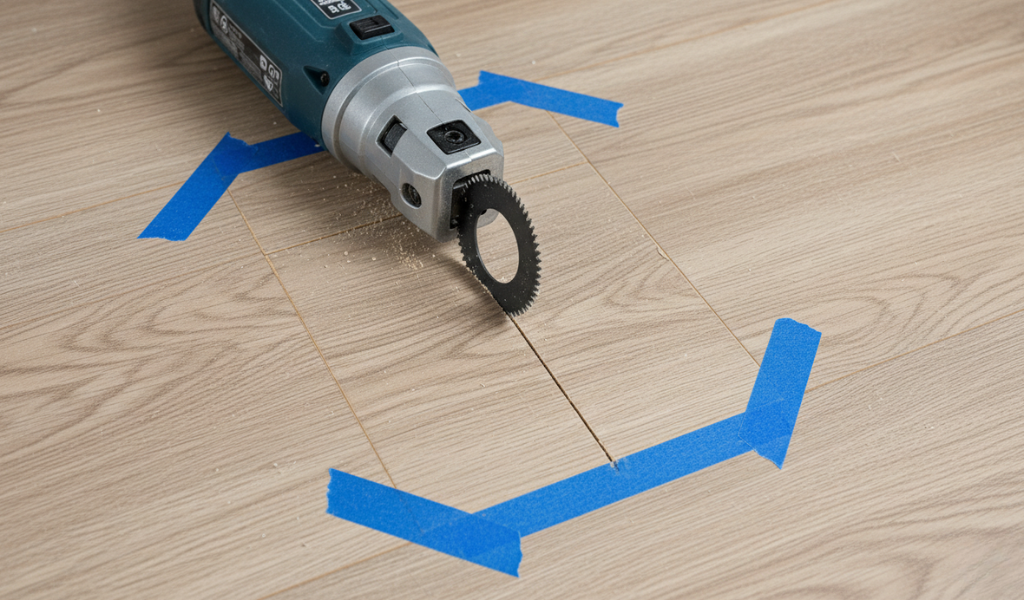
Take your damaged replacement board and place painter’s tape across its surface. Draw a straight line down the center of the board lengthwise, ending about one inch from each end. From those points, draw diagonal lines out to the four corners of the plank, creating a “center line with Y-shapes” at both ends.
Set Your Saw Depth
This is the most critical step. Take your circular saw or oscillating tool and set the blade depth to match the exact thickness of your laminate flooring plank (usually between 8mm and 12mm). If your blade is set too deep, you will cut straight through your subfloor, underlayment, or potentially slice into radiant heating pipes.
Carefully cut along the center line and the diagonal lines you drew on the damaged plank. The diagonal cuts will separate the center of the board from the delicate tongue-and-groove locking joints of the surrounding healthy planks.
Use a chisel or a small pry bar to lift out the center section of the cut board. Once the center is gone, gently wiggle and pull the remaining outer edges away from the surrounding interlocking tracks. Vacuum the empty space thoroughly to remove all sawdust, splinters, and debris.
Take your fresh, matching laminate plank. You cannot click it into place because the surrounding floor is locked down. To make it fit, you must modify its locking mechanism.
Take a sharp utility knife or a hand planer and shave off the bottom lip of the groove on the new board, as well as the tongue on the short end. This effectively turns the interlocking joint into a smooth, flush edge that can slide directly down into place.
Run a thin, neat bead of high-quality wood glue along the exposed tongues of the surrounding floorboards. Carefully position your modified replacement plank into the opening, tongue side first, and lower it down until it sits completely flush with the rest of the floor.
Wipe away any excess glue that squeezes up through the seams using a damp microfiber cloth immediately. Place a heavy object, like a couple of paint cans or a stack of heavy boxes, over the new board. Let the adhesive cure for at least 12 to 24 hours before walking on it.
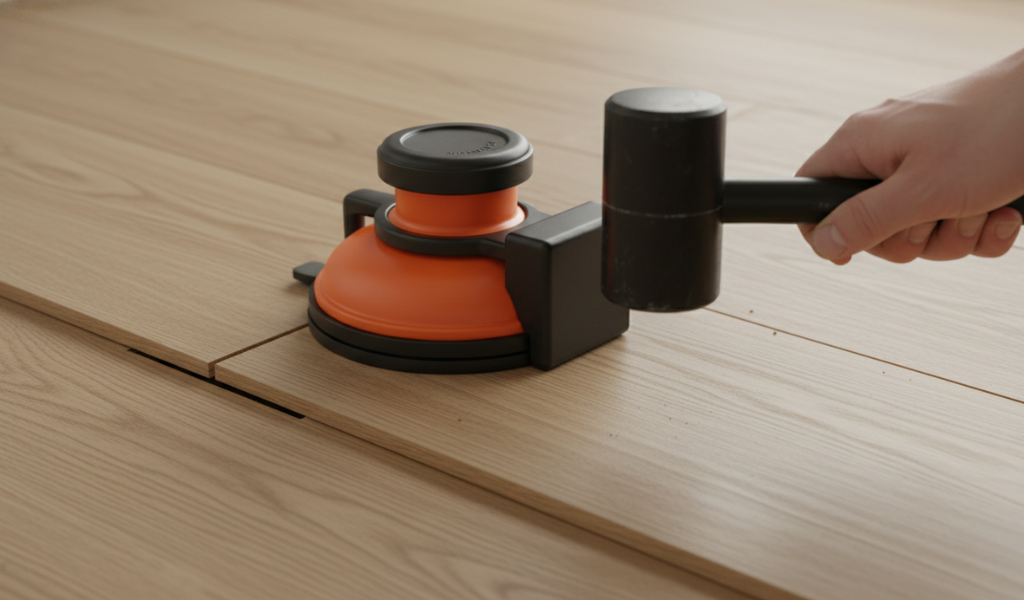
As your house shifts, settles, and experiences dry winter air, your floating floor can develop gaps. If planks become loose, they slide apart, leaving a dark gap that collects dirt and lets moisture slip right down to the core. Fortunately, closing these gaps is incredibly satisfying and requires no cutting at all.
Before pushing boards back together, look inside the gap. Use a toothpick or a soft brush attached to your vacuum to clear out any accumulated dust, lint, or pet hair. If dirt is left inside the seam, the boards will not close completely.
A floor gap fixer tool consists of a heavy-duty aluminum or plastic block topped with a highly sticky adhesive backing or powerful suction cups. Stick or press this tool firmly onto the surface of the loose plank, roughly two inches away from the open gap.
Take your rubber mallet and firmly tap the side of the gap fixer block in the direction of the open gap. The impact will slide the floating plank across the underlayment, snapping the tongue and groove back together tightly.
If a board continues to slide loose week after week, it means the internal locking mechanism has worn down. To fix this permanently, squirt a tiny droplet of wood glue into the open groove before tapping it shut. Once closed, use painter’s tape to hold the planks tightly together for a few hours while the glue sets.
Life happens. Dropped kitchen knives, sliding metal furniture legs, or excited pet claws can leave white scratches and gouges across your floor covering. While these do not require structurally replacing a board, they look ugly and expose the core to water damage.
Clean the chipped area thoroughly with a damp cloth and allow it to dry completely.Scoop up a small amount of acrylic floor putty or laminate filler onto a plastic putty knife.Force the putty down deep into the chip opening, ensuring there are no trapped air pockets.Hold your plastic putty knife at a 45-degree angle and draw it firmly across the surface to scrape away excess filler. The putty should be perfectly flush with the surrounding floor.Let it cure undisturbed for 4 hours before anyone walks near it.
For lighter scratches, you can purchase a wax floor repair kit. Choose the wax stick color that matches your floor’s mid-tones. Rub the wax stick back and forth across the scratch with firm pressure until the scratch is entirely filled with wax. Use a plastic scraper or an old credit card to buff away the excess wax around the edges until it blends seamlessly into the floor’s sheen.
Once you have gone through the effort of repairing your floor, you certainly do not want to repeat the process six months down the road. Follow these pro-level preventative habits to ensure your floors remain immaculate:
Did you know that poor cleaning habits are one of the leading causes of premature laminate floor failure? Traditional wet mopping can absolutely ruin a laminate floor over time. Here is how to keep things sparkling safely:
Prioritize Dry Methods First: Use a soft-bristle broom or a microfiber dust mop daily to pick up loose dirt. If you use a vacuum cleaner, ensure it is set to “hard floor mode” to turn off the rotating roller brush, which can create micro-scratches.
Never Soak the Floor: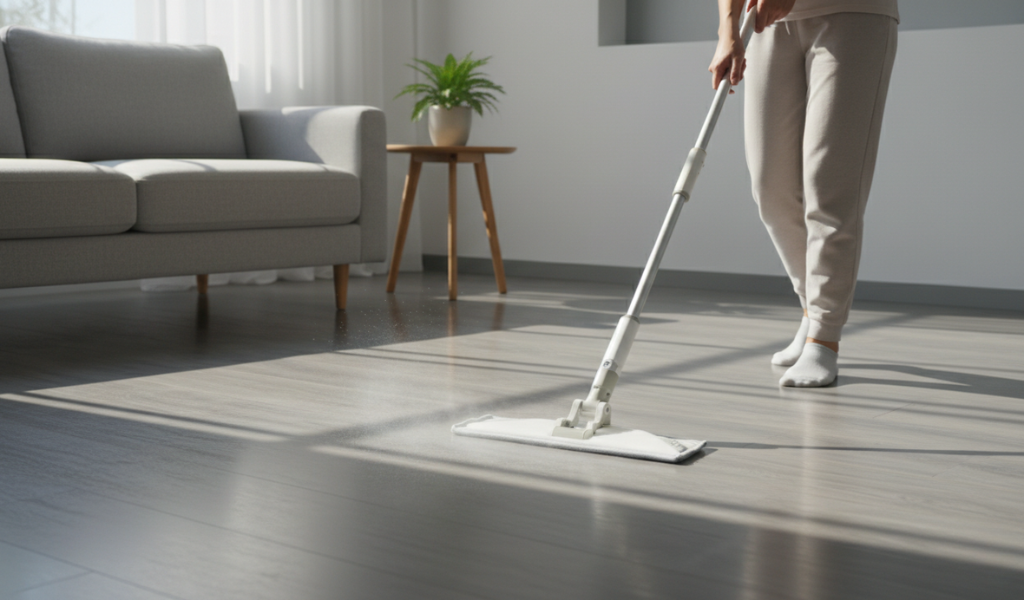 Ditch the traditional bucket and mop. Water will run into the joints and cause a swollen floor. Instead, use a spray bottle filled with a specialized laminate floor cleaner and a lightly damp microfiber pad. The floor should dry within 30 seconds of passing over it.
Avoid Harsh Chemicals: Avoid using vinegar, ammonia, steam cleaners, or wax-based polishes on laminate. Steam cleaners force high-pressure moisture deep into the seams, permanently delaminating the layers, while wax leaves behind a cloudy, sticky residue that tracks footprints.
Dealing with a buckled or damaged floor covering can feel overwhelming, but as we have covered, knowing how to repair laminated flooring is entirely within your reach. To wrap things up, remember these key rules:
With a little time and the right approach, you can successfully restore your floors to their former glory, keep your hard-earned money in your wallet, and enjoy a beautiful, squeak-free home for years to come.
Now it’s your turn! Grab your tools, check those wall edges, and get your floor looking flawless again. If you found this DIY guide helpful, feel free to bookmark it or share it with a fellow homeowner tackling a weekend renovation project!
Yes, it can, if the water is left long enough to seep deep into the joints. While the top graphic layer is sealed, the exposed click-lock seams are vulnerable. A small spill left overnight can easily cause the fiberboard core to absorb moisture and swell up into a localized bubble.
Once you cut away the constricted edges near the wall to give the floor its 3/8-inch expansion gap, the pressure is released immediately. However, it can take anywhere from 24 hours to a week for the warped boards to flatten out entirely, especially if you place heavy weights over the peak to guide them back down.
No! This is a common mistake. Unlike solid hardwood, laminate flooring cannot be sanded. If you attempt to sand down a swollen spot, you will destroy the clear protective wear layer and the thin photographic paper underneath, exposing the ugly brown fiberboard core. Swollen boards must either flatten naturally after tension relief or be cut out and replaced.
Generally, no, because laminate is designed to be a floating floor system. However, if a specific joint’s locking mechanism has broken or worn down, causing a persistent gap, applying a small drop of specialized wood glue inside that specific groove is an excellent way to secure those two boards together permanently.
If the bubbling is widespread due to moisture rising out of a concrete slab, trimming the edges won’t fix it long-term. You will unfortunately need to lift the planks, lay down a proper 6-mil polyethylene moisture barrier over the concrete subfloor, install a quality underlayment, and then reinstall the flooring planks.