Physical Address
304 North Cardinal St.
Dorchester Center, MA 02124
Physical Address
304 North Cardinal St.
Dorchester Center, MA 02124
Stripped threads and damaged fasteners can bring a repair job to a grinding halt. Whether you’re a seasoned mechanic or a hands-on DIYer, knowing how to use a tap wrench correctly is the difference between a clean thread repair and a snapped tap buried in metal.
A tap wrench is a precision hand tool designed to drive taps, reamers, and extractors by hand—giving you far greater control than any power tool can offer. Unlike open-end wrenches or machine-driven tools, a tap wrench lets you feel the torque in real time, reducing the risk of overdriving and fracturing a hardened tap inside a workpiece.
If you’re new to hand tools or want a broader foundation before diving in, check out our comprehensive guide to automotive wrenches to understand where tap wrenches fit in the larger toolkit.
This guide covers everything you need: how T-handle and double-end tap wrenches work, how to choose the right size, a step-by-step tapping technique, and the safety practices that protect both your tools and your workpiece.
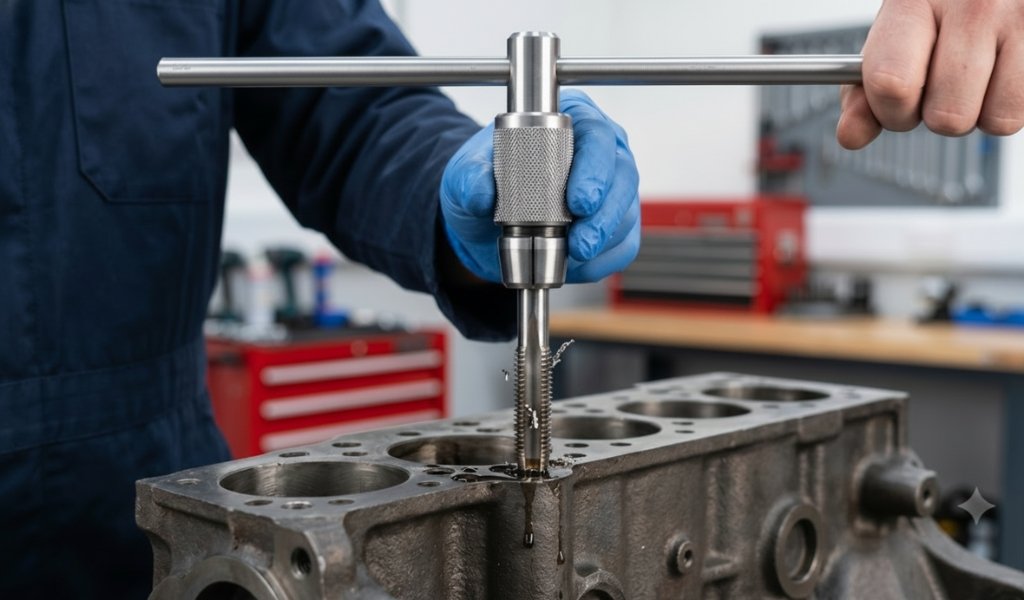
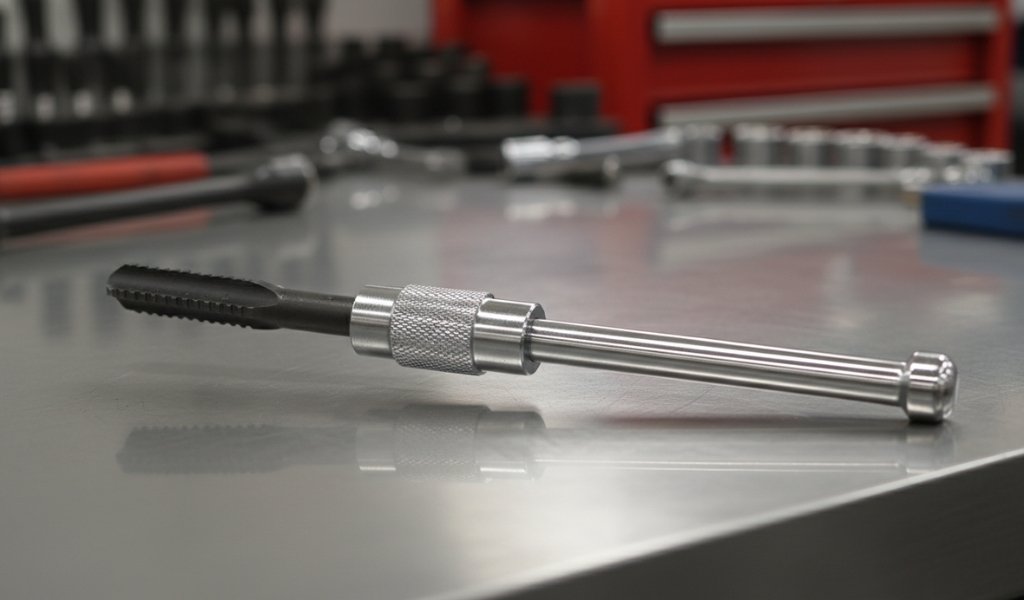
A tap wrench is a handheld tool used to rotate a tap by hand through a pre-drilled pilot hole, cutting threads into metal, cast iron, zinc, or other materials. The tool’s adjustable chuck—sometimes called a collet or jaw—clamps firmly onto the shank of the tap, holding it centered and secure throughout the cut.
The chuck is tightened via a knurled sleeve or collar, which allows the jaws to grip taps of various shank diameters. This adjustability is what makes a single tap wrench compatible with a wide range of tap sizes.
Tap wrenches work by converting your hand motion into controlled rotational torque. Because the tool is turned by hand, the operator can feel resistance as threads form—critical feedback that prevents breakage.
There are two primary types of tap wrenches, each suited to different applications:
T-Handle Tap Wrench
Double-End Tap Wrench
A quality option like the Starrett tap wrench—available in both T-handle and double-end configurations—is a reliable choice for professional-grade precision. Chrome-plated finishes on premium models resist corrosion and extend tool life significantly.
T-handle wrenches are among the most versatile small tools in a mechanic’s or DIYer’s kit. Common applications for tap wrenches include:
Tap wrenches are used whenever manual control is essential—situations where power-driven tools risk snapping the tap or misaligning the thread. Any repair on a blind hole, a thin-walled component, or a delicate fastener calls for the precision that only a handheld tool provides.
Matching the tap wrench to the job is critical. Using an undersized tool on larger taps creates excessive strain; using an oversized wrench on fine taps makes it nearly impossible to feel the cutting resistance.
Consider tap size first:
Check chuck capacity:
Material considerations:
Other factors:
Before you start, gather your materials:
A loose tap is one of the most common causes of thread damage and broken tools. Always verify the clamp before applying rotational force.
Proper rotation technique is what separates a clean thread repair from a broken tap.
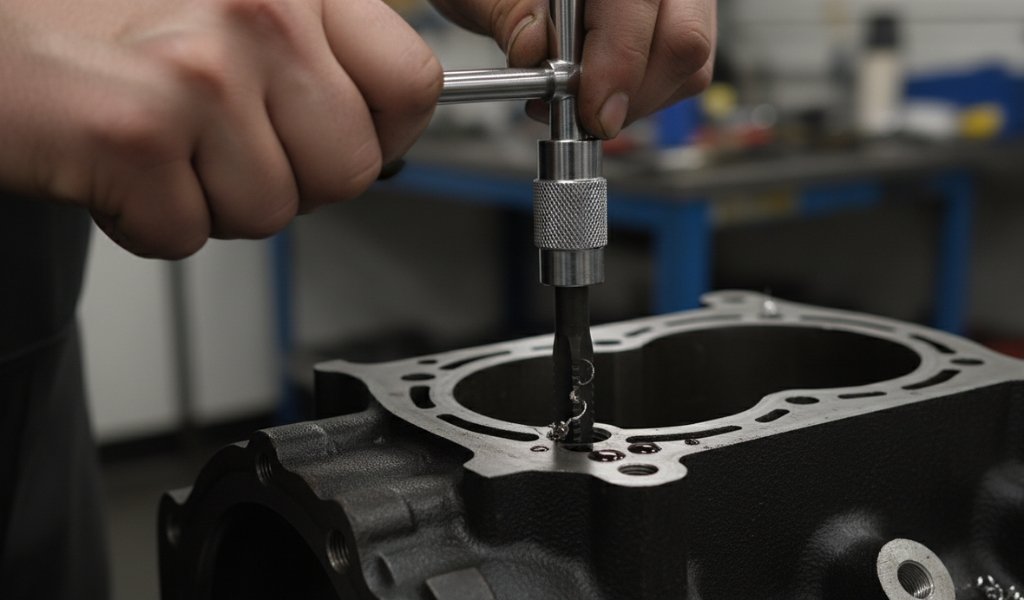
For blind holes (holes that don’t pass through the material), stop advancing the tap before it bottoms out. Forcing a tap against the bottom of a blind hole is a leading cause of breakage.
Following the correct technique is only part of the equation. These practices protect you, your tools, and the workpiece.
Before you start:
During tapping:
Tool care:
Material-specific notes:
A T-handle tap wrench is a precise, reliable tool—but only when used with the right technique and matched to the right job. Getting familiar with chuck adjustment, the back-and-forth rotational method, and correct pilot hole sizing will prevent the most common tapping failures.
Start with softer materials to build your feel for resistance and cutting feedback. Once you’re comfortable with how tap wrenches work on aluminum or zinc, move to harder materials with confidence.
For more guidance on expanding your tool knowledge, revisit our comprehensive guide to automotive wrenches or browse the full range of tap and die set options on Tools Tale.
Match the tap to the existing thread pitch and diameter of the hole you’re repairing. Use a thread gauge to measure the original thread, then select a tap of the same size and pitch. The pilot hole must be drilled to the corresponding tap drill size—consult a tap drill chart for exact specifications.
The most frequent causes include: using an undersized pilot hole that requires excessive torque, failing to back off regularly to clear chips, applying lateral force that bends the tap, and forcing the tap against the bottom of a blind hole. Using a dull or incorrect tap for the material is also a common factor.
Use a tap extension when the hole is located deep inside a cavity or recess that a standard T-handle tap wrench cannot reach. Extensions attach between the tap shank and the chuck, effectively lengthening the tool’s reach while maintaining alignment. They are common in automotive engine work where bolt holes sit deep within cylinder heads or blocks.
First, do not attempt to drill out the broken tap immediately—hardened tap material will destroy standard drill bits. Use a tap extractor by inserting its prongs into the flutes of the broken tap and rotating counterclockwise with a T-handle wrench. Apply penetrating oil beforehand to reduce resistance. If the extractor method fails, an EDM (electrical discharge machining) service can remove the broken tap without damaging the surrounding material.
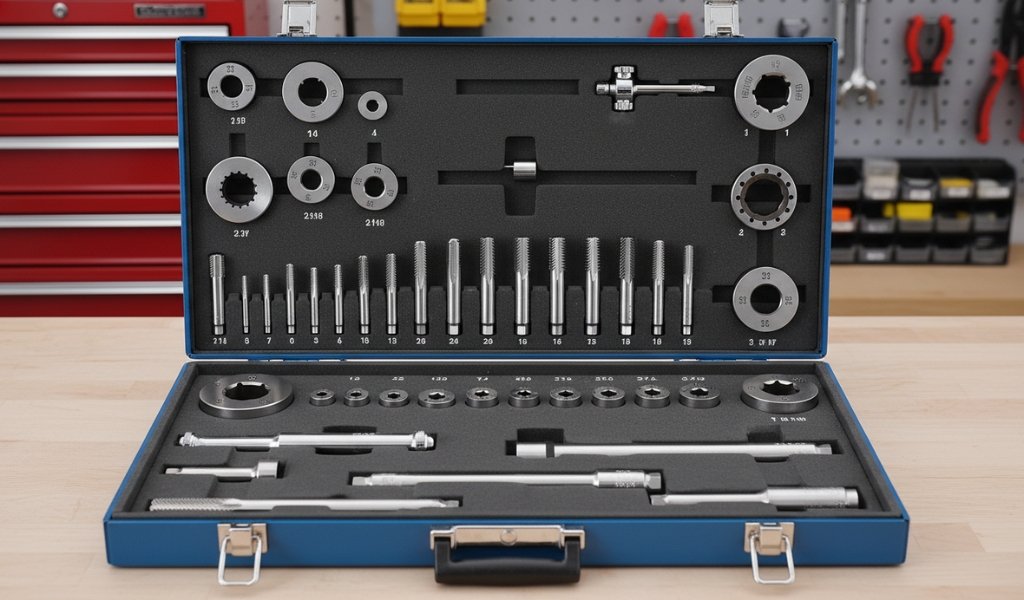
A tap and die set is used to cut threads on both internal and external surfaces. Taps cut internal threads inside a drilled hole—creating the thread that a screw or bolt engages. Dies cut external threads onto a shaft or bolt. Together, they allow mechanics and DIYers to create, repair, or restore threaded connections in metal, plastic, and other materials.
Technically, a bolt can be used to drive some taps in an emergency, but standard wrenches—including open-end wrenches—are not designed for this purpose. They provide no centering support, no fine torque control, and no way to feel cutting resistance. Using an improper tool dramatically increases the risk of misaligned threads and tap breakage. A dedicated adjustable tap wrench is always the correct choice for thread repair work.