Physical Address
304 North Cardinal St.
Dorchester Center, MA 02124
Physical Address
304 North Cardinal St.
Dorchester Center, MA 02124

Few hand tools are as universally recognized as the hammer. You’ll find one in almost every home, workshop, and job site around the world. Yet most people never stop to think about how this simple tool actually does what it does so well. How does a hammer work? What makes one type of hammer better suited for a task than another? And why does the way you swing it matter so much?
This guide answers all of that. Whether you just bought your first hammer or you’ve been swinging one for years, you’ll walk away with a much clearer picture of the mechanics, the different types of hammers, how to use one correctly, and how to stay safe while doing it.
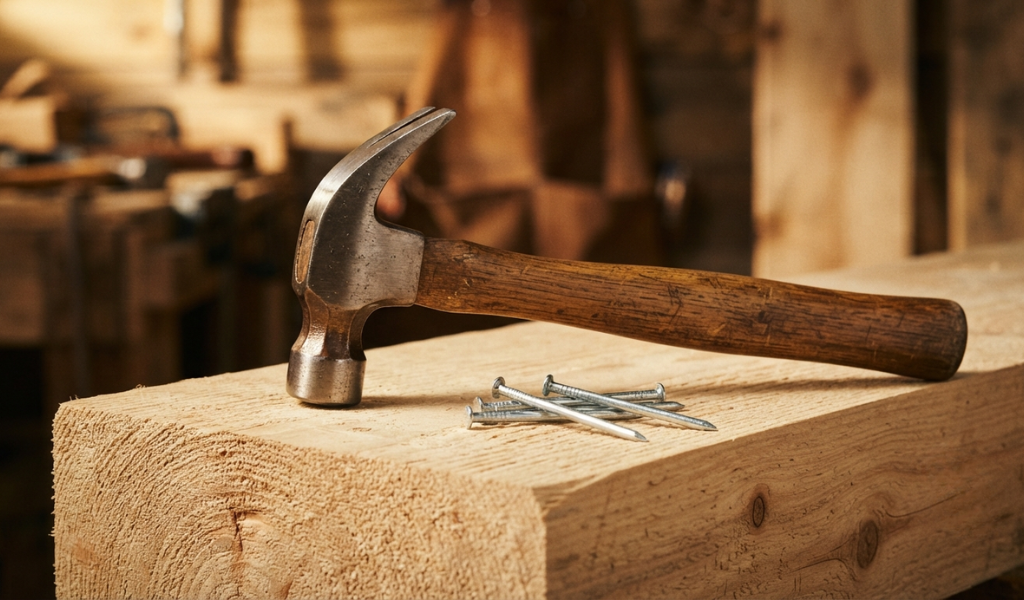
A hammer is one of the oldest and most essential hand tools ever created. At its core, it’s a tool designed to deliver a controlled strike to a surface or object. That might mean driving nails into wood, breaking up masonry, shaping metal on an anvil, or gently tapping a tile into place. The hammer is used across various industries, from carpentry and metalwork to upholstery and construction.
The basic concept hasn’t changed much in thousands of years. A heavy head attached to a handle creates a system that amplifies the force of your swing. That’s the hammer in a nutshell. But the details of how it’s made and what is a hammer, how it’s balanced, and what type of hammer you choose for the job make a big difference in the result.
To understand how a hammer works, you first need to know what it’s made of.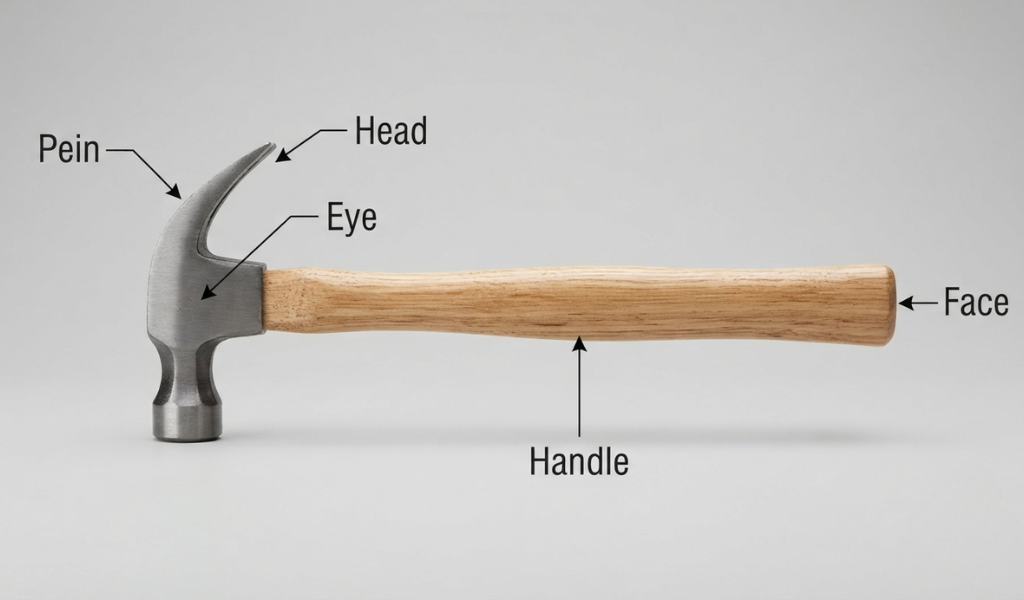
The Head is the heavy part at the top. It’s usually made of metal, though some specialty hammers use rubber, wood, or plastic. The head of the hammer is what makes contact with whatever you’re striking.
The Face is the flat end of the head. This is the striking surface you use to drive nails or flatten materials. Some faces are smooth, while others have a slight texture to grip nails better.
The Pein (or Peen) sits on the opposite side of the face. Depending on the type of hammer, the pein might be rounded, flat, pointed, or v-shaped. On a ball peen hammer, it’s dome-shaped and used for metalwork tasks like setting rivets or shaping sheet metal.
The Handle connects the head to your hand. Handles are made from wood, fiberglass, or steel. A longer handle gives you more leverage and power, while a shorter one offers more control. The material also affects vibration — fiberglass and steel handles tend to absorb shock better than older wooden ones.
The Eye is the hole where the handle inserts into the head. It needs to be tight and secure. A loose head is one of the most dangerous hammer faults there is.
Every hammer is designed with a specific purpose in mind. The weight, balance, head shape, handle length, and material are all chosen to match the type of work it will do.
A 16 oz claw hammer, for example, is deliberately balanced so that most of the weight sits at the head. This makes it effective for driving large nails into wood without requiring too much arm strength. A lightweight hammer like a tack hammer, on the other hand, is meant for small fasteners and precision work driving small nails or upholstery tacks where heavy force would do more harm than good.
The shape of the head also matters. A flat head is best for striking nails squarely. A rounded pein is better for spreading metal. A heavy head on a long handle, as you’d find on a sledgehammer, is designed for maximum force over a wide area.
The hammer works on a simple but powerful physical principle: momentum. When you swing a hammer, you accelerate its head through an arc. The further and faster the head travels, the more momentum it builds. When that moving head comes to a sudden stop against a nail or surface, all of that momentum converts into a concentrated force at the point of impact.
This is why the weight of the hammer head matters. A heavier head holds more momentum at the same swing speed, which means more force delivered per strike. That’s also why experienced carpenters use the full arc of their swing rather than short, choppy strokes the longer the arc, the more speed the head builds.
Leverage plays a role too. Holding the handle near the end (rather than choking up toward the head) gives you a longer lever arm, which multiplies the force you generate. It’s the same reason a longer wrench loosens a bolt more easily.
When the face of the hammer strikes the nail head, the force travels straight down through the nail’s shaft. That force overcomes the friction between the nail and the wood, pushing the nail deeper with each strike. The sharper the nail tip, the more concentrated the force, which is why nails drive more easily than blunt objects.
The material you’re driving into also matters. Softwood like pine offers less resistance than hardwood like oak. Denser materials absorb the energy differently, which is why you might need a heavier hammer or more strikes for harder surfaces.
There are many different types of hammers, and each one is built for a specific purpose. Knowing which hammer to reach for makes your work faster, safer, and cleaner.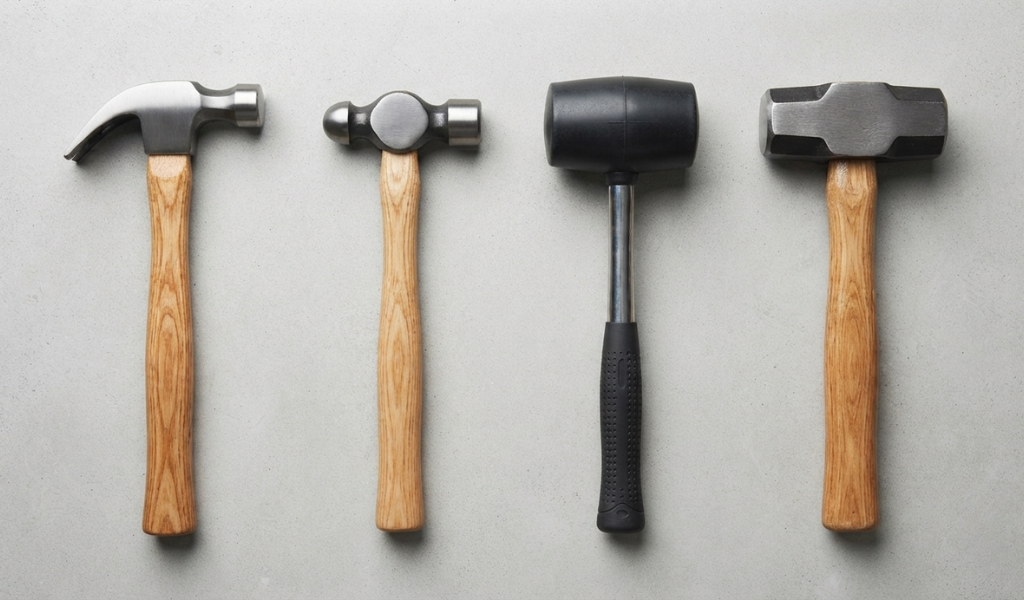
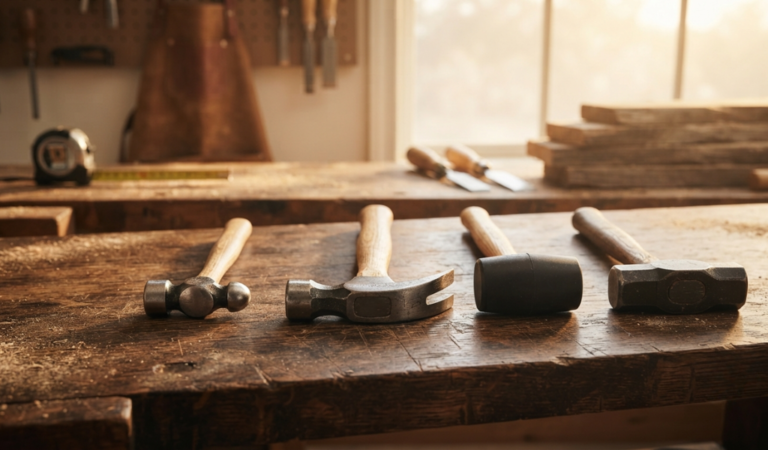
The claw hammer is probably the most common hammer in any home toolkit. One side of the head is a flat face for driving nails, and the other is a curved, v-shaped claw designed to remove nails from wood. You hook the claw under the nail head and use the handle as a lever to pry the nail loose. A standard claw hammer typically weighs 16 oz, which gives it enough weight to drive large nails without wearing you out. It’s the go-to tool in carpentry and general household repairs.
The ball peen hammer (sometimes spelled ball pein hammer) is a staple in metalwork. Instead of a claw, the back of the head is rounded that’s the “ball peen.” This shape is used for shaping metal, setting rivets, and working on sheet metal. The ball end spreads and flattens the edges of a rivet or punch without damaging the surrounding area. It’s a common tool for blacksmiths and mechanics alike.
Also known as a lump hammer, the club hammer is a short, heavy-duty hammer with a double-sided flat head. It looks like a miniature sledgehammer and is commonly used for demolition tasks, masonry work, and driving cold chisels or bolts. The heavy head delivers serious force in a relatively compact size, making it ideal for breaking up small areas of tile, brick, or concrete.
The sledgehammer is the heavy hitter of the group. With a long handle and a very heavy head, it’s designed to deliver maximum force across a large area. It’s used for heavy demolition work, breaking up concrete, driving fence posts, and any job that requires serious impact. You wouldn’t use a sledgehammer to drive a small nail, but when you need to knock down a wall or break through thick masonry, nothing else comes close.
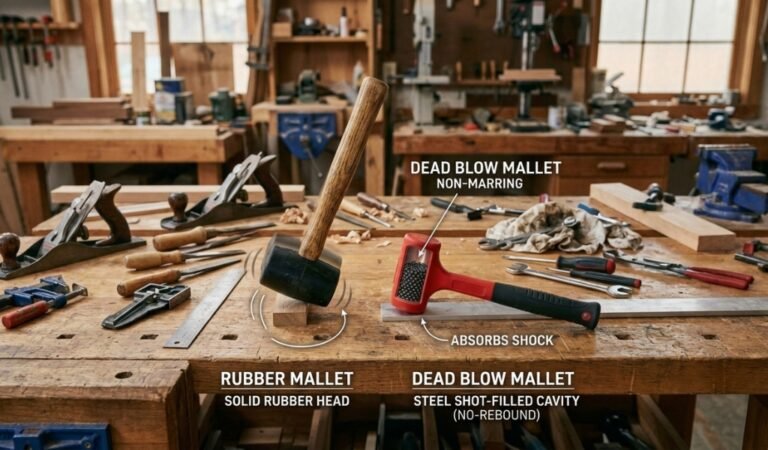
A rubber mallet looks similar to a hammer but has a soft rubber head instead of a metal one. The soft material allows it to deliver force without damaging delicate surfaces. It’s widely used for assembling furniture, fitting tiles, adjusting parts that need a tap rather than a strike, and working with materials that would dent or scratch under a metal head. The rebound from a rubber mallet is also gentler, which gives the user more control.
The tack hammer is a lightweight hammer used for small fasteners, particularly in upholstery work. Some versions are double-sided and magnetic, which lets you hold a small tack in place with the magnetic end before driving it with the other side. It’s not a heavy-duty tool, but for detailed, precise work on upholstery, trim, or fine woodworking, it’s exactly the right hammer for the task.
A power hammer is a mechanical tool used primarily in metalworking and blacksmithing. Rather than relying on a manual swing, power hammers use a motor-driven piston to deliver repeated, consistent blows at a set force and speed sometimes hundreds of strikes per minute. These mechanical hammers are common in industrial settings and forge shops, where shaping metal repeatedly by hand would be impractical. They’re capable of producing far more force than any hand tool.
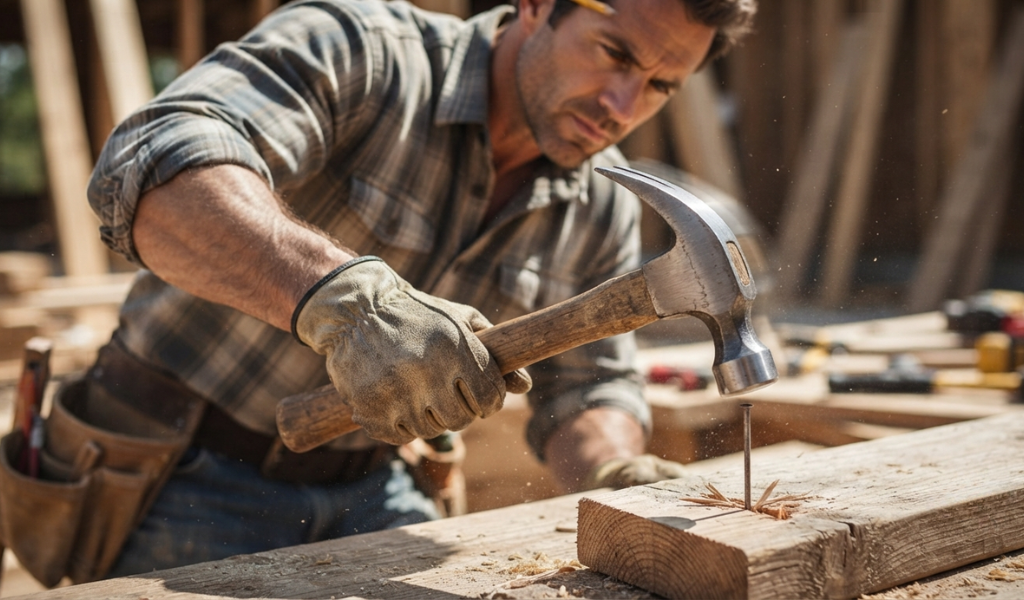
The most well-known use for a hammer is driving nails into wood. You position the nail, tap it gently a few times to set it, then use full, controlled swings to drive it flush with the surface. A 16 oz claw hammer handles most nailing tasks around the house, while heavier hammers are better suited for large nails or dense materials.
The claw on the back of a claw hammer makes it easy to pull out nails. Hook the claw under the nail head, then use the handle as a lever to pry it free. For deeply set or stubborn nails, place a small scrap of wood under the hammer head to increase leverage without damaging the surface.
For small demolition jobs knocking out a tile, breaking up a small patch of concrete, or removing a section of drywall a club hammer or ball peen hammer with a cold chisel gets the job done. The hammer drives the chisel into the material, breaking it apart with controlled force.
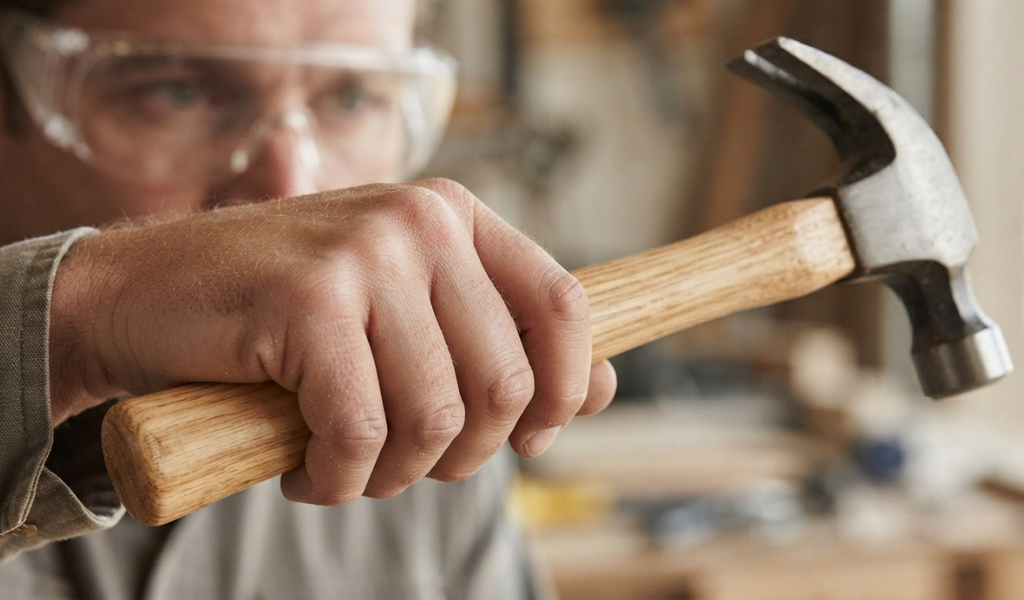
Hold the hammer near the end of the handle, not up close to the head. Gripping near the end gives you maximum leverage and the full benefit of the hammer’s weight. Your grip should be firm but not rigid a white-knuckle grip causes fatigue and reduces accuracy.
Let the weight of the hammer do the work. Start with your elbow, bring your wrist into the swing at the end, and aim to strike the nail head squarely with the flat face. Glancing blows bend nails and can send them flying. Keep your eye on the nail, not the hammer, and follow through on the swing.
Always wear safety glasses when hammering. Nail heads can snap, chips of material can fly, and a missed swing can send debris in any direction. Gloves protect your hands from blisters and cuts, especially during extended work.
Before you swing, check the hammer head to make sure it’s secure on the handle. A loose head is a serious hazard it can fly off during a swing and cause serious injury. Also inspect the handle for cracks or splinters. If the hammer is damaged, set it aside and don’t use it until it’s repaired or replaced.
Picking the right hammer for the job comes down to weight, head type, and handle length.
For general home repairs and carpentry, a 16 oz claw hammer covers most tasks. If you’re doing metalwork or need to set rivets, a ball peen hammer is the right choice. Heavy demolition calls for a sledgehammer or club hammer. For delicate work on surfaces that can’t be dented, a rubber mallet is the answer. Upholstery and fine detail work calls for a tack hammer.
Think about handle material too. Fiberglass and steel handles reduce vibration and tend to last longer than wood in demanding conditions. If you’ll be hammering for long periods, a shock-absorbing handle can reduce fatigue and strain.
Proper storage keeps your hammer in good condition and prevents accidents. Always store hammers in a dry location moisture causes wooden handles to swell and crack, and metal heads to rust over time. Hang hammers on a pegboard or store them in a toolbox with enough space so the head isn’t resting on the handle at an angle.
Keep the face of the hammer clean. Built-up debris on the striking surface can cause glancing blows and reduce accuracy. A quick wipe-down after use is all it takes.
The hammer is a deceptively simple tool. A weighted head, a handle, and the physics of momentum that’s all it takes to drive a nail, shape metal, or knock down a wall. But getting the most out of your hammer means understanding how it’s designed, which type of hammer fits the task, and how to swing it safely and accurately.
Start with a quality 16 oz claw hammer if you’re just building out your toolkit. Add a rubber mallet and a ball peen hammer as your projects expand. And always take a moment before you swing to check that the head is tight, your grip is right, and your eyes are protected.
The right hammer, used correctly, is one of the most satisfying tools you’ll ever pick up.
Always inspect the hammer before use to ensure the head is secure. Hold the handle near the end for maximum leverage and control. Strike the target squarely with the flat face, not at an angle. Wear protective eyewear at all times to guard against flying debris.
Striking two metal hammer heads together creates a serious risk of chipping. Hardened steel can fracture under impact, sending sharp metal fragments flying at high speed. This is one of the most commonly overlooked hammer safety rules in workshops.
A hammer handle can crack or splinter if the head strikes off-center repeatedly, transmitting shock directly into the handle material. Metal heads can chip if struck against another hardened steel tool. Rust and moisture can also weaken wooden handles over time, making them brittle and unsafe to use.
Wear safety glasses to protect against flying debris. Inspect the hammer head and handle before every use. Keep your free hand away from the striking zone. Use the correct type of hammer for the task using a lightweight tack hammer for heavy demolition, for example, increases the risk of the tool slipping or breaking. Never use a hammer with a loose or cracked handle.
A claw hammer features a flat face on one side and a curved v-shaped claw on the other, making it the standard tool for driving and removing nails in carpentry. A ball peen hammer has a flat face on one side and a rounded dome (the peen) on the other, which is used for shaping metal, setting rivets, and metalwork. Each hammer is designed for a specific industry and task.
For most home and carpentry tasks, a 16 oz claw hammer strikes the best balance between power and control. Heavier hammers, like a 20 oz or 22 oz model, drive large nails faster but require more arm strength. Lighter hammers are better suited for precision tasks where control matters more than force.
No. A sledgehammer is far too heavy and imprecise for driving standard nails. The excess force would drive nails through the surface or split the wood entirely. Always match the hammer to the task using the wrong hammer for the job wastes effort and risks damaging your materials or injuring yourself.