Physical Address
304 North Cardinal St.
Dorchester Center, MA 02124
Physical Address
304 North Cardinal St.
Dorchester Center, MA 02124

A hammer is one of the oldest and most reliable hand tools ever made. Whether you’re hanging a picture frame, building a deck, or breaking up old concrete, knowing how to use a hammer correctly makes the job faster, safer, and more satisfying. Yet despite how simple a hammer looks, most beginners pick one up without thinking about whether it’s the right type, whether they’re gripping it properly, or whether they’re putting themselves at risk.
This guide covers everything you need to know about the use of a hammer, from its basic parts to the most common types of hammers, how to swing one safely, and how to choose the right hammer for your specific project. Whether you’re a first-time DIYer or someone looking to sharpen their skills, you’ll walk away with practical knowledge you can apply right away.
A hammer is a basic hand tool used to deliver a forceful blow to an object. In most cases, that means driving a nail into wood, shaping metal, or breaking materials apart. The concept is straightforward: a heavy head attached to a handle gives you the mechanical leverage needed to apply much more force than your hand alone ever could.
What is a hammer and what makes a hammer so useful is how adaptable it is. A single tool, depending on its design, can drive large nails into floor beams, chip away at tile, shape sheet metal, or gently tap trim into place without damaging it. That versatility is why the hammer has remained a staple of carpentry, construction, and metalworking for thousands of years.
Different hammers are designed for different jobs, though. Using the wrong hammer for a task is one of the most common beginner mistakes. Understanding the parts of a hammer and the purpose behind each design will help you select and use one with real confidence.
Every hammer, regardless of type, shares a few key components. Knowing what these parts are called helps you understand how the tool works and how to use it more effectively.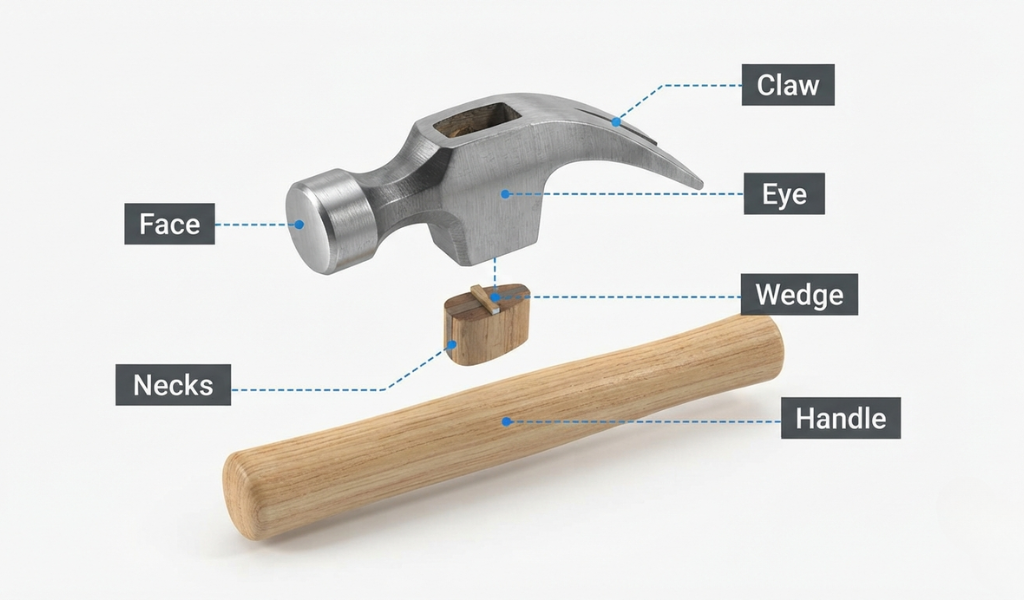
The Head is the heavy part that does the actual striking. It includes several surfaces: the face of the hammer (the flat end that strikes the nail), the cheek (the side of the hammer head), and in some designs, a ball or claw on the opposite end.
The Face is the striking surface. It’s usually flat or slightly rounded. A flat face is good for general work, while a rounded or textured face can help prevent slipping on the nail head.
The Claw or Peen sits on the back of the hammer head. On a claw hammer, this is a curved, forked shape used to pry and remove nails. On a ball peen hammer, this end is round and used for shaping metal or setting rivets.
The Handle connects the head to your hand. Hammer handles can be made from wood, fiberglass, or steel. Wood handles absorb shock well but can crack over time. Fiberglass handles are durable and lightweight. Steel handles are the strongest but tend to transfer more vibration.
The Eye is the hole in the hammer head where the handle is inserted and secured. A loose eye is a serious safety hazard, so always inspect this before using any hammer.
The basic physics of a hammer come down to force and leverage. When you swing a hammer, you build up speed through the arc of your swing. That speed, combined with the weight of the hammer head, creates the impact needed to drive a nail or break a surface.
The longer the handle, the more leverage you get. A longer swing generates more force at the point of impact, which is why framing hammers have longer handles than tack hammers. However, more force also means less control. For precision work, a shorter, lighter hammer gives you better accuracy.
The key is matching the weight and length of the hammer to what the job actually demands. A heavy sledgehammer can drive a stake into the ground in three swings. But use that same sledgehammer to drive a small nail into a cabinet, and you’ll split the wood, bend the nail, or worse, miss entirely.
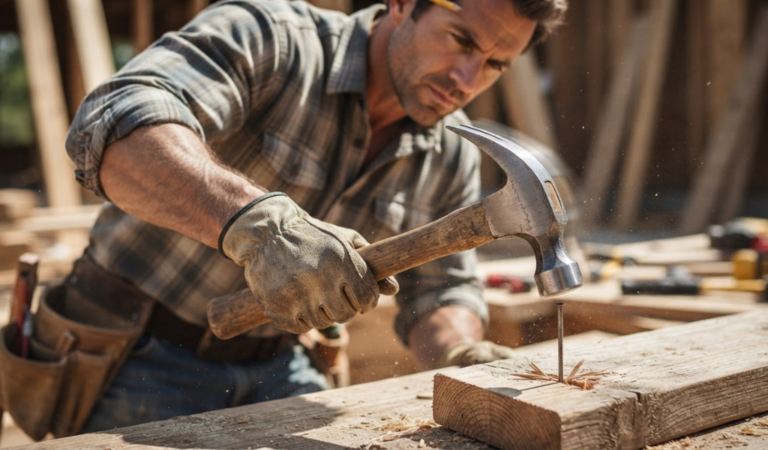
This is the most common use of a hammer in carpentry and construction. Whether you’re nailing down floorboards, building a fence, or framing a wall, a hammer drives nails securely into wood with speed and precision. Start by tapping the nail lightly to set it in place, then use full swings to drive it flush with the surface. Avoid angling your strikes, as that causes the nail to bend or veer off course.
The claw on a standard claw hammer is shaped specifically to hook under nail heads and pry them out. Slide the claw under the nail head, then use the handle as a lever and pull back. For stubborn nails buried deep in wood, place a scrap block under the hammer head to give yourself more leverage without gouging the surface.
A heavier hammer, such as a club hammer or sledgehammer, is the tool of choice for demolition. Breaking up old tiles, chipping away at masonry, driving stakes into the ground, and knocking down non-load-bearing walls all fall into this category. The heavy blow delivered by these hammers makes short work of materials that would wear out a lighter tool quickly.
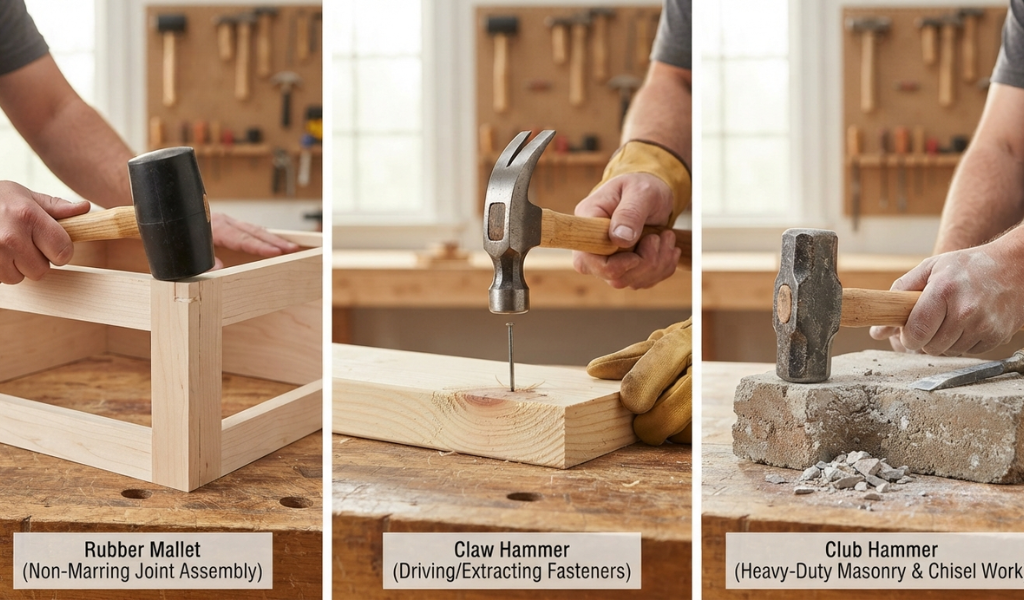
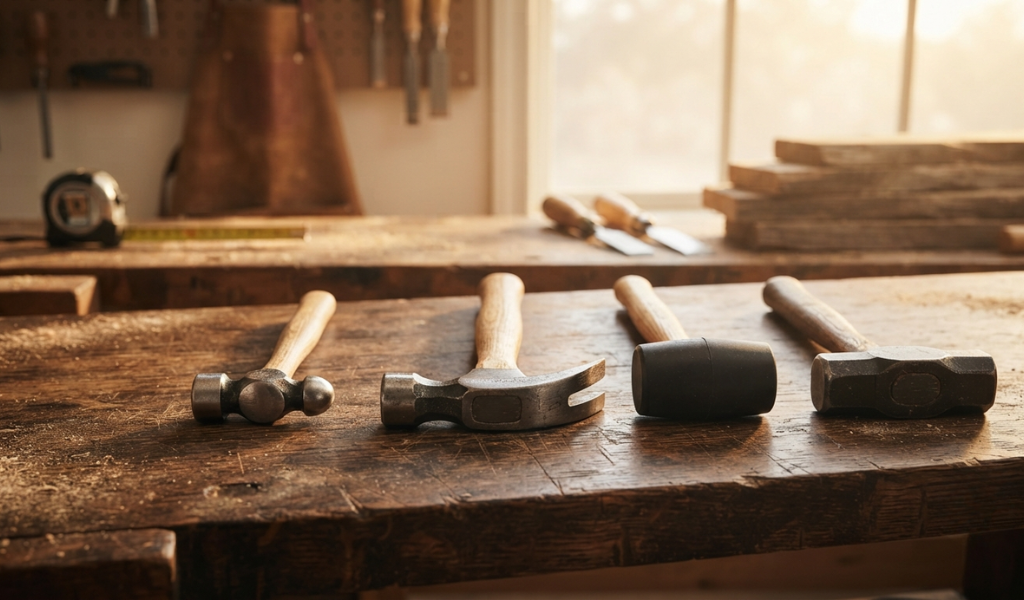
The claw hammer is the most common hammer found in homes and job sites alike. It has a flat face for driving nails and a curved claw for pulling them out. Standard claw hammers weigh between 16 and 20 ounces, making them versatile enough for general carpentry work. If you’re only buying one hammer, this is the one to get.
The ball peen hammer has a flat striking face on one end and a rounded, dome-shaped peen on the other. It’s used in metalworking for tasks like shaping sheet metal, setting rivets, and striking chisels or punches. Unlike a claw hammer, it’s not designed to drive nails into wood. The round end lets you work metal into a specific shape without the sharp edges a flat face would leave behind.
A framing hammer looks similar to a claw hammer but is heavier, usually 20 to 32 ounces, and has a longer handle for extra reach and power. The face of the hammer is often textured to grip nail heads and reduce slipping. It’s built for high-volume construction work like framing walls and nailing large beams. If you’re working on a construction site or doing heavy carpentry, a framing hammer will save you a lot of effort compared to a standard claw hammer.
A club hammer, sometimes called a lump hammer, has a double-faced head and a short, sturdy handle. It’s a smaller version of the sledgehammer and is used for masonry work, driving cold chisels, and light demolition. It gives you more control than a full-size sledgehammer while still delivering a heavy blow. A good club hammer is essential if you’re working with stone, brick, or concrete.
A sledgehammer is the heaviest hammer you’ll find on most job sites. With a long handle and a large, heavy head, it’s built for powerful, forceful strikes. It’s used to demolish walls, break up concrete floors, drive large stakes into the ground, and handle any job where brute force is the priority. Because of its size and weight, a sledgehammer requires both hands and a wide, stable stance to use safely.
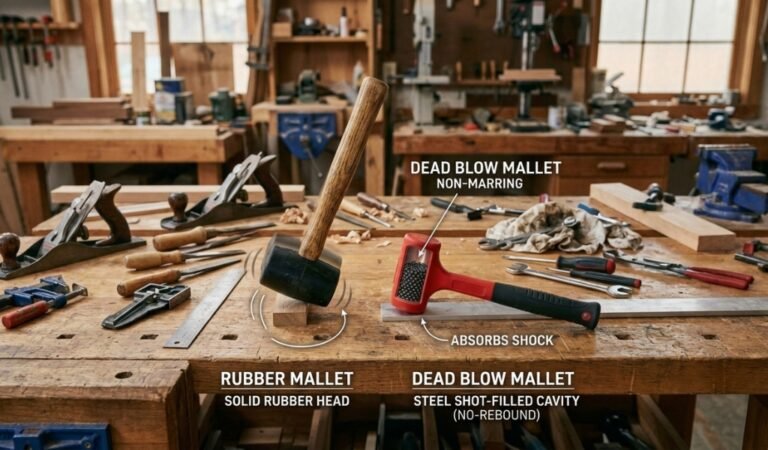
A rubber mallet has a large, cylindrical rubber head instead of a metal one. The rubber absorbs impact so the blow is softer and spread over a wider area. This makes it ideal for tasks where you need force but can’t afford to damage the surface, such as assembling furniture, tapping tile into place, fitting cabinet parts together, or adjusting flooring without cracking it. A rubber mallet is also commonly used in landscaping to drive edging and stakes into soil.
A tack hammer is a lightweight, narrow-headed hammer designed for small, precise work. It’s used to drive brads, tacks, and small nails into trim, upholstery, or delicate surfaces where a full-size hammer would be too aggressive. The narrow head lets you reach tight spots without accidentally striking surrounding surfaces. If you do a lot of trim work or upholstery projects, a tack hammer is worth having on hand.
Eye protection is non-negotiable when using a hammer. Nails, chips of wood, or fragments of tile can fly off without warning. Safety glasses or goggles should be worn every time. Gloves can help with grip and reduce vibration fatigue during extended use, though some tradespeople prefer bare hands for better feel and control.
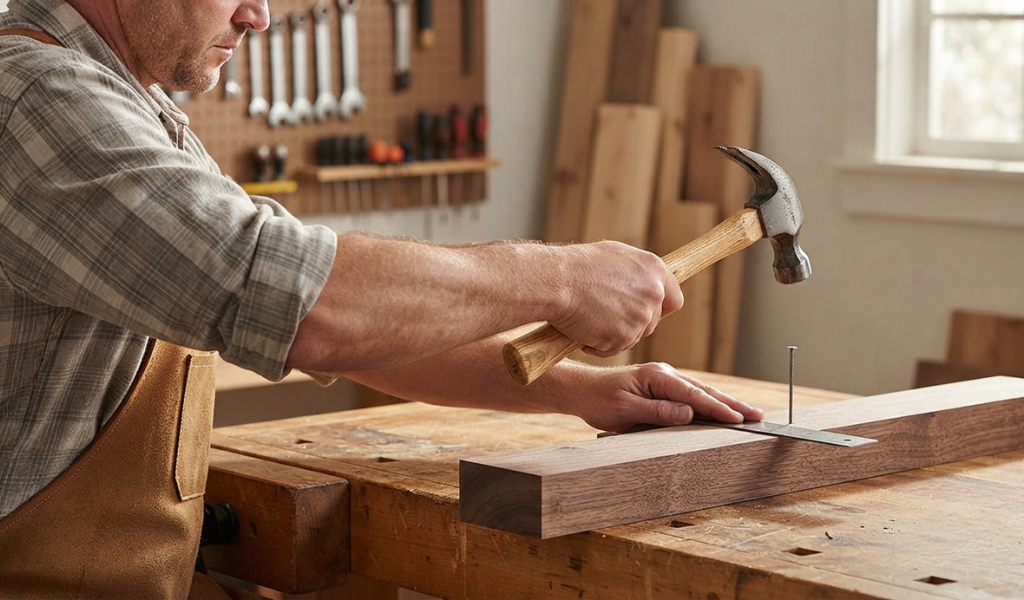
Hold the handle near the end, not up close to the head. Gripping near the end maximizes leverage and gives you more power with less effort. Your grip should be firm but not tense. A death grip on the handle tires your arm quickly and reduces accuracy.
When you swing, use your whole arm, not just your wrist. Let the weight of the hammer head do the work. Your elbow should extend on the downswing, and your wrist should snap slightly at the point of impact to add speed. Keep your eye on the nail head throughout the swing. Looking away, even briefly, is how people accidentally hit their thumb.
Start with light taps to set the nail, check that it’s straight, then transition to full swings. If the nail starts to bend, pull it out and start fresh. Trying to straighten a bent nail usually makes things worse.
Different materials require different approaches. Driving nails into hardwood takes more force than softwood, so a heavier hammer makes the job easier. Working with masonry or stone calls for a club hammer or sledgehammer. Metal work requires a ball peen hammer designed specifically for shaping and striking chisels. If you’re working with delicate surfaces like ceramic tile or finished wood, a rubber mallet prevents cracking and surface damage that a metal hammer would cause.
For general home repairs and DIY projects, a standard 16-ounce claw hammer covers most tasks. Framing and heavy construction work calls for a framing hammer or a heavier claw hammer. Demolition needs a club hammer or sledgehammer. Precision work on trim, upholstery, or small nails is best done with a tack hammer. And any time you’re assembling furniture or fitting pieces together without metal fasteners, a rubber mallet is the right tool. Choosing the right hammer for the job isn’t just about results. It’s also about protecting yourself and your materials.
This is the most frequent mistake beginners make. Using a sledgehammer to drive a finishing nail, or a tack hammer to break up concrete, both lead to poor results and potential injury. Each hammer is designed for a specific range of tasks. Take a moment to select the right one before you start, and the job will go more smoothly.
Hitting a nail at an angle, instead of straight down, causes it to bend and veer off course. It also puts unnecessary stress on the hammer handle and can cause the head to glance off, sending the nail or the hammer flying. Always position yourself so you can strike directly in line with the nail. If you’re working in a cramped space and can’t get a straight angle, use a nail set or punch to finish driving the nail rather than awkwardly angling the hammer.
A hammer is a simple tool with a lot of depth to it. The right type, the right technique, and a clear understanding of what each style of hammer is designed for will make a genuine difference in the quality of your work. From driving nails in carpentry to demolition and metalworking, the hammer remains one of the most useful hand tools you can own.
Take time to inspect your hammer before each use, always wear eye protection, and practice your swing on scrap material before tackling a real project. Once you build good habits, using a hammer safely and effectively becomes second nature.
The five most common uses of a hammer are: driving nails into wood, removing nails with a claw, shaping metal, breaking or chipping masonry, and assembling furniture or fitting parts together with a rubber mallet.
The claw hammer is by far the most widely used hammer. It handles the two most frequent tasks in carpentry, which are driving nails and pulling them out, making it the go-to choice for both professionals and DIYers.
Both have a similar design, but a framing hammer is heavier (typically 20 to 32 ounces) and has a longer handle for more power. A standard claw hammer is lighter (usually 16 ounces) and better suited to general tasks. The framing hammer is built for high-volume construction where you’re driving large nails repeatedly into beams and structural wood.
Always grip the handle near the end for maximum leverage. Keep your eye on the nail, swing with your full arm, and let the weight of the head do the work. Start with light taps to position the nail, then move to full swings. Always wear eye protection and inspect the hammer for a loose head or cracked handle before use.
Consider the material and the scale of the job. General carpentry and home repairs work well with a 16-ounce claw hammer. Heavy construction needs a framing hammer. Masonry and demolition call for a club hammer or sledgehammer. Metalworking requires a ball peen hammer. Delicate assembly or tile work is best done with a rubber mallet. When in doubt, choose the lighter option, as it gives you more control and reduces the risk of damage.
A rubber mallet is not designed to drive nails, particularly into wood. Its rubber head absorbs impact rather than transmitting it cleanly, which means it won’t seat a nail effectively. Use a rubber mallet for tasks where you need a gentle, spreading force, such as fitting tile, assembling furniture, or adjusting flooring pieces into place.