Physical Address
304 North Cardinal St.
Dorchester Center, MA 02124
Physical Address
304 North Cardinal St.
Dorchester Center, MA 02124

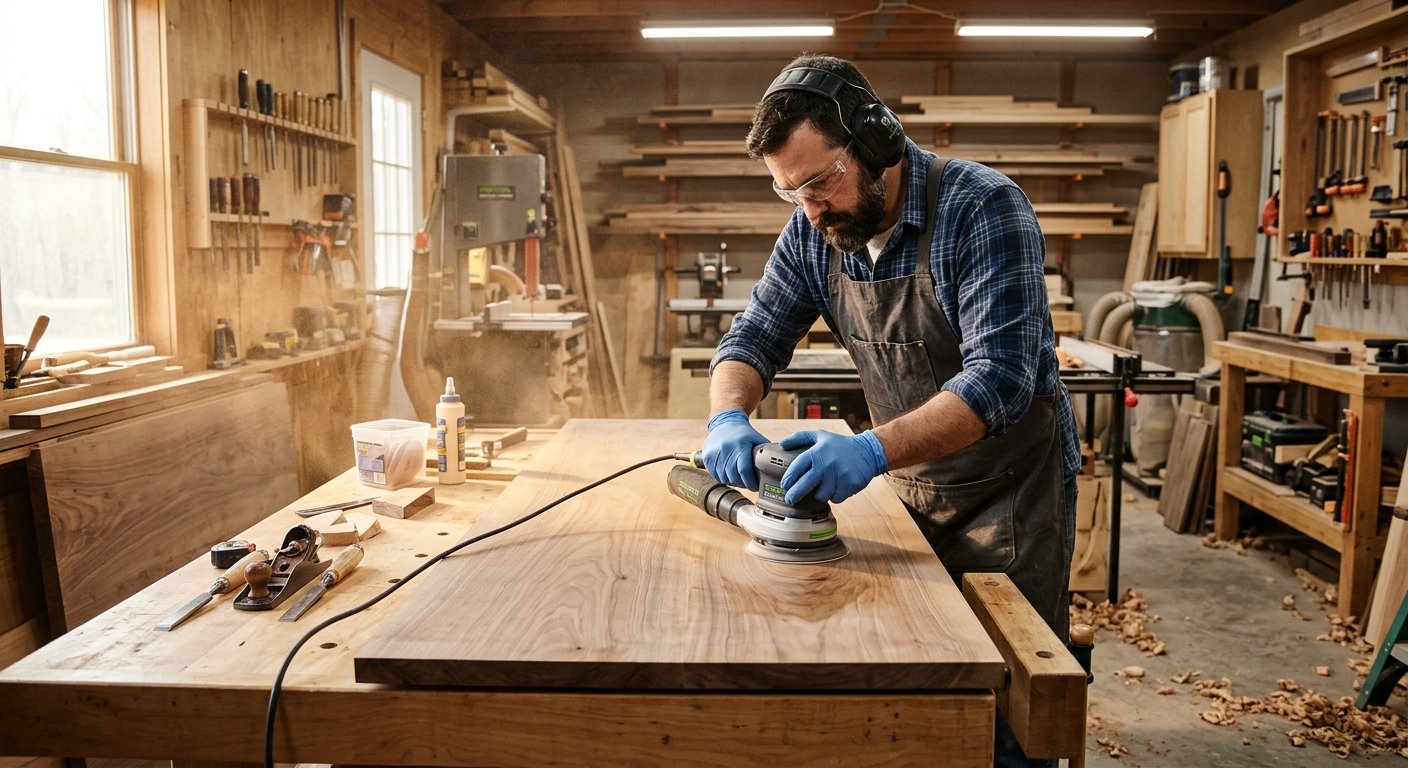
You spent hours cutting, gluing, and clamping a tabletop. It looks great right up until you wipe on the first coat of stain. Suddenly every swirl, scratch, and low spot jumps out like a spotlight. Sanding woodworking flat surfaces for beginners feels like the easy part of a project, but it is where many good builds go wrong. The good news is that a few simple habits fix almost everything.
Whether you work with soft pine, rubber wood vs teak wood, or a plain piece of oak, the basic rules stay the same. You need a flat surface first, a smart plan for grits, and a way to know when you are done. In this guide you will learn how to sand wood without dips or swirl marks, which tools are worth buying, how to use a pencil to check your progress, and how to fix the mistakes that trip up almost everyone at the start. Grab a block and some paper, and let us get into it.
Sanding sounds like a simple job. You rub the wood until it feels smooth. But a flat surface such as a tabletop, a shelf, a door panel, or a cabinet side tells the truth about every mistake. The eye is very good at spotting waves and shiny patches, and light from a window will show them in seconds. That is why sanding flat work needs more care than sanding a small carved piece.
The goal is not only a smooth surface. The goal is a surface that is smooth and flat at the same time. A surface can feel silky and still have a gentle dip in the middle, and that dip will show up under a glossy finish. So every step in the sanding process should serve both goals.
Dips usually come from pressing too hard in one spot or from using a soft backing pad on uneven wood. When you lean on a sander, the pad bends and wears away the softer parts of the grain first. Wood is not the same density everywhere. The darker, harder bands of growth stay high while the lighter bands sink. Pressing hard makes this worse.
Swirl marks come from random orbital sanders when the paper is too coarse, too worn, or moved too fast. Every pass leaves tiny curved scratches. If you jump from a rough grit to a fine one without taking out the earlier scratches, those curves stay hidden under the surface and then appear when you add stain or a coat of oil.
Rounded edges are the third trap. Near the edge of a board, the sander tips slightly as it runs off the wood. Do this a few times and the sharp corner becomes a soft bulge. Rounding over edges by accident is one of the most common beginner problems, and it ruins the clean lines of a good project. The fix is simple. Keep the sander flat and let at least half of the pad stay on the wood at all times. Stop before you slide fully off the edge.
A quick example helps here. A friend built a small walnut coffee table and finished it in an afternoon. In the garage it looked perfect. In the living room, when the afternoon sun hit it from the side, he saw a long shallow wave down the middle and soft rounded edges on every corner. He had pushed down on a belt sander to save time. He ended up taking everything back to bare wood and starting over with a scraper and a sanding block. A little patience in the first hour would have saved him a whole weekend.
Sanding is not only about looks. It opens the wood grain so that stain, oil, or lacquer can soak in evenly. Wood that is too rough will drink too much finish and look dark and blotchy. Wood that is too smooth, especially soft woods like pine, may refuse to take stain and look pale and patchy.
This is why the last grit matters. For most projects that will get stain, stopping at 150 or 180 grit gives the best results. For a clear coat of oil or a clear lacquer, you can go to 220. Going finer than that rarely helps and can seal the pores so that stain sits on top. Some woodworkers go to 320 before a clear finish on hardwood, but this is a personal taste more than a rule.
A clean surface matters just as much as the grit. Any dust left on the wood will mix with your finish and leave a gritty feeling. Always vacuum the surface and wipe it with a slightly damp cloth before you apply anything. The wood grain will rise a little when wet, so lightly sand again when it dries. This small step gives you a much smoother final look.
You do not need a shop full of machines to get good results. A few well chosen tools will take you very far. The key is to match the tool to the job and avoid relying on one tool for everything.
The random orbit sander is the most popular power sander for beginners, and for good reason. The round pad spins and moves in a small random pattern, which helps it remove wood fast without leaving straight scratches. It works well on wide flat panels, tabletops, and cabinet doors. A five inch model is a good size for most home shops. Look for one with dust extraction, since sanding dust is both messy and bad for your lungs. Many models connect to a shop vacuum for much cleaner air.
A sheet sander, sometimes called a finishing sander, uses a rectangular pad and moves in a small back and forth or orbital motion. It is lighter and reaches into tight corners better than a round sander. It is also gentler, so it is slow at heavy material removal. Many people use one for the final passes on a clear coat or for sanding between coats of finish.
A hand sanding block is the simplest tool of all and the one that gives you the most control. A flat block of cork, rubber, or hard foam keeps the paper firm and flat, which helps you hand sand without making dips. It is also the best choice for narrow parts, edges, and tight corners where a power sander would round things over. Blocks cost very little, and you can even make one from a scrap of wood wrapped in sandpaper.
What about a belt sander? It is a strong tool for heavy stock removal, such as flattening a glued up board or removing old paint. But it can chew through wood in seconds. A beginner should use it with great care, or skip it at the start. A hand plane, a scraper, or a planer will often give you a better flat surface than aggressive sanding ever will. Flatten first with the right tool and then sand to refine the surface.
So which one should you buy first? If you have to pick one power tool, get a random orbit sander. Add a couple of hand sanding blocks for edges and details. A flat sanding board, which is simply a long flat piece of plywood or MDF with sandpaper glued to it, is another cheap trick for keeping panels truly flat. Many articles on fine woodworking sites recommend sanding boards for flattening small panels, and they work very well.
A few other items round out the kit. Wear a dust mask or respirator every time you sand, since fine dust gets deep into the lungs. Add safety glasses and hearing protection if you use a machine. Keep a vacuum or brush close by, along with a clean rag and a bright light to check your work. Some people also like mesh style abrasives, sometimes called sandnet, because the open design lets dust pass through and keeps the paper from clogging.
Grit is the number printed on the back of the paper. It tells you how coarse or fine the abrasive is. A low number means large particles that cut fast and leave deep scratches. A high number means tiny particles that leave a finer and finer scratch pattern. 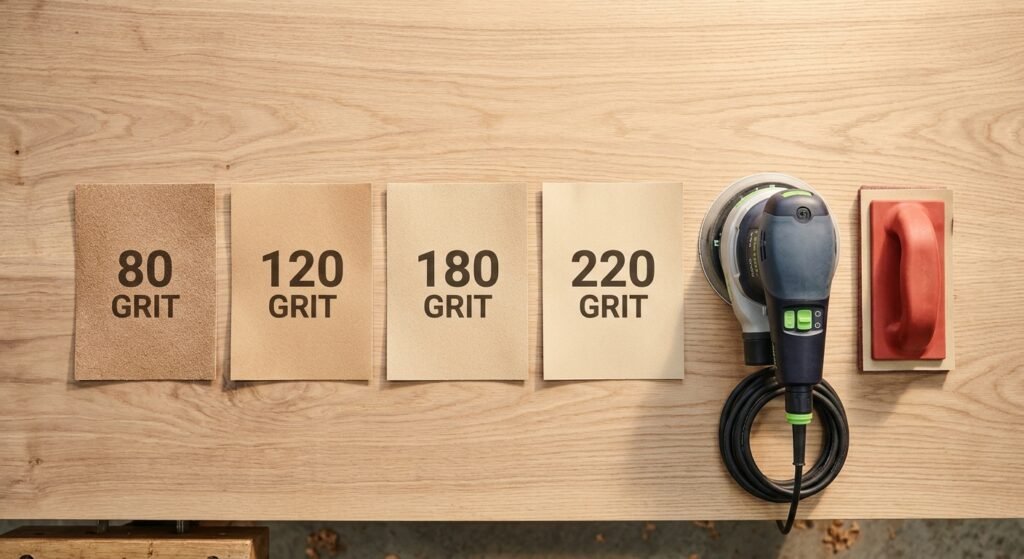 The trick is to move through the grits in order so that each one removes the scratches left by the one before.
Here is a simple progression that works for most projects.
Start with 80 grit only if the surface is rough, has glue squeeze out, or needs real stock removal. If your board was planed smooth, you can skip this and start at 100 or 120. Starting too coarse for no reason just adds work, because you will need extra time to remove the deep scratches.
Move to 120 grit as your main workhorse. This grit removes mill marks and the scratches from the rough grit, and it gets the surface close to flat and even. Spend the most time here, because mistakes in flatness are easiest to correct at this stage.
Next comes 150 grit and then 180 grit. These smooth the wood and prepare it for a stain. Many woodworkers stop at 180 for stained work.
Finish with 220 grit if you plan a clear finish like oil or lacquer. This grit gives a silky feel without closing the pores of the wood.
The one important rule is not to skip too many steps. A good guide is to never jump more than about one step at a time, such as 80 to 120, or 120 to 180. If you jump from 80 straight to 220, the fine paper cannot erase the deep scratches, and they will return later in the finish. A harder wood like maple or oak may need a bit more time at each stage, and a softer wood like pine can be sanded quickly but needs a gentle touch.
Change paper often. Worn paper stops cutting and starts polishing, which creates heat and burnishes the surface. Burnished wood does not accept stain evenly. If you feel you are working harder but not getting anywhere, replace the sheet.
Here is a clear routine you can follow on any flat project. Take your time, and do not rush the early steps.
Step 1: Check the surface first. Run your hand across the wood and look at it under a bright light held low at an angle. This shows high spots, glue lines, and dents. If a joint between boards is uneven, flatten it with a hand plane or scraper before sanding. Sanding is for smoothing, not for fixing big errors.
Step 2: Remove glue and stuck on bits. Scrape off dried glue with a sharp scraper or a chisel held flat. Glue left behind will clog paper and block stain, leaving light patches that you cannot fix later.
Step 3: Start with the right grit. Pick the coarsest grit you really need. For a planed board, 120 is often enough. For a rough board, begin at 80.
Step 4: Sand with light pressure. If you use a random orbit sander, let the weight of the machine do the work. Keep the pad flat and move slowly, about one inch per second. Overlap each pass by half the pad width. Work across the whole surface and not just one spot. When you use a hand sanding block, sand in the direction of the grain with long even strokes.
Step 5: Clean the dust. Before moving to the next grit, vacuum the wood and wipe it down. Loose grit from the last step can drop under the new paper and cause deep scratches. It sounds small, but this habit separates tidy work from messy work.
Step 6: Move to the next grit. Repeat the sanding with the next finer paper. Again keep the sander flat and moving. Check the surface with your hand and under a low light each time. If you still see scratches from the earlier grit, spend more time before moving on.
Step 7: Hand sand at the end. After the last pass with the power tool, finish with a hand sanding block and the same grit, working in the direction of the grain of the wood. This removes any faint circular scratches that the machine left behind. Sanding across the grain would leave cross scratches that show up under a finish, so avoid it at the final stage.
Step 8: Raise the grain and check. Wipe the surface with a damp cloth. Let it dry fully. Lightly sand again with your last grit. Now look at the wood under raking light. If you see no scratches or dull patches, you are ready for stain or sealer.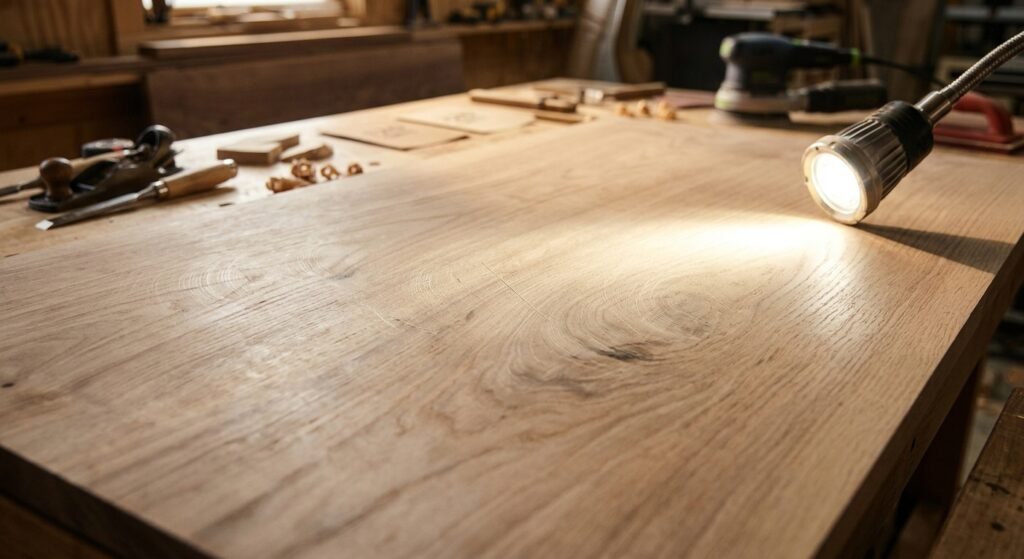
For edges and corners, switch to a hand sanding block and use light strokes. Do not sand the edge with the same pressure as the flat face. A tiny softening with 220 paper is fine and helps the finish last longer, but heavy rounding will look sloppy.
One of the best tips for sanding is also one of the simplest. It is called the pencil trick, and it takes thirty seconds. You use a regular pencil to scribble light lines over the whole surface. Draw a loose grid or a zigzag so that every part of the board is covered. This is sometimes called a scribble test.
Now sand. As you work, the pencil marks start to disappear. The marks go away first on the high spots, because that is where the paper touches the wood. Low spots keep their marks longer because the paper cannot reach them. When every mark is gone, you know the whole surface has been touched by that grit.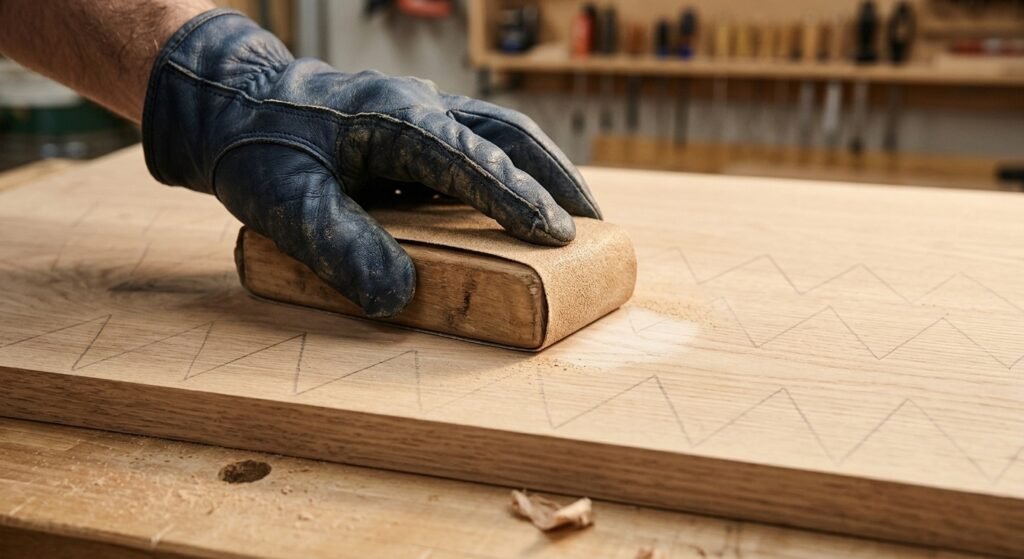
This is a powerful way to see what your hand and eyes might miss. If one corner still has pencil lines while the rest is clean, you have a dip there or you did not sand it long enough. If a long streak remains in the middle, the board may be slightly hollow. Keep going until all the lines are gone, but stop if you see the marks vanishing too fast in one spot, since that may mean you are taking too much off.
Use the pencil trick at each grit. Scribble again after you change paper. The new lines show you where the new paper has done its job. It also reminds you not to rush to the next step before the current grit has cleaned up the previous scratches.
Here is a real example. A hobbyist building a bookshelf was frustrated by faint scratches that kept showing after he applied a coat of oil. He tried the pencil trick on his next shelf and found that his 120 grit pass had left several spots untouched near the edges. He repeated the pencil marks at 150 and 180 and finally got a smooth and even finish. The cost of the trick was a pencil and a few minutes, and it saved him from sanding the whole shelf over again.
Everyone makes mistakes when learning to sand wood. Here are the most common ones and what to do about each.
Skipping grits. This is the number one reason for leftover scratches. If you notice deep lines after staining, there is no shortcut. Go back to the coarser grit that matches the scratch, sand until the lines are gone, then climb back up through the grits in order.
Pressing too hard. Leaning on the sander creates heat, uneven wear, and dips. If you feel the machine working harder and the pad slowing down, ease off. If you have already made a dip, flatten the area with a scraper or a plane, or sand the whole surface evenly with a sanding board until the low spot disappears.
Leaving swirl marks. Swirls show up when paper is clogged, the sander moves too fast, or you stop at too coarse a grit. Take the surface back a grit or two. Use fresh paper and slow, steady passes. Finish by hand sanding with the grain using a block.
Sanding across the grain. Cross grain scratches are hard to see on bare wood, but they glow once finish goes on. The fix is to go back and sand along the grain with the last grit you used, then one grit finer. A scraper can also remove a thin layer and reset the surface.
Rounding over edges by accident. Keep the pad flat and avoid tipping at the ends. For a worn edge, you can sometimes restore a crisp line by planing or sanding the edge square with a block. If the rounding is mild, you can blend it into the rest of the piece by softening all edges evenly.
Skipping the dust cleanup. Loose grit under the paper creates random deep scratches. Vacuum and wipe the surface between grits. Good dust collection also helps keep your lungs healthy.
Sanding through veneer. On plywood with a thin top layer, it takes only a few passes to cut through the veneer and expose the layer beneath. Use fine grits only, a light hand, and stop often to check. If you do break through, there is no easy fix except patching or covering the spot.
Wet sanding too soon. Wet sanding is a technique used between coats of lacquer or on certain finishes, not on bare wood before stain. Use it only when your finish instructions call for it.
No matter the problem, patience is the best repair. Wood forgives a lot when you go slow, and a few extra minutes at the right grit will always beat a rushed job.
Sanding woodworking flat surfaces for beginners comes down to a few steady habits. Flatten first with the right tool, move through your grits in order, keep pressure light, clean the dust between steps, and use the pencil trick to see your progress. Choose a random orbit sander for the big work, a hand sanding block for edges and details, and always finish with the grain.
The best way to learn is to practice on a scrap board. Try each grit, scribble with a pencil, and watch how the marks disappear. Once you feel the difference, your real projects will look cleaner and more professional. Ready to try it? Pick up a pack of 120, 180, and 220 grit paper, grab a block, and give your next project the flat and smooth finish it deserves. If this guide helped, share it with a fellow woodworker who is just getting started.
For most planed boards, start with 120 grit. If the surface is rough or has glue on it, start with 80 grit and work up. Starting too fine will not remove the marks you need to remove, and starting too coarse wastes time.
You can hand sand any flat surface. It takes longer but gives you great control. Use a flat sanding block and long strokes with the grain. For large tabletops, a random orbit sander saves a lot of effort, and you can finish with a block by hand.
Use fresh paper and keep the pad flat. Move slowly with light pressure and overlap each pass. Do not skip grits. Finish by hand sanding with the grain using your last grit to remove any faint circles.
For most stained projects, 150 or 180 grit is best. Finer paper can close the pores and lead to patchy color. For clear oil or lacquer, 220 grit is a good finish.
Use the pencil trick. Scribble light lines over the surface and sand until they are all gone. Then check the wood under a low angled light. If you see no scratches, dips, or dull patches, you are done at that grit.
Yes, in most cases. A light sanding with 220 to 320 grit between coats removes dust nibs and helps the next coat bond. Wipe away the dust well before applying the next coat.
Yes. Fine sanding dust is not safe to breathe, especially with hardwoods. Wear a dust mask or respirator, use dust extraction when you can, and keep your work area well ventilated.