Physical Address
304 North Cardinal St.
Dorchester Center, MA 02124
Physical Address
304 North Cardinal St.
Dorchester Center, MA 02124


There’s a moment every woodworker knows well: you’ve spent hours shaping a beautiful piece of wood furniture, carving out fine details and delicate grooves, and then you reach for the sandpaper. Suddenly, the easy part is over. Sanding intricate woodwork is where patience meets skill, and where most projects either come together or quietly fall apart.
Whether you’re refinishing an ornate chair, cleaning up a carved relief panel, or smoothing the tight corners of a detailed frame, the challenge is always the same: how do you get a smooth finish without losing the details that make the piece special? Flat surfaces are forgiving. Intricate ones are not.
This guide is built for woodworkers who want real answers. You’ll learn how to sand wood furniture with delicate details, which tools actually work in tight crevices, how to choose the right sandpaper grit for each stage, and the common mistakes that ruin otherwise great work. By the end, you’ll have a clear, practical approach to detail sanding that protects your carving, preserves your grooves, and delivers a flawless finish every time.
Intricate woodwork refers to any piece that features detailed shapes, carved surfaces, curved edges, or tight areas that standard flat sanding methods can’t reach. It’s the opposite of a tabletop or a flat panel. These are the pieces that demand real attention and specific sanding tools to do the job right.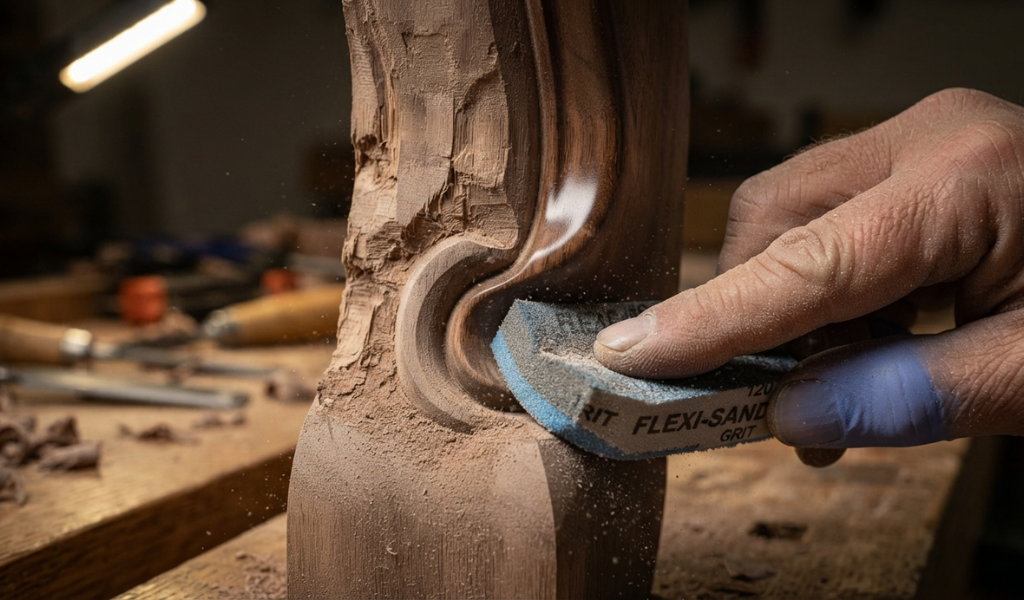
Some of the most common examples include hand-carved furniture legs, decorative molding, relief carvings, wooden picture frames, musical instruments, and architectural millwork. Each of these features areas where a standard sanding block won’t fit, and where orbital sanders can cause more harm than good if used carelessly.
Detail work also includes furniture that’s being refinished. When you strip old varnish or stain from carved wood furniture, you need to sand wood furniture carefully in every groove without losing the shape of the original carving. This is where proper sanding technique separates a professional result from a rough one.
The whole point of sanding is to remove imperfections and prepare the surface for a finish. But with intricate woodwork, the stakes are higher. Sand too aggressively, and you round off crisp edges or flatten carved grooves. Sand unevenly, and your stain or varnish will absorb differently across the surface, creating blotchy patches that no amount of finishing can hide.
Delicate sanding is what keeps the detail work looking intentional and refined. It’s not just about smoothness. It’s about respecting the form of the piece while still achieving the surface quality needed for a great finish.
Before getting into the full toolkit, it’s worth calling out one specific tool that makes intricate sanding far more manageable: the finger sanding pad. This is a small, flexible sanding pad designed to fit into tight spaces where your hand or a standard sanding block simply won’t go. It conforms to curved surfaces and grooves, applying even pressure without flattening the contour of the wood. For detailed sanding, it’s one of the most useful tools you can have on your workbench.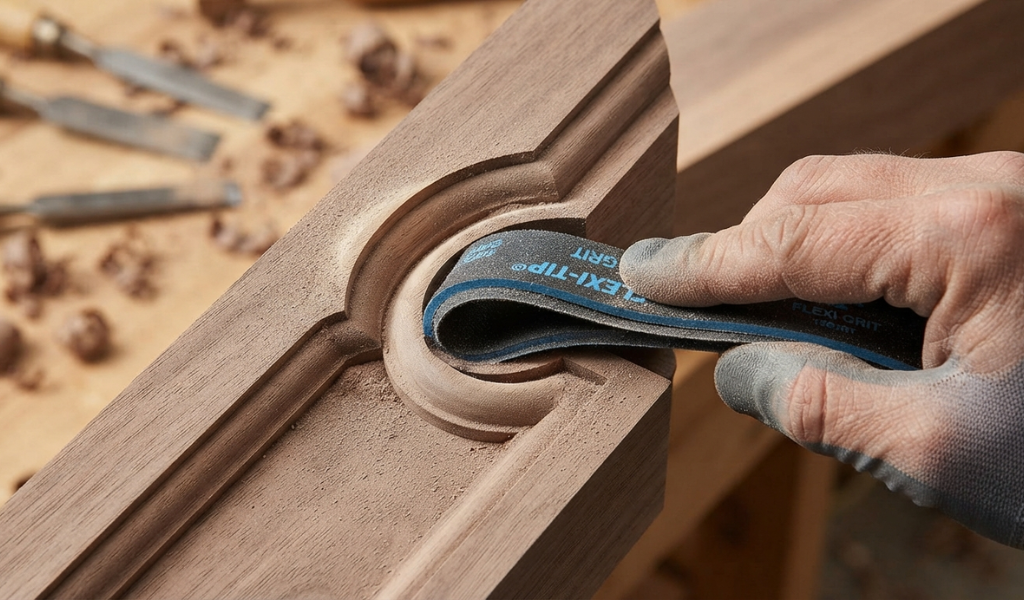
Getting the right sanding tools in place before you start saves a lot of frustration. The wrong tool for intricate work can damage the very details you’re trying to preserve.
Hand sanding is the backbone of detail work. It gives you the most control, which is exactly what you need when working around a carving or inside a groove.
A sanding block is useful for relatively flat areas within a detailed piece. You wrap sandpaper around it and use short, controlled strokes to work the surface. For curved or contoured areas, you can wrap sandpaper around a dowel rod, a pencil, or even your finger to match the shape of the surface.
Foam sanding blocks are another great option. Because foam is flexible, it can follow gentle curves without digging into edges or rounding off sharp details. For very small crevices, folding your sandpaper into a tight crease and working it gently into the groove is one of the oldest and most effective techniques in hand sanding.
Beyond basic hand tools, there are a handful of specialty accessories that make sanding intricate woodwork much more manageable.
Sanding sticks are thin, narrow strips with sandpaper bonded to them, perfect for reaching into tight areas that fingers can’t access cleanly. Detail sanding files, which come in various profiles (triangular, round, flat), are designed to match common molding and carving shapes.
For power options, a rotary tool with small sanding attachments can speed up the sanding process on accessible carved areas. However, you need a steady hand. Rotary tools remove material quickly, and in intricate work, removing too much material is a hard mistake to fix. Orbital sanders are generally too large and aggressive for true detail work, though a small detail sander with a pointed pad can sometimes be useful on slightly more open areas.
Having the right tools is only half the job. The technique matters just as much, especially when you’re working around delicate details and carved grooves.
The key to sanding curves is keeping your abrasive flexible enough to follow the contour of the wood. Stiff sanding blocks create flat spots on curved surfaces. Instead, wrap sandpaper around a flexible foam pad or your fingers, and use light, consistent strokes that follow the direction of the curve.
Always sand with the grain of the wood, even on curves. Cross-grain scratches are harder to remove and become very visible under a stain or varnish. Move in smooth, steady strokes and check the surface periodically by looking at it from a low angle in good light. This catches uneven spots before they become a bigger problem.
Tight corners and crevices need patience more than anything else. Fold a piece of sandpaper into a sharp crease and work it gently back and forth inside the groove. Don’t force it. Let the abrasive do the work with light, even pressure.
For very small crevices, a sanding stick or a folded piece of extra-fine grit sandpaper wrapped around a toothpick can reach spots that nothing else will. The goal isn’t to remove a lot of material. It’s to clean up the surface and smooth out any roughness left from carving or routing, without damaging the edges of the groove.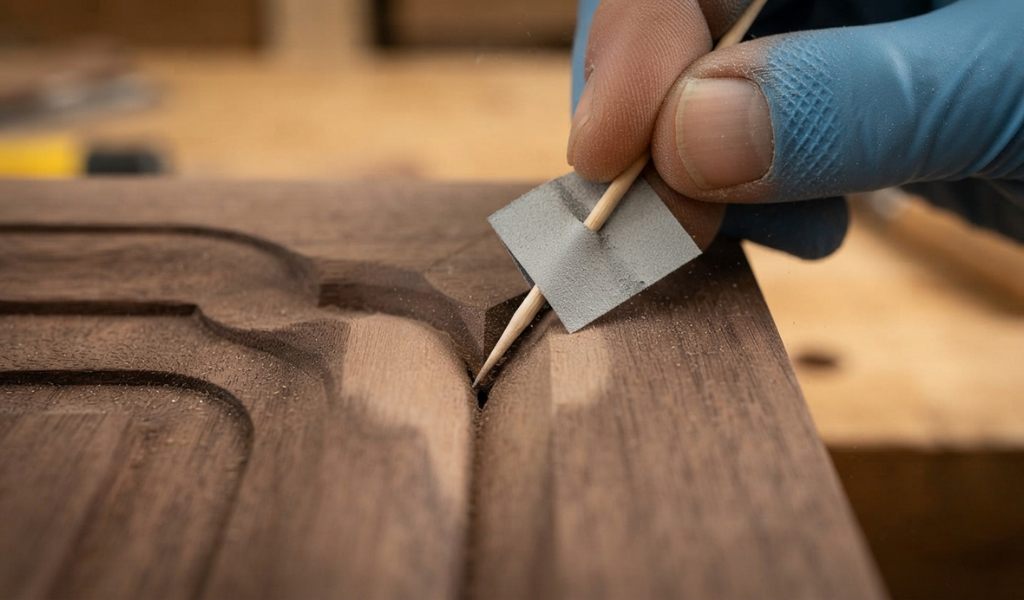
Understanding sandpaper grit is fundamental to getting a good result. Grit refers to the coarseness of the abrasive particles on the sandpaper. Lower numbers mean coarser grit that removes more material. Higher numbers mean finer grit that smooths the surface.
Initial sanding on intricate woodwork should start with a medium or coarse grit, typically somewhere between 80 and 120 grit, depending on the condition of the surface. If you’re refinishing old wood furniture and need to remove an old finish, coarse sandpaper in the 60 to 80 grit range can speed up the stripping process on accessible flat areas.
For the intricate areas themselves, starting too coarse is risky. A coarser grit removes more material and can easily damage fine carving details. In tight grooves and carved sections, starting with 120 grit is often safer. It still removes material and smooths rough surfaces, but it gives you more control over how much comes off.
After the initial sanding with coarser grit, you work through progressively finer grits. A typical grit progression for intricate woodwork might go from 120 to 180, then to 220, and finally to 320 or higher for a very smooth finish. Each stage removes the scratch marks left by the previous grit and refines the surface further.
For the final pass, especially if you’re applying a clear finish or a light stain, sanding up to 320 or even 400 grit gives you a surface that finishes beautifully and feels genuinely smooth to the touch. Extra fine grit is especially important in carved areas where any remaining scratches will catch the light and show through the finish.
Most problems in detailed sanding come from a handful of repeated mistakes. Knowing them ahead of time is the fastest way to avoid them.
Over-sanding is the most common mistake in intricate work. It happens when you spend too long in one spot, gradually rounding off crisp edges or wearing down carved details until they lose their definition. The fix is simple: check your work often. Step back, look at the piece from different angles, and stop as soon as the surface looks and feels right.
More pressure does not mean faster results in detailed work. It means more risk of damage. Heavy pressure causes the sandpaper to dig into soft spots unevenly, creates grooves, and can snap fine carved elements. Use light, even pressure and let the abrasive do its job gradually.
Scratch marks appear when you skip grits or change direction mid-stroke. Always follow the grain and move through your grit progression in order. Jumping from 80 to 220 grit leaves deep scratches underneath that the finer paper can’t fully remove, and they’ll show up under a stain.
Using coarse sandpaper on delicate carving, or fine sandpaper when you need to remove a thick old finish, both create problems. Match your grit to the task at each stage and change it when the surface condition changes.
Once your sanding is done, the surface needs proper preparation before any finish goes on.
Sawdust left on the surface gets trapped under your finish and creates a rough, grainy texture. Use a soft brush to clear out grooves and crevices, then wipe the entire surface down with a tack cloth. A tack cloth picks up fine dust that a regular cloth will miss. For deeply carved areas, compressed air can help blast dust out of tight spots before the final wipe-down.
Before applying any stain or varnish, inspect the sanded surface carefully. Use a single raking light source held at a low angle to the wood.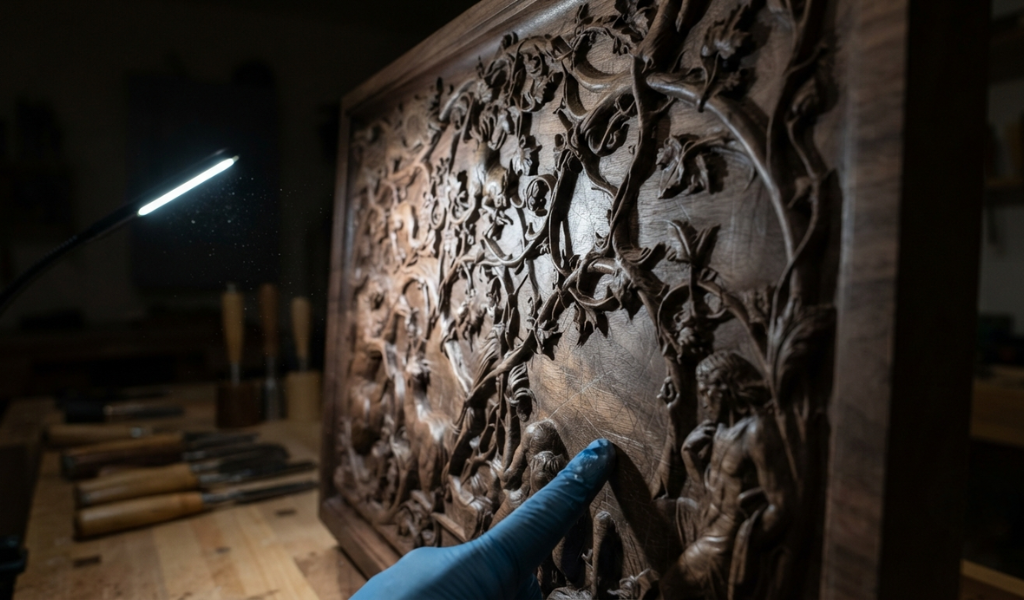 This reveals any remaining imperfections: scratches, uneven spots, or areas that weren’t fully sanded. Fix these now. Once the finish goes on, any imperfection that’s still there becomes permanent.
Knowing when to stop is a skill that takes practice. The general rule: stop when the surface feels consistently smooth to your fingertips and looks even under raking light. There should be no visible scratches from the current grit and no rough patches in carved areas or grooves.
For most projects, finishing at 220 grit is enough before applying stain. If you’re applying a clear finish and want an especially refined look, sanding to 320 is worth the extra time. Going beyond 400 grit on most wood species offers very little additional benefit and can actually burnish the surface to the point where stain won’t absorb evenly.
The goal of proper sanding is to refine the surface without erasing what makes the piece interesting. To maintain fine details throughout the process, check your work after every grit change. Pay special attention to the highest points of carved areas, since these wear faster than recessed grooves. Keep your strokes short and controlled in detailed areas, and never rush.
If you’re working on a piece where the carving has very fine lines, consider leaving those finest lines unsanded and just cleaning them with a brush or cloth. Sometimes the best sanding decision in a particular spot is no sanding at all.
A few last thoughts that make a real difference in the quality of your finished work:
Always wear safety goggles when sanding. Fine sawdust is hard to see and easy to inhale or get in your eyes, especially when working in tight spaces with small tools.
Work in good lighting. You can’t see what you’re doing if you can’t see the surface clearly.
Sand in stages and check often. Rushing through the grit progression is the fastest way to end up with a surface that needs to be redone.
Use the right tool for each area of the piece. A flat sanding block in a curved groove won’t work, and neither will a flexible foam pad on a flat section that needs to stay perfectly flat.
Take breaks. Fatigue leads to uneven pressure and missed spots. Step away from the piece periodically and come back with fresh eyes.
How do you sand intricate trim?
Sand intricate trim using folded sandpaper, sanding sticks, or small foam sanding pads that can follow the profile of the trim. Work with the grain using light, even pressure, and progress through grits from 120 up to 220 or higher. Avoid using orbital sanders on trim, as they’re too aggressive for detailed profiles.
What is the best tool for intricate sanding?
For most detail work, hand sanding with a flexible foam pad, sanding sticks, or a finger sanding pad gives you the most control. A rotary tool with small sanding attachments can help on larger carved areas, but hand sanding remains the safest and most precise option for tight spaces and fine details.
How do you sand small crevices in wood?
Fold a piece of fine-grit sandpaper into a sharp crease and work it gently into the crevice using light back-and-forth strokes. Sanding sticks and sandpaper-wrapped dowels also work well. For very small crevices, wrapping sandpaper around a toothpick or skewer gives you access without damaging the surrounding surface.
When should you sand intricate wood versus leaving it natural?
Sand intricate wood when you plan to apply a finish, stain, or varnish, or when the surface feels rough and uneven. Leave it natural (unsanded) if the piece has extremely fine carved lines that sanding would damage, or if the natural tool marks are part of the intended aesthetic of the piece.
What types of sandpaper and grits should be used for intricate sanding?
Start with 120 grit for initial sanding in detailed areas, then progress to 180, 220, and 320 for finishing. Use flexible sandpaper or foam-backed sheets that can conform to curves. Avoid stiff sandpaper on carved surfaces, as it won’t follow the contour and will create flat spots.
What are the best tools for sanding intricate woodwork?
The best tools include foam sanding blocks, sanding sticks, finger sanding pads, folded sandpaper, and dowel-wrapped sandpaper for different shapes and sizes of detail. A rotary tool with small sanding drums can assist on larger carved areas. For most detail work, hand sanding gives the most control and the safest results.
How do you avoid damaging fine carving details while sanding?
Use fine grit sandpaper rather than coarse, apply light even pressure, and check your work frequently. Focus on the recessed areas and lightly touch the raised detail areas. Stop as soon as the surface is smooth. The most common cause of damage to fine carving details is over-sanding, not under-sanding.