Physical Address
304 North Cardinal St.
Dorchester Center, MA 02124
Physical Address
304 North Cardinal St.
Dorchester Center, MA 02124


You have just cut a curved piece of wood on your band saw. The edge is rough, the saw marks are everywhere, and sanding by hand would take half your afternoon. This is the moment an oscillating spindle sander earns its place in the shop. It sands curves, rounded corners, and tight inside cuts quickly and evenly, and it does the work with far less effort than a sheet of sandpaper.
If you are new to power sanding, this guide will walk you through everything. You will learn what the machine does, how it works, and why so many woodworkers call it one of their favorite shop helpers. You will also see how to use it step by step, stay safe, and avoid common beginner mistakes. If you also work with small parts or straight edges, our Sanding Jig: Complete Guide for Woodworking Projects pairs nicely with the machine you are about to learn.
An oscillating spindle sander is a stationary power tool made to smooth curved and shaped edges. It has a vertical rod called a spindle that sticks up through a flat table. A sanding sleeve slides over the spindle, and the spindle spins at high speed. At the same time, it moves up and down. That up and down motion is what the word oscillating means.
Most woodworkers use it for work that other sanders handle badly. A belt sander is great for flat faces, and a disc sander is good for straight edges and ends. But neither one handles an inside curve very well. A spindle sander does. You can sand the inside of a heart shape, the curve of a chair leg, or the round edge of a tabletop with almost no fuss.
You will find the machine in two main styles. Benchtop models are small and sit on a workbench. They suit hobby shops, garages, and anyone with limited space. Floor models are bigger, heavier, and more powerful. They are common in professional cabinet shops where the machine runs all day. Both work the same way, so what you learn on a small one carries over to a large one.
Some people call this tool a spindle sander, an oscillating sander, or an OSS. If you see those names in a store or a video, they mostly mean the same machine. Just check that it has the up and down motion, because that feature is what makes it special.
The idea is simple. A motor turns the spindle, and a second mechanism moves the spindle up and down at the same time. Together, those two motions let the sanding sleeve cut wood across its whole height instead of in just one spot.
Think about a regular spinning drum. If it only turned, the same narrow strip of sandpaper would touch your wood every time. That strip would heat up, clog with dust, and wear out quickly. It could also leave burn marks and tiny grooves in the wood. With the oscillating motion, the contact point keeps moving along the sleeve. The heat spreads out, the dust clears, and the paper stays sharp much longer.
The up and down stroke also gives a smoother finish. Because the abrasive crosses the wood at a slight angle with each pass, it leaves tiny scratches in many directions rather than one straight line. That is why the edge feels so even when you finish.
When you use the machine, you hold the workpiece flat on the table and push it gently against the sleeve. The spinning spindle takes off a little wood at a time. You rotate the piece slowly, following the curve. The table keeps your work level, and the sleeve does the cutting. A beginner can get a clean, even edge in just a few passes.
Speed matters a little. Most machines run at a fixed speed that works for general wood sanding. Some higher end models offer variable speed, which helps when you sand plastic or soft materials that melt from heat. For most hobby work, a single speed is fine.
The first big benefit is speed. Hand sanding a curved edge can take many minutes, and the result is often uneven. A spindle sander finishes the same job in seconds. If you make cutting boards, signs, toys, or furniture parts, the time you save adds up fast.
The second is consistency. When you sand by hand, your pressure changes as you tire. One side ends up smoother than the other, or a flat spot appears in a curve. The machine does not get tired. It gives the same result on the first piece and the twentieth, which is very handy when you make matching parts.
Third, it gives you control over shape. You can pick a spindle size that matches the curve you want. A small spindle handles tight inside curves, while a big one gives soft, gentle arcs. This lets you refine a shape in ways that are hard to do by hand. You can even fix small mistakes left by the band saw or scroll saw and turn a wobbly line into a smooth one.
Another plus is longer sandpaper life. Since the oscillating motion spreads wear across the sleeve, you get more use out of each one. Over a year of projects, that saves real money.
The machine also helps with dust. Most models have a dust port that connects to a shop vacuum. Fine dust is bad for your lungs, and it also hides your layout lines and makes a mess. A good port pulls much of it away before it spreads through the room.
Finally, it is safer than many other sanding methods. Your hands stay on top of the workpiece instead of near a moving belt. There are no sharp teeth, and the cutting action is gentle and steady. With basic care, it is one of the friendlier machines you can own.
Before you use the machine, take a minute to learn what each part does. Knowing the names helps you read manuals, order replacement parts, and talk to other woodworkers. It also helps you spot trouble early.
The spindle is the vertical shaft that holds the abrasive. It is usually made of metal and stands straight up through a hole in the center of the table. Most machines come with a set of spindles in different diameters, often from half an inch up to three inches or more. Each size is made for a different curve.
Over each spindle goes a rubber drum, and over the drum goes a sanding sleeve. The sleeve is a small tube of sandpaper that slides on like a sock. A nut at the top of the spindle squeezes the rubber so it swells and grips the sleeve tightly. When you tighten the nut, the drum gets slightly bigger and the sleeve stays put. When you loosen it, the sleeve slips off easily.
Sleeves come in many grits. A coarse one, around 80 grit, removes wood fast and is good for cleaning up saw marks. A medium one, around 120, smooths things out. A fine one, around 180 or 220, gives a nearly finished surface. Always start with the coarsest grit you need, and move up step by step. Skipping too far leaves scratches that are hard to remove.
Keep a few spare sleeves in each size. A worn sleeve burns the wood and wastes your time. If you see dark marks, or if the machine seems to push harder to cut, it is time to change it.
The oscillating mechanism is what moves the spindle up and down. Inside the machine, a small gear or cam turns the motor’s spin into a vertical stroke. The stroke length is usually between half an inch and one inch, which is enough to spread wear without making the machine shake.
You cannot see most of this mechanism, but you can hear and feel it working. A healthy machine runs with a steady hum and a smooth rhythm. If you notice knocking, rattling, or a jerky stroke, something may be loose or worn. Stop the machine, unplug it, and check the manual.
A few models let you turn off the oscillation. This can help when you want a very precise cut, such as sanding to a line, since the spindle stays at one height. But for most work, leave it on. The up and down motion is the whole point of owning this machine.
Keep the mechanism clean and lightly oiled if the manual says so. Dust gets into everything, and a little regular care can keep it running for many years.
The table is the flat surface where you rest your workpiece. It is usually cast iron or steel, and it has a hole in the middle for the spindle. A good table is flat and smooth so wood slides easily. Many models let you tilt the table to sand beveled edges, often up to 45 degrees. This is useful for chair seats, angled joints, and decorative edges.
Most machines come with a set of insert rings for the table. These are small plastic or metal rings that fit around the spindle and fill the gap between the sleeve and the table. Pick the ring that fits your spindle size as snugly as possible. A tight gap keeps small pieces from slipping down and getting stuck.
The dust port sits under the table or at the back of the machine. It is a round opening where you attach a vacuum hose. Most are about 2 inches wide, though some are larger. If your hose does not fit, an adapter or hose reducer from the hardware store solves it. Using a vacuum makes a big difference in how clean your air and your shop stay.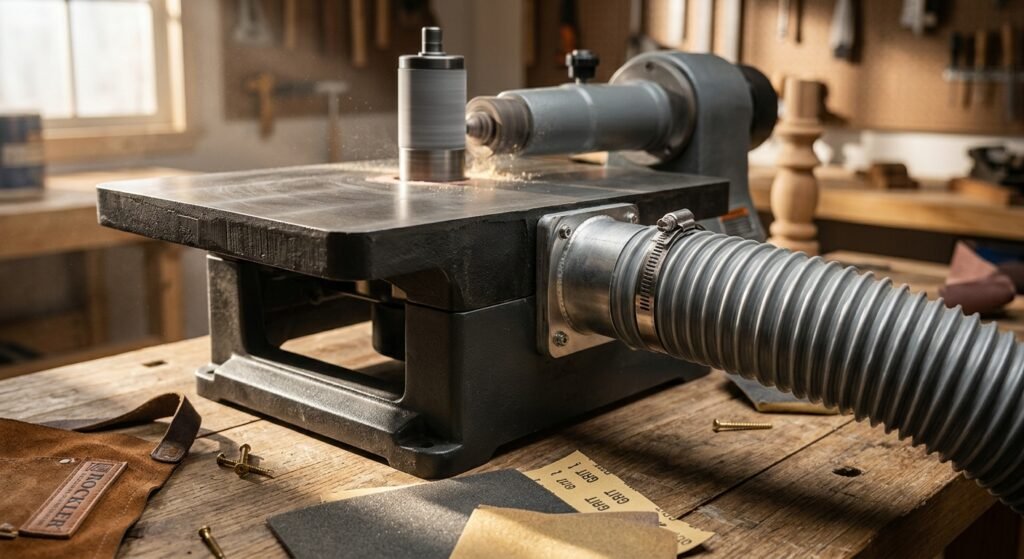
A small tip: wax your table with paste wax every few months. It helps wood glide, reduces friction, and protects the metal from rust.
Using this sander is easy once you know the basic steps. Take your time on your first few runs, and try it on scrap before moving to your real project.
Start by choosing the right spindle. Look at the curve you need to sand. The spindle should be smaller than the tightest inside curve in your piece. If it is too big, it cannot reach into the curve and will flatten it. If you are not sure, pick the smaller one. You can always sand a gentle curve with a small spindle, but you cannot sand a tight curve with a big one.
Next, install the sleeve and the correct table insert. Slide the sleeve onto the rubber drum and tighten the nut at the top until the sleeve feels firm. Drop in the insert ring that matches the spindle. Spin the spindle by hand before turning on the power, and make sure it moves freely and nothing rubs.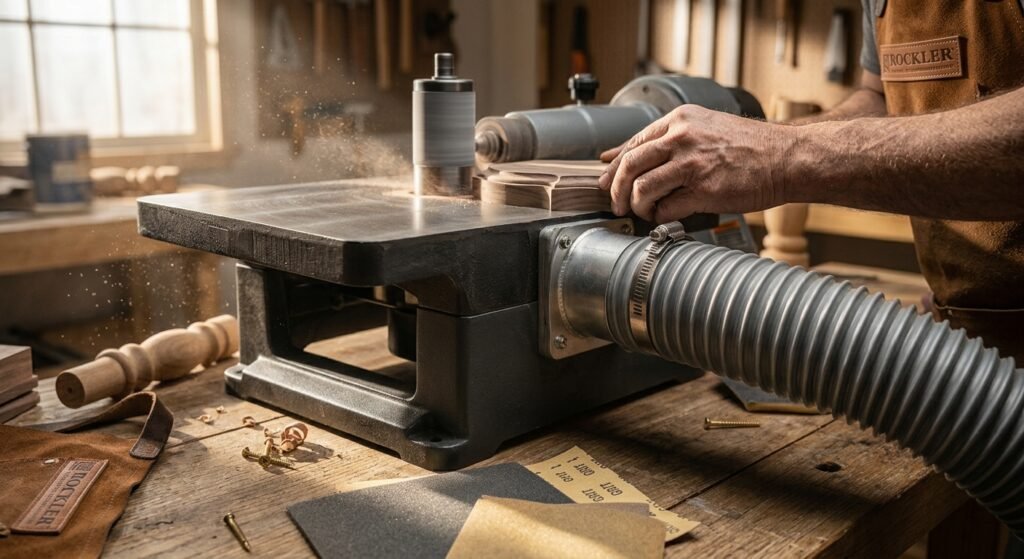
Now prepare your workpiece. Cut it close to your line first, leaving only a small amount of wood to remove. Sanders work best when they only need to clean up a rough edge. If you try to remove a lot of wood, the machine will work hard, and the sleeve will burn.
Turn on the machine and let it reach full speed. Hold the wood flat on the table with both hands. Gently feed the edge into the spindle against the direction of rotation. This is important. The spindle spins one way, and you should push the wood into it so the sleeve pulls the work toward the table, not away from it. If you feed it the wrong way, the sleeve can grab the wood and fling it.
Keep the piece moving at a steady pace. Never hold it still against the spindle, because that creates a flat spot or a burn mark. Slide the edge slowly along the sleeve, and rotate the wood to follow the curve. Use light pressure and let the machine do the cutting. Pressing hard slows the motor and makes the surface rough.
Check your work often. Pull the piece away, run your fingers along the edge, and look for uneven spots. If you see a flat area, adjust your feeding speed. Move smoothly, and the line will round out nicely.
Finally, turn off the machine and wait for the spindle to stop completely before you touch anything. Then wipe the table, empty the dust bin, and put your tools away. A clean machine is ready for the next job..
A spindle sander is a friendly machine, but it is still a power tool. Good habits keep you safe and keep your shop a pleasant place to work.
Always wear eye protection. Small chips and dust can fly up at any time. Add a dust mask or a respirator, especially when you sand hardwoods or MDF. Fine dust gets deep into your lungs, and some woods cause allergic reactions. Hearing protection is smart too, since the motor and the vacuum can be loud over a long session.
Keep your clothes and hair under control. Skip loose sleeves, dangling jewelry, and gloves, because any of them can get caught in a spinning spindle. Tie back long hair, and roll up your sleeves.
Check the machine before every use. Look at the sleeve for tears, and make sure the nut at the top is tight. Make sure the table is clean and locked at the right angle. Confirm that the insert ring fits well and that the power cord is in good shape.
Hold the workpiece firmly, and keep your fingers away from the sleeve. Do not try to sand tiny pieces freehand. Use a jig, a clamp, or a push block instead. A good rule is that if the piece is too small to hold with your whole hand and still stay clear of the abrasive, it needs a holder.
Feed against the rotation. This is the most important safety rule for the machine. Learn which way your spindle turns, and always push the work into it, not along with it. If you feel the wood being pulled, stop and check your direction.
Never reach over or around the spindle while it is moving. Wait for it to stop before you clear dust, change a sleeve, or pick up a dropped piece. It only takes a few seconds, and it can save you from a bad injury.
Keep the work area clean. Sawdust builds up quickly, and it burns easily. Use a vacuum to collect it, and empty the bin regularly. Keep the floor clear so you do not trip when you move around the machine.
Unplug the machine whenever you change sleeves, adjust the table, or clean inside it. Accidents happen most when someone forgets this simple step.
Even careful beginners make a few errors. Here are the most common ones, with easy ways to fix them.
Using the wrong spindle size. A big spindle on a tight curve will flatten the shape and leave gaps. Pick a spindle a little smaller than your tightest curve, and the sleeve will follow it properly.
Pressing too hard. Heavy pressure burns the wood, slows the motor, and wears out the sleeve fast. Let the machine do the work, and use a light, steady push.
Holding the piece in one spot. If you stop moving, the sleeve cuts a dip or leaves a dark burn. Keep the wood moving along the spindle, and rotate it as you go.
Feeding the wrong way. Pushing with the rotation makes the sleeve grab your workpiece and throw it. Always feed against the spin.
Skipping grits. Jumping from 60 to 220 grit leaves deep scratches under the fine paper. Move up in steps so each grit removes the marks from the last.
Using worn sleeves. A dull sleeve glazes over, burns the wood, and makes the machine seem weak. Change sleeves as soon as they stop cutting well.
Ignoring the table insert. A loose or missing ring lets thin pieces drop into the gap. Always fit the right ring for the spindle you are using.
Sanding too much wood at once. The sander is for smoothing, not for shaping from scratch. Cut close to the line with a saw, and use the sander to finish the job.
Forgetting dust control. A clogged port or a full bin makes the sleeve load up and the shop air unhealthy. Connect a vacuum and keep it working.
Skipping maintenance. Dust and wear can damage bearings and the oscillating mechanism. Clean the machine often and follow the care steps in the manual.
An oscillating spindle sander is one of the most useful machines you can add to a woodworking shop. It turns rough, sawn curves into smooth, even edges in a fraction of the time that hand sanding takes. The oscillating motion keeps the sleeve cool and sharp, the table keeps your work steady, and the spindle sizes let you match almost any curve.
To get the best results, choose the right spindle, start with a grit that fits the job, and feed your wood against the spin. Keep your pressure light, your sleeves fresh, and your dust under control. And always put safety first, because good habits matter more than any tool.
Now it is your turn. Pick a small project, such as a cutting board, a toy, or a set of coasters, and try the steps from this guide. Keep notes on what grit and spindle worked best for each wood. In a few weeks, you will feel like you have used the machine for years. Share your results with other woodworkers, and keep learning one project at a time.
It is used to sand curved edges, inside curves, and shaped parts. Woodworkers use it for chair legs, cutting boards, toys, signs, and cabinet pieces. It also works well for cleaning up saw marks after a band saw or scroll saw cut.
A belt sander uses a flat moving belt, and it is best for flat surfaces and straight edges. A spindle sander uses a round, vertical drum, and it is best for curves. The up and down motion on a spindle sander also spreads wear over the sleeve.
It can sand the edges of flat boards, but it is not meant for large flat faces. For wide panels, a belt sander, a random orbit sander, or a drum sander is a better choice. Use the spindle sander for edges and shapes.
Start with 80 grit to remove saw marks, then move to 120, and finish with 180 or 220. Pick the coarsest grit that does the job, and move up one step at a time. This gives a smooth edge with less work.
Check the direction the spindle turns, and push the wood against that rotation. This keeps the workpiece pressed against the table and under your control. If the wood feels like it wants to jump or pull away, change your feed direction right away.
A dust collector is not required, but a shop vacuum connected to the dust port is a big help. It keeps the air cleaner, protects your lungs, and makes your sleeves last longer. For daily use, it is worth the small cost.
Yes. Benchtop models are strong enough for most hobby work and fit in small spaces. They cost less, and they handle common projects with ease. If you start doing heavy daily work, you can move up to a floor model later.