Physical Address
304 North Cardinal St.
Dorchester Center, MA 02124
Physical Address
304 North Cardinal St.
Dorchester Center, MA 02124

Water Popping Wood: What It Is, Benefits, and How to Do It Right
If you’ve ever pulled a stain rag across a freshly sanded tabletop only to watch the colour come out patchy and uneven, you already understand why water popping exists. It’s one of those techniques that separates a finish that looks store-bought from one that looks homemade in the worst sense. Professional floor refinishes and cabinet shops have relied on it for decades, yet plenty of hobbyist woodworkers have never heard the term.
Water popping wood is the deliberate application of water to a wood surface before staining, and it’s a step that can make or break your final colour. Before we get into the technique itself, it’s worth understanding what’s actually happening at the fibre level because sanding is where this whole process begins. If you haven’t already nailed down your prep work, our complete guide to sanding covers the grit progression and technique fundamentals that set you up for a successful water pop.
This guide walks through exactly what water popping does, why it matters, and how to execute it without ruining your project. We’ll cover the science, the step-by-step process, application differences between floors and furniture, and the mistakes that trip up even experienced woodworkers.
Water popping sometimes called grain-popping is the process of applying a light, even coat of water to bare wood before staining. The water causes the wood fibres to swell and stand up, effectively reopening the pores that sanding closed down. Once the wood dries thoroughly, the surface is left more receptive to stain, allowing for deeper penetration and a noticeably richer colour.
Contractors and hardwood floor refinishers popularised this technique because it solves a very specific problem: stain that looks blotchy, pale, or inconsistent across a large surface. Rather than fighting an uneven finish after the fact, water popping addresses the issue before a drop of stain ever touches the wood. It works particularly well on hardwood species with dense, closed grain though as we’ll cover shortly, it isn’t only for floors.
To understand why water popping works, you need to understand what sanding does to wood at a microscopic level. Wood is made up of hollow cellular structures wood cells that run largely parallel to the grain. When you sand a surface, particularly through the finer grits, the abrasive action doesn’t just smooth the surface; it also bends and burnishes these fibres flat, effectively sealing over the open ends of the wood cells.
This is great news for achieving a smooth surface, but it’s a problem when it comes to stain absorption. A burnished, closed-pore surface doesn’t accept stain as readily or as evenly as an open one. The final grit you use matters here too: the higher you go, the more compressed and sealed the surface becomes.
Water reverses this temporarily. Wood is hygroscopic, meaning it naturally absorbs and releases moisture based on the surrounding environment. When you wet the surface, water penetrates into the wood cells, causing them to expand and the raised grain to stand proud of the surface. Once the water evaporates and the wood dries thoroughly, that raised, reopened texture is exactly what allows stain to soak in more deeply and consistently.
The most obvious benefit of water popping is colour depth. Stain applied to popped wood penetrates further into the reopened grain, resulting in a noticeably richer, more saturated colour compared to stain applied directly to a sanded, unpopped surface. This is especially valuable with darker stains, where colour depth is often the entire point of the finish.
Because the entire floor or workpiece has been treated uniformly with water, the pores open at a consistent rate across the surface. That translates into more even colour from one plank to the next, rather than patches that look darker or lighter depending on how tightly the grain was sanded in that particular spot.
Blotchiness is one of the most common complaints in wood finishing, and it’s usually caused by inconsistent porosity across the wood surface. Water popping evens out that porosity before stain goes anywhere near the wood, which dramatically reduces the risk of blotchy patches particularly on species like pine and maple, which are notorious for uneven stain absorption due to their mixed grain density.
Water popping also helps mask fine sanding swirl marks left behind by random orbital sanders. Because the water raises the grain evenly, those faint circular scratches become less visible once the stain is applied, giving you a smoother, more polished-looking final result.
This is one of the most common questions we hear in the shop, and the honest answer is: it depends on what you’re trying to achieve. Pre-stain wood conditioner works by partially sealing the wood surface, which slows and evens out stain absorption reducing blotching, but also somewhat muting colour depth. It’s a quick, forgiving option that works well on softwoods like pine.
Water popping, by contrast, opens the grain rather than sealing it. This produces deeper, more dramatic colour, but it demands more precision, gets the moisture level wrong, and you risk uneven results or a longer drying process. For hardwood floors and furniture pieces where rich colour is the goal, water popping is generally the superior choice. For softwood or budget projects where speed matters more than depth, a wood conditioner is often the easier route. Choose water popping if you want maximum colour saturation and are willing to invest the extra prep time; choose a conditioner if you’re working with a blotch-prone softwood species and want a faster, lower-risk process.
Before you start, gather a bucket with clean water, a spray bottle or sprayer, a lint-free rag or sponge, and a t-bar or applicator pad if you’re working on a large floor. Many professionals prefer purified water or distilled water over ordinary tap water, particularly on lighter wood species, since tap water can occasionally carry minerals that affect colour slightly. For most projects, though, clean tap water works perfectly well.
Prior to water popping, make sure the entire surface has been sanded to your final grit and thoroughly cleaned of dust. Any residual sanding dust will interfere with even water absorption, so vacuum and wipe the surface down before you begin.
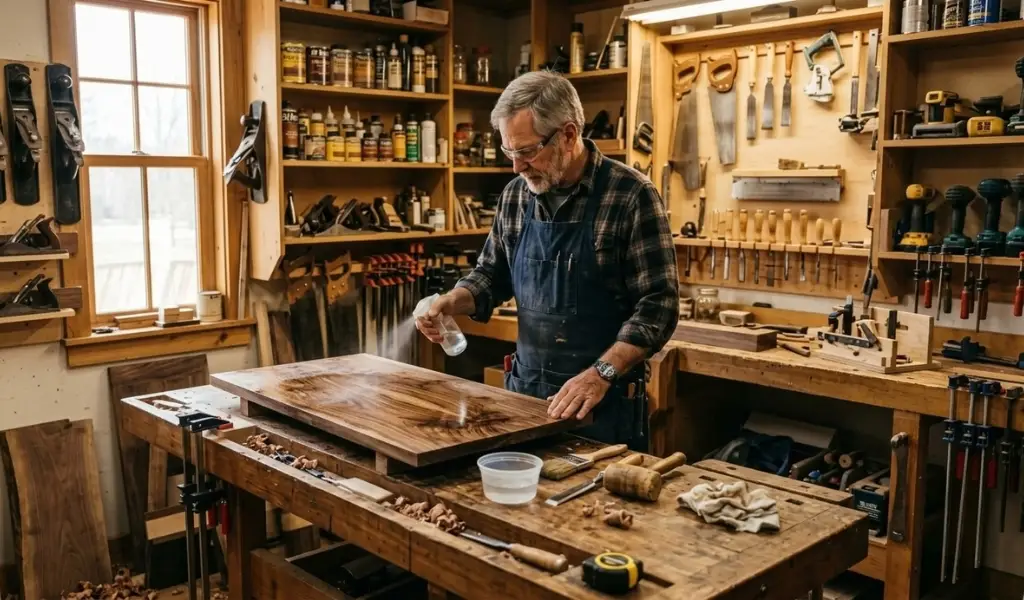
The goal is to wet the wood evenly, not to soak it. Using a spray bottle, spray an even mist across the surface of the wood, then use a rag, sponge, or applicator pad to spread the moisture evenly and remove any excess. On larger surfaces like hardwood floors, a t-bar with a lambswool pad allows you to apply water onto the entire floor in a controlled, even pass.
Avoid letting water pool or puddle anywhere on the surface. Puddling causes uneven absorption, which defeats the entire purpose of the technique and can lead to blotchy patches once stain is applied. Work in manageable sections, applying water to an unfinished area, spreading it evenly, and moving on before it has a chance to sit too long in one spot.
This is the step most beginners rush, and it’s the one that causes the most problems. Once you’ve wet the surface, the wood needs to dry thoroughly before any stain goes on. Drying times vary depending on wood species, humidity, and temperature, but as a general rule, allow at least several hours often overnight for hardwood floors before proceeding.
High relative humidity and cool temperatures will extend the drying process considerably, so factor your shop or job site conditions into your timeline. If you want certainty rather than guesswork, a moisture meter is the professional’s tool of choice. Check the wood moisture content against a dry baseline reading taken before you started; if the readings match, you’re clear to stain.
Water popping an entire hardwood floor is a different undertaking to popping a small tabletop, mainly in terms of scale and drying logistics. On floors, contractors typically use a pump sprayer or garden sprayer to cover large areas quickly, followed immediately by a t-bar or applicator pad to spread the moisture evenly before it can puddle in the seams between boards. Airflow and ventilation become critical on floors, since a slow drying process across an entire room can extend your project timeline by a full day or more.
Furniture and tabletops offer more control. A spray bottle or a dampened rag is usually sufficient, and you can work section by section without worrying about foot traffic or large-scale drying logistics. The smaller surface also makes it easier to achieve a genuinely even application of water on the first attempt, since you’re not racing against the drying time of an already-treated section elsewhere in the room.
End grain cutting boards present a unique challenge because end grain absorbs both water and finish far more aggressively than face grain. Water popping is particularly useful here not just for colour, but for surface preparation. Wetting the surface raises the grain fibres, which can then be sanded back down with fine grit sandpaper, resulting in a noticeably smoother surface once oil or finish is applied.
Some woodworkers repeat this raise-and-sand cycle two or three times on end grain boards specifically to pre-empt the fuzziness that would otherwise appear the first time the finished board gets wet in normal use. It’s a small bit of extra effort that pays off considerably in the smoothness and longevity of a cutting board’s surface.
The single most damaging mistake in this entire process is staining before the wood has dried thoroughly. Applying an oil-based or water-based stain over damp wood traps moisture beneath the finish, which can lead to poor adhesion, a cloudy or hazy appearance, and in some cases, finish failure months down the line. Always confirm dryness ideally with a moisture meter rather than relying on touch or visual guesswork, since a surface can feel dry while still holding moisture deeper in the wood cells.
Once you’ve water popped a surface and it has dried, resist the urge to sand it again. Sanding at this stage will simply cut off the raised grain you worked to create, undoing the entire benefit of the process and leaving you back where you started with a closed, burnished surface. The one exception is end grain cutting boards, where a light, intentional sanding pass is part of the deliberate raise-and-sand cycle described above but on floors, furniture, and standard face-grain projects, the rule is simple: once it’s popped and dry, leave it alone and move straight to staining.
Raised grain is delicate, particularly before it’s been sealed with stain or finish. On floors, this means staying off the surface entirely once it’s been popped footprints and scuff marks will flatten the raised fibres in isolated spots, creating uneven texture and, later, uneven stain absorption exactly where you walked. On furniture, avoid resting tools, rags, or your hands on a freshly popped surface. Plan your workflow so that the drying period doesn’t require you to touch or walk across the treated area until it’s fully dry and ready for stain.
Water popping reopens the wood’s pores by raising the grain, which sanding had previously closed and burnished flat. This allows stain to penetrate more deeply and evenly once the wood has dried, resulting in richer colour and more uniform coverage across the entire surface.
It’s particularly valuable on hardwood species and darker stain colours, where colour depth and consistency matter most. Without this step, stain applied directly to a finely sanded surface can look pale, uneven, or blotchy especially on wood with variable grain density.
In almost all cases, no. Sanding after water popping removes the raised grain you just created, cancelling out the entire benefit of the process. The main exception is end grain cutting boards, where woodworkers intentionally raise and sand the grain in repeated cycles to achieve an ultra-smooth final surface.
For floors, furniture, and standard face-grain projects, the rule holds firm: once the wood is popped and dry, move directly to staining. Touching it up with sandpaper at this stage only creates extra work and undoes your prep.
Water popping opens the wood’s grain to allow deeper stain penetration and richer colour, while a pre-stain conditioner partially seals the surface to slow and even out stain absorption. Conditioner is faster and more forgiving, particularly on blotch-prone softwoods, but it tends to mute colour depth compared to water popping.
If your priority is maximum colour saturation on a hardwood species, water popping is generally the better choice. If you’re working with pine or another softwood and want a quicker, lower-risk process, a pre-stain conditioner is usually the more practical option.
End grain absorbs both water and finish far more aggressively than face grain, which makes cutting boards especially prone to a rough, fuzzy surface once they get wet in normal use. Water popping raises that grain deliberately, ahead of time, so it can be sanded smooth before the finish ever goes on.
Many woodworkers repeat the process two or three times, alternating between wetting and light sanding, to pre-empt the fuzziness that would otherwise appear the first time the board is washed. The result is a noticeably smoother, more durable surface once oil or finish is applied.
Water popping isn’t a difficult technique, but it does reward patience over speed. The wood needs time to absorb moisture evenly, time to dry thoroughly, and a hands-off approach once that raised grain has formed. Rush any one of those stages and you’ll end up undoing the very consistency you set out to achieve.
Treat it as part of your finishing routine rather than an optional extra step, particularly on hardwood floors and darker stain projects where colour depth genuinely matters. Pair it with solid sanding fundamentals from the start, and you’ll find your stain jobs come out looking noticeably more professional richer colour, fewer blotches, and a smooth surface that does justice to the wood underneath.