Physical Address
304 North Cardinal St.
Dorchester Center, MA 02124
Physical Address
304 North Cardinal St.
Dorchester Center, MA 02124

If you’ve ever picked up a wooden dowel from the hardware store, you already know they rarely come ready to use straight out of the package. Learning how to sand wooden dowels properly is one of those small woodworking skills that makes a huge difference in the final look and feel of your project. Whether you’re building furniture, making dowel joints, or crafting something decorative, a smooth and even surface changes everything about how the piece turns out.
In this guide, we’ll walk through everything you need to know, from the tools you should grab before starting to the exact steps for getting that silky smooth finish. By the end, you’ll be able to handle any dowel rod project with confidence, no matter the size or shape.
Raw wood dowels often come with rough spots, mill marks, or slight inconsistencies left over from the manufacturing process. These imperfections aren’t always visible at first glance, but you’ll feel them the moment you run your hand along the surface. Splinters are also a real concern, especially with cheaper cylindrical wood rods that haven’t been finished well.
Sanding solves several problems at once. It removes rough patches, smooths out any fuzzy wood grain fibers, and prepares the surface for staining or painting. A dowel that hasn’t been sanded will absorb finish unevenly, leaving blotchy patches that ruin the appearance of your project. On top of that, if you’re making something people will touch often, like a curtain rod, a toy, or a handle, smooth wood just feels better and safer to use.
There’s also a practical joinery reason. In many woodworking projects, dowel pins need to fit snugly into drilled holes. Sanding helps you fine-tune the diameter slightly so the peg slides in with the right amount of friction, not too loose and not too tight.
Before diving into the sanding process, it helps to have the right supplies on hand. You don’t need anything fancy, but having a few specific items will save you time and frustration.
Sandpaper grit is the backbone of any sanding job. For wood dowels, you’ll typically want a range of grits rather than just one. Start with something coarser, like 80 or 100 grit, if the dowel has visible rough patches or tool marks. Move up to 150 or 180 grit for general smoothing, and finish with 220 grit or higher for that polished, glass-like feel.
Sanding blocks are handy for flat surfaces, but they’re less useful on round wood dowels since the curved shape doesn’t match a flat sanding pad well. Still, keeping a block around is useful for sanding the ends or any flat sections attached to the rod. Foam-backed sanding pads work a bit better on curved shapes because they flex slightly around the surface.
Since dowels are cylindrical, a few specialized tools make the job much easier. Sandpaper strips or sheets cut into narrower pieces let you wrap the abrasive around the rod, almost like buffing a shoe. Some woodworkers use a technique similar to shining shoes, holding the strip in both hands and sliding it back and forth while rotating the dowel.
A drill or a lathe can also speed things up significantly. By chucking the dowel into a drill and spinning it while holding sandpaper against the surface, you get an even, consistent finish in a fraction of the time it takes by hand. This method works particularly well for long dowel rods or when you’re processing several pieces at once.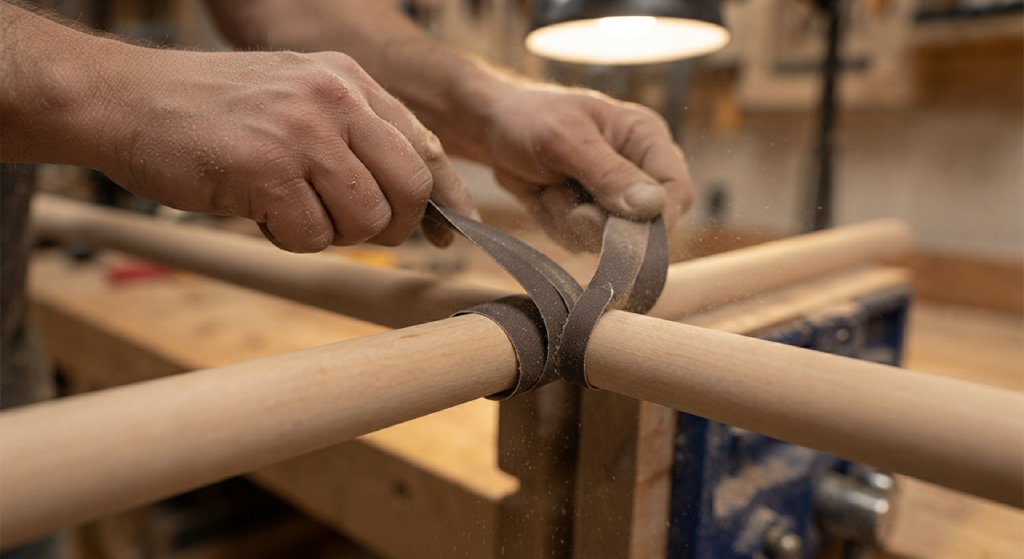
For smaller detail work, sanding sponges or fine abrasive pads offer more control, especially around edges or tight spaces where standard sandpaper feels clumsy.
Now let’s get into the actual process. Following these steps in order will give you the most consistent results.
Before any sanding happens, you need to stabilize the wood rod. Trying to sand a dowel that’s rolling around on a table is not only frustrating but can also lead to uneven pressure and inconsistent results. Clamps work well here, though you’ll want to pad the clamp jaws with a soft cloth or rubber to avoid denting the wood.
Another option is using a vise with protective jaw covers, or even a simple V-shaped cradle cut into a scrap block of wood. This cradle lets you rotate the dowel while keeping it steady, which is especially helpful for longer pieces.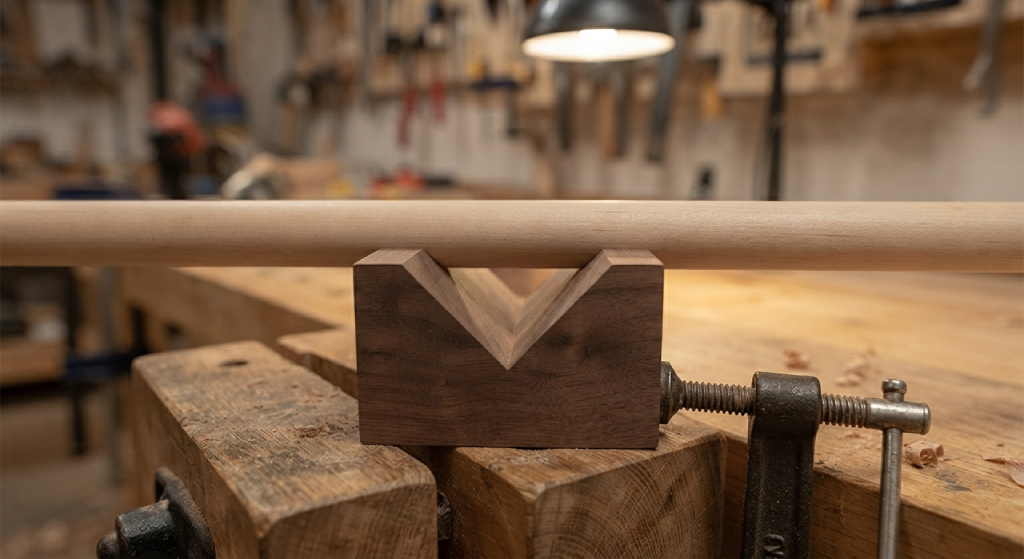
If you’re using a drill to spin the dowel, secure one end in the chuck and support the other end with a center point or a simple handheld guide to prevent wobbling.
Once the dowel is secured, examine the surface closely. If there are visible tool marks, splinters, or rough patches, begin with a coarser grit like 80 or 100. This removes material quickly and knocks down any major imperfections. Be careful not to overdo it in one spot, since dowels can develop flat spots or uneven diameters if you apply too much pressure in one area for too long.
If the dowel already feels reasonably smooth, you can skip the coarse grit and start with something in the 120 to 150 range instead. Starting too fine on a rough surface wastes time and sandpaper, while starting too coarse on an already smooth piece removes more wood than necessary.
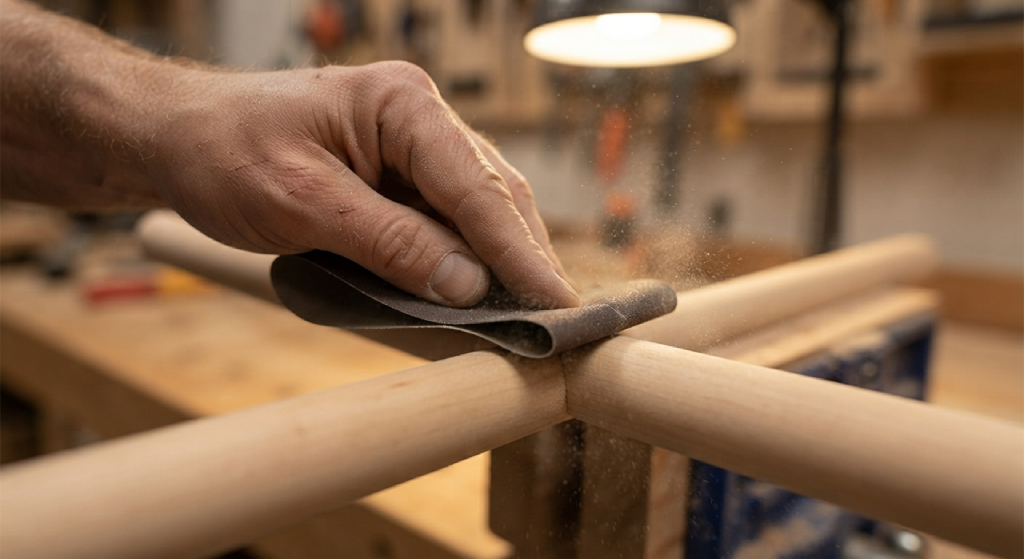
This step is where patience really pays off. Wrap your sandpaper around the cylindrical wood rod and move it back and forth while slowly rotating the dowel with your other hand. The goal is to cover the entire circumference evenly, not just the side facing up.
A common mistake is sanding only the top or the easiest-to-reach side, which leaves the underside rough and untouched. Rotate the piece every few strokes to make sure you’re treating the whole surface the same way. If you’re using a drill or lathe method, this part becomes easier since the rotation happens automatically, but you still need to move the sandpaper along the length of the rod to avoid grooves forming in one spot.
Keep consistent pressure throughout. Pressing too hard in some areas and too lightly in others creates an uneven texture that becomes obvious once you apply stain or paint.
After you’ve worked through the medium grits and the surface feels mostly smooth, switch to a fine grit, typically 220 or higher. This final pass removes any remaining scratches left by the coarser paper and gives the wood that soft, almost silky texture.
Wipe the dowel down with a tack cloth or a slightly damp rag between grit changes. This removes dust particles that can interfere with the sanding process and lets you actually see how smooth the surface has become. Some woodworkers like to do a final pass with 320 grit for projects that will be left unfinished or lightly oiled, since higher grits bring out a subtle sheen in the wood grain.
The ends of a dowel rod often get overlooked, but they deserve just as much attention as the sides. Rough or splintery ends are uncomfortable to handle and can catch on fabric or skin.
Start by using a sanding block on a flat surface for the very tip of the dowel. Press the end against the sandpaper and move it in small circular motions. This flattens out any unevenness from cutting the rod to length. If the end was cut with a saw, you’ll likely see saw marks that need a coarser grit first before moving to something finer.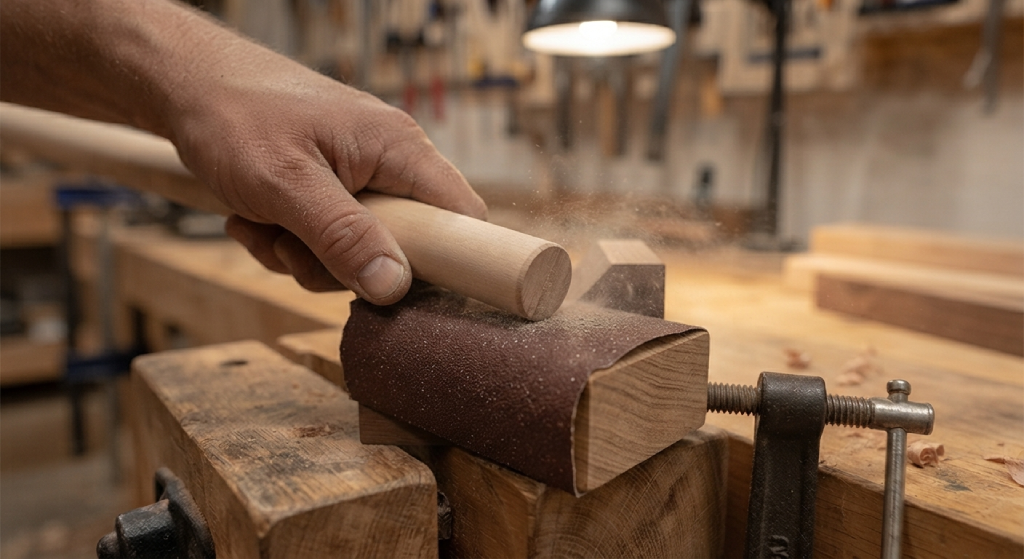
For rounded or chamfered ends, a small piece of sandpaper folded into a narrow strip works well for following the curve. Some people prefer using a countersink bit or a chamfering tool first to create a slight bevel, then sanding that bevel smooth by hand. This softens the edge and prevents it from splintering over time, which is especially useful for dowels used in furniture legs or handrails.
Thin dowels present a different challenge altogether. Because they’re delicate, applying too much pressure can snap them or create flat spots that ruin the round shape. The key here is control rather than speed.
Instead of wrapping full sheets of sandpaper around a thin dowel, cut narrow strips and hold them loosely, almost like a shoelace, gently sliding them back and forth while rotating the dowel slowly between your fingers. This reduces pressure and gives you a much more even result.
Sanding sponges are particularly useful for small dowels because they conform to the shape without digging in too hard. If you’re working with dowels under a quarter inch in diameter, consider using finer grits from the start, since these thinner pieces don’t usually have deep imperfections that require aggressive sanding.
Another trick many hobbyists use is running the thin dowel through a small hole cut into a sanding block or a folded piece of sandpaper. Pulling the dowel through this makeshift jig in one smooth motion sands the entire surface at once, which is much faster and more consistent than sanding by hand.
Getting a truly smooth finish isn’t just about the final grit you use, it’s about consistency throughout the entire process. Skipping grits, like jumping from 80 straight to 220, often leaves faint scratches that the finer paper can’t fully remove. It’s better to work through the grits gradually, even if it takes a little longer.
Lighting matters more than people expect. Sanding under bright, angled light helps you spot uneven patches or missed spots that are easy to overlook under dim lighting. Running your hand along the dowel with your eyes closed can also help you feel imperfections that your eyes might miss.
Dust management plays a role too. Built-up sanding dust can clog the sandpaper and reduce its effectiveness, so tapping or brushing it off periodically keeps the abrasive working properly. For a truly polished result, some woodworkers finish with a piece of brown paper bag after the final grit, which acts as an ultra-fine abrasive and helps burnish the wood surface to a soft shine.
Even experienced hobbyists run into a few recurring issues when sanding dowels. One of the biggest mistakes is applying uneven pressure, which creates flat spots or an oval shape instead of a perfect cylinder. This is especially common when sanding by hand without rotating the dowel often enough.
Another frequent problem is skipping grits, which leaves visible scratch marks that show up clearly once stain or paint is applied. Rushing through the process rarely saves time in the end, since you often have to backtrack and redo sections.
Using worn-out sandpaper is another issue people overlook. Once sandpaper loses its abrasive edge, it stops cutting effectively and just polishes over rough spots instead of actually smoothing them. Swapping to fresh paper regularly makes a noticeable difference in both speed and quality.
Lastly, many beginners forget to sand the ends of the dowel entirely, focusing only on the length of the rod. This leaves rough, unfinished tips that stand out against an otherwise smooth surface.
Sanding wooden dowels might seem like a small task, but it plays a big role in the overall quality of your finished project. Taking the time to secure the dowel properly, work through the right grits, and pay attention to details like the ends and thinner sections will give you results that look and feel professional. Whether you’re working on a furniture repair, a craft project, or a batch of dowel pins for joinery, these steps will help you get a clean, even finish every time.
If you’re just starting out, don’t worry about getting it perfect on the first try. Like most woodworking skills, sanding gets easier and faster the more you practice. Grab a few scrap dowels, work through the grits, and get a feel for how the wood responds before moving on to your actual project piece.
What grit sandpaper is best for wooden dowels?
It depends on the starting condition of the dowel. Rough or unfinished dowels usually need 80 to 100 grit first, followed by 150 grit, and finished off with 220 grit for a smooth surface. If the dowel is already fairly smooth, you can often start at 150 grit and skip the coarser step.
Can I sand a dowel using a power drill?
Yes, and it’s actually one of the fastest methods. Secure one end of the dowel in the drill chuck, support the other end, and let the drill spin the piece while you hold sandpaper against the surface. This gives a very even result and works especially well for longer rods.
How do I keep a dowel from becoming oval-shaped while sanding?
The main cause of oval or flat-sided dowels is uneven pressure applied to one spot for too long. Rotating the dowel frequently and using consistent, light pressure across the whole surface helps maintain its round shape.
Do I need to sand the ends of a dowel separately?
Yes, the ends often need different handling than the sides. A flat sanding block works well for smoothing the tip, especially if it was cut with a saw and has visible marks. Rounding the edges slightly afterward prevents splintering.
What’s the best way to sand very thin or small dowels?
Thin dowels need a gentler touch. Narrow strips of sandpaper held loosely, or sanding sponges that conform to the shape, work better than wrapping full sheets around them. Reducing pressure prevents snapping or flattening the rod.
Should I sand between coats of finish on a dowel?
Yes, light sanding with fine grit sandpaper, usually around 320 or higher, between coats of stain or sealant helps smooth out any raised grain and gives a better surface for the next coat to adhere to.
How can I tell if a dowel is smooth enough?
Run your hand along the entire surface, including the ends, and feel for any rough patches or fibers. Checking under bright, angled light also helps reveal spots that might feel smooth but still show scratch marks or unevenness.