Physical Address
304 North Cardinal St.
Dorchester Center, MA 02124
Physical Address
304 North Cardinal St.
Dorchester Center, MA 02124
Installing your own flooring or backsplash may seem like a high-stakes puzzle, but honestly, it is one of the most rewarding home improvement skills you can learn. It can feel daunting to gather all the necessary information before you start your first tile project, as there is a tremendous amount of in-depth installation advice intended for professionals that is far more than you need for a simple weekend DIY.
Actually, basic tile work boils down to five fundamental steps. Whether you are transforming a muddy laundry room or adding a sleek subway tile backsplash to your kitchen, the process follows a predictable rhythm. This guide breaks down the professional secrets of cutting tile, selecting the right substrates and cutting tool like manual or electrical which one you need , and ensuring your hard work stays crack-free for decades.
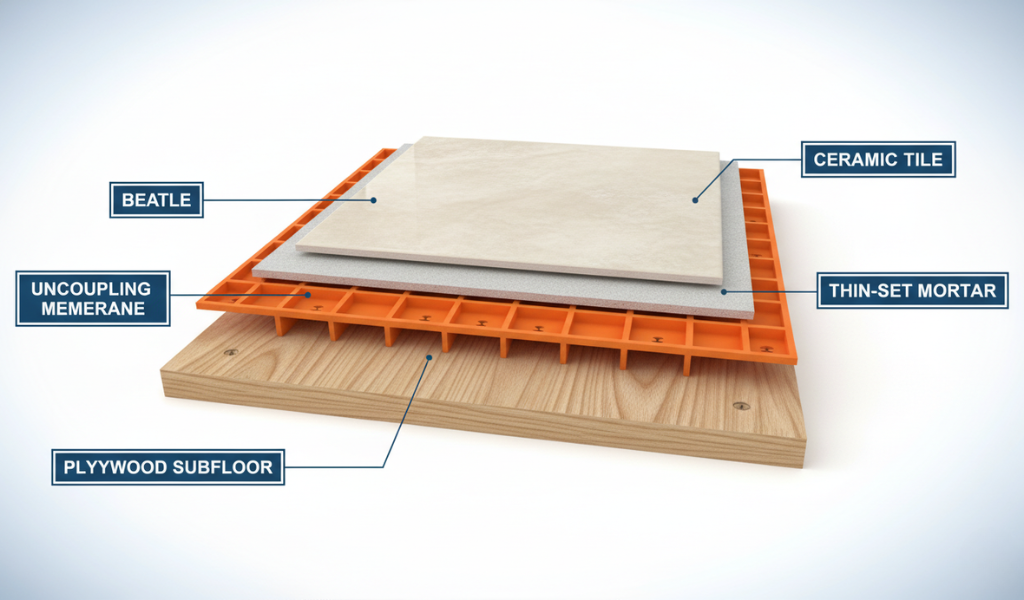
The “substrate” is simply the material that supports the tile, whether on a vertical wall or a horizontal floor. Think of it as the foundation of a house; if the foundation shifts or flexes, the surfaces above can eventually crack. In tile work, the substrate works in conjunction with a membrane to allow the tile and mortar bed to move independently of the substrate.
A tiled surface expands and contracts at a different rate than the substrate beneath it. To prevent cracks, we use uncoupling membranes. This lightweight waffle-faced material allows the substrate and the tile-mortar bed to move separately from one another. Without this layer, the stress of the substrate moving would be transferred directly into your tile, leading to cracked tile or grout joints.
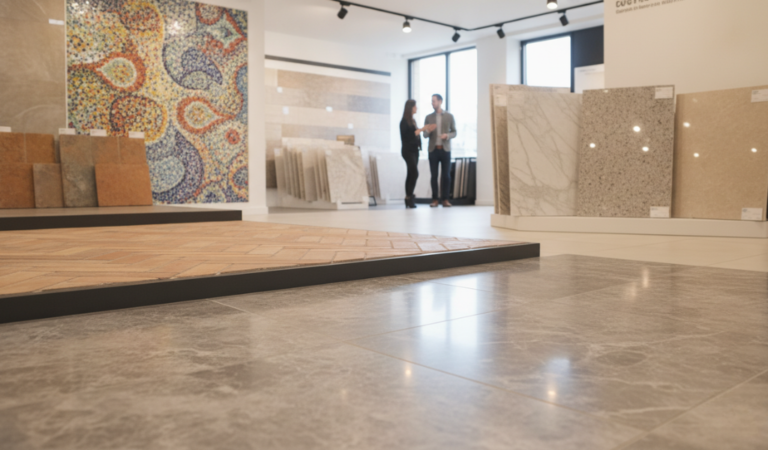
Learning how to select tile involves balancing aesthetics with the technical needs of your environment. Tile is a broad term encompassing fired clay, glass, or natural stone. For your first tile project, you will likely choose between ceramic and porcelain.
When you select tile, visit a specialty retailer to ask about the material’s specific performance for your application, whether it’s a shower stall, backsplash, or mudroom floor.
For your first tile project, layout planning is one of the most important steps to get right. Before you touch a bucket of mortar, you must have a plan. Layout is where many beginners make their biggest mistakes. For your first tile project, there are two classic patterns to consider:
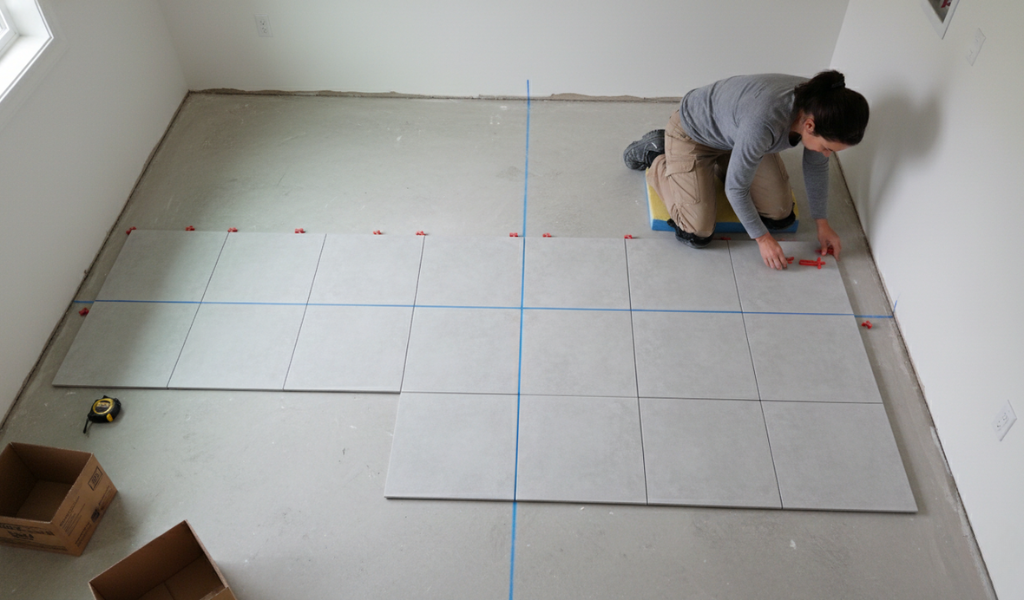
Never start tiling by simply flushing a full tile against one corner. Walls are rarely straight, and you might end up with a tiny sliver of tile at the other end.
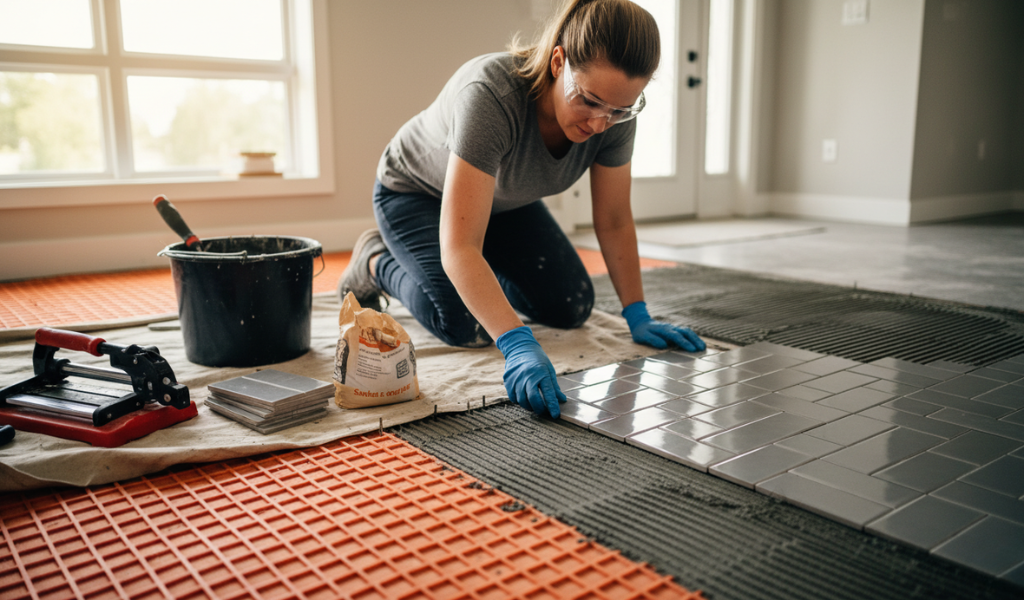
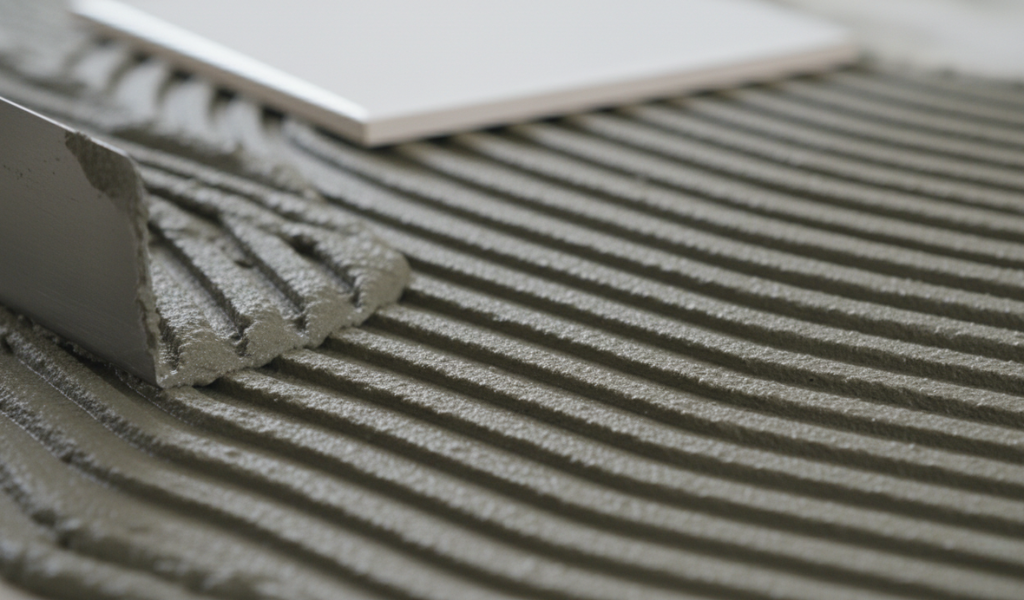
Now we enter the most active phase of the project. Proper mortar application and precision in cutting tile are the hallmarks of a professional-grade finish.
You can use pre-mixed thin-set mortar or mix your own from powder.
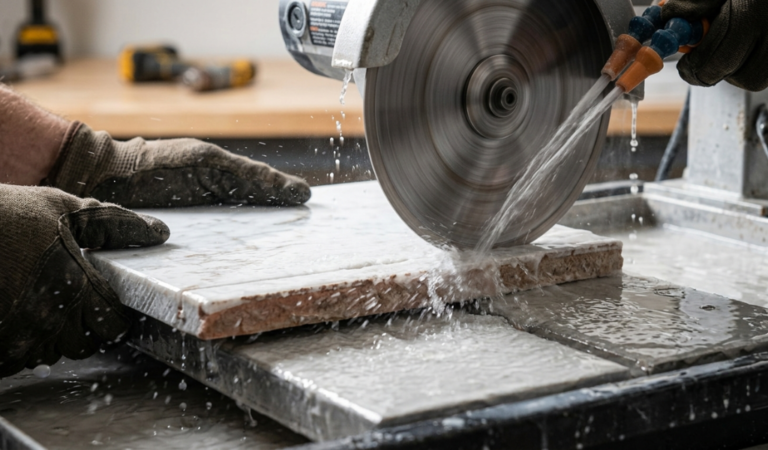
When it is time for cutting tile, you need to know how to choose the right tile cutter for your project and have several options depending on your budget and needs:
Grout is the final step that locks everything together. It comes in two primary forms:
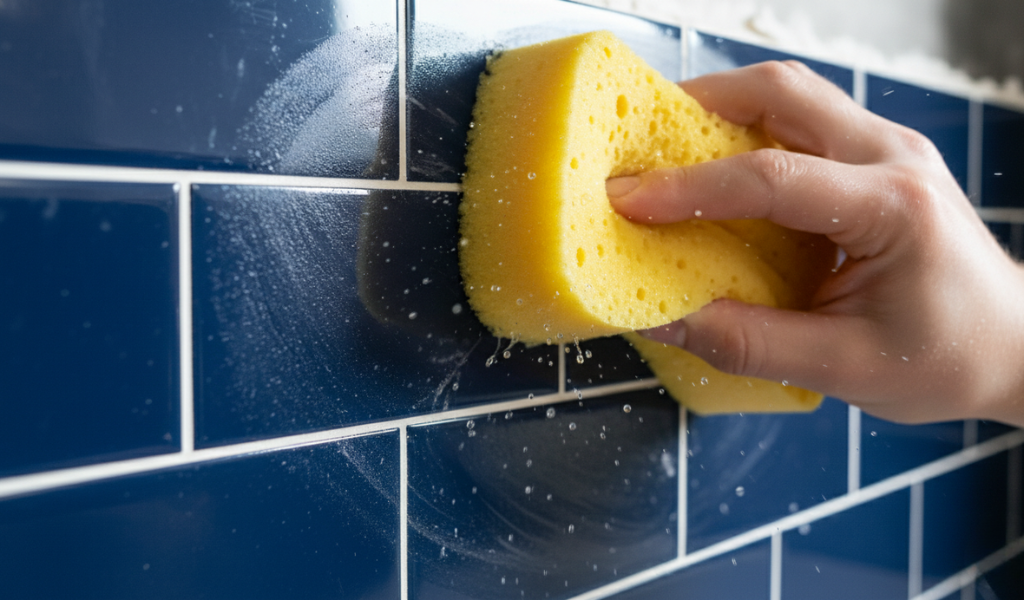
Use a “grout float” to push the mixture into the tiles at an angle to the grout lines, being sure to fill every gap. Use firm but gentle pressure to pack the space. After the grout begins to set, wipe the surface with a moist (not wet) grout sponge. Once a “haze” appears on the dry tile, buff it off with a moist sponge or use a grout haze remover if it is difficult to remove.
| Tool | Purpose |
| Notched Trowel | Ensures a uniform mortar bed for the tile. |
| Grout Float | Packs grout firmly into the joints. |
| Tile Saw | Necessary for fast and accurate cutting tile. |
| Tile Spacers | Maintains consistent grout line widths throughout. |
| Uncoupling Membrane | Reduces the likelihood of cracked tile by isolating movement. |
By the time you finish your first tile project, you will realize that tile work is not about brute force—it is about patience and preparation. From selecting the right cement board to carefully centering your layout, each step is a building block toward a professional finish. Completing your first tile project successfully depends on patience, proper preparation, and following each step carefully.
Don’t let the fear of a permanent mistake stop you. Most tiling errors happen because someone rushed the layout or ignored the substrate needs. If you take the time to set a solid foundation, your new tile will remain beautiful and intact for decades.
Yes, but only where there is little chance of prolonged humidity, like a mud room. Never use drywall in a shower stall or tub surround, as moisture easily damages it.
Porcelain is a type of ceramic made with specific clay that makes it harder, denser, and more water-resistant. Standard ceramic is generally softer and easier to cut.
If you are tiling over a substrate that moves at a different rate than tile (like wood or concrete), a membrane like Schluter Ditra is highly recommended to prevent cracks.
As a rule of thumb, small tiles require a trowel with small notches, and large tiles require a trowel with large notches. A 1/4-inch x 3/8-inch trowel is a great starting point for most small tiles.
Yes, pre-mixed grout is excellent for small tile jobs like a backsplash or shower surround and can come in both sanded and non-sanded versions.
This is normal for wet saws. Wet saws use water to keep the diamond blade cool and minimize dust while cutting tile.