Physical Address
304 North Cardinal St.
Dorchester Center, MA 02124
Physical Address
304 North Cardinal St.
Dorchester Center, MA 02124
Whether you are framing a basement, installing a bottom plate for a new partition wall, or simply hanging a heavy wooden shelf in your garage, knowing how to attach wood to concrete is a fundamental skill for any DIYer or professional builder.
At first glance, it seems like an impossible task. Wood is organic and flexible, while concrete is a dense, stony construction material that doesn’t exactly welcome a standard nail. Because these two materials have completely different molecular structures, they don’t naturally want to stay together. If you try to drive a regular wood screw into a concrete slab, you’ll end up with a broken screw and a frustrated afternoon.
In this comprehensive guide, we will explore every professional method to attach wood to concrete, from high-power nailers to heavy-duty anchors. By the end of this article, you’ll know exactly which fastener to choose to ensure your project stays “permanent and secure.”
The best way to attach wood to concrete is by using concrete anchors, screws, or wedge bolts. For light projects, plastic anchors or concrete screws work well. For heavy-duty or structural applications, wedge anchors or epoxy-set threaded rods provide the strongest hold.
The Science: Why Wood and Concrete are Different
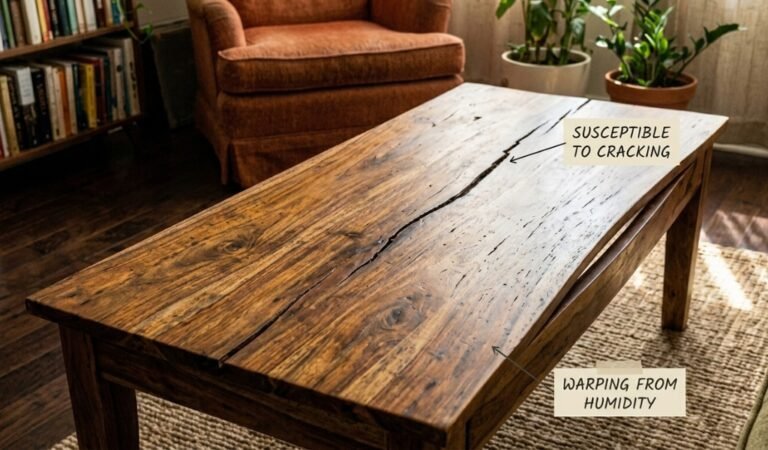
concrete and wood are “polar opposites” in the world of construction. Concrete is incredibly dense and brittle under certain tensions, while wood expands and contracts with humidity.
Because concrete lacks the grain structure of wood, a standard thread cannot “bite” into the material. Instead, we rely on mechanical expansion or chemical bonding. To successfully anchor wood to concrete, you must create a system where the fastener expands against the walls of a pre-drilled hole, creating enough friction to resist being pulled out.
Another factor is density. Concrete has a high compressive strength but relatively low tensile strength. If you use the wrong fastener, you won’t just fail to attach the wood; you might actually “shatter” the concrete surface, leaving a crater that is impossible to patch effectively.
The Moisture Factor: Avoiding Wood Rot
Before we talk about bolts, we have to talk about “capillary action.” Concrete is porous—it acts like a sponge, pulling moisture from the ground. If you place a standard piece of pine directly against a concrete slab, that moisture will transfer into the wood, leading to mold, rot, and structural failure within a few years.
Using Pressure-Treated Lumber
Always use pressure-treated (PT) lumber for the “bottom plate” or any piece of wood touching the concrete. PT wood is infused with chemicals that resist rot and insects. In many jurisdictions, this isn’t just a tip—it’s a building code requirement.
Sill Sealers
For added protection, pros use a “sill sealer”—a thin strip of foam that sits between the wood and concrete. It acts as a moisture barrier and fills in small gaps where the concrete might be uneven, providing a tighter seal for your wall or structure.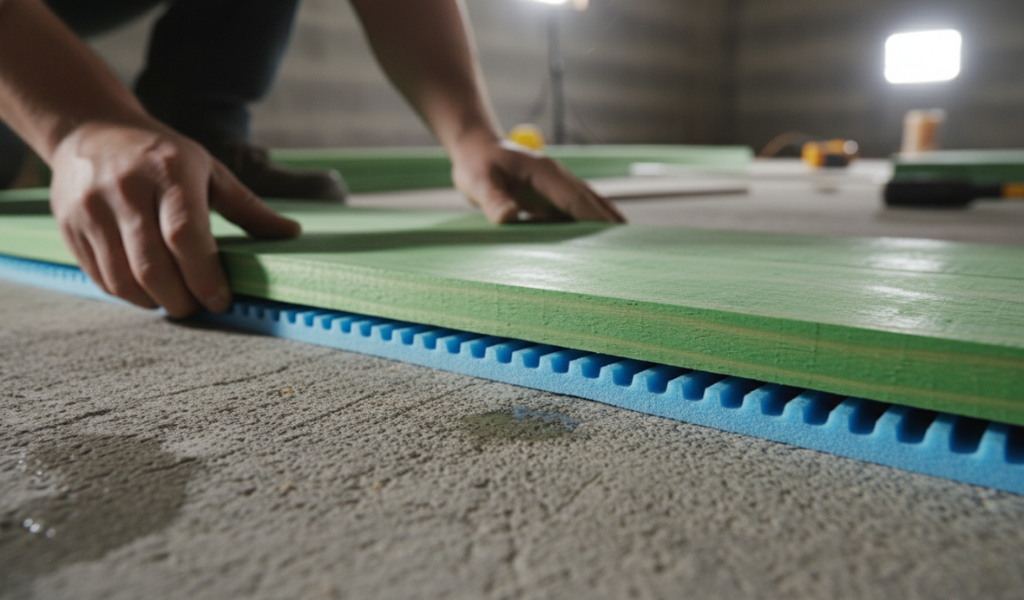
Top Methods to Fix Wood into Concrete
There isn’t a “one-size-fits-all” answer to how to attach wood to concrete. The method you choose depends on the weight of the wood and the structural requirements of the project.
Power Tools You’ll Need for the Job
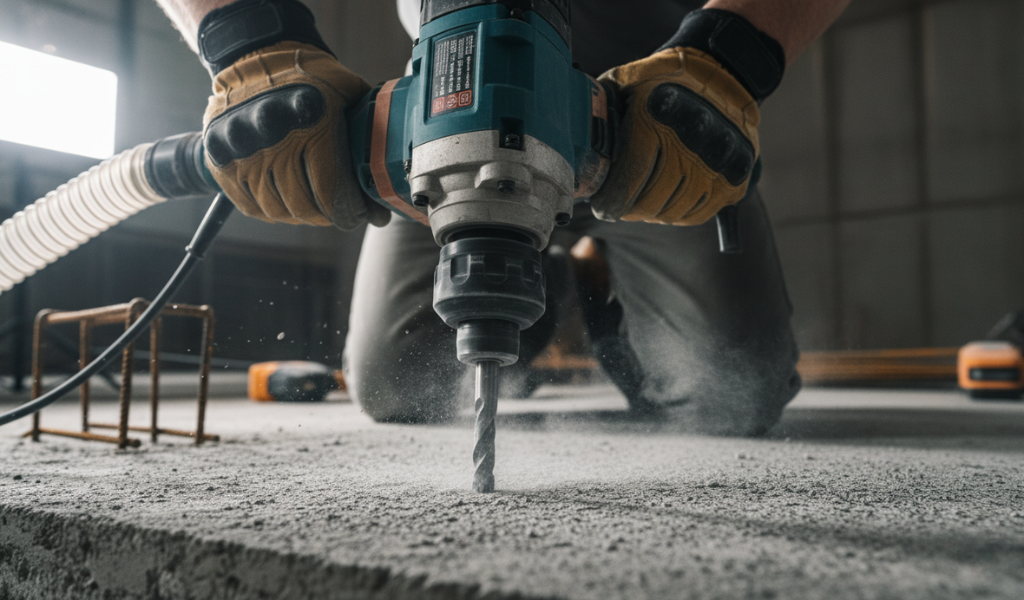
You cannot attach wood to concrete effectively without the right power. A standard household drill usually won’t cut it.
Unlike a standard drill, a rotary hammer uses a piston mechanism to pound the drill bit while it spins. This “hammering” action pulverizes the concrete, allowing the bit to move through the construction material like a hot knife through butter. For holes larger than 1/4 inch, a rotary hammer is almost “mandatory.”
Often called a “powder-actuated tool,” this looks and feels like a firearm. It uses .22 caliber blanks to fire pins into the floor. It’s the fastest way to put down a basement bottom plate, but it offers less “pull-out” resistance than a bolt.
If you are driving large “hex-head” concrete screws (like Tapcons), an impact wrench provides the torque necessary to thread into the stone without snapping the head of the screw off. The rapid tapping of an impact driver helps the threads cut into the masonry without seizing.
Essential Hand Tools
Even with the best power tools, you’ll need these basics:
Step-by-Step: Using Screws and Sleeves
For light-duty projects like hanging a tool rack, a light mirror, or decorative trim, plastic sleeves are your best friend.
Light-Duty (Up to 50 lbs)
Medium-Duty (Up to 100 lbs)
For something a bit heavier, skip the plastic and use concrete screws (often blue-coated). These have specially designed threads that cut directly into the concrete.
How to Anchor Wood to Concrete with Heavy-Duty Bolts
When the project is structural—like a deck ledger board or a wall stud—you need “maximum holding power.”
Wedge anchors are incredibly strong.
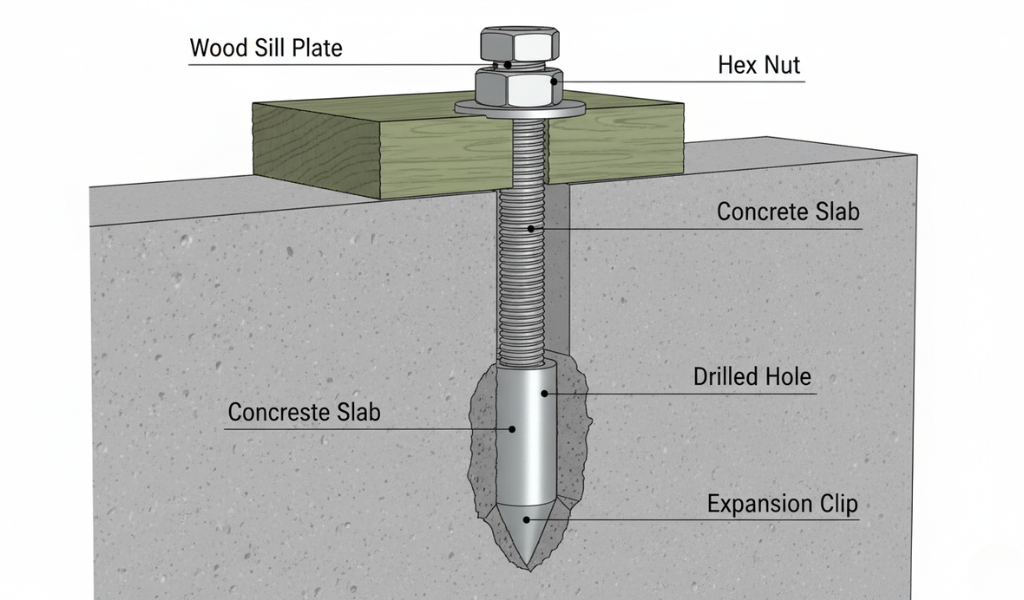
If you are working with existing dry concrete and need extreme strength:
Attaching Wood Without Drilling (Adhesives & Gas Tools)
Can you attach wood to concrete without spending hours behind a hammer drill? Yes, but there are trade-offs.
Using Adhesives
High-strength construction adhesives or two-part epoxies can bond wood to concrete.
Using a Powder-Actuated Tool (Ramset)
This technically doesn’t require “pre-drilling.” You simply point and fire.
Specialty Solutions: Toggle Bolts and Hollow Blocks
If you are working with a concrete block wall (CMU) rather than a solid slab, the center of the block is hollow. In this case, a wedge anchor won’t work because there is nothing for the wedge to grab onto.
Toggle Bolts are the answer. You drill a hole through the face of the block, fold the “wings” of the toggle bolt, and push it through. Once inside the hollow cavity, the wings spring open. As you tighten the screw, the wings pull tight against the inside of the block. This is the best way to hang cabinets or heavy TV mounts on block walls.
The “Wet Set” Method: Planning Ahead
The strongest possible way to anchor wood to concrete is to place your anchors while the concrete is still wet (poured). This is common in new home construction.
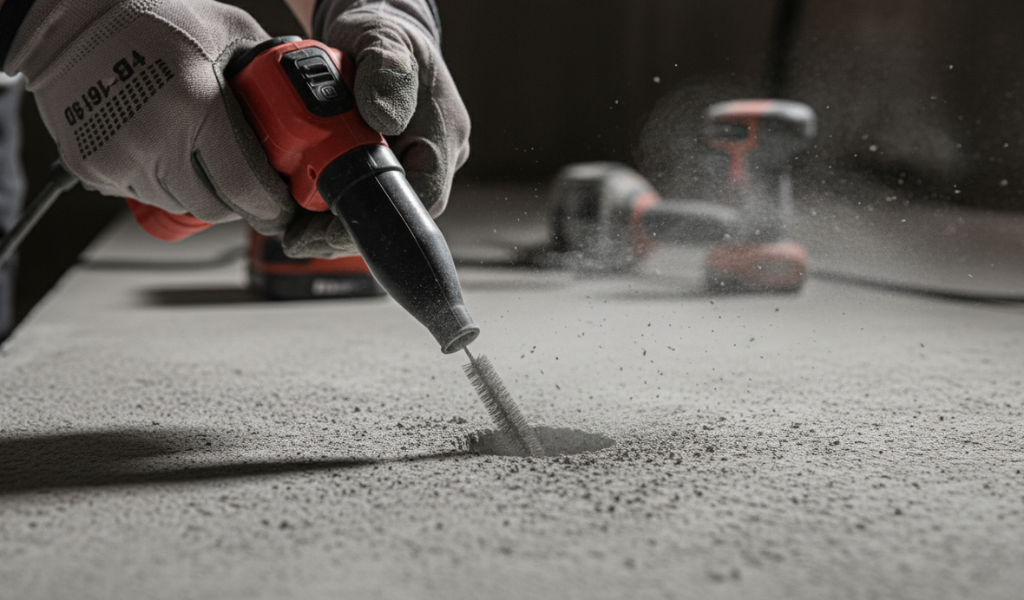
Safety First: Managing Silica Dust and Kickback
Working with concrete involves more than just physical effort; it involves health risks.
The Danger of Silica
When you drill into concrete, you create fine dust containing crystalline silica. Breathing this in can cause permanent lung damage (silicosis).
Dealing with Kickback
Rotary hammers have immense torque. If the drill bit catches on a piece of rebar, the drill can “kick back” and twist your wrist or hit you in the face.
Common Mistakes to Avoid
When NOT to Attach Wood to Concrete
Always ensure proper surface condition before attaching wood.
Conclusion: Getting a Professional Result
Learning how to attach wood to concrete is all about matching the right tool to the right load. For light household tasks, a simple plastic sleeve and screw work wonders. For structural building, nothing beats the security of a wedge anchor or a chemically bonded threaded rod.
By understanding the differences between these materials and taking the time to prep your holes and select the right fasteners, you can ensure your project is built to last a lifetime. Concrete may be tough, but with the right approach, you can master it.
Ready to start your project? Make sure you have your safety gear ready and your battery charged. Happy building!
FAQ: Frequently Asked Questions
Technically, you can use a regular drill with a masonry bit, but it will take much longer and likely burn out your drill motor. For concrete, a hammer drill or rotary hammer is “highly recommended.”
The strongest method is embedding a threaded rod into wet concrete before it dries. For existing concrete, using a threaded rod with a high-strength epoxy is the most secure structural bond.
No. Regular screws will not grip and will likely snap. You must use specialized concrete screws (like Tapcons) or use a sleeve/anchor system.
A general rule of thumb is to drill at least 1 inch deeper than the fastener will penetrate. This provides space for any leftover dust so it doesn’t prevent the bolt from sitting flush.
Yes, you can use heavy-duty construction adhesives like Liquid Nails, but it should only be used for non-structural applications or in combination with mechanical fasteners (screws).
Yes! Concrete can hold moisture, which causes wood to rot over time. Always use pressure-treated wood when it is in direct contact with a concrete surface.