Physical Address
304 North Cardinal St.
Dorchester Center, MA 02124
Physical Address
304 North Cardinal St.
Dorchester Center, MA 02124


If you have ever struggled to wrestle a heavy sheet of ¾-inch plywood across a table saw, you know how frustrating that can be. One slight slip and you’ve got a jagged edge or, worse, a ruined piece of expensive maple. For years, the choice was either a bulky table saw or a shaky circular saw guided by a prayer and a 2×4.
Then came the track saw. Often called a plunge saw, this tool has revolutionized how both professional carpenters and DIY users approach woodworking. It offers the precision of a stationary saw with the portability of a handheld tool. But with so many options on the market, how to select and use a track saw effectively can feel overwhelming. Whether you are looking to break down sheet goods or trim a door with millimeter accuracy, this guide will walk you through everything you need to know.
A track saw is a precision cutting tool that rides on a guide rail to make straight, clean, and accurate cuts in wood and sheet materials. To select the right track saw, consider factors like corded vs. cordless power, track compatibility, blade quality, safety features, and cutting depth. To use a track saw properly, place the guide rail on the cut line, set the correct blade depth, and move the saw steadily along the track for smooth and splinter-free cuts.
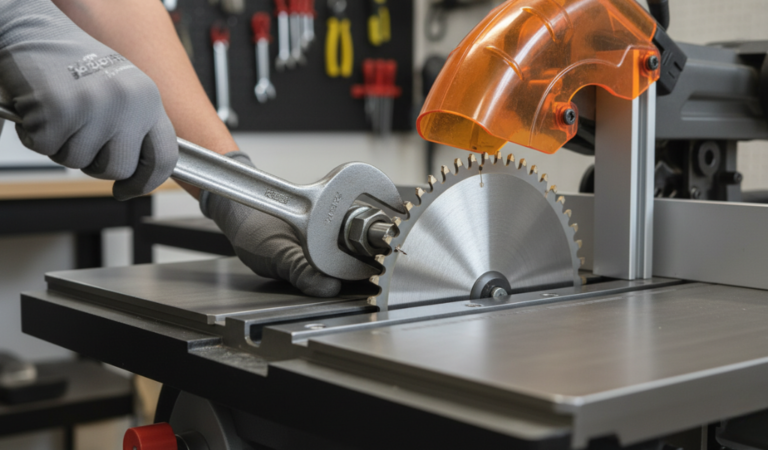
At first glance, a track saw looks like a standard circular saw’s sophisticated cousin. However, the mechanics are quite different. A track saw consists of a specialized plunge-action saw designed to lock into a long aluminum guide rail (the track).
Unlike a traditional circular saw where the motor and blade are fixed in an “open” position, a track saw’s blade stays retracted inside the housing. You place the saw on the rail, start the motor, and then “plunge” the blade down into the wood. The bottom of the saw has a precision-machined groove that fits perfectly onto a rib on the track, ensuring there is zero side-to-side play.
The edge of the track features a rubberized strip called a ‘splinter guard’. You place this strip exactly on your cut line, and the saw cuts right against it. This strip provides downward pressure on the wood fibers, which is the secret to getting an edge so clean it looks like it was cut by a precision machine.
If you are on the fence about adding another tool to your workshop, consider these advantages in more detail:
Choosing the right tool isn’t just about buying the most expensive model. Choosing the right model requires an honest look at your workspace, power availability, and the specific materials you handle.
This is one of the first major decisions.

Most kits come with a 55-inch track, which is perfect for cross-cutting a 4-foot sheet of plywood. However, if you plan on ripping full 8-foot sheets, you have two choices:
When choosing a track saw, remember you are often buying into a “system.” Brands like Festool, Makita, and Triton share a similar rail profile. DeWalt and Bosch use proprietary designs. If you already have a lot of batteries for a specific brand, that might be your deciding factor.
When you are narrowing down how to select and use a track saw, pay close attention to these “make-or-break” features that separate the professional tools from the entry-level models :
The Riving Knife: This is a small metal fin behind the blade. As you cut, it keeps the two pieces of wood from pinching the back of the blade. This is a critical safety feature that prevents the saw from being launched back toward the user.
Variable Speed Control: Not all wood is the same, and neither are all materials. Cutting through a thick slab of oak requires a different RPM than cutting through a delicate sheet of acrylic or aluminum. Look for a dial that lets you adjust the speed.
Electronic Brake: For both safety and speed, you want a blade that stops almost instantly when you let go of the trigger. This allows you to lift the saw off the track immediately without waiting for it to spin down.
Anti-Kickback Dial: Some tracks and saws feature a small dial that locks the saw to the track in a way that it can only move forward. If the blade binds, the saw is physically prevented from jumping backward out of the track.
Once you’ve unboxed your new tool, it’s time to make some sawdust. Mastering how to select and use a track saw starts with a solid, stable setup.

Never cut directly on a concrete floor or a finished table. The best method is to lay down a sheet of 1-inch or 2-inch rigid foam insulation. This supports the entire piece of wood, prevents tear-out on the bottom of the cut, and allows the blade to pass through the wood and slightly into the foam without hitting the floor.
The first time you use a new track, the rubber splinter guard will be slightly oversized. You must “zero” it.
A common mistake is plunging the blade too deep. This creates more heat and friction. Set your blade depth so that it exceeds the thickness of the wood by about 3mm to 6mm (1/8 to 1/4 inch). Most saws have a “track compensation” button that accounts for the thickness of the aluminum rail itself.
Once you have the basics down, you can start using the track saw for more complex joinery that would be nearly impossible with other tools.
Most track saws can tilt from 0° up to 45°. The beauty of a track saw is the pivot geometry. On high-quality models, the blade enters the wood at the exact same point on the splinter guard, regardless of whether you are cutting at 90° or 45°. This makes cutting mitered “waterfall” edges for furniture incredibly simple—just align the track to your mark and tilt the saw.
Expert Tip: If you are cutting a steep bevel on a narrow board, use the ‘accessory clamps’ to ensure the track doesn’t tip over.
If you need to cut a hole in a countertop for a sink or a vent, the track saw is your best friend.

To keep your saw cutting smoothly, you must treat it like the precision instrument it is.
Learning how to select and use a track saw is a game-changer for anyone serious about woodworking. By choosing the right track saw —whether it’s a budget-friendly corded model or a premium cordless model —you are investing in accuracy that a standard circular saw simply cannot match.
Remember to always prioritize safety, use a sacrificial foam base, and keep your tracks clean. With these tips in mind, you’ll be breaking down sheet goods with more confidence and accuracy. Now, get out to the shop and start creating!
Q: Can I use a regular circular saw with a track? A: Not really. A true track saw has a specialized base with a groove that locks onto the rail. While there are “universal” base plates you can buy for circular saws, they lack the plunge action and the splinter-free precision of a dedicated system.
Q: How many teeth should my blade have? A: For general plywood and sheet goods, a 48-tooth or 52-tooth blade is standard. If you are ripping thick solid lumber, a 12-tooth to 24-tooth blade will prevent burning.
Q: Do I need to clamp the track every time? A: Not always. Most tracks have high-friction rubber on the bottom. For long, heavy cuts on raw wood, the weight of the saw usually keeps the track in place. However, for short cuts or slippery surfaces like melamine, using clamps is much safer.
Q: What is the best way to transport long tracks? A: Most manufacturers sell padded “track bags.” These protect the rubber splinter guard from getting nicked and prevent the aluminum from getting scratched or bent in your vehicle.
Q: Can I cut 2x4s with a track saw? A: Yes, but it’s often “overkill.” A miter saw is faster for 2x4s. However, if you need to rip a 2×4 into a 2×2 with a perfectly straight edge, the track saw is the best tool for the job.
Q: Why does my saw feel “tight” on the track? A: Check the adjustment cams on the base of the saw. These are small knobs you turn to remove any “wobble” between the saw and the track. If they are too tight, the saw won’t slide; if too loose, your cut won’t be straight.