Physical Address
304 North Cardinal St.
Dorchester Center, MA 02124
Physical Address
304 North Cardinal St.
Dorchester Center, MA 02124

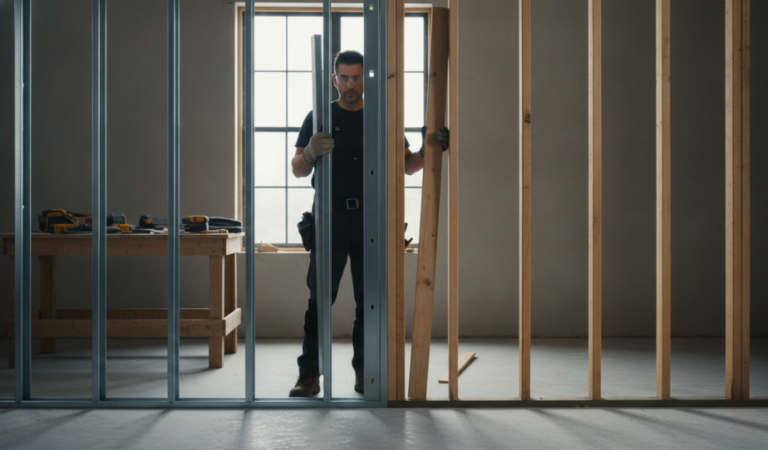
If you are planning a modern construction project, you will likely need to know how to cut metal studs. These materials have become incredibly popular for both commercial building and residential framing. Unlike traditional wood framing, working with metal requires specific tools and techniques to ensure precise, clean edges.
Many builders switch to metal framing because it offers superior durability. Knowing how to manipulate this material opens up a new level of building skills. You can frame out a basement, build a partition wall, or even construct load-bearing exterior walls once you understand the fundamentals.
This comprehensive guide will walk you through everything you need to know about cutting metal studs. We will cover the basic definitions, the benefits of using these materials, and the exact step-by-step processes for handling different gauges of steel. By the end of this article, you will have the confidence to tackle your next metal framing project with professional-level precision.
You might be asking yourself exactly what is a Metal Studs and how it differs from traditional framing lumber. A metal stud is a framing component made from sheet steel. Manufacturers take large flat sheets of galvanized steel and cold-form them into specific shapes, typically a “C” or “U” channel. These shapes give the thin metal incredible structural rigidity.

Metal studs are manufactured in sizes that mimic traditional dimensional lumber. You can purchase them in dimensions similar to 2×4, 2×6, and 2×8 wooden boards. This sizing makes it easy for builders to integrate them into existing construction techniques. You can even mix them with wood framing if you need to build a custom wooden frame for a specific heavy door or window installation.
The thickness of the metal is measured in gauges. A higher gauge number means the metal is thinner and lighter. For example, a 20-gauge or 25-gauge stud is very light and typically used for interior, non-load-bearing walls. A 12-gauge stud is much thicker, heavier, and designed for load-bearing applications.
There are numerous reasons why modern builders choose metal over wood. The Benefits Of Using Metal Studs span from long-term durability to immediate ease of installation.
First, metal studs are completely impervious to termites and other wood-destroying insects. If you live in an area prone to termite infestations, building with steel framing provides incredible peace of mind. The strongest pests cannot damage a steel frame.
Second, they offer superior fire resistance. Wood framing acts as fuel during a building fire, allowing flames to spread quickly through the walls. Steel studs do not burn. They maintain their structural integrity much longer under extreme heat, providing valuable time for evacuation and fire suppression.
Additionally, metal studs are perfectly straight. Wood lumber often warps, bows, or twists as it dries out or absorbs moisture from the environment. Steel studs arrive straight from the factory and stay that way permanently. This results in perfectly flat walls that make drywall installation a breeze. They also do not rot, split, or shrink over time.
When planning a framing project, you need to understand the Different Types of Studs and Their Uses in Construction to choose the correct material.
Interior Partition Studs
These are lightweight studs, usually 20-gauge to 25-gauge. Builders use them for interior walls that do not support any weight from the roof or floors above. Their primary job is simply to hold up drywall and provide a space for electrical wiring and plumbing to run through the wall.
Structural Load-Bearing Studs
These studs range from 12-gauge to 16-gauge steel. They have the strength and structural integrity required for exterior walls and load-bearing interior walls. They can support the massive weight of roof trusses, multiple floors, and heavy exterior siding materials.
Track Systems
While not technically studs, tracks are a necessary component of metal framing. The track is a U-shaped metal channel that attaches to the floor and the ceiling. The vertical metal studs slide into these tracks, and builders secure them together with specialized metal framing screws.
Selecting the right tool depends entirely on the gauge of the metal you plan to cut. Lighter metals require simple hand tools, while heavy-duty structural steel demands powerful electric saws.
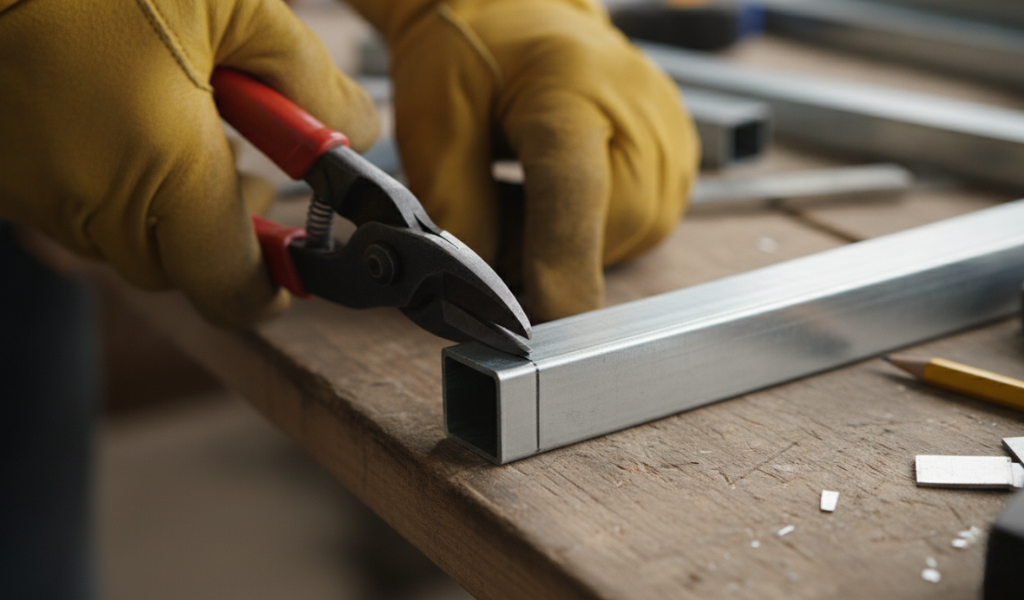
For light-duty studs, you will need aviation snips or metal shears. These hand tools look like robust scissors and easily slice through 20-gauge or thinner steel.
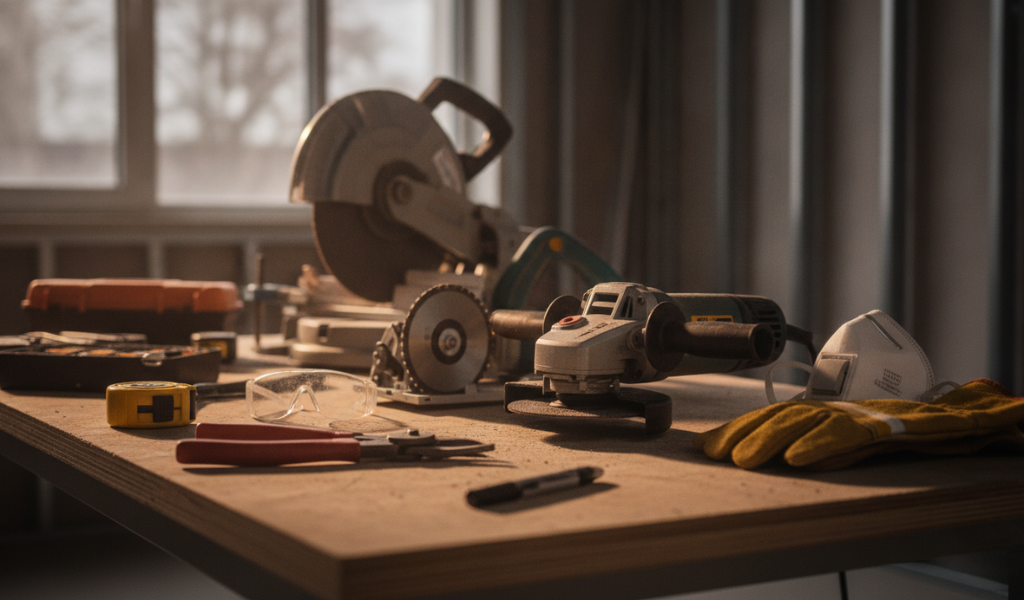
For heavier gauges, you must use power tools. An angle grinder equipped with a metal-cutting abrasive disc is a popular choice for quick cuts. A circular saw or a chop saw fitted with a ferrous-metal cutting blade will provide the cleanest, straightest cuts. Finally, a reciprocating saw (often called a Sawzall) with a fine-toothed bi-metal blade is excellent for cutting studs that are already installed in a wall. In extreme industrial settings, builders might even use a cutting torch for the thickest structural steel.
Always prioritize safety equipment. When cutting metal, especially with abrasive blades, sparks and sharp metal shavings will fly into the air. You must wear high-quality safety glasses, heavy leather work gloves, and long sleeves to protect your skin and eyes.
Cutting light-gauge metal studs is a quiet and relatively simple process that does not require electricity.
Step 1: Measure and Mark
Use a standard tape measure to determine your required length. Use a permanent marker to draw a straight line across both the web (the wide flat back part) and the two flanges (the raised sides) of the stud.
Step 2: Cut the Flanges
Take your aviation snips and cut down both of the raised side flanges along your marked line. Cut all the way down until the snips meet the flat web of the stud.
Step 3: Score and Bend
Once both flanges are cut, bend the stud back and forth along the un-cut web. The thin metal will quickly weaken and snap cleanly along the line.
Step 4: Clean the Edges
Sometimes the snapping process leaves a slightly jagged edge. Use your snips to carefully trim away any dangerous burrs, or run a metal file quickly across the edge to smooth it out.
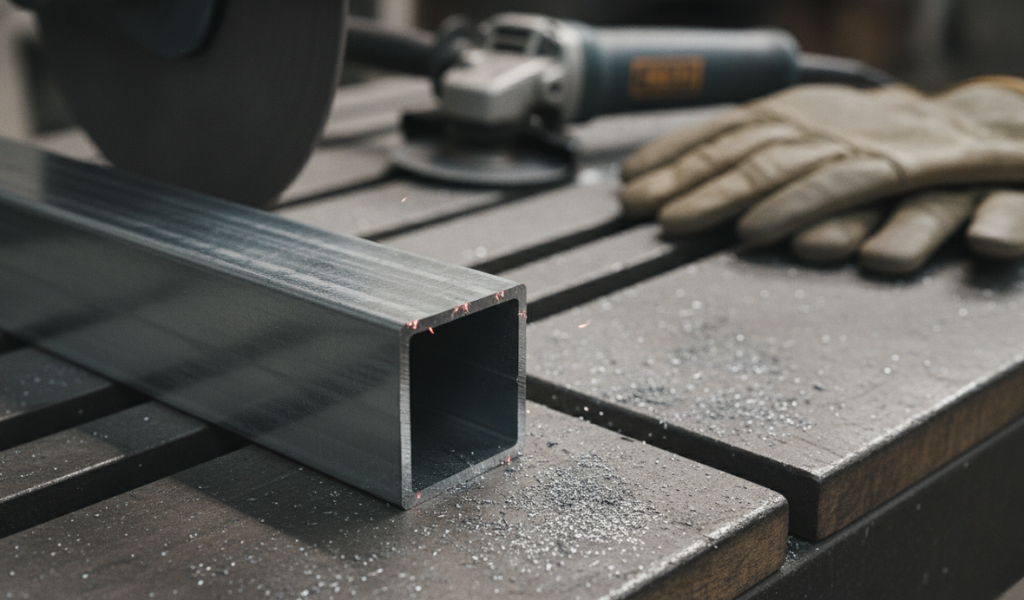
Heavy-duty structural studs will not bend and snap. You must cut completely through the material using a power saw. A chop saw is the best tool for this job because it holds the metal securely and delivers a perfectly square cut.
Step 1: Secure the Material
Measure and mark your cut line clearly. Place the metal stud firmly against the fence of your chop saw. The open U-shape of the stud should face down or toward the fence to prevent the blade from catching and bending the metal.
Step 2: Align the Blade
Bring the saw blade down while it is turned off to ensure it lines up perfectly with your mark.
Step 3: Make the Cut
Put on your safety glasses and gloves. Pull the trigger and let the saw reach full speed. Slowly lower the abrasive blade into the metal. Do not force it. Let the speed of the blade do the work, applying steady, gentle pressure until it cuts completely through the bottom web.
Step 4: Grind the Edges
Abrasive blades often leave sharp burrs and slag on the edge of the cut steel. Take a hand file or an angle grinder with a flap disc and gently smooth the freshly cut edges. This protects your hands from deep cuts during assembly and prevents the sharp edges from severing electrical wires later on.
Experienced framers use a few specific strategies to make metal construction faster and safer.
Always keep your work area clean. Metal shavings accumulate quickly on the floor. They are incredibly sharp and easily become embedded in the soles of your boots, which can ruin finished flooring if you walk into another room. Sweep your cutting area frequently.
When using a circular saw, many builders use a specialized cold-cut metal blade rather than an abrasive disc. Abrasive discs melt their way through the metal, creating intense heat and sparks. Cold-cut blades use carbide teeth to chip away the metal. They produce a cleaner cut, generate very few sparks, and leave the metal cool to the touch immediately after cutting.
If you need to cut a stud that is already fastened to the wall, a reciprocating saw is your best friend. Slide a piece of scrap wood behind the stud before you begin cutting. This protects the existing drywall or plumbing hidden behind the metal frame from accidental blade strikes.
Learning how to cut metal studs opens up a durable, straight, and fire-resistant framing option for your building projects. By correctly identifying your materials and matching them with the appropriate cutting tools, you ensure a safe working environment and professional results. Light interior tracks can be handled easily with basic hand snips, while structural frames require the heavy-duty power of abrasive saws.
As you plan your next basement finish or partition wall, consider making the switch to metal framing. It is lighter to carry, easier to store, and guarantees perfectly flat walls. Grab your tape measure, put on your safety gear, and start building with confidence.
No. Standard wood blades have fewer, larger teeth designed to clear sawdust. Hitting steel with a wood blade will destroy the teeth instantly and can send dangerous shrapnel flying toward you. You must use a blade specifically labeled for metal cutting.
Metal tracks are usually light-gauge steel. The easiest method is to cut both side flanges with aviation snips, bend the track back to weaken the web, and snip the remaining flat section to separate the pieces.
Yes, it is highly recommended when using power tools. Abrasive blades create a fine metallic dust that is harmful to breathe. A standard N95 dust mask provides good protection against these airborne particles.
Instead of nails, metal framing uses specialized self-tapping pan-head screws. These screws have a small drill bit tip that bores through the steel flanges, locking the stud and the track together tightly.