Physical Address
304 North Cardinal St.
Dorchester Center, MA 02124
Physical Address
304 North Cardinal St.
Dorchester Center, MA 02124
There’s something genuinely satisfying about building your own tools. A wooden mallet is one of those projects that looks impressive but is far more manageable than most people think. Whether you’re a seasoned woodworker or just getting started, learning how to make a wooden mallet gives you something a store-bought version never can—a tool that fits your hand, matches your style, and carries a story.
This guide walks you through everything you need to know: what a wooden mallet is, what it’s used for, which tools you’ll need, and exactly how to build one from scratch. By the end, you’ll have a fully functional, handcrafted mallet ready for your workshop.
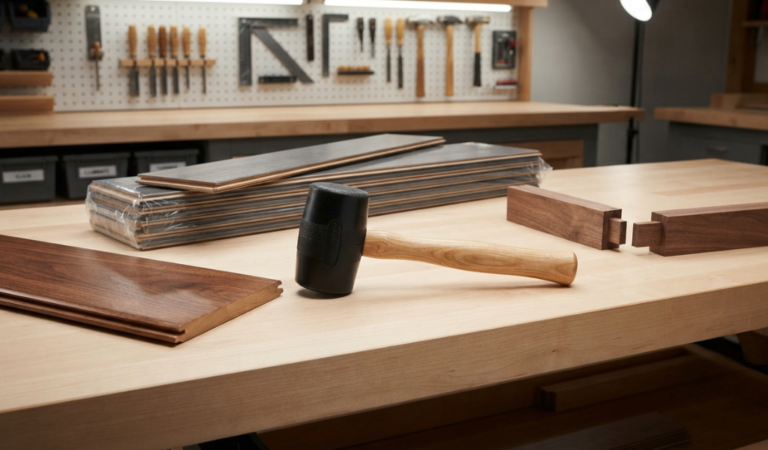
A mallet is a type of hammer with a large, blocky head—usually made from wood, rubber, or rawhide. Unlike a metal hammer, a mallet delivers a softer, more controlled blow. This makes it ideal for tasks where you need force without the risk of damaging the surface you’re working on.
Wooden mallets, in particular, have been used by craftspeople for centuries. They’re simple in design but highly effective in practice.
A wooden mallet has a surprisingly wide range of uses, especially in woodworking. Here are the most common:
Basically, any time you need to hit something wooden without wrecking it, a wooden mallet is your best friend.
Before you start cutting, make sure you have the right gear on hand. Here’s what you’ll need at minimum:
Helpful but not essential:
Don’t let the tool list intimidate you. If you have the basics, you can absolutely get this done.
Wood selection is where things get fun. You have a lot of freedom here, but there are a few principles worth keeping in mind.
Stick with hardwoods. Species like oak, maple, and walnut are far more durable than softwoods like pine or cedar. A heavier, denser wood also gives your mallet a satisfying heft, which makes it more effective in use.
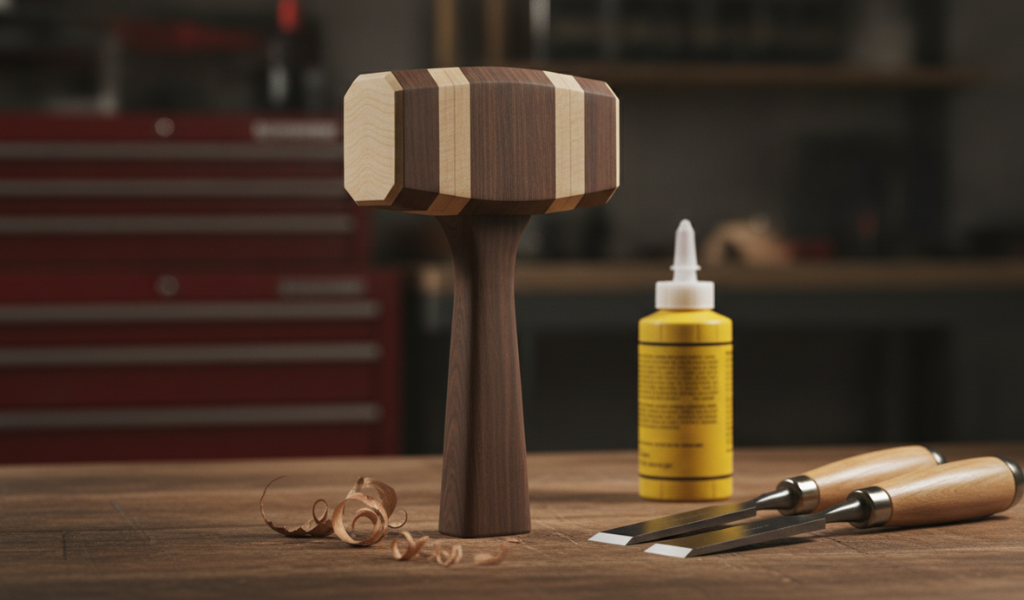
Think about contrast. One of the best things about making a laminated mallet head is the visual effect of layering different wood species together. Pairing a light wood like hard maple with a darker species like walnut or a vibrant one like padauk creates a striking look.
Use what you have. Got leftover hardwood scraps from another project? This is a great way to put them to use. Reclaimed wood also works well and adds character.
A classic combination is hard maple for the handle and middle layer, padauk for the outer plates, and yellowheart as a contrasting accent. But any combination of complementary hardwoods will work beautifully.
Start with a simple sketch. Think about the proportions you want—the head, the handle, and how they’ll relate to one another.
A classic set of proportions that works well: a head that is three inches square on the ends and six inches long, with a handle twelve inches in total length. This produces a balanced, comfortable tool that looks as good as it performs.
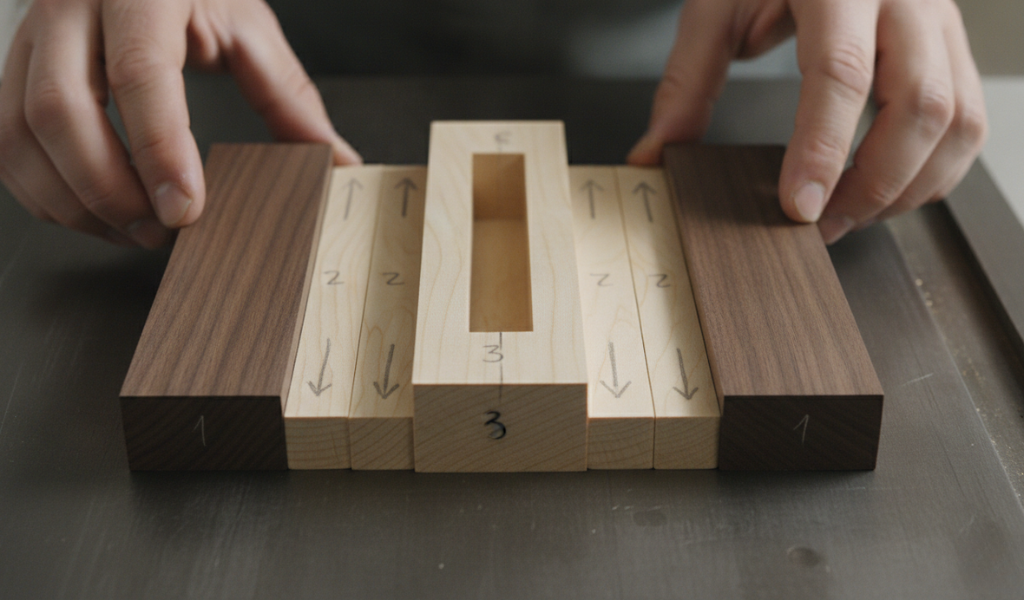
For the head, plan to laminate an odd number of layers (three, five, or more). A five-layer head with thicknesses of 0.75 – 0.25 – 1 – 0.25 – 0.75 inches adds up neatly to three inches. The middle layer should be cut from the same piece of wood as the handle—this ensures a tight, natural fit without extensive trimming.
Once you’ve finalized your design, prepare your lumber. Make sure all pieces are at their target thickness before cutting. If you have a planer, now’s the time to use it. If not, try to source wood at the exact thickness you need from your lumber supplier.
Rip all boards to width using a table saw. Cut the head plates slightly longer than the final length—you’ll trim them to final dimensions after gluing. Cut the handle to its exact final length now, since it’s much harder to trim once the mallet is assembled.
One of the trickiest cuts is the wedge slot in the handle. Using a crosscut sled with the handle clamped upright, cut a slot about 2 to 2.5 inches deep into the top end of the handle. This slot is what will lock the head in place once you drive in the wedge later. Aim for a slot width that’s slightly under a quarter inch.
Before reaching for the glue bottle, check every face that will be glued. Lay each piece on a flat surface and look for any warping, cupping, or saw marks that could prevent a clean bond. Sand any problem areas flat using sandpaper adhered to a true, flat surface.
Label each piece with a number and an arrow to mark its orientation. You’d be surprised how easy it is to get confused mid-glue-up—a little preparation here saves a lot of stress later.
Do a complete dry fit before applying any glue. Stack all the pieces together and make sure everything lines up with no gaps. This is also the time to practice your clamping sequence.
Now comes the most critical part of the build. Work methodically and don’t rush.
Apply a thin, even layer of wood glue to each mating surface using an old credit card or a brush. A thin layer bonds just as well as a thick one—and it’s far less messy.
Use small wooden dowels (cut from a 1/8-inch dowel rod) to align and pin the center pieces in place as you build up each layer. This prevents them from sliding out of position when you apply clamping pressure. If you have a brad nailer, you can use that instead.
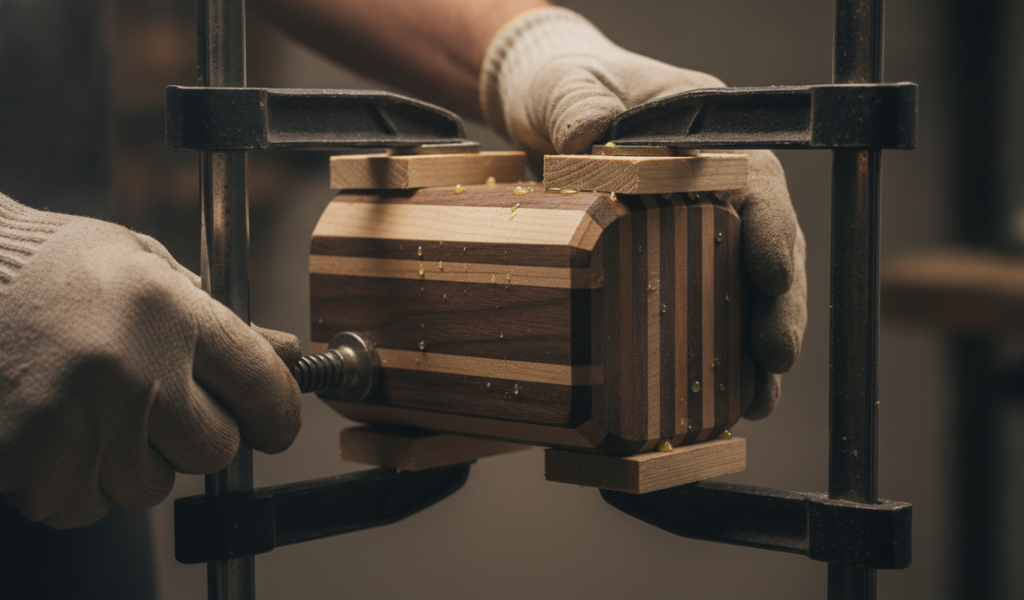
Once all layers are stacked and aligned, clamp the assembly firmly using F-style bar clamps or parallel bar clamps. Place scrap wood cauls on either side to protect the outer faces from clamp marks. Scrape any glue squeeze-out from the handle cavity before it dries, then set the head aside to cure fully.
After the glue has cured, remove the clamps and scrape off any hardened glue residue with a dull chisel.
Flatten the top and bottom faces of the head by sanding them on a flat reference surface. Check your work frequently with a square.
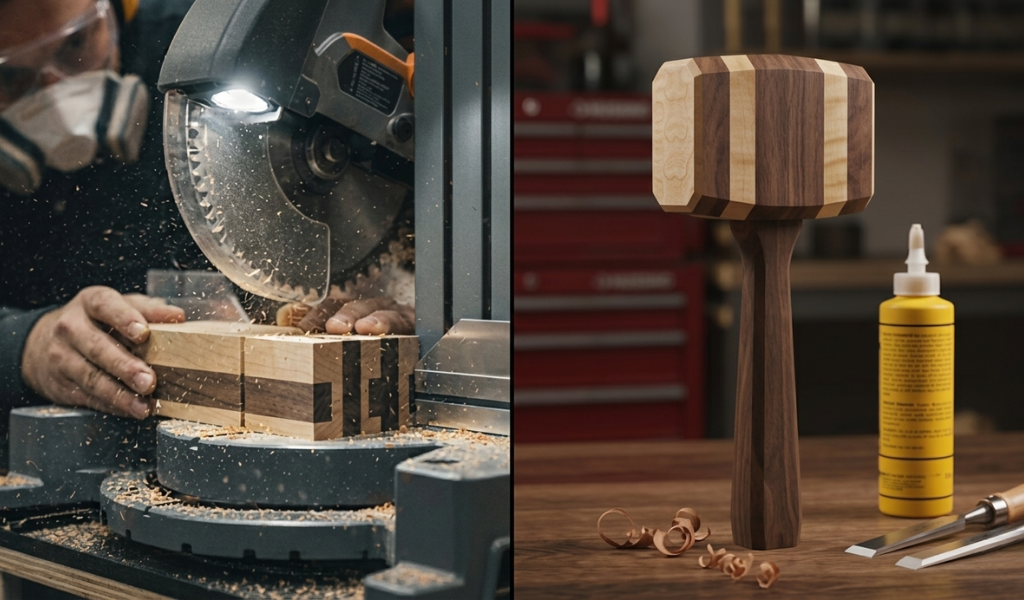
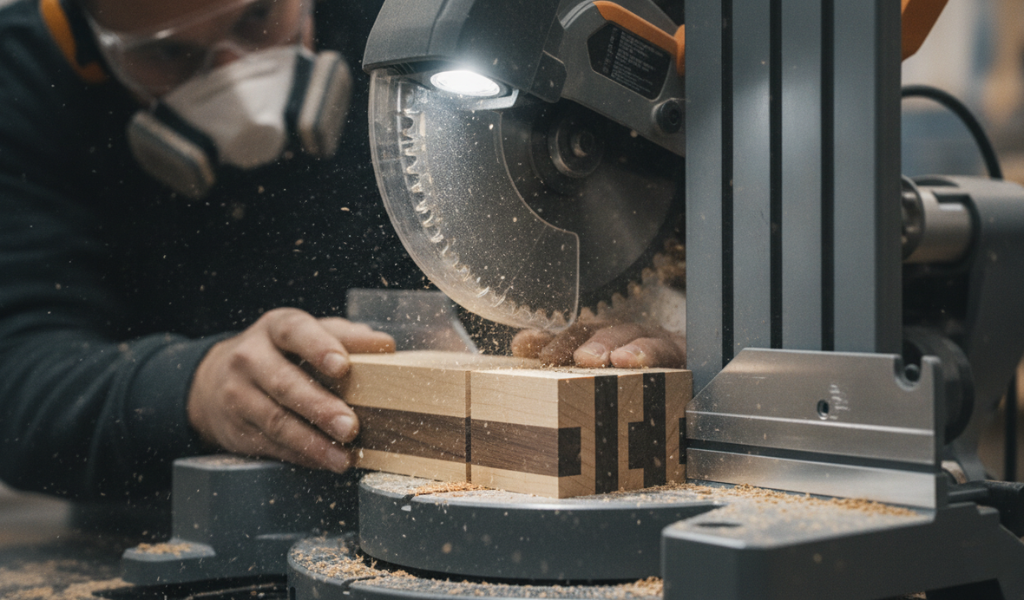
Next, cut the striking faces at a slight angle—about 2 degrees. This ensures the face of the mallet hits squarely as it travels through its natural arc. A miter saw makes this cut simple and precise.
Now it’s time to refine the shape. Chamfering the edges of both the head and handle serves two purposes: it looks polished, and it makes the mallet more comfortable to hold. It also reduces the chance of edges chipping with use.
Use a router table with a chamfer bit for the quickest results, or wrap coarse sandpaper around a scrap block and knock the edges off by hand at roughly 45 degrees.
Sand all surfaces progressively up to 220 grit. Once you’ve reached that stage, raise the grain by wiping the wood lightly with a damp cloth. Let it dry for a few minutes, then give it one final pass with 220 grit to knock down any raised fibers.
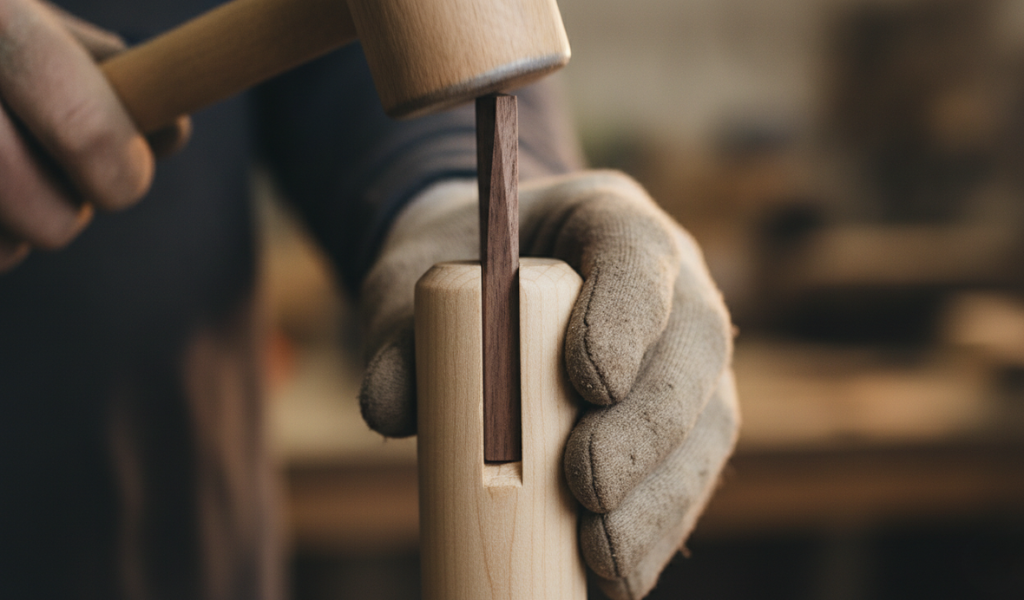
Make the wedge from a thin offcut—ideally the same species as your contrasting layer so it blends in visually. Sand a slight taper on both faces so that it gets tighter the deeper it goes into the slot.
Before assembly, sign or mark the mallet somewhere discreet. A woodburning pen leaves a more permanent mark than a Sharpie. You built this thing—put your name on it.
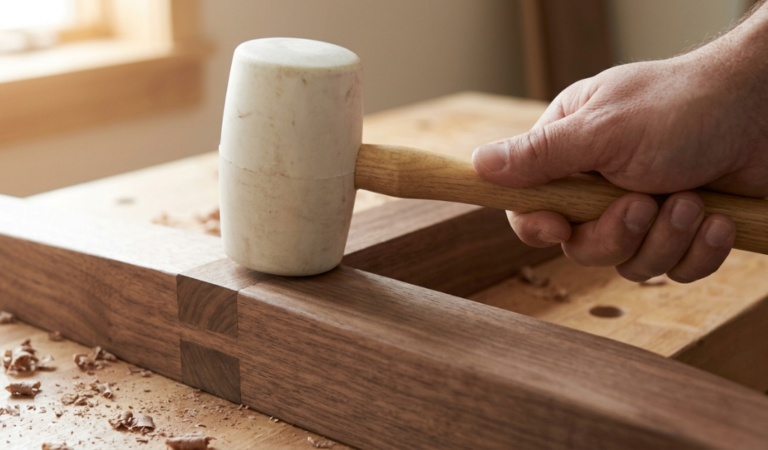
Slide the handle up through the bottom of the head, then tap the bottom of the handle against a solid wooden surface to seat the head. Once the handle protrudes slightly from the top, insert the wedge and tap it home. The handle is held entirely by friction from the wedge—no glue needed. If the handle ever loosens, you can simply drive in a new, slightly wider wedge and it’s good as new.
Trim the protruding wedge and handle flush with the top surface of the head using a sharp chisel, then sand smooth.
A good finish protects the wood and brings out its natural color and grain. Danish Oil is a classic choice—it’s easy to apply, penetrates well, and gives the wood a warm, rich sheen without building up a thick surface layer.
Apply the oil with a clean cotton rag in a well-ventilated space. Let it soak in for about thirty minutes, then repeat the process until the wood stops absorbing oil (usually two or three coats). Wipe off any excess and buff to a sheen with a clean cloth.
If you prefer a different look, wipe-on varnish, tung oil, or even a simple beeswax finish all work well. The key is protecting the wood without making the handle slippery.
Building your own wooden mallet takes a few hours and a modest collection of tools, but the result is something far more useful than anything you’d pull off a shelf. It fits your hand. It reflects your taste in wood. And every time you pick it up in the shop, you know exactly how it was made.
Once you’ve got one under your belt, you’ll likely want to make another. Many woodworkers find the second mallet even better than the first—tighter joinery, cleaner laminations, a more refined handle shape.
If you found this guide helpful, consider exploring other hand tool builds like a wooden spokeshave or a marking gauge. The skills you’ve developed here translate directly.
What is the best wood to use when making a wooden mallet?
Hard maple, oak, and walnut are the most popular choices. These hardwoods are dense, durable, and give the mallet a satisfying weight. Avoid softwoods like pine—they compress and dent too easily under repeated use.
Do I need a lot of woodworking experience to make a wooden mallet?
Not at all. This is a beginner-friendly project. You’ll need basic table saw skills and an understanding of wood glue, but the steps are straightforward and forgiving. Mistakes are easy to work around, and the design is very flexible.
How long does it take to make a wooden mallet?
Expect to spend around 4 to 6 hours spread over two days—one session for milling, cutting, and gluing, and a second session (after the glue has cured) for trimming, sanding, assembly, and finishing.
Does the handle need to be glued into the head?
No. The handle is secured purely by friction from the wedge driven into its top end. This is actually a benefit—if the handle ever loosens or gets damaged, you can remove it and replace it without rebuilding the whole mallet.
Can I make a wooden mallet without a table saw?
A table saw makes the job significantly easier, but it’s not strictly required. A circular saw with a straight-edge guide can handle most of the ripping. A hand saw can substitute for crosscuts in a pinch. The results may be slightly rougher, but the mallet will still be functional.
What finish should I use on a wooden mallet?
Danish Oil is a great all-around choice—it protects the wood, enhances the grain, and doesn’t make the handle slippery. Tung oil and wipe-on varnish are also solid options. Avoid thick film finishes like polyurethane on the handle, as they can make it uncomfortable to grip and tend to peel with use.
How many layers should the mallet head have?
The head should always have an odd number of layers (three, five, seven, etc.). This ensures the handle slot falls naturally in the center. Five layers is the most common choice—it gives you room to use multiple wood species for a visually appealing lamination without overcomplicating the build.