Physical Address
304 North Cardinal St.
Dorchester Center, MA 02124
Physical Address
304 North Cardinal St.
Dorchester Center, MA 02124
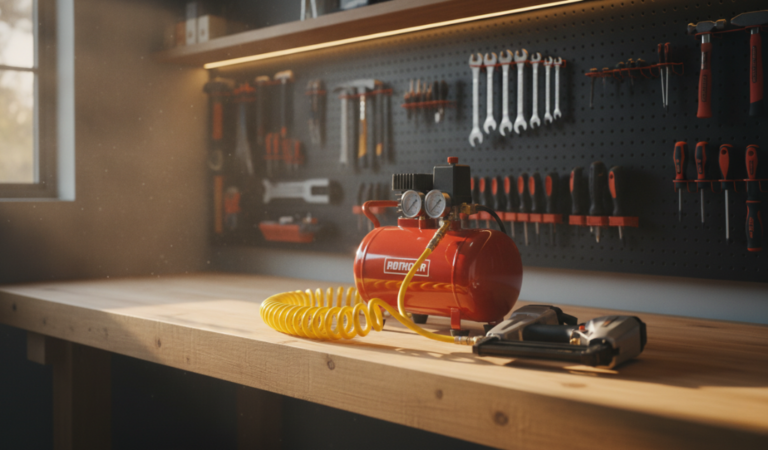
If you’ve ever walked into a professional workshop or a serious DIYer’s garage, you’ve likely heard that unmistakable rhythmic hum followed by a sharp hiss of air. That is the sound of productivity. Whether you are looking to speed up a construction project with a nail gun, paint a car with a sprayer, or simply keep your tires at the right PSI, learning how to use an air compressor is a fundamental skill that transforms how you work.
At first glance, an air compressor might look like a daunting piece of machinery—a heavy metal tank with various gauges, knobs, and valves. However, it is surprisingly beginner-friendly once you understand the basic mechanics. In this guide, we’ll break down everything from the initial setup to safety protocols and long-term maintenance, ensuring you feel confident operating any compressor you encounter.
To truly master how to use an air compressor, you have to understand What is a compressor first and the science inside the tank. It isn’t just a container of air; it is a battery for mechanical energy. A motor (either electric or gas-powered) drives a piston or a centrifugal impeller. This movement sucks in atmospheric air, squeezes it into a much smaller volume, and shoves it into a steel storage tank.
In simple terms, an air compressor takes air, squeezes it into a tank, and releases it to power tools. The air inside wants to expand back to its original size. Because it is trapped, it exerts pressure against the walls of the tank. When you pull the trigger on a tool, you are giving that air an escape route. As it rushes out, it provides the kinetic energy needed to drive a piston in a nail gun or rotate a turbine in an impact wrench. This is why pneumatic tools are often more powerful than electric ones—they can release a massive amount of energy in a split second without waiting for a battery to discharge.
Furthermore, air tools are famously durable. Unlike electric drills that can burn out if they stall, an air tool simply stops moving when it hits too much resistance. Once the resistance is cleared, it starts right back up without any damage to the internal motor. This makes the air compressor the heart of any high-performance shop.
Choosing the right tool for the job starts with knowing the types of compressor available. They generally fall into two categories: positive displacement and dynamic. However, for most DIYers and professionals, we focus on the displacement models.
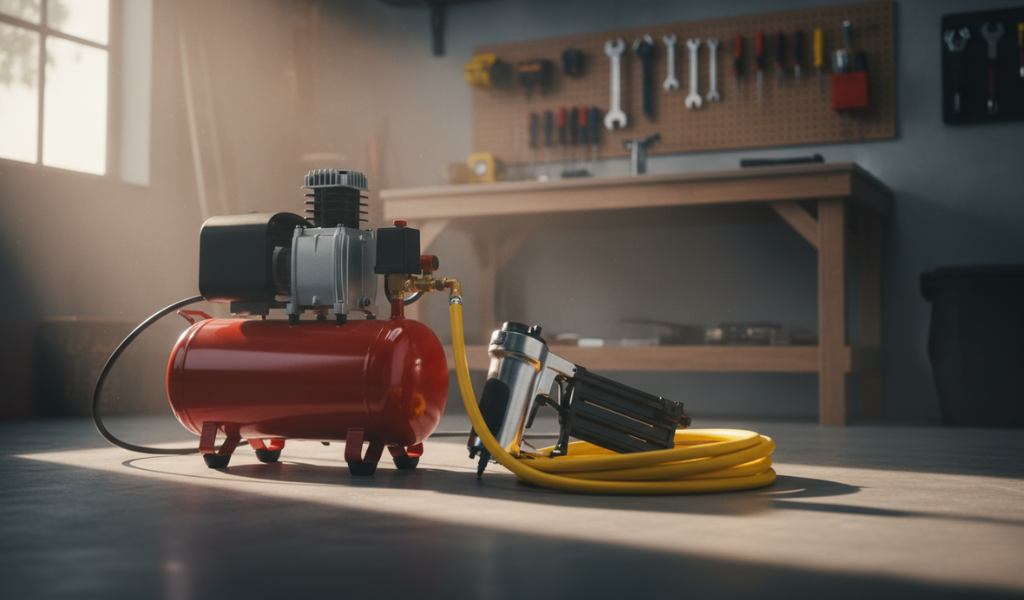
These are the “entry-level” heroes of the woodworking world. Named for their flat, round tanks, they usually hold 1 to 6 gallons of air. They are almost always oil-free, making them very low-maintenance. They are perfect for finishing carpentry, tire inflation, and clearing dust off your workbench. Their main limitation is “recovery time”—if you use a tool that requires a constant stream of air, you’ll have to wait frequently for the tank to refill.
These feature two cylindrical tanks. This design increases air capacity without making the footprint much larger. They are often used by contractors who need to run two nail guns at once. They offer a great balance between portability and power.
If you see a tall, vertical tank bolted to a shop floor, that’s a stationary unit. These often run on 240V power and can hold 60 to 80 gallons. These are designed for “high-demand” tools like sanders, grinders, and paint sprayers which require a high CFM (Cubic Feet per Minute) to operate continuously.
Oil-Free: These use permanent lubrication (usually Teflon coatings). They are lighter, cheaper, and work in any orientation. However, they are louder and have a shorter overall lifespan.
Oil-Lubricated: These are the “heavy-duty” choice. They run much quieter and can last decades if you change the oil regularly. They are heavier and must remain level so the oil can circulate.

Before you ever touch the power switch, you must prioritize your physical well-being. Compressed air is incredibly powerful and, if mishandled, can be ”extremely dangerous”.
Whenever you are using a compressor, you must wear safety glasses or a full-face shield. Compressed air doesn’t just power tools; it kicks up “microscopic debris”. A stray wood chip or a tiny metal filing launched at 90 PSI can cause permanent eye damage .
Air compressors are loud. A typical small unit can produce 80-90 decibels, while larger ones can go higher. Prolonged exposure leads to “tinnitus” or permanent hearing loss. Always wear earplugs or high-quality ear muffs while the motor is running.
If you are using your compressor for painting or cleaning, you are atomizing particles into the air. Always work in a well-ventilated area. If you are spray painting, a respirator (not just a dust mask) is required to keep toxic fumes out of your lungs.
Never point a compressed air nozzle at your skin. There is a rare but fatal condition called an ”air embolism”, where compressed air is forced through the skin and into the bloodstream. Additionally, always wear closed-toed shoes. Air hoses are trip hazards, and pneumatic tools are heavy—protect your toes!
Setting up your workstation is about creating a flow that is both efficient and safe. Follow this sequence every time to ensure your compressor lives a long life.
Place the unit on a flat, stable surface. If you are using an oil-lubricated model, being unlevel can prevent the oil from reaching the piston, leading to a catastrophic engine seizure. For all models, a level surface prevents the machine from “walking” across the floor due to the vibrations of the motor.
If your unit has an oil window or a dipstick, check it now. The oil should look like honey—clear and amber. If it looks like chocolate milk, water has contaminated it, and it needs a change. Ensure the level sits at the ⅔ mark. If you need to top it off, use “non-detergent” compressor oil. Standard 10W-30 car oil contains detergents that can damage the seals of an air pump.
Check your air hose for cracks or “bubbles” in the outer lining. A burst hose is like a whip and can cause serious injury.
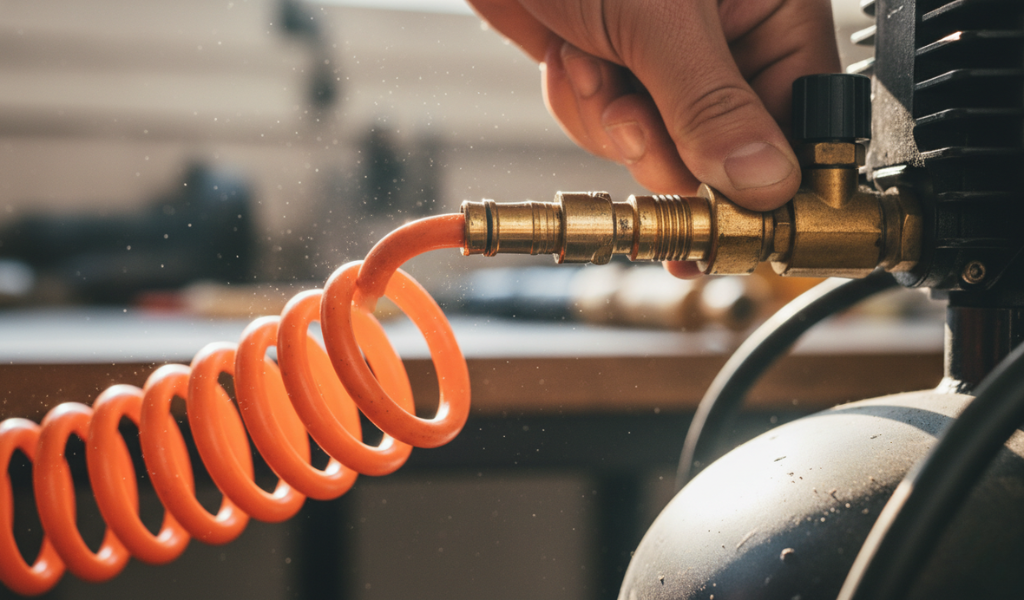
The Pull-Back Method: Slide the collar of the female coupler back, insert the male plug, and release.
The Click Test: Give the hose a firm tug. If it pops off, the balls in the coupler didn’t seat correctly.
Attach your desired tool before you pressurize the line. This is safer because you aren’t fighting against 90 PSI of resistance while trying to click the coupler into place. Make sure the tool’s trigger is in the “off” or “locked” position.
Plug the unit directly into a wall outlet. If you must use an extension cord, it must be a “heavy-duty 12-gauge” cord or thicker. Thin household cords will cause a voltage drop, which makes the motor run hot and eventually burn out the start capacitor.
Now that you’re hooked up, let’s look at how to operate air compressor systems during the actual work phase.
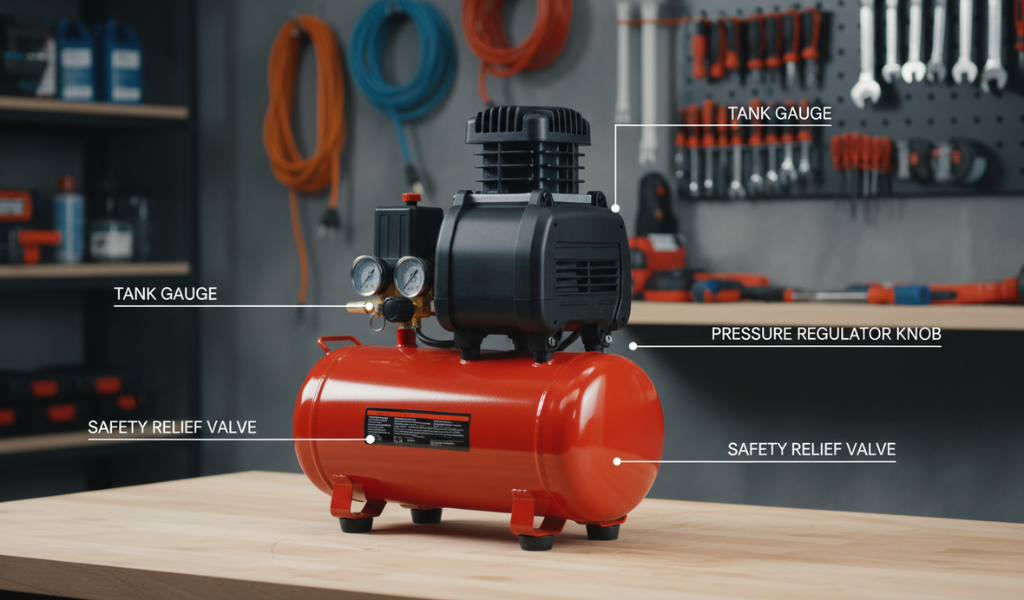
Every tank has a safety valve, usually a brass fitting with a small ring. Before the tank is full, give that ring a quick pull. You should hear a sharp “whoosh.” This ensures that if the pressure switch fails and the motor doesn’t stop, the tank won’t explode; it will simply vent the excess air through this valve.
Flip the switch to “On” or “Auto.” Most compressors have an “Auto-Start/Stop” feature. This means the motor will run until the tank reaches a certain pressure (cut-out) and will stay off until you use enough air that the pressure drops below a certain point (cut-in). Let the motor finish its first cycle completely before you start working.
You will see two gauges on your machine.
The Tank Gauge: Shows how much pressure is currently “stored” in the metal tank.
The Regulated (Hose) Gauge: Shows how much pressure is actually going into your tool.
Turn the regulator knob (usually a large plastic dial) clockwise to increase pressure. Refer to your tool’s manual. A common mistake is thinking “more pressure equals more power.” Using 120 PSI on a tool rated for 90 PSI won’t make it work better; it will simply “shatter the internal seals” and ruin the tool.
To go from a beginner to an expert in how to use an air compressor, you must understand CFM (Cubic Feet per Minute). While PSI is the “strength” of the air, CFM is the “volume” of air.
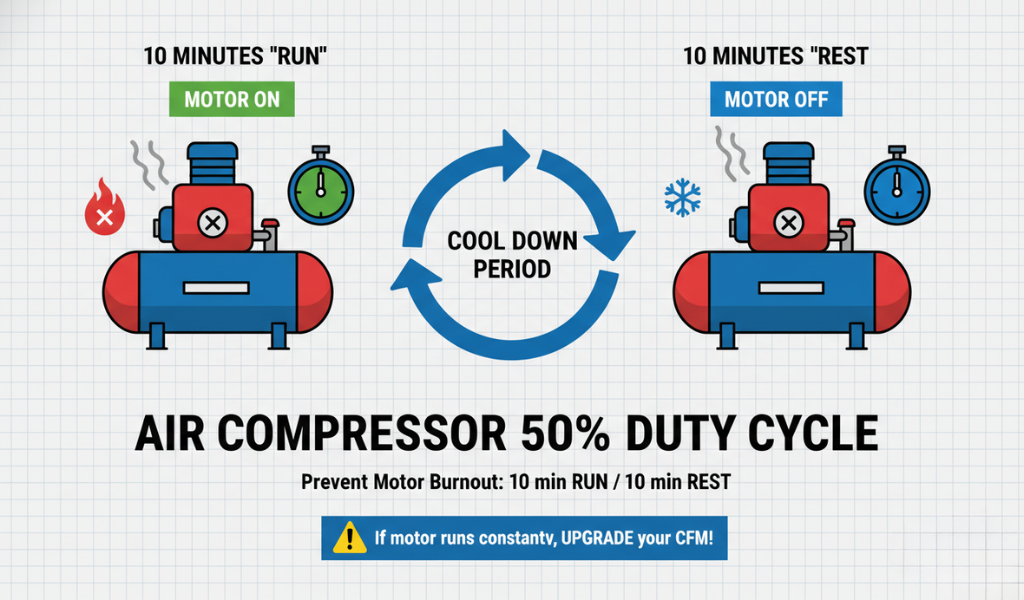
If you are using a tool like an orbital sander and it suddenly slows down even though the motor is running, you have exceeded the CFM rating of your compressor. The tank is empty, and the motor cannot compress air as fast as the tool is using it.
The Fix: You must stop and wait for the tank to “recover.”
The Pro Move: For high-CFM tools, use a shorter hose with a larger diameter (3/8″ instead of 1/4″). This reduces friction and allows air to flow more freely.
If you switch from a nail gun (which uses a “burst” of air) to an air blower (which uses a “constant stream”), you may need to re-adjust your regulator. Always check the gauge while the tool is actually running (dynamic pressure) rather than when it is sitting idle (static pressure).
A well-maintained compressor can last 20 years so you must know about an air compressor maintenance properly. A neglected one might last two. The secret is in the shutdown.
Turn the regulator knob all the way down (counter-clockwise) and trigger your tool one last time to empty the air left in the hose. This makes it much easier and safer to disconnect the tool.
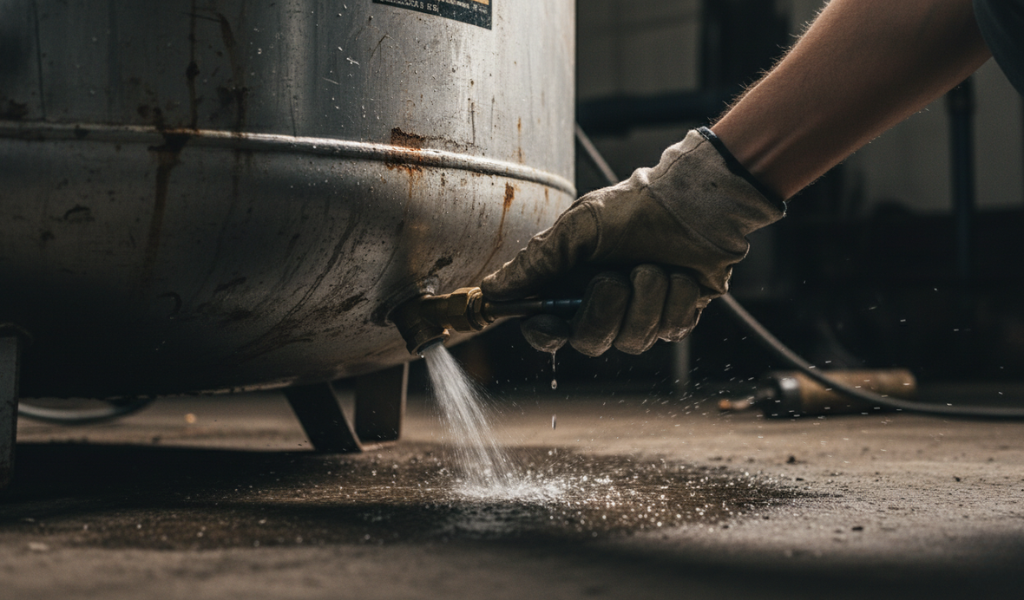
This is the single most important step in this entire guide. When air is compressed, it gets hot. When it hits the cool metal of the tank, it creates “condensation”—literally puddles of water inside your tank. Locate the drain cock at the bottom of the tank. Slowly twist it open. A mixture of air and rusty water will spray out.
Why? If you leave this water inside, it creates a “corrosive environment”. Eventually, the bottom of the tank will thin out and could lead to a dangerous tank failure.
Your compressor “breathes” through a small filter. If you are working in a dusty garage, this filter gets clogged. Once a month, pop the filter cover off and blow it out with—ironically—compressed air. If the motor can’t breathe, it has to work twice as hard, which leads to overheating.
Periodically, spray a mixture of soapy water on the fittings and valves while the tank is pressurized. If you see bubbles forming, you have a leak. Usually, a quick turn with a wrench or some fresh Teflon tape on the threads will solve the problem.
Tool Oiling: Most pneumatic tools (except paint sprayers and oil-free tools) need a drop or two of air tool oil in the air inlet before every use. This keeps the internal O-rings supple and prevents metal-on-metal wear.
Temperature Management: In freezing weather, moisture in the lines can freeze, blocking your tools. If you work in a cold climate, consider your setup.
Hose Management: Never pull your compressor by the hose. This puts immense strain on the brass fittings and will eventually cause a leak. Move the unit by its handle.
Storage: Always store the unit in a “temperature-controlled” environment if possible. Extreme heat can degrade the rubber seals, and extreme cold can make the oil too thick for the motor to turn over.
Learning how to use an air compressor opens up a world of professional-grade DIY possibilities. You must also learn about what is an air compressor used for because of its well maintenance and purposes.
From the satisfying “pop” of a nail gun to the efficiency of a pneumatic wrench, these machines are the backbone of any productive shop.
Remember: Set up on level ground, check your PSI ratings, and always drain the tank after use. By following these simple steps, you’ll ensure your equipment stays in peak condition for years to come. Now that you’re an expert in how to operate air compressor units, what’s your first project going to be?
It is strongly discouraged. Extension cords can lead to power drops, causing the motor to struggle or overheat. If you absolutely must use one, ensure it is a “heavy-duty 12-gauge” cord and keep it as short as possible. Otherwise, just use a longer air hose to reach your project.
This happens when the tank hasn’t been drained recently. Moisture builds up inside the tank and eventually gets pushed into the hose. Open the drain valve at the bottom of the tank to clear it out. For painting or sensitive work, you may want to install an “inline moisture filter.”
For oil-lubricated models, a good rule of thumb is once a year or every 100-200 hours of use. If the oil looks dark, gritty, or milky, change it immediately to prevent pump damage.
While the tank won’t explode, it’s not good practice. Leaving air in the tank keeps the metal under constant stress and prevents you from properly draining the moisture. For maximum longevity, always drain the tank at the end of your workday.
This usually means there is a significant leak somewhere or the ‘pressure switch’ is faulty. Check all your hose connections with soapy water. If no leaks are found, the machine may not be able to reach its “cut-out” pressure, which could indicate a worn-out piston seal.
For basic tasks like inflating tires and using a brad nailer, a 1–6 gallon “pancake” compressor is perfect. If you plan on using spray guns, grinders, or impact wrenches, you’ll likely need a 20–30 gallon tank to provide the necessary volume of air.
This often happens during startup when the motor requires a “surge” of electricity. If you are on a shared circuit with lights or other tools, it may overload the breaker. Try plugging it into a dedicated 20-amp circuit and avoid using long extension cords.