Physical Address
304 North Cardinal St.
Dorchester Center, MA 02124
Physical Address
304 North Cardinal St.
Dorchester Center, MA 02124

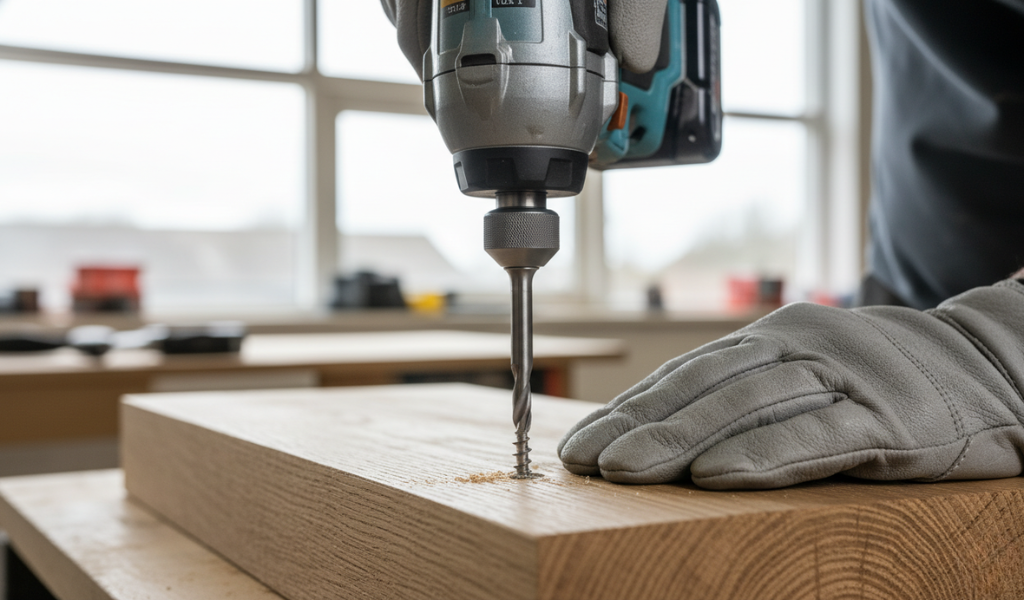
We have all been there. You are right in the middle of a weekend DIY project, assembling some furniture, or tightening a critical component on a machine. You are applying steady pressure, turning the screwdriver, and suddenly—slip.
The screwdriver slips, the screw head becomes damaged, and suddenly the fastener will not tighten or come out properly. In many cases, this can stop your project completely, leaving the fastener stuck in place.
Learning how to prevent stripped screws is not just a skill reserved for industrial engineers or master mechanics. It is a fundamental piece of workshop wisdom that saves time, prevents ruined materials, and helps avoid unnecessary frustration. Whether you are building a backyard deck, fixing an appliance, or managing a manufacturing line, understanding why fasteners fail is the secret to making sure they never do.
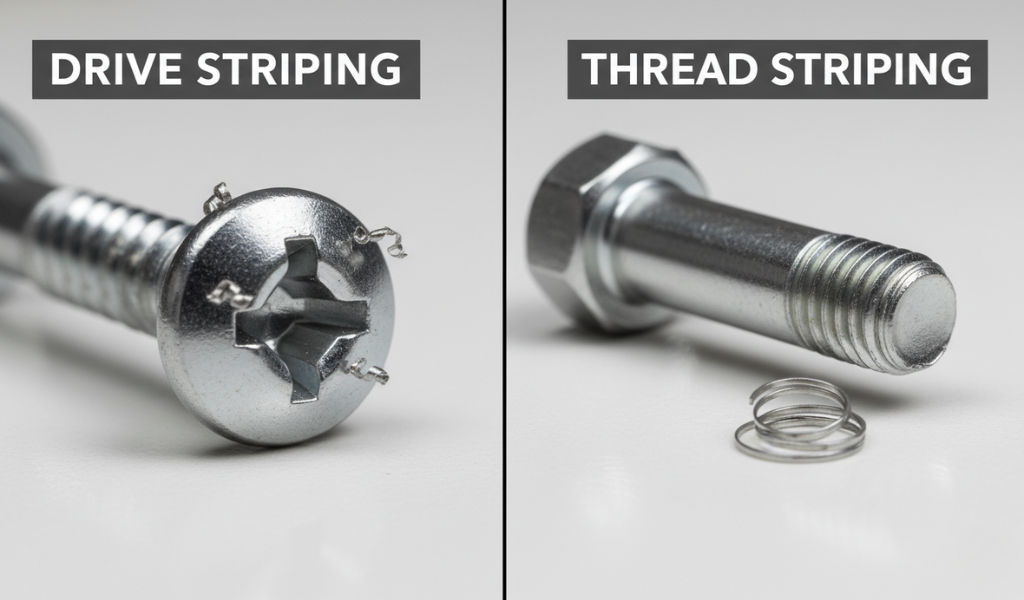
When people talk about a ‘stripped screw’, they usually mean they cannot get the fastener out. However, in the world of mechanical assembly, there are actually two distinct types of screw stripping. Knowing which one you are dealing with is crucial for troubleshooting.
Drive Stripping
This is the classic visual nightmare. Drive stripping happens when the recessed slots inside the head of the hardware—whether it is a Phillips, flathead, or hex drive—become deformed, rounded, or completely hollowed out.
Once the metal inside the head is chewed up, your driver bit can no longer grab onto the recess. The driver simply spins in place, making the damage worse with every single rotation.
Thread stripping is a completely different animal, and it is often a quiet disaster. This occurs when the helical ridges on the shaft of the fastener, or the internal ridges inside the pre-drilled hole, completely shear off.
When you try to tighten the hardware, it just spins and spins without ever clamping down. It feels loose, provides zero holding power, and often goes unnoticed until the entire joint falls apart under structural weight.
Fasteners do not just strip because they feel like it. Stripping is almost always the result of a correctable human error or a mismatch in tools. If you want to master how to prevent stripped screws, you have to look closely at these five common mistakes.
This is one of the most common causes of stripped screws. There is a common human instinct to tighten a fastener until it stops, and then give it one extra hard twist just to be safe.
Every single piece of hardware has a specific ‘proof load’—which is the absolute maximum amount of tension it can handle before the metal permanently stretches and deforms. When you exceed this limit, the metal gives way. If you are using powerful impact drivers or air tools without any safety limits, you can easily strip out the threads or snap the head off entirely before you even realize what happened.
Have you ever noticed how a traditional Phillips screwdriver tends to push itself up and out of the slot when you turn it really hard? That annoying phenomenon is an intentional design quirk known as ‘cam-out’.
The Phillips drive system was originally designed for early automated factories. It was engineered to let the tool slip out of the head when it got tight to avoid over-tightening the joint.
However, in modern hands, cam-out is the ultimate enemy. If you do not push down hard enough, or if you use a worn-out screwdriver bit that does not sit flush in the slot, the tool will slide upward, bite into the top edges of the metal, and strip the head instantly.
When joining components together, always consider the hardness of your metals. As a general safety rule, your fastener should be equal to or harder than the material it is entering.
If you take a high-strength, hardened steel fastener and drive it aggressively into soft aluminum, brass, or soft plastic without modifying your approach, you will easily strip out the soft internal walls of your pilot hole.
Conversely, using cheap, soft metal fasteners in a dense hardwood or thick steel plate will cause the head of the hardware to twist right off or deform at the first sign of resistance.
A pilot hole is a guide path for your hardware. If your pre-drilled pilot hole is a fraction too small, the amount of friction and resistance increases dramatically as you drive the metal home. This extreme resistance causes the driver bit to slip and ruin the head.
On the flip side, if your pilot hole is too large, the ridges on your hardware will barely catch the sides of the hole. This leaves you with less than 60% thread engagement, meaning the joint will strip out the moment any real weight or pull force is applied.
Not all hardware is built the same. Using fine-threaded fasteners in soft materials like plywood, drywall, or soft plastics is an open invitation for thread stripping.
Fine threads have small spaces between their ridges, which works beautifully in hard metals but cannot grab enough material in soft mediums. Soft materials require deep, wide, coarse threads to bite into the fibers and anchor themselves firmly.
Now that we know exactly why these failures happen, let us dive into the actionable steps you can take to make sure you never have to deal with a ruined fastener head again.
If you are working on critical projects like automotive engine repairs, structural builds, or sensitive electronics, stop guessing how tight the hardware is. Use a manual torque wrench or a clutch-driven electric screwdriver. Set the tool to the manufacturer’s exact recommendations. When the tool reaches the proper limit, the clutch will safely click or slip, entirely avoiding over-torquing.
When driving hardware manually or with an impact driver, your body positioning matters. Do not hold the tool at an angle. Keep the driver perfectly perpendicular to the surface of the work piece. Apply significant downward pressure with the palm of your hand as you turn. This force keeps the driver bit locked deep within the recess, combating the natural tendency of the tool to slide up and cause cam-out.
Driver bits are consumable items; they are not meant to last forever. Over time, the sharp edges of a Phillips or Torx bit become slightly rounded. A worn-out bit cannot sit flush inside the head of a fastener. If your driver bit looks polished, rounded, or chipped at the tip, throw it in the trash immediately. Spending a couple of dollars on a fresh pack of bits will save you hours of extracting ruined hardware down the road.
If you are dealing with stubborn hardware, or if you want some extra insurance on a high-stakes project, use a drop of ‘screw grab’ fluid or friction gel. These fluids contain tiny particles of industrial grit. When you place a drop in the head of the fastener, the grit locks the metal surfaces of the tool and the hardware together, dramatically increasing grip and preventing slips.
Never try to force a large fastener directly into dense wood or metal without a guide hole. Look up a standard drill bit chart to find the exact matching bit size for the specific size of hardware you are using. Aim for an industry-standard 75% thread engagement. This provides maximum holding strength without creating excessive assembly friction.
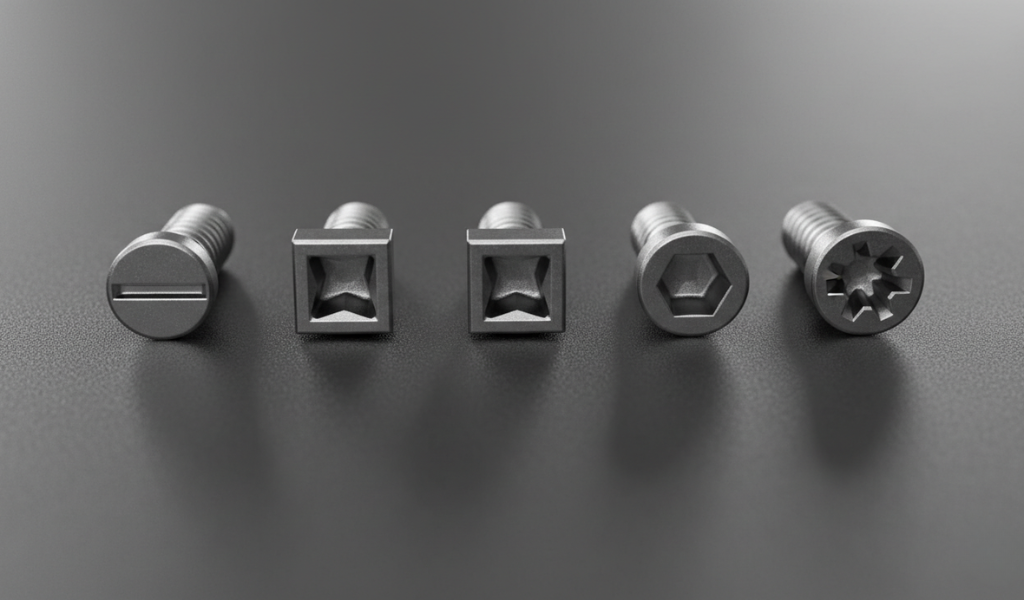
One of the most effective ways to implement screw stripping prevention is to upgrade the style of hardware you use. If your project requires high torque or structural strength, move away from old-fashioned slotted or Phillips heads.
The table below breaks down the most common drive styles based on how well they resist slipping under heavy pressure.
| Drive Type | Cam-Out Resistance | Torque Transfer | Ideal Applications |
| Slotted (Flathead) | Extremely Low | Poor | Antique furniture restoration, light switch plates, cosmetic work. |
| Phillips | Low | Moderate | General drywall installation, lightweight consumer electronics. |
| Square (Robertson) | High | Excellent | Pocket-hole woodworking, deck building, cabinet making. |
| Hex Socket (Allen) | High | High | Machinery assembly, bicycle components, flat-pack furniture. |
| Torx (Star Drive) | Exceptionally High | Maximum | Modern automotive assembly, structural construction, high-precision manufacturing. |
As you can see, modern options like Torx and Square drives offer better grip and torque control . Because their side walls are straight rather than tapered, they do not push the tool out when you twist. You can drive them with incredible force with almost zero risk of damaging the head.
A major component of knowing how to prevent stripped screws is understanding the metallurgy and design of the fasteners themselves.
Stainless steel fasteners are popular because they do not rust. However, stainless steel is relatively soft compared to hardened alloy steel.
If you drive a stainless steel fastener into a stainless steel hole too quickly, the friction creates intense heat, causing the threads to microscopically weld themselves together. This painful issue is called ‘galling’. To prevent galling, apply a high-quality anti-seize lubricant to the threads before installation and lower your driving speed.
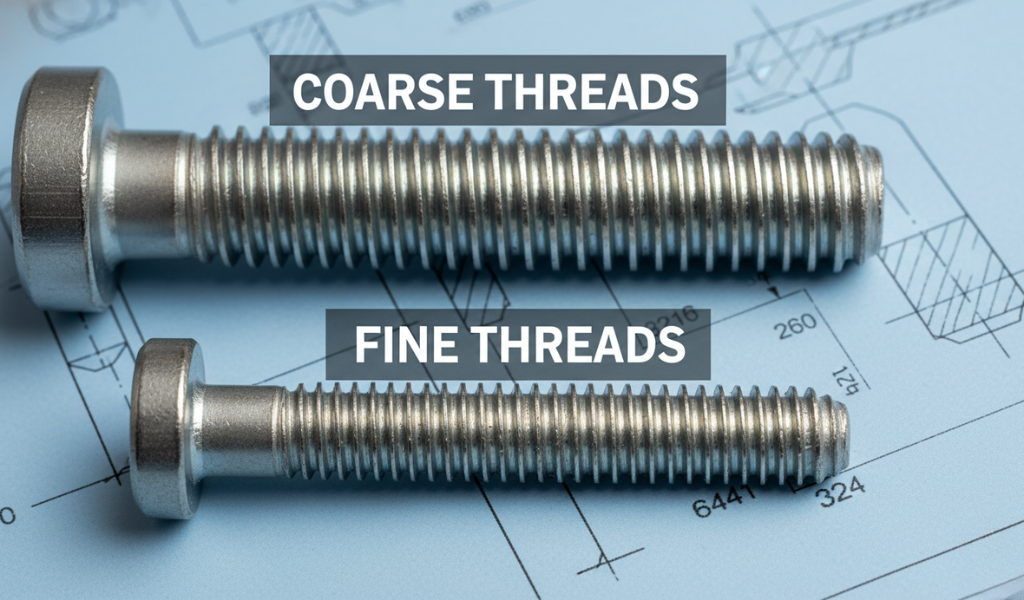
Coarse vs. Fine Threads
Always match the thread pitch to the density of the target material:
Before you pull the trigger on your power drill during your next building session, print or review this simple checklist to ensure you are fully protected against stripping.
Stripped screws are rarely an unavoidable accident; they are almost always a symptom of a correctable mechanical mismatch. Whether it is a worn-out driver bit, an aggressive power tool setting, or a total lack of a pilot hole, the root causes are entirely within your control to fix.
By upgrading to high-performing drive types like Torx or Square, matching your thread styles to your building materials, and slowing down to apply firm, deliberate pressure, these habits can greatly reduce the chances of stripped screws during your projects.
Your Next Steps: Before starting your next project, take an honest look at your toolbox. Purge those rounded-out screwdriver bits, grab the correct drill bit set for your pilot holes, and make ‘patience over power’ your guiding rule. These small steps can help prevent damaged screws, wasted materials, and unnecessary frustration.
The moment you feel the driver slip even once, stop immediately. Do not try to force it the rest of the way. Back the hardware out slowly while applying heavy downward pressure. Throw that damaged fastener away and replace it with a fresh one. Trying to save a fifty-cent piece of hardware is never worth ruining your entire project.
Phillips heads are tapered by design, which causes the tool to naturally lift out of the head under heavy rotational resistance. Star (Torx) and hex drives have vertical, flat walls that allow the bit to lock deeply into the metal, completely eliminating the upward lifting force.
Yes! If the head is only mildly damaged, placing a wide, flat rubber band or a small piece of fine steel wool over the stripped head before inserting the screwdriver can fill the empty gaps. This simple trick provides just enough temporary friction to back the damaged hardware out.
Not if you drill the correct size. A proper pilot hole only removes the material that would be displaced by the solid center core of the shaft. It leaves all the surrounding material intact for the wide outer threads to bite into, giving you maximum holding power without splitting the material.
Yes, using a bit of wax, soap, or specialized thread lubricant is an excellent way to reduce installation friction when driving long hardware into dense woods or metals. Just keep in mind that lubricated hardware requires less torque to tighten, so turn down your power tools to avoid over-tightening.
Put the driver bit into the head of the fastener before you attach it to any tool. Give it a gentle wiggle. If there is noticeable play, or if the bit sits at an angle, it is the wrong size. A perfectly matched bit will lock into place cleanly and hold the weight of the hardware without dropping it.