Physical Address
304 North Cardinal St.
Dorchester Center, MA 02124
Physical Address
304 North Cardinal St.
Dorchester Center, MA 02124


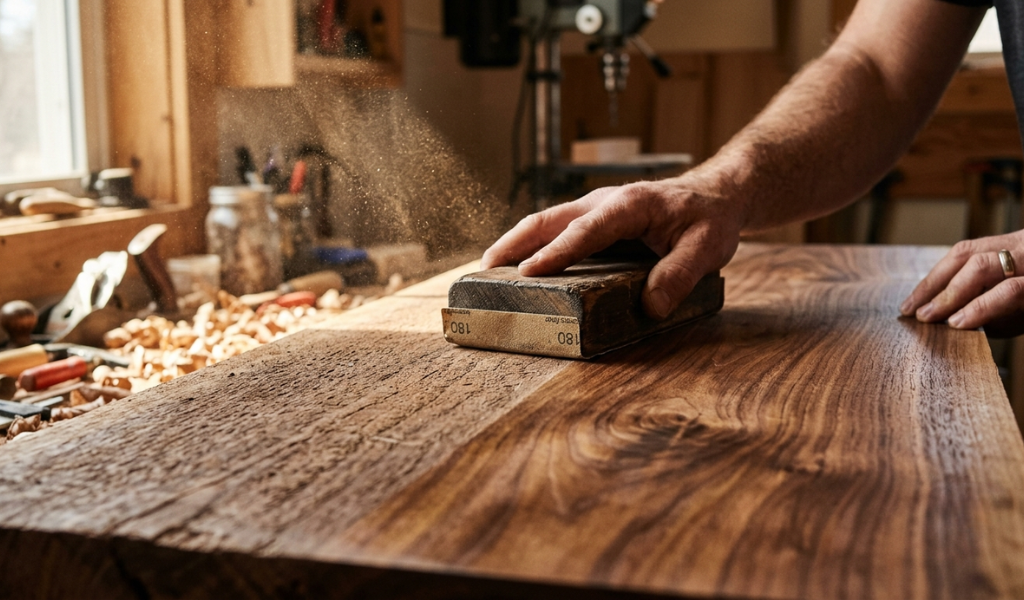
Knowing how to sand wood without leaving scratches can make or break your final finish. One wrong move with the wrong grit, and you’re left chasing marks that show right through your stain or paint whether you’re refinishing an old dresser or building a dining table from scratch.
This guide covers everything from why scratches happen in the first place to the exact grit sequences professionals use to achieve a flawless surface. You’ll find practical advice on choosing the right sandpaper, avoiding orbital sander swirl marks, sanding different wood types correctly, and inspecting your work like an expert. Think of it as your complete guide to woodworking sanding techniques built for anyone who wants cleaner results and fewer frustrating do-overs.
Sanding scratches are rarely the result of bad luck; they are almost always the consequence of avoidable technique errors. Common mistakes include using an inappropriately coarse grit without transitioning through finer levels, applying excessive downward pressure, skipping steps in the grit sequence, or sanding against the wood’s natural grain. Each of these actions leaves behind distinct marks ranging from deep grooves to abrasive haze that become painfully obvious once stain or finish is applied. Because coarse grit is designed to remove material rapidly, it leaves deep valleys in the wood that finer grits cannot easily erase if the progression is too aggressive, such as jumping directly from 60 to 220 grit..
Most scratches don’t appear randomly , they come from predictable mistakes. Using too coarse a grit without stepping down through finer grits, pressing too hard on the surface, skipping grit levels in your sequence, or sanding across the grain each leaves a different type of mark. All of them become highly visible once you apply stain or finish.
Coarse grit sandpaper cuts fast and removes material quickly, which is exactly why it’s useful for rough surfaces. But those same abrasive particles leave deep grooves that take real effort to remove. If you jump from 60-grit straight to 220-grit, those deep grooves don’t disappear they just get harder to see until the finish goes on and suddenly they’re impossible to miss.
Wood grain runs in one direction, and that direction matters more than most beginners realize. Sanding with the grain lets the abrasive move along the natural fibers of the wood. Sanding against it or even at an angle tears across those fibers and leaves cross-grain scratches that are notoriously difficult.
Different wood species also respond differently. Softer woods like pine scratch easily and can show uneven texture if you use too coarse a grit or apply inconsistent pressure. Harder woods like oak and maple are more forgiving but still require the same disciplined approach.
The most common beginner mistake is rushing. People want to get to the finishing stage quickly, so they skip grits or don’t sand long enough at each stage. Another frequent issue is continuing to use worn-out sandpaper that’s lost its abrasive edge. Rather than cutting, dull paper starts to burnish the wood creating a glazed surface that resists stain and hides problems until they’re revealed by the finish.
Grit numbers are inversely proportional to particle size: lower numbers (40–60) indicate coarse, fast-cutting abrasives for heavy stock removal or paint stripping, while higher numbers (180–320+) represent fine particles used for surface refinement and between-coat smoothing. For the vast majority of woodworking, staying within the 80 to 220 range is sufficient for bare wood preparation. The golden rule is to never skip more than one grit level at a time; a standard, reliable progression moves from 80 to 120, then 150, 180, and finally 220. Stopping at 220 is generally ideal, as exceeding this on bare wood can “burnish” the surface, effectively sealing the pores and preventing stain from penetrating evenly.
Grit numbers describe how coarse or fine the abrasive particles are. Lower numbers mean coarser grit with larger particles that remove material fast. Higher numbers mean finer grits with smaller particles designed to refine and smooth the surface.
Here’s a straightforward breakdown of how grit numbers translate to use cases:
For most woodworking projects, you won’t need to start below 80 grit or go above 220 grit on bare wood.
The golden rule of sanding is to move through grits progressively never skip more than one grit level at a time. A reliable sequence for most projects looks like this: start at 80 grit, move to 120, then 150, then 180, and finish at 220.
Each step removes the scratches left by the previous grit. Skip a step, and the finer grit you move to isn’t coarse enough to remove the deeper marks left behind. You’ll spend twice as long chasing those and often still see them once the finish goes on.
For most staining or painting projects, 180 to 220 grit is the sweet spot. Going finer than 220 on bare wood can actually close the grain too much, preventing stain from absorbing evenly. If you’re applying multiple coats of finish, you can sand between each coat using 320 or 400 grit but that’s a separate process from preparing raw wood.
The most vital habit in wood finishing is always sanding parallel to the wood’s natural fiber direction. When you sand across or at an angle to the grain, the abrasive particles tear the wood fibers rather than smoothing them, creating cross-grain scratches that are notoriously difficult to eliminate. This issue is particularly pronounced in softer woods like pine, which show damage easily, though even hardwoods like oak require this disciplined approach.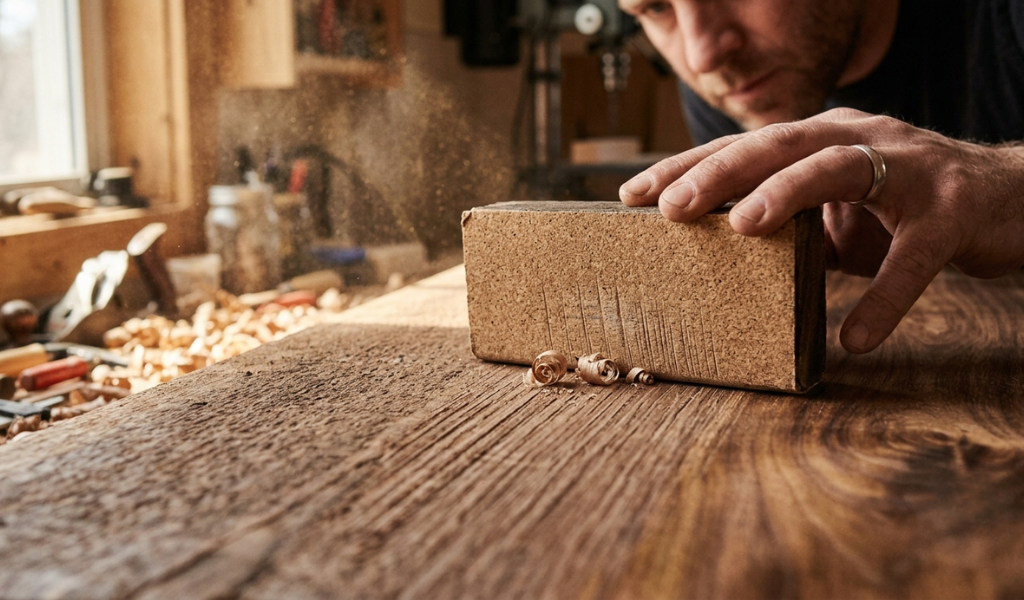
When you sand across the grain, the abrasive cuts against the wood’s natural fiber direction, tearing the fibers rather than smoothing them. The result is cross-grain scratches that are much deeper and harder to remove than made along the grain. These scratches become highly visible once stain or a clear finish is applied. Even a few passes in the wrong direction can set your project back significantly.
Hand sanding gives you the most control. Keep your strokes long, even, and always parallel to the grain. Avoid short, scrubbing motions; they create uneven texture and inconsistent scratch patterns. Apply steady, moderate pressure and let the abrasive do the work rather than forcing it.
Avoid sanding the same spot repeatedly without moving across the full surface, or you risk creating low spots and uneven depth that show up clearly under finish.
Curved surfaces require a more flexible approach. Use foam sanding blocks or folded sandpaper that can flex with the shape of the material. For tight corners and detailed profiles, a small piece of sandpaper wrapped around a dowel or pencil works well. The goal is maintaining contact along the grain direction as much as possible, even when the surface curves.
The tools you select significantly influence the final outcome. Hand sanding offers superior control for delicate work and final passes, but it requires a sanding block such as cork, rubber, or foam to distribute pressure evenly and prevent your fingers from creating low spots. When using power tools like a random orbital sander, the goal is to let the machine’s weight do the work, as excessive pressure only induces defects
Hand sanding is slower but gives you complete control over pressure and direction. It’s ideal for final passes, delicate surfaces, or areas that power sanders can’t reach. Power sanders remove material much faster and work well for large, flat surfaces but they introduce their own risks if used incorrectly.
A sanding block keeps your sandpaper flat and distributes pressure evenly across the surface. Without one, your fingers create uneven pressure points that leave inconsistent marks. Rubber or cork blocks work well for flat surfaces; foam blocks are better for slight curves. Whatever material you choose, the goal is consistent, even contact across the entire sanding area.
Random orbital sanders are among the most popular power sanders for woodworking. They move in a random elliptical pattern that reduces the risk of circular swirl marks but they can still cause problems if you move them too fast or lift them while they’re still spinning.
Keep the sander moving at a slow, steady pace and let it overlap with each pass. Never press down hard; the weight of the tool itself provides enough pressure. Always finish with a few hand-sanding passes along the grain to eliminate any remaining swirl marks before applying finish.
Technical precision extends beyond just the choice of sandpaper; it encompasses the entire workflow. A critical, often-overlooked step is removing all sanding dust between grit changes using a vacuum and a tack cloth. Neglecting this allows residual dust particles to act as unintentional abrasives, creating new scratches as you attempt to refine the surface. Furthermore, you must apply consistent, moderate pressure to avoid creating divots or uneven texture.
After finishing each grit level, clean the surface thoroughly before moving on. Use a vacuum followed by a tack cloth or a slightly damp cloth to remove all dust and debris. Sanding dust left on the surface acts as an abrasive when you switch to finer grits, creating new scratches just as you’re trying to eliminate old ones.
This step is easy to skip when you’re eager to move forward, but it’s one of the most effective habits for achieving a genuinely smooth surface.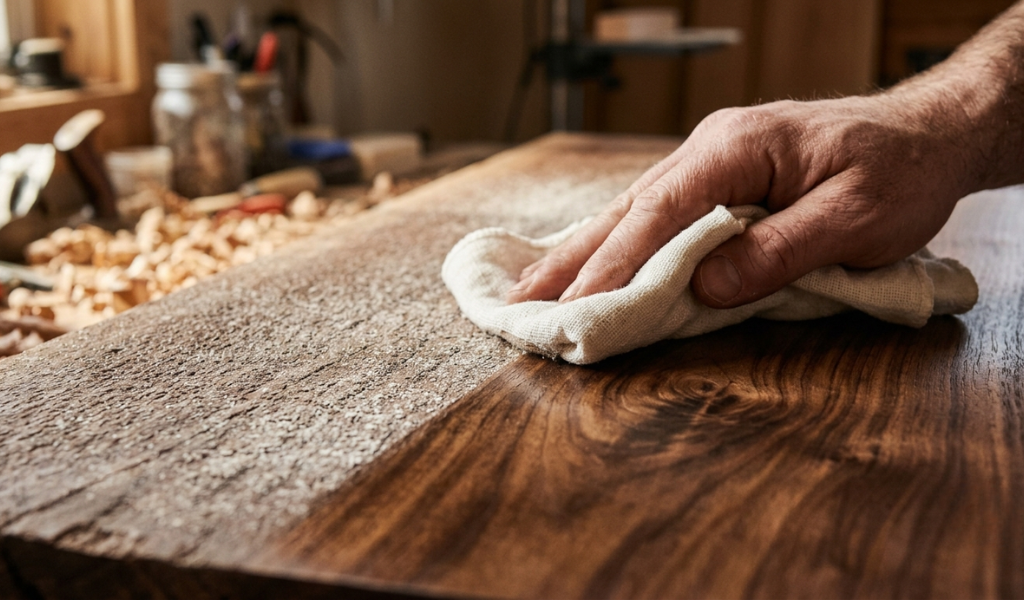
Uneven pressure is one of the sneakier causes of a poor finish. Pressing harder in certain areas creates low spots and uneven texture that show up clearly under stain. Keep your hand flat, use a sanding block, and distribute pressure across as wide an area as possible. If you’re using a power sander, let the machine do the work adding extra pressure doesn’t speed things up, it just creates new problems.
After each grit level, hold the surface at an angle to a bright light source natural side light or a work lamp works well. This low-angle technique, known as raking light, reveals scratches, high spots, and uneven areas that look invisible under standard overhead lighting. If you see marks, keep sanding at the current grit before moving on.
Don’t assume the surface is ready just because it feels smooth to the touch. Your hands are far less sensitive to fine scratches than your eyes are under good lighting.
Any scratches present before finishing will be permanently highlighted once your stain or clear coat is applied, making it essential to address them beforehand. Distinguish between deep scratches, which cast visible shadows and often require dropping back to a coarser grit to erase Before applying the final finish, perform a final pass with 220 grit, clean the surface meticulously with a tack cloth and allow it to settle the wood is perfectly prepared to absorb the finish evenly.
Deep scratches catch light and cast a visible shadow. Fine scratches tend to look more like haze or cloudiness spread across the surface. Deep scratches usually require dropping back to a coarser grit and working back up through your sequence. Fine scratches can often be removed with an extra pass at your current grit level.
If you spot marks after your final sanding pass, sand the affected area again with 180 or 220 grit along the grain. Keep checking under raking light until the marks are gone. Don’t be tempted to move forward hoping the finish will hide them it won’t.
Before applying any finish, do one final pass with 220 grit to make sure the surface is uniformly smooth. Then clean off all dust, wipe the surface with a tack cloth, and let it sit for a few minutes before applying your stain or paint. A clean, properly prepared surface absorbs finish evenly and produces the professional result you’re looking for.
Achieving a professional-grade surface is a matter of consistency and preparation. Beyond maintaining a strict, progressive grit sequence and always sanding with the grain, prioritize replacing your sandpaper as soon as it feels dull; worn paper generates heat and creates burnished, glazed spots that resist stain. For open-grained species like oak, consider a water-popping technique . Wiping the wood with a damp cloth after the final sanding to raise the grain, then lightly knocking it down with 220 grit once dry.
Progressing through grits gradually and always sanding with the grain solves most problems before they start. Beyond that: replace worn sandpaper often (dull abrasive generates more heat and leaves more marks), don’t rush between grit changes, and always do a final inspection under raking light before moving on.
Softwoods like pine scratch easily and benefit from lighter pressure and finer initial grits — start at 100 rather than 80 to avoid tearing the fibers. Hardwoods like maple and walnut can handle coarser initial grits but still require the same careful grit progression. Open-grain woods like oak are worth raising with a light water wipe after the final sanding pass. Once dry, lightly sand with 220 grit to knock down the raised fibers before applying stain; this prevents the grain from lifting again under the finish and creating a rough texture.
Sanding doesn’t have to be the frustrating part of a project. Once you understand why scratches happen and how to prevent them choosing the right grit, following a consistent sequence, using the appropriate tools, and inspecting your work carefully at each stage the whole process becomes more predictable and far more satisfying.
Take your time, trust the process, and your surfaces will be smooth, clean, and ready for a finish that actually looks the way you intended.
What is the golden rule of sanding?
The golden rule of sanding is to move through sandpaper grits progressively from coarser to finer without skipping steps. Each grit level removes the scratches left by the previous one. Skipping grits leaves deep marks that finer grits can’t fully remove.
What grit sandpaper should I use to avoid scratches on wood?
For most woodworking projects, a sequence of 80, 120, 150, 180, and 220 grit produces a clean, smooth surface. Start at 80 or 100 grit for initial sanding, and finish at 180 to 220 before applying stain or paint.
Why do I still see scratches after sanding?
Visible scratches after sanding usually mean you skipped a grit level, didn’t sand long enough at a particular stage, or sanded across the grain at some point. Check the surface under raking light after each grit change and address any marks before moving to the next grit.
Does sanding direction really matter that much?
Yes — sanding direction is one of the most important factors in achieving a scratch-free finish. Sanding with the grain produces smooth, clean results. Sanding against or across the grain tears wood fibers and leaves marks that are very difficult to remove.
Can a random orbital sander leave scratches?
Yes, if used incorrectly. Moving the sander too fast, pressing too hard, or lifting it while it’s still spinning can all leave swirl marks. Move slowly, let the tool do the work, and finish with a few hand-sanding passes along the grain to eliminate any remaining marks.
How do I know when a surface is ready for stain or paint?
Hold the surface at an angle to a bright light source. If you see any scratches, haze, or uneven areas, keep sanding. When the surface looks uniformly smooth under raking light and feels consistent to the touch, it’s ready for finish.
What should I do if scratches appear after I apply stain?
Let the stain dry completely, then lightly sand the affected area with 220 grit along the grain. Clean off all dust and reapply stain to the sanded area. If the scratches are deep, you may need to sand back further and work through your grit sequence again before re-staining.