Physical Address
304 North Cardinal St.
Dorchester Center, MA 02124
Physical Address
304 North Cardinal St.
Dorchester Center, MA 02124

Walk into any hardware store and you’ll find an entire wall of sandpaper. Different colors, different backings, different abrasive materials and dozens of numbers printed on each sheet. For most beginners, those numbers are meaningless. For experienced woodworkers, they’re everything.
Sandpaper grit numbers are the single most important factor in determining how a sanded surface turns out. Choose the wrong grit at the wrong time and you’ll either waste hours of effort or permanently damage the wood you’ve been carefully shaping. Get the sequence right, and you’ll end up with a surface so smooth it practically finishes itself.
This guide breaks down exactly what grit numbers mean, how they’re measured, which grit range to use at each stage of your project, and the most common mistakes to avoid. Whether you’re a weekend DIY enthusiast or a professional carpenter, understanding the logic behind grit selection will transform the quality of your finished work. For a broader look at surface preparation techniques, be sure to check out our ultimate guide to woodworking sanding techniques, which covers everything from power sanding to hand-sanding fundamentals.
Let’s start at the beginning.
Grit refers to the size of the abrasive particles bonded to a sheet of sandpaper. More specifically, sandpaper grit refers to the coarseness of those particles and how aggressively they cut into a wood surface. Every number printed on the back of a sandpaper sheet tells you something specific about how that sheet will behave.
Sandpaper grit is measured by counting the number of abrasive particles that fit within a defined area traditionally expressed as particles per square inch. The measurement process involves passing abrasive particles through a standardized mesh screen. The number stamped on the sandpaper corresponds to the mesh screen used during that process.
A 60-grit sheet, for instance, means the abrasive particles passed through a mesh with 60 openings per square inch. A 220-grit sheet used a much finer mesh with 220 openings per square inch. This is why higher grit numbers produce finer, smoother results; the particles are physically smaller.
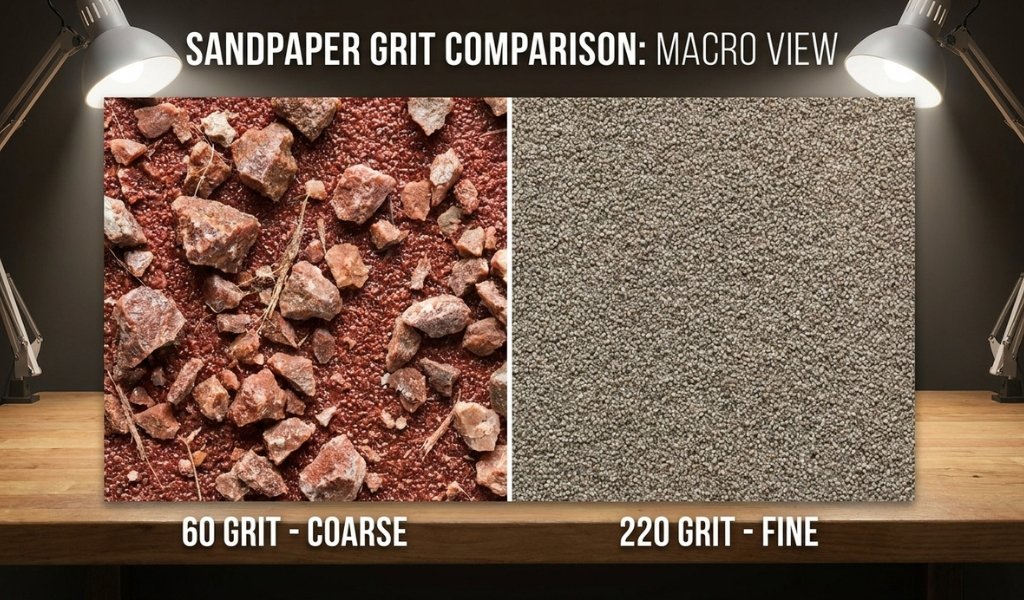
The grit number system operates on an inverse scale. Lower grit numbers = larger abrasive particles = more aggressive cutting. Higher grit numbers = smaller particles = finer, smoother results.
This means 40-grit sandpaper is significantly coarser than 120-grit sandpaper. It removes material faster, leaves deeper scratches in the wood surface, and requires follow-up sanding with progressively finer grits to smooth those scratches away. On the flip side, fine grit sandpaper anything 220 and above barely removes material at all. Its purpose is polishing and smoothing, not shaping.
Understanding this inverse relationship is the foundation of every smart grit selection decision you’ll make.
There are two primary grading systems used to classify sandpaper grit worldwide, and they don’t always match up perfectly.
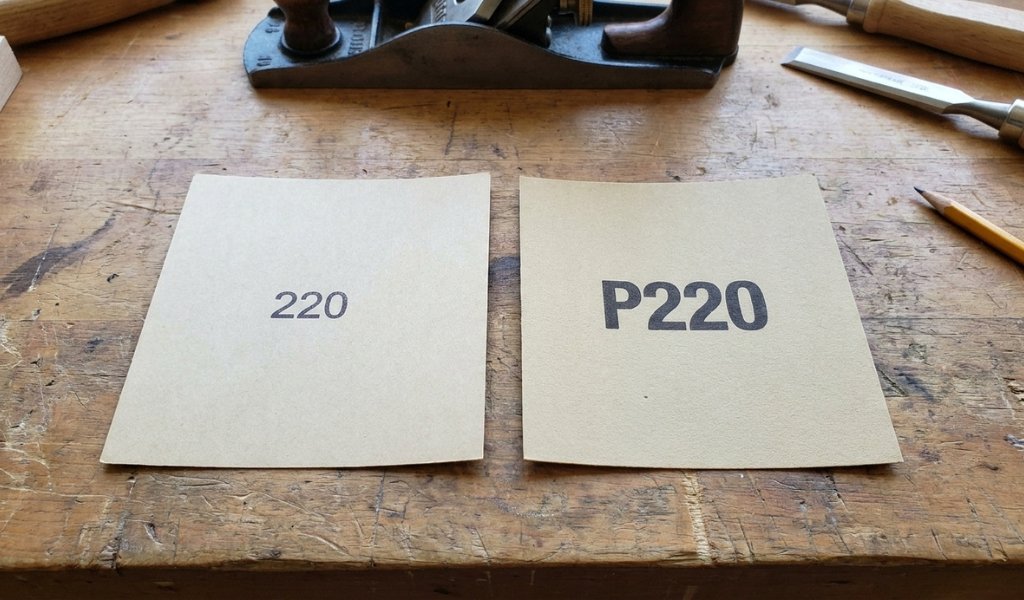
CAMI (Coated Abrasive Manufacturers Institute) is the North American standard. It uses the mesh-count method described above and produces the familiar grit numbers most woodworkers in the US recognize: 36, 60, 80, 120, 220, and so on.
FEPA (Federation of European Producers of Abrasives) is the European standard, and it uses a “P-grade” prefix to distinguish it from CAMI ratings. You’ll see this written as P80, P120, P220, and so forth. At lower grit levels, CAMI and FEPA ratings are close enough to be interchangeable in most workshop applications. However, at higher grit levels particularly above P400 the two systems diverge significantly. A P2000 sheet (FEPA) is considerably finer than a 2000-grit CAMI sheet.
For most woodworking applications, this distinction matters less than it does for automotive finishing or metal polishing. But if you’re purchasing sandpaper from international suppliers or working with wet sanding materials, it’s worth knowing which system you’re buying in.
For a more detailed breakdown of abrasive grading standards, see our detailed sandpaper and grit guide.
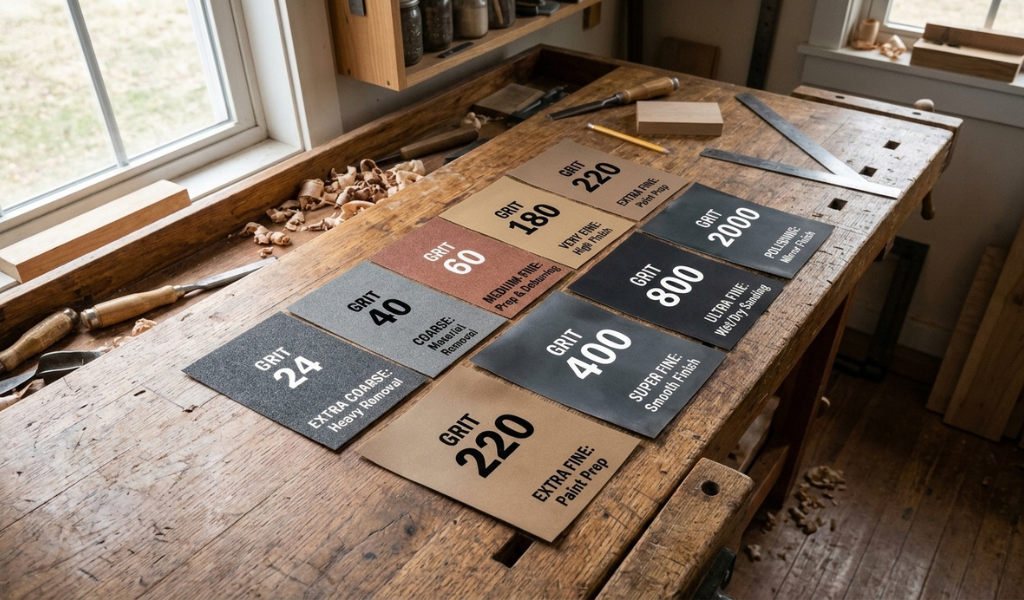
The full range of sandpaper grit options spans from ultra-coarse sheets used for demolition and heavy stock removal all the way to the finest grit sandpaper available, which is used for polishing finishes to a mirror sheen. Here’s how those ranges break down in practical woodworking terms.
This is the aggressive end of the grit range. Sandpaper in the 24–60 grit zone including 36-grit and 40-grit sandpaper is designed for removing large amounts of material quickly. Coarse grit at this level cuts through old paint, glue, rough lumber, and uneven surfaces with minimal effort.
The tradeoff is that coarse sandpaper leaves deep scratches in the wood. These scratches are intentional at this stage you’re not trying to achieve a smooth surface yet. You’re removing high spots, flattening rough boards, or stripping an old finish. 40-grit sandpaper is commonly used on surfaces that have never been sanded before, or on reclaimed wood that needs significant leveling before fine work can begin.
Important: Only use coarse grit when the project demands it. Starting too aggressively on already-smooth wood means more corrective sanding later.
Medium grit sandpaper spanning roughly 80 to 120 grit is where most woodworking projects spend the bulk of their time. After coarse sanding removes the worst imperfections, medium grit refines the surface and begins the real shaping work.
80-grit sandpaper is a workhorse. It removes the deep scratches left by coarser grits while still cutting efficiently through wood fibers. 100-grit bridges the gap between aggressive and controlled sanding. 120-grit sandpaper brings the surface closer to pre-finish condition, smoothing out remaining tool marks and light scratches.
At this stage, you’re preparing wood for the fine grit phase rather than chasing a final result. The wood should look uniform free from visible gouges or rough patches but not yet silky smooth. Medium sandpaper is also commonly used during shaping work with spokeshaves and card scrapers where some surface refinement is needed before finish sanding begins.
Fine grit sandpaper in the 150–180 range is where the visual transformation happens. This is the pre-finish stage, the last round of sanding before any stain, oil, or topcoat goes on.
At 150 grit, you’re eliminating the faint scratches left by the medium grit stage. At 180 grit, you’re refining further, producing a surface that accepts stain evenly and shows the natural grain of the wood without interruption. Sanding wood to this level reveals character marks, figure, and depth that coarser sanding obscures.
One caution: don’t sand beyond 180 grit on wood that will receive a stain or penetrating oil finish. Over-sanding closes the pores of the wood, preventing the finish from soaking in evenly. The result is a blotchy, uneven appearance the opposite of what you’re working toward.
For projects that will be painted rather than stained, 150-grit is often sufficient before priming.
220-grit sandpaper marks the beginning of the finishing zone. At this grit level and beyond, you’re no longer removing material from the wood itself, you’re refining applied finishes, knocking down dust nibs, and building toward a glass-smooth final surface.
220 grit is often used between coats of paint or varnish to scuff the previous coat and improve adhesion. 320-grit and 400-grit sandpaper go further, smoothing cured finishes with increasing precision. The finest grit sandpaper options 600-grit, 1000-grit, and even 2000-grit sandpaper are primarily used for wet sanding lacquers, varnishes, and polyurethane topcoats, where the goal is a mirror-level polish.
400-grit sandpaper is particularly common in furniture finishing, often used between the final two coats of a finish to create a perfectly level surface before the last coat is applied. 2000-grit sandpaper, when used for wet sanding with a lubricant, is capable of producing automotive-level clarity in wood finishes.
At this stage of sanding, garnet sandpaper and silicon carbide papers are popular choices for their fine cutting action and durability on cured finishes. The type of sandpaper material matters more at finer grits than it does at coarser ones.
Knowing which grits exist is only half the equation. The other half is understanding how to sequence them. Grit progression the order in which different grit levels are used determines whether your final surface is flawless or full of hidden scratches that only reveal themselves after the finish goes on.
The golden rule of sanding is straightforward: never skip more than one grit range in a single jump. Moving from coarse to fine in one step doesn’t work. Each grit leaves its own pattern of scratches in the wood surface. The job of the next grit is to sand out those scratches and replace them with a finer pattern. Skip a step, and the scratches from the previous grit remain visible beneath the finish.
A standard progression for a bare wood project might look like this: 80 → 120 → 150 → 180. Each step removes the scratch pattern of the one before it. Jump straight from 80 to 180, and the aggressive scratches from the 80-grit sheet will telegraph right through your final finish.
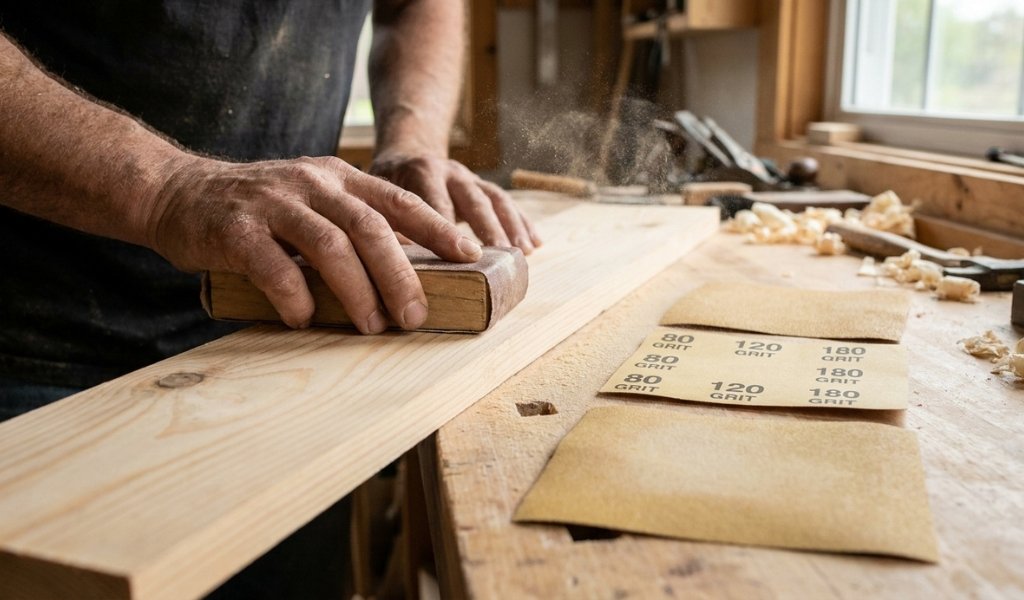
This is especially important when learning how to choose which sandpaper grits to use for a specific project. The answer isn’t just about picking the right starting point, but about planning the full sequence before you begin.
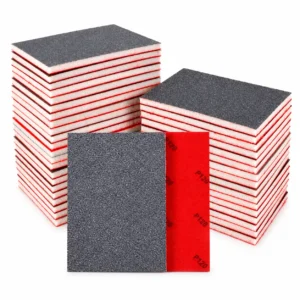
If you want a versatile sanding option for different stages of a woodworking project, sanding sponge blocks are available in a wide range of grits. This 24-piece set covers 80 to 3000 grit, making it useful for moving from coarser sanding to finer finishing.
The 50% Grit Rule (Why Proper Steps Prevent Scratches)
A useful guideline that many experienced woodworkers follow is the 50% rule: each successive grit should be roughly 50% higher in number than the previous one. So after 80-grit, you’d move to 120 (which is close to 50% higher). After 120, you’d move to 180. After 180, you’d move to 220 or higher.
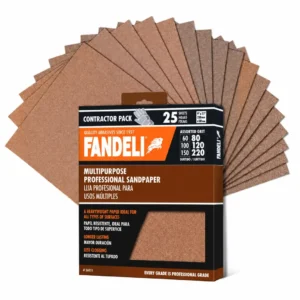
If you need multiple sandpaper grits for a woodworking project, an assorted pack can be a convenient option. This Fandeli sanding paper pack includes 80, 120, and 220 grit sheets, covering several common stages of sanding from surface preparation to finer finishing.
This rule isn’t absolute; some woodworkers prefer tighter steps between grits for particularly demanding projects but it provides a reliable framework for maintaining consistent scratch removal at each stage. The 50% grit rule prevents the common mistake of jumping from, say, 60-grit directly to 220-grit, which leaves deep coarse scratches that no amount of fine grit sanding can fully erase without going back to an intermediate step.
The same logic applies when choosing grit options for wet sanding or when working with types of wood sanding paper that cut differently such as aluminum oxide versus silicon carbide since abrasive material also affects how aggressively each sheet removes the previous scratch pattern.
Understanding the theory is one thing. Applying it correctly under workshop conditions is another. These are the most common grit-related mistakes that cost woodworkers time, effort, and sometimes entire projects.
This is the most frequent error, and it’s particularly tempting when you’re eager to get to finishing. Jumping from 60-grit to 180-grit feels efficient. In practice, it traps coarse scratch patterns beneath the surface that become glaringly obvious once a stain or finish is applied.
The fix is simple but requires patience: work through every necessary grit step. If you’re starting at 60 grit, plan on stopping at 80, then 120, then 150 or 180 before reaching for your finish. The extra 20–30 minutes spent sanding properly will save hours of stripping and resanding a finished piece.
Starting with too coarse a grit on smooth, already-prepared wood wastes time and creates unnecessary material removal. Starting with too fine a grit on rough or uneven wood means the sandpaper can’t cut effectively you’ll burn through sheets quickly while barely improving the surface.
The right approach is to assess the actual condition of the wood before selecting your starting grit. Rough-sawn lumber warrants starting at 60 or 80 grit. Pre-planed, smooth workshop wood can often start at 100 or 120 grit. Choosing the right sandpaper grit from the outset determines how efficiently the rest of the project goes. Learning how to choose which sandpaper grits to use for different wood conditions is a skill that develops quickly with practice and saves a significant amount of sandpaper in the process.
Over-sanding is a subtle mistake that even experienced woodworkers make. Sanding beyond the necessary grit level particularly past 180 grit on bare wood polishes and compresses the surface of the wood grain. This closes the pores, which means stains and penetrating oils can no longer soak in evenly.
The result is a blotchy, inconsistent finish that no amount of re-coating will fix without stripping back to bare wood and starting again. Know your endpoint before you begin sanding, and stop when you reach it. For painted finishes, that’s usually 150–180 grit. For stained or oiled finishes, it’s 150–180 grit as well. Beyond that, you’re working on the finish itself, not the wood.
It’s also worth noting that on softer woods like pine, even 150-grit can begin to burnish the grain. For those species, working carefully through grit steps and stopping at 120 or 150 is often the right call. The relationship between wood species, grain direction, and grit selection is something we explore in depth in our upcoming guide on wet vs. dry wood sanding, where abrasive behavior on different wood surfaces is covered in detail.
Sandpaper grit numbers aren’t arbitrary. They represent a precise measurement system that, once understood, gives you complete control over your sanded surfaces. The logic is simple: start coarse to remove material, work through medium grits to shape and refine, and finish with fine grits to prepare for your topcoat.
Follow the grit progression rules, never skip more than one range, and apply the 50% rule as a guide and you’ll eliminate the hidden scratches that show up after finishing. Avoid the common mistakes of skipping too many grits, starting at the wrong coarseness level, or over-sanding beyond what the wood needs.
The best woodworkers aren’t necessarily the fastest. They’re the ones who take the time to sand correctly at every stage and arrive at finishing with a surface that does most of the visual work before a drop of stain ever touches it.
40-grit sandpaper is coarser than 60-grit sandpaper. Because grit numbers use an inverse scale, lower numbers indicate larger abrasive particles and more aggressive cutting action. 40-grit is used for heavy stock removal, while 60-grit is a slightly finer coarse option suited to rough surface leveling.
Sandpaper grit is measured by passing abrasive particles through a standardized mesh screen and counting the number of openings per square inch. Two primary grading systems are in use: CAMI (the North American standard) and FEPA (the European standard, identified by a “P” prefix). Both systems measure the size of abrasive particles, but they diverge at higher grit levels.
The golden rule of sanding states that you should never skip more than one grit range in a single progression step. Each grit removes the scratch pattern left by the previous one. Skipping grits leaves coarser scratches visible beneath fine finishes, which typically only become apparent after a stain or topcoat is applied.
Skipping more than one grit range is not recommended in most woodworking applications. While minor skips such as moving from 80 to 150 grit on already-smooth wood can sometimes work, jumping from a coarse grit like 60 directly to a fine grit like 220 will leave deep scratches that are very difficult to remove without going back to an intermediate grit.
The 50% rule suggests that each successive grit in your progression should be approximately 50% higher in number than the previous step for example, moving from 80 to 120, then 120 to 180, and so on. This ensures each grit effectively removes the scratch pattern of the previous one without requiring excessive sanding time at any single stage.
Assess the current condition of your wood surface before selecting a starting grit. Rough-sawn or uneven lumber typically warrants starting at 60–80 grit. Pre-planed or previously sanded surfaces can often start at 100–120 grit. The goal of your starting grit is to efficiently remove imperfections not to achieve a smooth surface immediately.