Physical Address
304 North Cardinal St.
Dorchester Center, MA 02124
Physical Address
304 North Cardinal St.
Dorchester Center, MA 02124

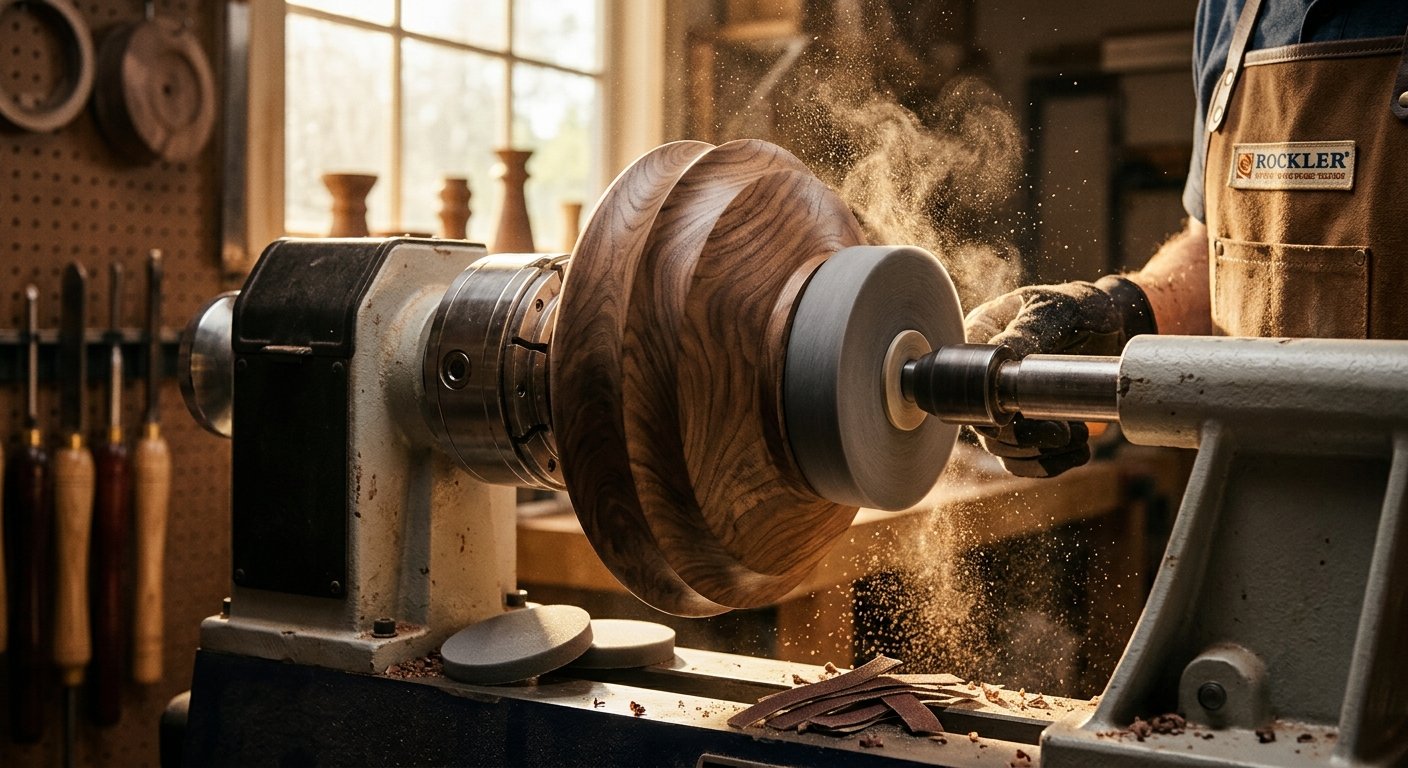
If you’ve ever picked up a wood bowl and run your hand across its surface, you know the difference between a rough job and a professional one. Bowl sanding is the step that separates the two. It’s the process that takes a freshly turned piece off the lathe and transforms it into something smooth, warm, and ready for finishing. For anyone getting into woodturning, learning how to sand a bowl correctly is just as important as learning how to turn one.
Before we even get into the sanding process, it’s worth mentioning that sanding isn’t only for bowls that will be oiled or waxed. If you’re working on an outdoor piece and plan to apply an exterior wood stain later, proper sanding still matters. A stain only looks as good as the surface underneath it, so skipping steps here will show up later no matter what finish you choose.
This guide walks through everything a beginner needs to know about bowl sanding, from the tools you’ll need to the grits you should use, and the mistakes that trip up most new turners. By the end, you’ll have a clear, repeatable process for getting a smooth bowl finish every time.
Bowl sanding is the process of smoothing out a turned wood bowl using sandpaper, sanding discs, or power sanding tools, typically while the piece is still mounted on the lathe. The goal is to remove tool marks left behind by the gouge during turning and to prepare the surface for oil, wax, shellac, or stain.
Unlike flat woodworking projects, bowl sanding happens on a curved, spinning surface. This changes how you approach the entire job. Instead of sanding with the grain in a straight line like you would on a flat board, you’re often working against curves, grain changes, and sometimes even natural edge features that run in multiple directions at once. That’s why bowl turning requires a slightly different sanding technique than standard woodworking.
Most turners sand while the lathe is running at a slower speed, using either hand sanding or power sanding tools attached to a drill. Both methods work, but each has its place depending on the stage of the process and the type of wood you’re working with.
Sanding isn’t just a cosmetic step. It plays a functional role in how the bowl looks, feels, and performs over time.
It removes tool marks. Even with a sharp gouge, turning leaves small ridges and grooves on the wood surface. Sanding knocks these down so the bowl feels smooth to the touch.
It prepares the wood for finish. Oils, waxes, and sealers soak into wood differently depending on how smooth the surface is. A poorly sanded bowl will absorb finish unevenly, leading to blotchy or dull patches.
It highlights the grain. Many turners are drawn to woodturning because of how grain patterns look once finished. Proper sanding and finishing bring out that natural beauty, especially on bowls with figured or natural edge wood.
It improves durability. A sanded surface is less likely to snag fibers, crack along rough spots, or collect dirt and oils from hands over time. For something like a salad bowl finish, where food and hands will be in constant contact, this matters even more.
Skipping or rushing this part of the process is one of the most common reasons a finished piece looks amateur, even if the turning itself was done well.
Before you start sanding bowls, it helps to have the right sanding tools on hand. You don’t need an expensive setup, but a few key items will make the process faster and the results more consistent.
For bowl sanding, you’ll want a range of sandpaper grits, usually starting around 80 grit for coarse sanding and working up through 120, 240, 320, and 400 grit for finer grits. Some turners go even further, into the 600 or higher range, especially for bowls that will have a glossy or oil-based finish.
Sanding discs with hook and loop or velcro backing are especially popular for bowl work because they attach and detach quickly from a mandrel, letting you switch grits without wasting time. Foam-backed discs are also worth having, since the foam layer helps the disc flex slightly to follow the bowl’s curve instead of digging into one spot.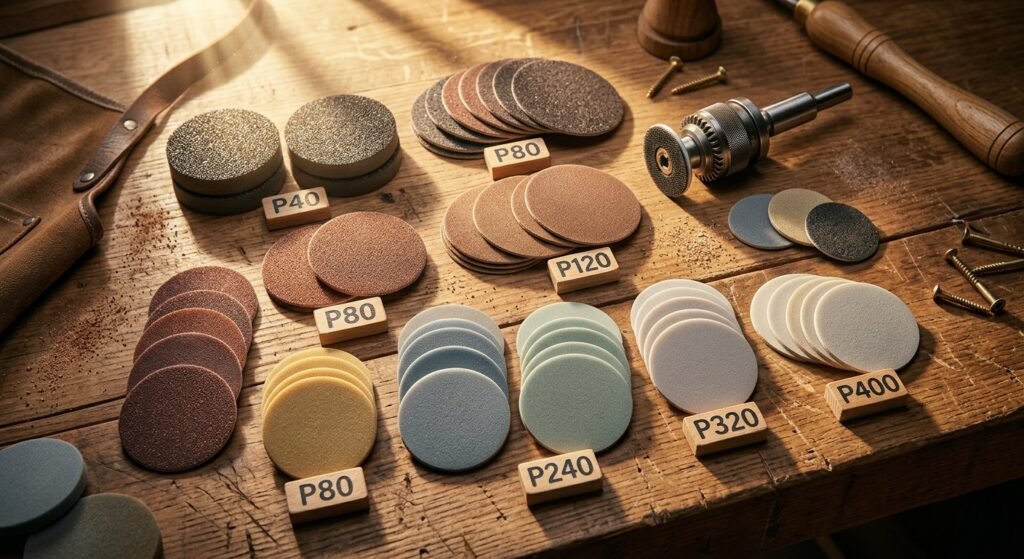
A quick note on sandpaper cuts: coarser grits cut faster but leave deeper scratches, while finer grits cut slower but leave a smoother finish. The trick is working through the grits in order without skipping too far ahead, which we’ll cover in more detail later.
A dedicated bowl sander, often a disc sander attachment powered by a power drill, is one of the most useful upgrades a beginner can make. These attach to a mandrel and let you hold the sanding disc against the spinning bowl while the lathe turns at a controlled speed, usually a few hundred RPM.
Other helpful accessories include:
While it’s entirely possible to hand sand a bowl from start to finish, combining power sanding and hand sanding tends to give the best results. Power sanding handles the bulk of material removal, while hand sanding finishes the surface and smooths out any remaining marks the disc couldn’t reach, particularly around the rim or inside tight curves.
Once you have your tools ready, the sanding process itself follows a fairly consistent order, whether you’re working on a simple spindle-turned piece or a more complex natural edge bowl.
1. Turn the lathe to a slow, steady speed. Somewhere in the range of 300 to 500 RPM works well for most bowl sizes. Too fast, and the sandpaper will heat up and glaze over quickly.
2. Start with your coarsest grit. If there are deep tool marks, begin around 80 grit. If the surface is already fairly clean off the gouge, you might be able to start at 120 grit instead.
3. Hold the sanding disc at a slight angle. Pressing it flat against the spinning bowl can cause uneven pressure. A slight tilt, combined with light, steady pressure, helps the disc cut evenly across the curve.
4. Move the sander constantly. Letting it sit in one spot, even briefly, can create a visible ridge or flat spot. Keep the disc moving in smooth, overlapping passes.
5. Check your progress often. Turn off the lathe and run your hand over the surface, or look at it under angled light. This makes it easy to spot any remaining tool marks or uneven areas before moving to the next grit.
6. Move through the grits in order. Progress from 80 to 120, then 180, 240, 320, and finally 400 grit, depending on your desired finish. Skipping grits often leaves scratches from the coarser paper that the finer grit can’t fully remove.
7. Sand the inside of the bowl separately. The inside of the bowl usually requires a different approach than the outside, since the curve is tighter and the sander needs more careful angling to avoid gouging the surface.
8. Finish with hand sanding. Once the power sanding is done, a quick hand sand with the grain, where possible, removes any leftover swirl marks from the disc and smooths the surface for finishing.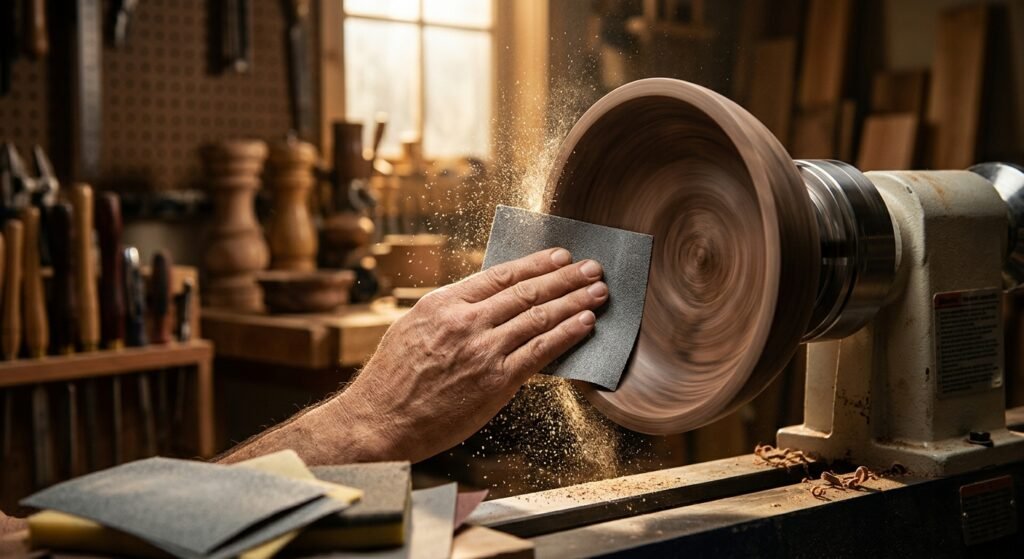
9. Remove dust before applying finish. A tack cloth or soft brush works well. Any dust left behind will show up under oil or stain.
This entire sanding process might take anywhere from 15 minutes for a small, simple bowl to well over an hour for a larger or more detailed natural edge bowl.
One of the most common questions beginners ask is what grit to use and when. Here’s a simple breakdown:
As a general rule, the harder the wood, the more benefit you’ll see from working through the finer grits. Softer woods can sometimes get away with stopping at 320, while denser hardwoods often look better with a 400 grit finish before oil or stain is applied.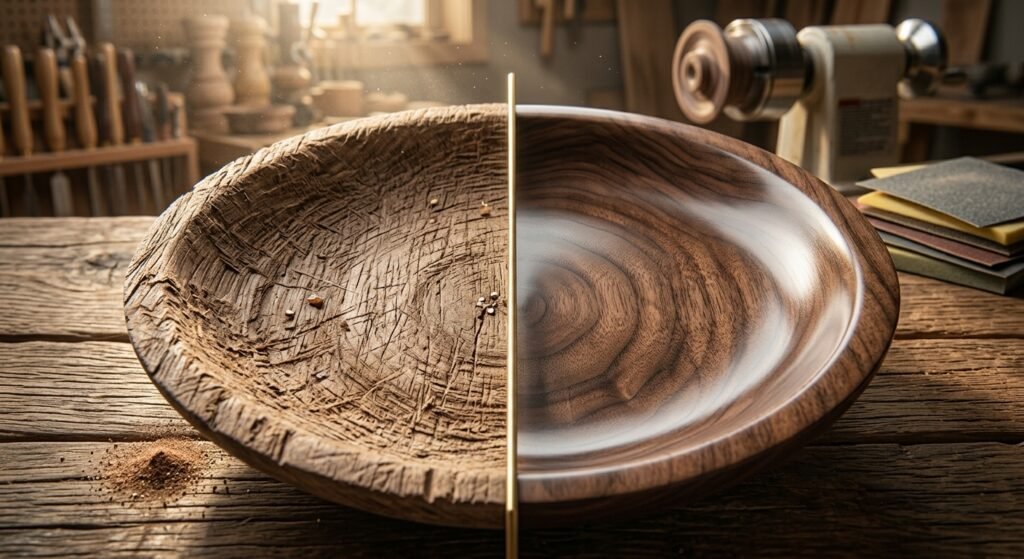
Even experienced turners make mistakes with sanding from time to time, but beginners tend to run into a few recurring issues.
Skipping grits. Jumping from 80 grit straight to 320 grit might feel like it saves time, but it usually leaves deeper scratches that the finer paper can’t remove. This forces you to go back and start over.
Sanding too fast or with too much pressure. This generates heat, which can glaze the sandpaper and actually burn the wood surface, creating dark rings that are difficult to sand out.
Letting the sander sit in one place. This creates flat spots or ridges, especially noticeable on curved surfaces like the bottom of the bowl or near the rim.
Not checking the surface between grits. Skipping this step means tool marks or scratches can go unnoticed until after finish is applied, when they become much more visible and harder to fix.
Ignoring the inside of the bowl. It’s easy to focus on the outside since it’s more visible, but the inside of the bowl deserves just as much attention, particularly for pieces meant for everyday use.
Sanding against the grain unnecessarily. While some cross-grain sanding is unavoidable with bowl turning, always finish with a pass that follows the grain direction as closely as possible to minimize visible scratches.
Avoiding these mistakes comes down to patience. Rushing through the sanding process is one of the fastest ways to end up with a finished bowl that looks unfinished.
Getting that professional, glass-like smooth bowl finish comes down to combining good technique with the right sequence of grits and finishing products.
Start by making sure each grit stage is fully complete before moving to the next. Rushing through 120 grit, for example, means the scratches from that stage will still be visible after 240 or 320 grit, since finer sandpaper isn’t designed to remove deep scratches, only refine what’s already there.
Once sanding and finishing is complete up through your final grit, a light hand sand with the grain helps eliminate any remaining swirl marks from the disc sander. From there, your choice of finish plays a big role in the final look.
A well-sanded bowl should feel smooth in every direction, with no snags, ridges, or rough patches. 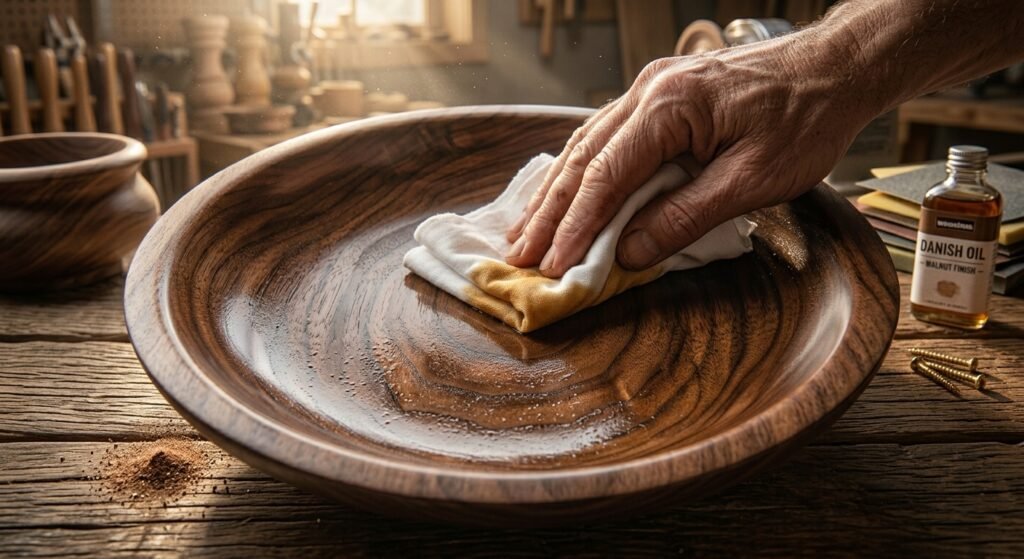 Running your fingers across the surface, especially near the rim and the bottom, is one of the simplest ways to check your work before moving on to finishing.
Bowl sanding might not be the most exciting part of woodturning, but it’s one of the most important. It’s the step that turns a rough, freshly cut piece into something smooth, polished, and ready to show off. Taking the time to work through each grit properly, checking your progress along the way, and finishing with careful hand sanding will make a noticeable difference in the final result.
If you’re just starting out, don’t worry about getting it perfect on your first few bowls. Like most woodworking skills, sanding gets faster and more intuitive the more you practice. Pay attention to how different woods respond to different grits, experiment with both power sanding and hand sanding, and you’ll quickly develop a process that works for you.
What grit should I start with when sanding a bowl?
Most bowls can start at 120 grit if the surface was turned cleanly with a sharp gouge or carbide tool. If there are deeper tool marks or rough spots, start with 80 grit instead and work your way up.
Do I need a lathe to sand a bowl?
While it’s possible to hand sand a bowl without a lathe, having the bowl mounted and spinning makes the process much faster and more even, especially for curved surfaces.
What is the best speed to run the lathe while sanding?
Somewhere between 300 and 500 RPM works well for most bowl sizes. Running the lathe too fast can cause the sandpaper to heat up and glaze over, reducing its effectiveness.
Can I use a regular drill for power sanding bowls?
Yes, a power drill fitted with a mandrel and sanding disc is one of the most common and affordable ways to power sand a bowl. Just make sure the drill has variable speed control.
How do I know when I’ve sanded enough?
Turn off the lathe and run your hand over the surface or check it under angled light. If you can’t feel or see any ridges, scratches, or tool marks, you’re ready to move to the next grit or apply finish.
What’s the difference between hand sanding and power sanding?
Power sanding removes material faster and is ideal for the bulk of the work, while hand sanding is better for finishing touches, tight curves, and removing swirl marks left behind by the disc.
Should I sand with or against the grain?
Always try to finish your sanding with a pass that follows the grain direction as closely as possible. This minimizes visible scratches, even though some cross-grain sanding is unavoidable on curved surfaces.