Physical Address
304 North Cardinal St.
Dorchester Center, MA 02124
Physical Address
304 North Cardinal St.
Dorchester Center, MA 02124

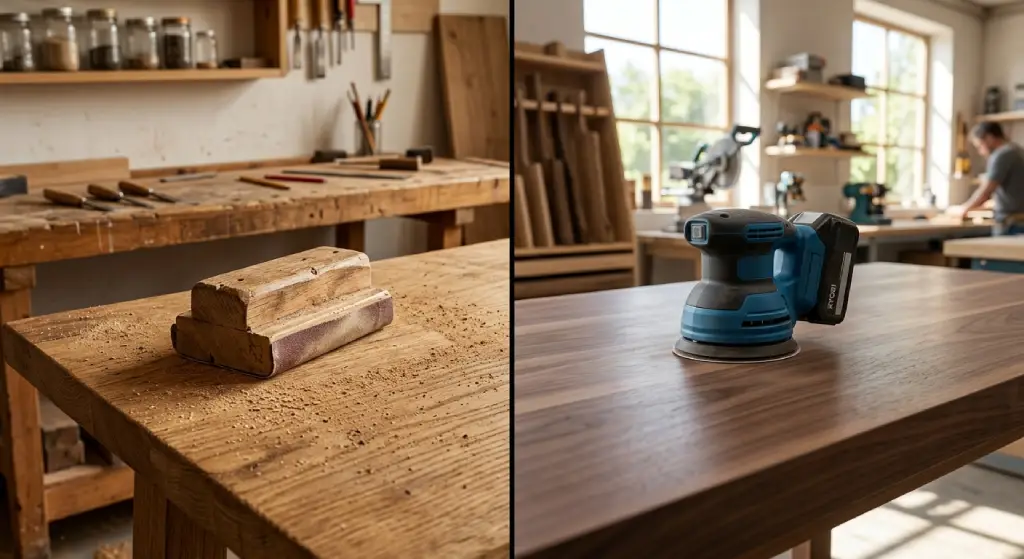
You have just built a table, stripped an old door or finished a set of shelves. Everything looks good until you run your hand over the wood and feel the rough spots. Now you face the question every woodworker asks sooner or later: do you grab a sheet of sandpaper or plug in a sander?
The debate around hand sanding vs power sanding never really ends, because both methods work. If you also work with small parts or straight edges, our Sanding Jig: Complete Guide for Woodworking Projects pairs nicely with the machine you are about to learn.Each one has strong points and weak points, and the best choice depends on the size of your project, the shape of the wood and how smooth you want the final surface. This guide breaks down the pros and cons of each sanding method in plain language. By the end you will know the right tool for the job and when to use both together.
Before you pick a side, it helps to know what each method really is. Both aim for the same result, a smooth surface that is ready for stain, paint or oil. They just get there in very different ways.
Sanding works by scratching the wood with tiny hard grains. The coarse grains remove material fast and leave deep scratches. The fine grains remove less and leave tiny scratches that you cannot see or feel. The goal is to move from coarse to fine until the surface is smooth. How you do that is where the two methods split.
Hand sanding means you sand by hand with a sheet of sandpaper, often wrapped around a flat sanding block. You push the paper across the wood, using your own arm strength and your own sense of touch. There is no motor, no cord and no noise.
The basic technique is simple. Wrap the paper around a block so it stays flat, and move it back and forth in the direction of the wood grain. Sanding with the grain is a key rule. If you sand across the grain, you leave scratches that show up badly once you add stain.
Hand sanding tools are cheap and easy to find. A few sheets of sandpaper in different grits and a cork or foam block will cover most jobs. You can also use a flexible foam pad for curves, a small sanding sponge for tight corners and even a dowel wrapped in paper for the inside of a hole.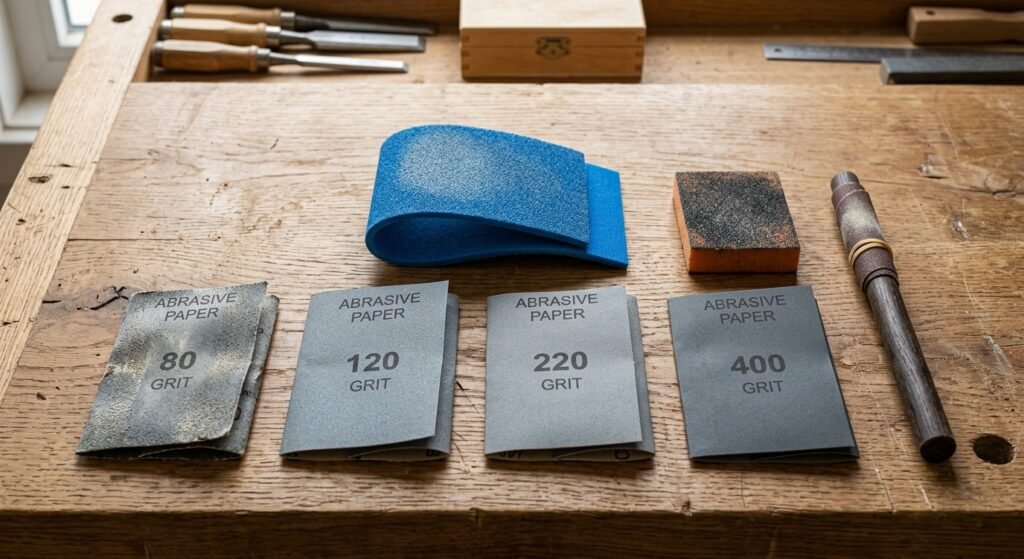
The biggest strength of hand sanding is control. You can feel the surface under your fingers and sense when a spot is rough or when you have taken off too much. This is why many experienced woodworkers still finish their best pieces by hand.
The weakness is speed and effort. Sanding a big surface by hand is slow and physically demanding. Your arm tires, your hand cramps and the work can take hours that a machine would do in minutes.
Power sanding uses an electric or battery-powered tool that moves the sandpaper for you. These power tools do the hard work, and your job is to guide them across the wood.
The most popular choice for home shops is the random orbital sander. Its round pad spins and shakes at the same time in a random pattern. This movement makes it very hard to leave a repeating scratch, so it is much more forgiving than older designs. If you are buying only one machine, this is usually the one to get. Using an orbital sander is easy to learn, and most people can get a good result on their first project.
There are other types too. A belt sander uses a loop of sandpaper that spins fast in one direction. It removes wood very quickly, so it is great for rough work, but it can gouge the surface if you pause or press too hard. A detail sander has a small triangle-shaped pad that reaches into corners. A sheet or palm sander is small and light, and it works well for smaller projects.
The main strength of power sanding is speed and consistency. A good sander can cover large areas quickly and leave an even finish. The weakness is that it is easy to remove too much wood or leave swirl marks if you rush. Machines also make noise and generate significant dust, so you need a dust mask and some form of dust collection.
Sometimes a simple side-by-side look makes the choice clearer. Here is how the two sanding methods compare on the points that matter most.
On speed, power sanding wins by a wide margin. A job that takes an hour by hand may take only a few minutes with a random orbital sander. If you have a big surface, a power sander can finish it in a fraction of the time. Hand sanding is slower, but on a small piece the difference is not a big deal.
On control, hand sanding comes out ahead. You decide the pressure, the direction and the exact spot you sand. A machine does what it does, and a small slip can leave a dip or a scratch. This is why hand sanding offers greater control and precision on delicate pieces, edges and details.
On cost, hand sanding is cheaper to start. A pack of sandpaper and a block cost very little. A decent power sander costs more, and you also need to buy sanding discs, which wear out and add up over time. Still, if you do woodworking often, a sander pays for itself quickly in saved hours.
On results, both methods can give a smooth finish, but they get there differently. A machine gives an even finish over a wide area with little effort. Hand sanding gives you the final touch and lets you fix small flaws. Most pros agree that the best result often comes from using both.
On dust and mess, power sanding is the bigger problem. Machines throw fine dust into the air very quickly. If you hook up a dust collection system or a shop vacuum, you can catch most of it. Hand sanding makes less dust at once, but it still makes some, so wear appropriate dust masks either way.
On effort, hand sanding takes more from your body. If you have sore wrists or a long project, a power tool saves your energy for the parts of the job that need skill.
Power sanding is not always better, but there are clear cases where it is the smart choice. If you ask the question of power sander vs hand tools on a big job, the machine will almost always win.
Big flat surfaces are where a power sander shines. Think of a dining table, a workbench top, a deck floor or a solid door. Sanding these by hand would take a very long time and leave you worn out. Worse, uneven pressure from a tired arm can leave a wavy surface.
A random orbital sander glides across the surface at a steady pace and gives an even finish. You keep the sander flat, move it slowly in overlapping passes and let the machine do the work. Do not press down hard. Light pressure gives better results than heavy pressure, and it keeps the pad and the paper from wearing out early.
A good sanding pattern helps a lot. Work in overlapping rows, move at a steady speed and keep the sander moving at all times. Stopping in one spot while the pad is spinning is the fastest way to dig a hole in the wood.
Here is a real example. A friend of mine refinished a large oak dining table with a hand block, and it took him a whole weekend with sore shoulders. The next year he sanded a matching set of chairs and a bench using a random orbital sander in a single afternoon, and the finish came out better. He still says he wishes he had bought the sander first.
One warning for edges. A sander can round over sharp corners and edges quickly, and it can tip when you work near edges. Keep the pad flat and avoid letting it hang over the side of the board.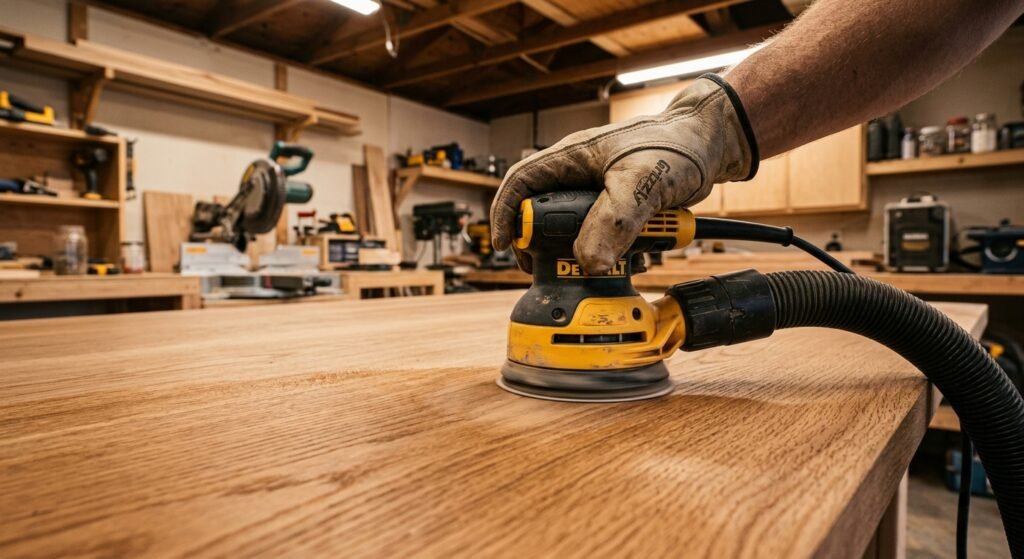
If you need to strip a thick layer of old paint, varnish or rough wood, power sanding is the way to go. A coarse grit such as 60 or 80 on a power sander can remove old finish and level rough boards much faster than any hand method.
A belt sander is best for the toughest jobs, like flattening a glued-up panel or taking down a warped board. It is aggressive and fast, so use it with care. Keep it moving, sand with the grain and check your progress often.
For refinishing an old piece, start with a coarse grit to remove the finish. Then move to 100 grit to clean up the scratches and finish with a finer grit such as 150 or 220 grit. Each step removes the scratches left by the one before it. Skipping grits is a common mistake, and it leaves deep marks that show up under stain.
A word of caution on old paint. If your house or the piece was made before 1978, the paint may contain lead. Test it first, and do not sand it without proper protection and dust control. Sanding is also hard on hardwood and soft veneer in different ways. Thin veneer can sand through in seconds, so be gentle and use a fine grit.
Hand sanding has its place, and a skilled woodworker will often reach for a sanding block before a machine. It is the right tool for the job in several situations.
Power sanders are built for flat surfaces. They struggle with curves, carved details and profiles like moulding, chair spindles and turned legs. A flat pad cannot follow a curve, and it will flatten the shape you worked hard to make.
When you sand by hand, the paper follows the shape. Use a flexible foam pad or fold the paper to match the curve. For fine grooves, wrap paper around a dowel or a pencil. A small sanding sponge works well for tight spots and rounded edges. You can feel exactly how much wood you are removing, so you keep the profile crisp.
Hand sanding is also the better choice for smaller or more delicate projects such as picture frames, small boxes and toys. The work is quick on a small piece, and a machine could easily remove too much. It is also a good way to keep the sharp lines of a joint without rounding them off.
End grain is another place to slow down. It soaks up stain more than the rest of the board and shows scratches more easily, so sanding it by hand to a finer grit gives a more even color. 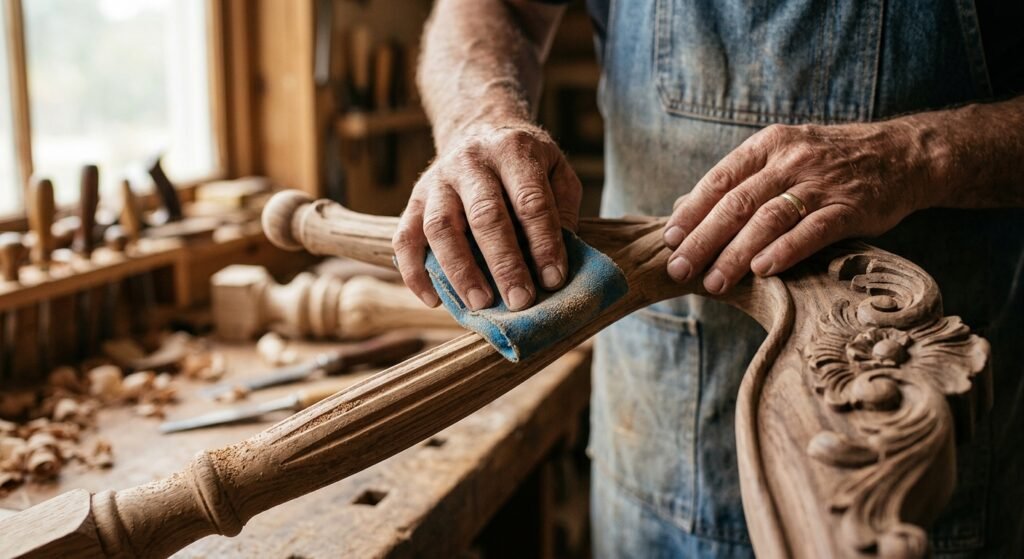
Even if you use a machine for most of the work, the last steps often go best by hand. After the power sander has done its job, a final pass by hand with 180 or 220 grit with the grain removes any light swirl marks and leaves a smooth finish. Random orbital machines are good, but they can leave faint circular scratches that show up under a dark stain. A quick hand pass fixes this.
Sanding between coats is another job for hand sanding. After the first coat of varnish, paint or lacquer dries, the surface often feels rough because the finish raises the wood fibers. A light pass with 220 grit or finer on a block knocks down those bumps without cutting through the coat. This step makes the second coat go on smoother, and it makes the final finish look professional.
Use very light pressure here. You are not trying to remove the finish. You only want to level it and give the next coat something to hold on to. Wipe off the dust with a clean cloth or tack cloth before you apply the next layer.
If you are working in a small space or at night, hand sanding is also quiet and makes less airborne dust, which many people appreciate.
The truth is that you do not have to choose one side. Many woodworkers and DIY enthusiasts use a mix of both, because each method covers the weak spots of the other. This hybrid approach gives you the efficiency and consistency of a machine along with the touch of hand work.
Here is a simple plan that works on most projects. Start with the power sander and a coarse grit, around 80, to remove rough spots, old finish or mill marks. Move to 100 or 120 grit to clean up the first scratches. On large flat parts, keep using the sander until the surface is even and flat.
Next, switch to hand sanding for edges, corners, curves and any spot the machine could not reach. Then do a final pass over the whole piece by hand with 180 or 220 grit, always sanding with the grain. This removes swirl marks and gives a very smooth finish that feels great to the touch.
For the finish itself, use hand sanding between coats. A light touch with fine paper keeps the surface smooth and helps the finish look deep and even.
A few extra tips make the whole process better. First, change your sandpaper often. Worn paper does not cut well and just makes heat and dust. Second, wipe the surface between grits so loose grains do not scratch the wood. Third, connect your sander to a shop vacuum or a dust collection system, and wear a good dust mask and eye protection. Fourth, check your work under a side light. Raking light shows scratches and uneven spots that you cannot see otherwise.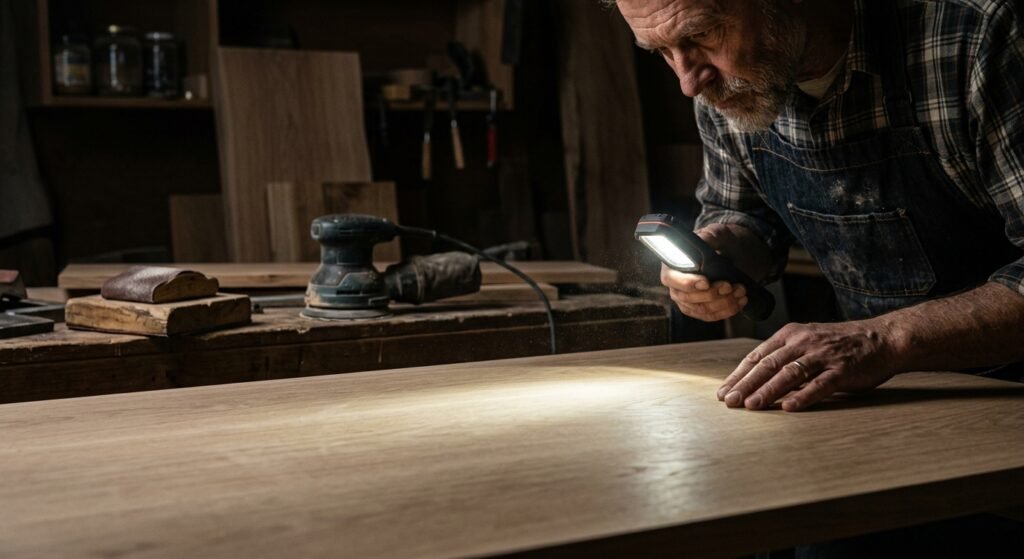
A cabinet maker I know follows this routine on every piece. He uses a random orbital sander for the big panels and a block for everything else. He says the machine saves his arms, and the hand work saves his reputation. It is a simple way to think about it.
The choice between hand sanding vs power sanding comes down to the job in front of you. Use a power sander for large surfaces and fast removal of old finish, since it saves time and gives an even result. Use hand sanding for details, curves, edges and the final prep, since it gives you more control over the sanding process. For the best results, combine both and let each one do what it does best.
Do not worry about picking the perfect tool every time. Practice on a scrap board, learn how each method feels and trust your hands. Over time you will know almost without thinking which one to pick up.
Ready to start your next project? Grab some paper, a block and a sander, and try the hybrid method on a small piece first. Share your own sanding tips in the comments, since other woodworkers would love to hear what works for you.
Neither one is better in every case. Hand sanding is better for detail work, curves and a final smooth finish. Power sanding is better for large surfaces and fast removal of material. Most good results come from using both.
A random orbital sander is the best place to start. It is easy to control, it leaves fewer swirl marks than other types and it works on most woodworking projects. A 5-inch model is common, affordable and easy to find discs for.
Yes, if you use it the wrong way. Pressing too hard, staying in one spot or tilting the sander can leave dips and gouges. Belt sanders are the riskiest. Keep the machine flat, keep it moving and let the paper do the cutting.
Start with 80 grit for rough work and old finish, then move to 100 or 120 grit to smooth it. Finish with 180 to 220 grit for most projects. For sanding between coats, use 220 grit or finer. Do not skip too many steps in the grit order.
Use light pressure, move the sander slowly and steadily and keep the pad flat. Replace worn discs, and finish with a hand pass using fine paper with the grain. Swirl marks are easier to see after staining, so check the surface with a side light before you apply any finish.
In most cases, yes. A light sanding with 220 grit after the first coat dries removes small bumps and helps the next coat bond. It leads to a smoother, more even finish. Wipe away all the dust before you add the next coat.
It is strongly recommended. Sanding makes fine dust that is bad for your lungs and covers your shop. Use a shop vacuum or a sander with a dust bag, and always wear a proper dust mask. This applies to both methods, though power sanding makes more dust in less time.