Physical Address
304 North Cardinal St.
Dorchester Center, MA 02124
Physical Address
304 North Cardinal St.
Dorchester Center, MA 02124

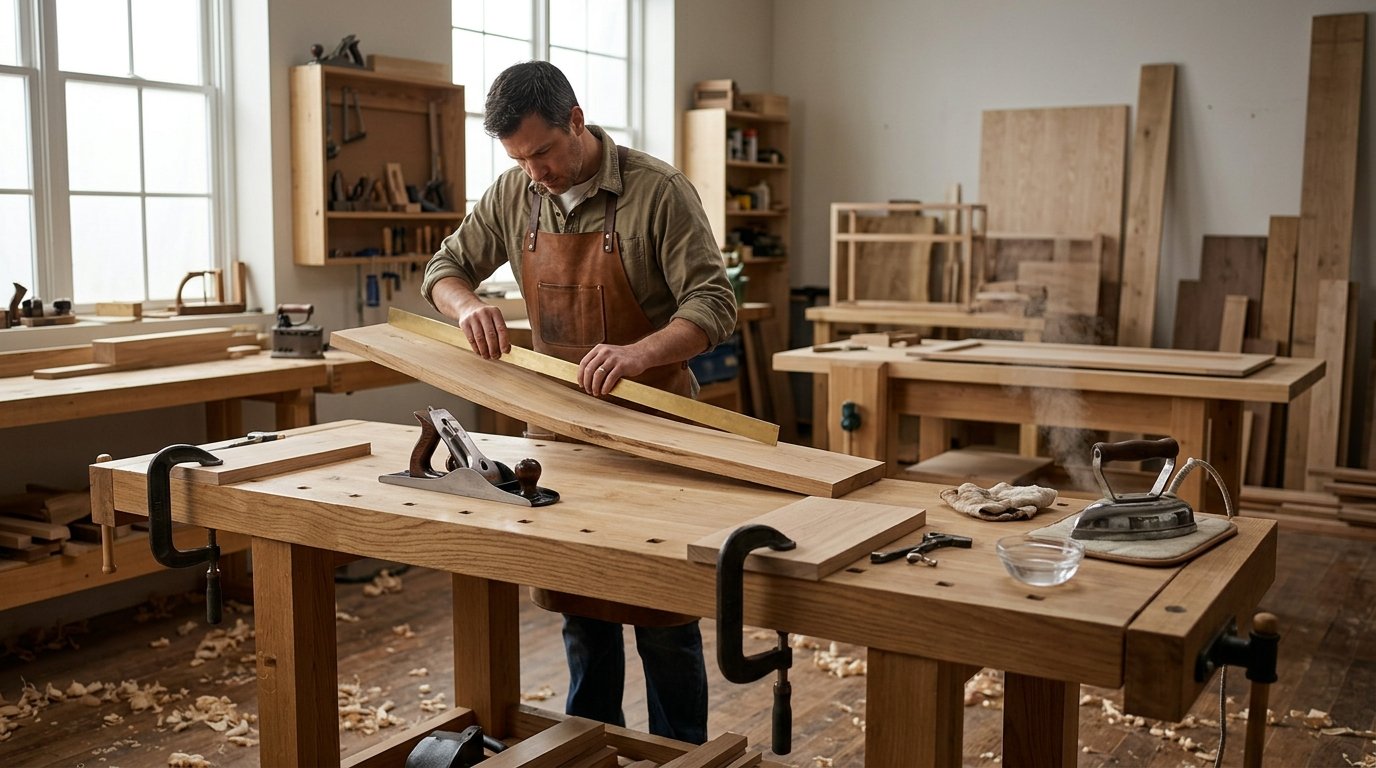
You walk into the shop, pick up a board you bought last month, and find it rocking on the bench like a seesaw. If this sounds familiar, you are not alone. Learning how to flatten warped wood is one of the most useful skills in woodworking, because almost every woodworker runs into a bad board sooner or later.
Wood warps because it takes in and gives off moisture. When one face dries faster than the other, the fibers shrink at different rates and the board bends. The good news is that most warped wood can be saved. If you also work with small parts or straight edges, our Sanding Jig: Complete Guide for Woodworking Projects pairs nicely with the machine you are about to learn. A mild bow or cup often responds to simple tricks, and even a badly twisted plank can become a good cutting board if you cut it into small pieces. This guide shows you three ways to straighten warped boards, and it also explains how to keep your next stack of lumber flat.
Before you reach for a clamp or a plane, take a minute to look at the board. The fix that works for a cupped board will not help a twisted one. A quick check now saves you from wasting time and thickness later.
A cup is a curve across the width of the board. The edges lift up, and the face looks like a shallow trough. It is the most common type of warp, and it usually happens when one side of a board stays damp while the other side dries out. Boards cut from the outer part of a log tend to cup more than boards cut from the center.
A bow is a curve along the length of the board, flat across the width. If you lay the board on a bench and the middle lifts up, it has a bow. Bowed wood often shows up when a stack of lumber is stored without enough support. A crook is similar to a bow, but the curve runs along the edge instead of the face. You see it when you sight down the narrow side of a plank.
A twist is the trickiest of the bunch. One corner is high and the opposite corner is high too, so the board rocks on a flat surface. A pair of winding sticks makes a twist easy to see. Set one stick across each end of the board, then sight along the top edges. If the sticks are not parallel, the board is twisted.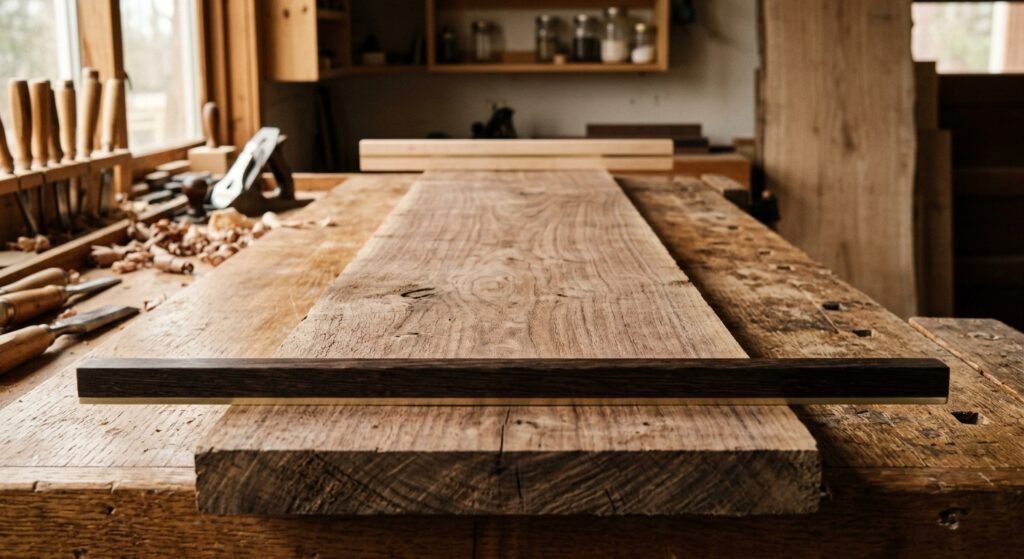
Next, check the moisture. A cheap pin meter will tell you if the board is still damp inside. Wood for indoor furniture should sit around 6 to 8 percent moisture. If your reading is much higher, the board is still drying and will keep moving. Flattening it right now is a waste of effort, because it will warp again once it dries.
Grain tension matters too. Some boards hold stress inside, and the stress shows up when you cut or plane them. Red oak and walnut can behave this way, especially wide slabs. A good sign of trouble is a board that bows right after you rip it. That tells you the tension was locked in from the start. Knowing this helps you pick the right method, and it reminds you to leave a little extra thickness so you have room to fix things.
This is the gentlest way to straighten warped boards, and it works best on a mild cup or bow. It costs almost nothing and needs no machinery. It is also the first thing to try on a thin piece of wood that you do not want to plane down. The idea is simple. You add moisture to the dry side so it swells and pulls the board flat again.
Place the board with the concave side facing up. This is the hollow side of a cupped board, and it is the side that dried out too much. Wipe it with a damp cloth or a wet cloth that has been wrung out well. You want the surface damp, not soaked. A dripping board will only make a mess and may cause new problems.
Let the water soak in for a few minutes, then wipe again. As the wood swells, the fibers on that face grow longer and start to push back against the curve. For a stubborn cup, you can repeat this a few times over several hours. Be patient here. Wood moves slowly, and rushing it can cause cracks.
Heat helps the moisture move deep into the fibers. Set a clothes iron to medium heat, lay a damp towel over the board, and pass the iron over the towel in slow, even strokes. The hot steam pushes water into the wood and softens it. Keep the iron moving so you do not scorch the surface.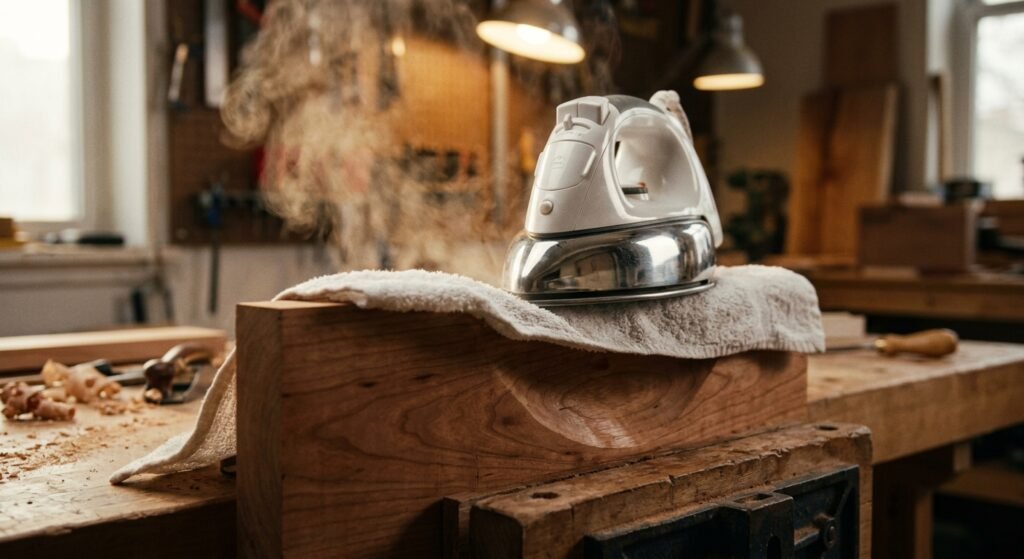
If you want a hands off option, set the board outside in the sun with the concave side up. The sun warms the wood and the damp face slowly relaxes. This works well on a warm and dry day, but keep an eye on it. Too much sun can dry the damp face too fast and make the cup worse. A good rule is to check it every 30 minutes.
For a thick antique board or a piece you care about, skip the iron and use a gentler approach. Old wood can be brittle, and a hot iron might leave a mark.
Once the board is damp and warm, it is time to hold it flat. Lay it on a flat surface such as a workbench and place scrap strips across it. Use hand clamps to pull the board down, or stack concrete blocks on top for steady weight. Do not crank the clamps hard. Gentle and even pressure works better, and it avoids splitting the wood.
Now comes the hard part, which is waiting. Leave the board under pressure for at least 24 hours, and up to several days for thick boards. Air must reach both faces, so use stickers, which are small wood strips, under and over the board. This lets the moisture leave evenly. When you remove the weight, the board should be much flatter. If it springs back a little, repeat the process once more.
When water and weight do not work, cut the problem away. Mechanical flattening removes wood from the high points until the face is flat. You lose some thickness, so this method suits boards that are oversized to begin with. Start with a board at least a half inch thicker than your final size if you can.
A hand plane is a quiet and accurate way to flatten a board, and it needs no power. Start by marking the high spots. Draw light pencil lines across the face, then check the board with winding sticks and a straight edge. Where the pencil marks disappear first, that is a high point.
Use a jack plane with a slightly curved iron for the rough work. Plane across the grain at an angle to remove thick shavings fast. This is called traversing, and it knocks down the high points without tearing the wood. Check your progress often with the straight edge. Once the face is close to flat, switch to a smoothing plane and take light cuts along the grain. A sharp iron makes the job much easier, so hone it before you start.
Work the convex side first when you can. Planing the hollow side of a cup removes a lot of wood for no reason. The goal is one flat face. After that, you can flip the board and plane the other face parallel to it, or run it through a thickness planer.
Many woodworkers do not own a wide jointer, and a thickness planer alone cannot flatten a warped board. The rollers press the board flat as it goes through, and then it springs back after the cut. The result is a thinner board with the same warp. A planer sled fixes this problem.
A sled is a flat, stiff base, often made from plywood or MDF, that carries the board through the machine. Place the warped board on the sled with the cupped side down. Use hot glue or small wedges to stop it from rocking, and then screw or tape a stop at the end.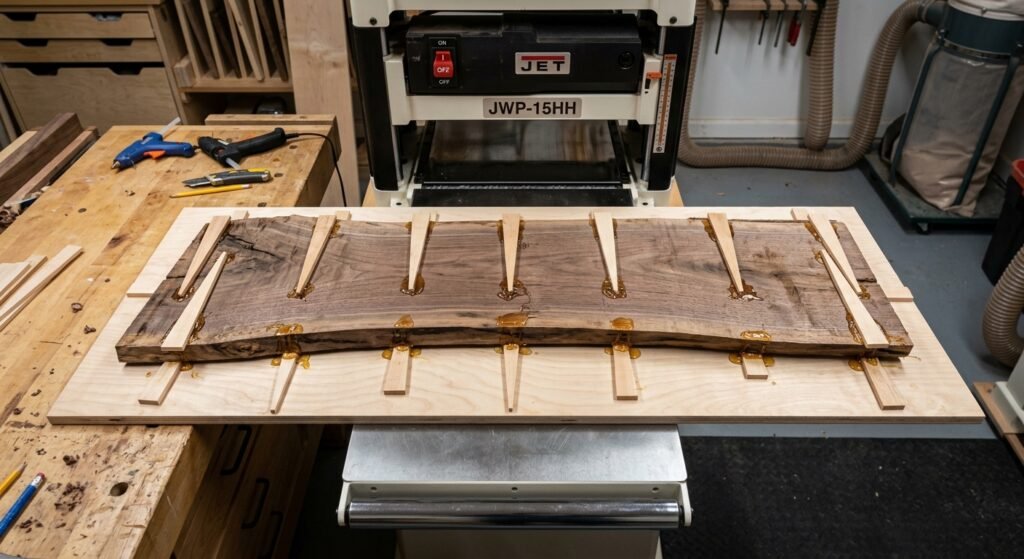 Run the sled through the planer, taking light passes, until the top face is flat. Then remove the board from the sled, flip it, and plane the second face until it is flat and parallel.
Take your time at the outfeed table, since long boards need support as they exit the machine. A wood planer can snipe the ends if the board drops. A roller stand or a helper will solve that. Keep your passes light, about one sixteenth of an inch or less, and your blade will stay sharp longer.
A short story shows how well this works. A woodworker in a small garage shop bought a cheap pine slab at a lumberyard for a bench top. It was cupped nearly a quarter inch. With a plywood sled, a few shims, and a planer, he flattened it to a smooth surface in about twenty minutes. The same board went on to hold a vise for years.
Sometimes a board is too wide or too stressed to fix any other way. In that case you can relieve the tension with kerf cuts. A kerf is a thin slot made by a saw blade. When you cut shallow kerfs across the back of a cupped board, the stress inside the wood has room to release, and the board can lie flat.
Start by placing the board with the cupped side down. Set your table saw or circular saw to cut about two thirds of the way through the thickness. Make a series of cuts across the back face, spaced about an inch or two apart. The closer the cuts, the more the board will flatten.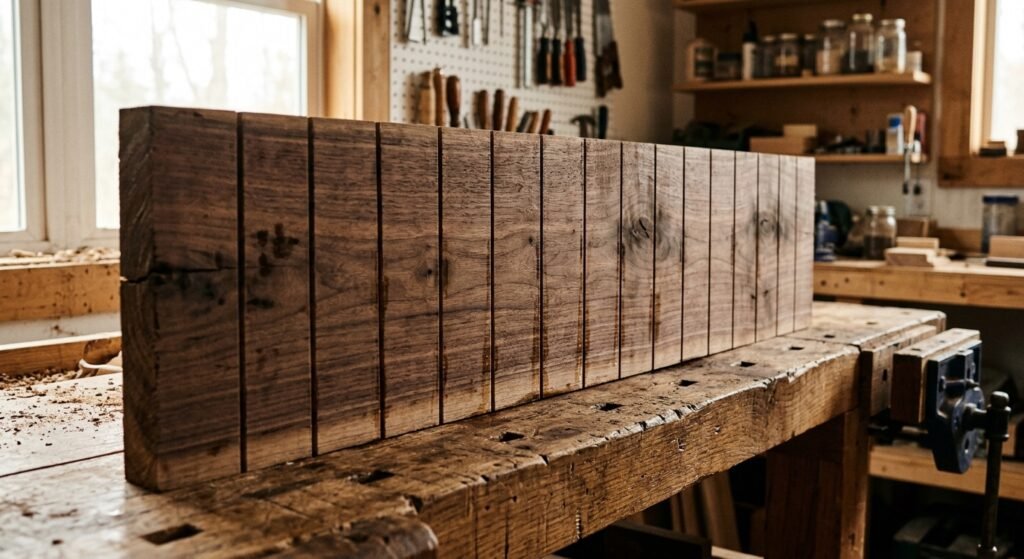 Take care when you use a table saw on a wide plank, and keep your hands away from the blade.
Once the cuts are made, press the board flat and fill the kerfs with thin strips of wood glued into the slots. The strips hold the board in its new shape. After the glue dries, sand and plane the surface smooth. This trick is common on antique repair jobs and on tabletops where you cannot afford to lose thickness.
Keep in mind that kerf cuts show on the back of the board, so use this method only on faces that stay hidden. For a cutting board or a visible panel, you may prefer to rip the board into narrow strips, flip the strips so the growth rings alternate, and glue them back together. This regluing step turns one warped board into a stable panel. Small pieces of maple and walnut work great for this, and they make a handsome cutting board in the end.
Fixing a warp is good, but avoiding one is better. Most warping comes from poor storage and sudden changes in moisture. A few simple habits will keep your wood flat before you even start a project.
Stack your lumber on a flat base with stickers between each layer. Place the stickers directly above one another so the weight stays even. Keep the stack off a concrete floor, because concrete can pull moisture into the bottom boards. A weight on top of the stack helps, too. This is how a good lumberyard stores its boards, and you can copy the same idea at home.
Let new wood rest in your woodworking shop for a week or two before you cut it. This lets the boards match the humidity of the room. If you plan to build indoors, the wood should come indoors early. Check the moisture reading with a meter if you have one.
Seal your finished pieces on all sides. If you finish only the top of a table and leave the underside bare, the bare side will lose or take on moisture faster and the top may cup. A coat of finish on every face keeps things balanced. For cutting boards, a regular rub of mineral oil keeps the wood from drying out and shrinking.
Finally, mill your boards in steps. Rough cut them slightly oversized, then let them rest overnight. Warp often shows up after the first cut, because the wood releases stress. When you return the next day, you can flatten the faces to final size and know the board will stay true.
Now you know how to flatten warped wood in three ways. Water, heat, and weight suit a mild cup or bow. A hand plane or a jointer sled is the best option when you have extra thickness and need a truly flat face. Kerf cuts help with stubborn tension and wide boards where other fixes fail. The right choice depends on the board, the tools you own, and how much wood you can afford to lose.
Start with the gentlest method and work your way up. Check the moisture, look at the type of warp, and be patient. Then store your next batch of lumber with stickers and flat support so you do not face the same problem again. Grab that rocking board from your bench today and try the damp cloth and clamp method first. You may be surprised how often a little water and time can save a good piece of wood.
Yes. For a mild cup or bow, a damp cloth, a bit of heat, and some clamps or heavy weight are often enough. Place the damp cloth on the concave side, let it soak in, and hold the board flat for a day or two. Deep warps may need a hand plane or a planer.
It can. Adding moisture to the dry side makes those fibers swell, which pushes the board back toward flat. It works best on thin boards with a light cup. Severe warps and thick planks need a mechanical fix.
No. The rollers press the board flat while it passes through, so the cut follows the shape of the warp, and the board bends back afterward. To flatten a board in a planer, use a sled or flatten one face on a jointer or with a hand plane first.
Start with at least a half inch of extra thickness. Planing out a cup or twist can remove a lot of wood, and you need enough left for your final size. If the board is already close to final thickness, try the water and weight method or cut it into small pieces.
Often yes. For a light warp, damp the concave side and clamp the board between flat surfaces as it dries. If it stays curved, plane or sand the high points, or cut it into strips and reglue them with the grain flipped. Use waterproof wood glue, and oil the board after.
It can, if the wood is still drying or if you do not seal it well. Check the moisture content first and let the board rest in your shop. After flattening, finish all sides of the piece and keep it away from damp spots and direct heat.
Store your lumber flat, with stickers between layers, off the floor, and in a space with steady humidity. Let new boards settle in your shop before cutting. Seal every face of your finished project to keep moisture changes even