Physical Address
304 North Cardinal St.
Dorchester Center, MA 02124
Physical Address
304 North Cardinal St.
Dorchester Center, MA 02124


The best hand tools for woodworking have not changed much in hundreds of years, and there is a good reason for that. A sharp chisel or a well-tuned plane gives you control that no machine can match. You feel the grain, you hear the cut, and you learn how wood really behaves. That is why so many people who start with a power tool end up reaching for a hand tool when the work gets serious.
If you are a beginner, a hand tool kit also costs far less than a table saw, a planer, and a router table. It takes up little space and makes almost no noise or dust. A small woodworking shop in a spare room or garage is plenty. This guide walks you through the essential woodworking hand tools, from marking and measuring to sharpening, so you can build a practical tool list without wasting money.
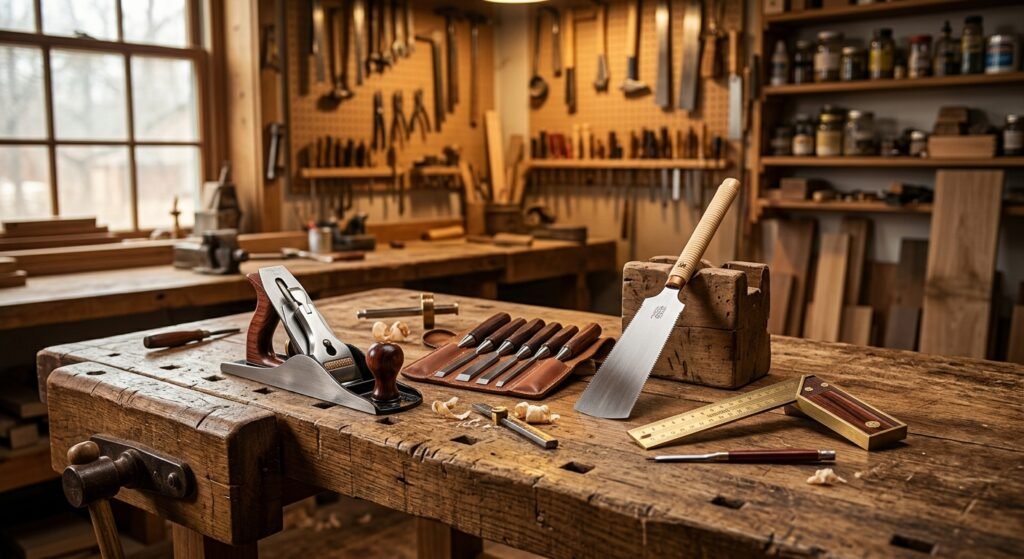
Every good project starts with a line on a board. If your measuring tools are off by even a little, the error grows with every step. A woodworker who marks well will cut well, and the joinery will close tight without much fixing. Spend your first tool budget here, because these tools guide everything else you do.
A combination square is the one tool most woodworkers say they would buy first. It slides along a steel blade, so you can mark a line at a set distance from an edge, check that a board is square, and even set a 45 degree bevel. A decent 12 inch model from a known brand will last you for decades. Cheap ones often come with a blade that is not truly square, so test it by drawing a line, flipping the square, and checking if the line matches.
A try square is simpler and has a fixed stock with a fixed blade. Many carpenters like it for marking across the end of a board because it sits flat and does not move. If you can only afford one, get the combination square. If you want a second, a small 6 inch try square is great for fine joinery and tight spots.
A pencil line is thick, and that thickness can move your cut by a full millimeter. A marking knife cuts a thin line right into the wood fibers. Your chisel or saw can sit in that line and stay there. This is a big reason why hand cut joints look so clean.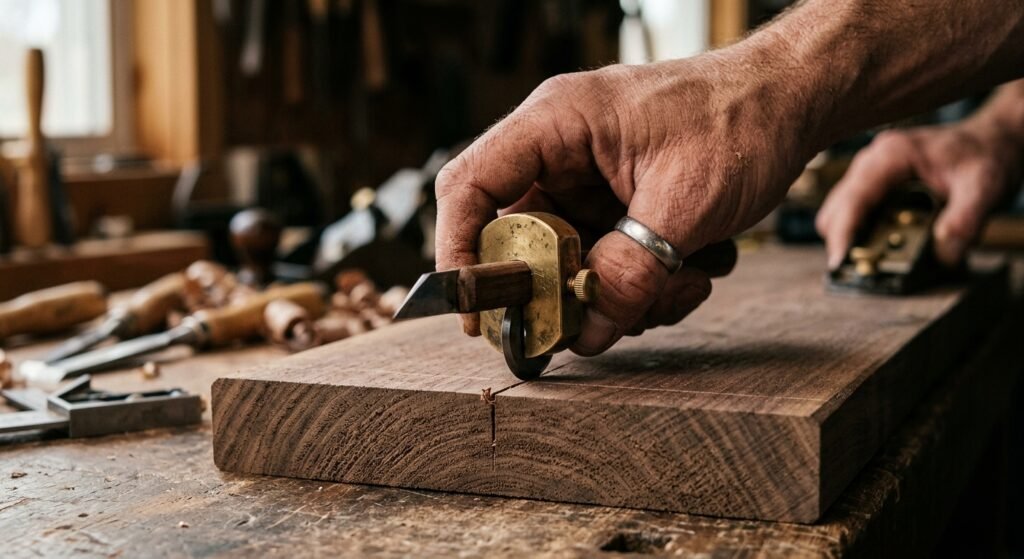
A wheel marking gauge works in a similar way. You set the fence, lock it, and roll a small steel wheel along the board. It makes a crisp line that follows the grain without tearing it. A pin type gauge can tear fibers when you go against the grain, so most people find the wheel type easier to use. For dovetails, tenons, and any joinery that needs exact depth, this gauge is hard to beat.
A tape measure is great for rough sizes, like cutting a board to length from a big pile. For fine work, switch to a steel rule. Stainless steel rulers in 6 and 12 inch sizes have thin, sharp markings that are easy to read and sit right against your work. A folding rule is also handy if you like to carry something small in your apron.
One tip that saves many beginners: pick one measuring tool for each project and stick with it. Tape measures can differ by a hair from one brand to another because of the hook at the end. If you measure with one and check with another, your numbers will not match, and you will blame the wood.
Saws are where most beginners feel the biggest jump in progress. A good hand saw cuts straight, stays quiet, and gives you a chance to correct yourself mid cut. You do not need a full wall of saws. Two or three well chosen ones will cover most of your first projects.
Western saws cut on the push stroke. They have a thicker blade, which keeps them stiff, and they come in two main types. A crosscut saw cuts across the grain, while a rip saw cuts along it. The teeth are shaped differently for each job, so a crosscut saw will struggle if you try to rip a long board with it.
Japanese pull saws cut on the pull stroke, which keeps the thin blade under tension and makes it hard to bend. That means a thinner kerf, less effort, and a smoother cut. A ryoba saw has teeth on both sides, one for ripping and one for crosscutting, so it works like two saws in one. A dozuki has a stiff spine along the back, which gives very precise cuts and makes it ideal for a dovetail saw job. For most beginners, one ryoba and one dozuki cover nearly everything.
If you cut a lot of angles later on, you might add a miter box or even a power miter saw. But for your first projects, a hand saw and a bench hook will get the job done.
Straight cuts are only half of the story. A coping saw has a thin blade held in a C shaped frame, and you can turn the blade to cut tight curves. It is also the classic tool for coping the end of a trim piece so it fits against another profile.
A fret saw is a deeper version for finer and more detailed work, like inlay or small scroll shapes. Blades are cheap, and you will break a few while learning. Keep a pack of spares, and use light pressure. Let the saw do the cutting, and you will break fewer blades.
A hand plane takes a rough board and turns it into a flat, smooth surface. It also leaves a shine that sandpaper cannot copy. Planes can feel confusing because there are so many sizes, but they follow a simple order. You start with the bigger planes to remove material fast and finish with smaller ones for a smooth surface.
The jack plane, known as a #5, is the all rounder. It is about 14 inches long and works well for flattening and trimming boards to size. Many woodworkers put a slight curve on the iron, called one cambered edge, so it takes thick shavings without leaving tracks.
The #4 smoothing plane is shorter, around 9 or 10 inches. You use it last, with a very fine setting, to smooth the surface before you apply a finish. A well tuned #4 smoothing plane leaves a surface that looks like glass.
The block plane is small enough to hold in one hand. It is perfect for trimming end grain, softening edges, and fixing small spots. A low angle block plane has the blade bedded at a lower angle, which cuts end grain more cleanly. If you only buy one plane to start, a low angle block plane is a smart choice, and it fits easily in a tool chest.
When you set up any plane, remember that the iron must be sharp and the blade should barely poke out of the sole. Beginners often set the blade too deep, and the plane digs in and chatters. Take a thin shaving and build up from there.
Once you move into joinery, two specialty planes become very useful. A shoulder plane has a blade that spans the full width of the body, so you can clean up the faces of a tenon or trim a rabbet right into a corner. It lets you fine tune a joint until it fits with hand pressure alone.
A router plane works like a small hand router. It has a narrow blade that sticks out below the sole, and it levels the bottom of a groove or a hinge recess to a set depth. It is slow compared to a power router, but it is quiet, safe, and very accurate. You can also pair it with a spokeshave, which shapes curved parts like chair legs and handles, to round out your shaping kit.
Chisels are the heart of hand cut joinery. They pare, chop, and clean, and they can reach places no machine can. A good set will last a lifetime if you keep it sharp, and a dull set will make you hate the craft. Buy fewer chisels of better quality instead of a big set of weak ones.
A bench chisel is the general purpose type. It has a thin, beveled edge on the sides, which lets it get into the corner of a dovetail. A basic wood chisel set in 1/4, 1/2, 3/4, and 1 inch sizes covers most jobs. Look for a carbon steel blade, because it takes a very sharp edge and is easy to hone, though it needs a little more care to avoid rust.
A mortise chisel is thicker and heavier, with a stout handle made to take hard blows. It is built to chop deep mortises without bending or levering out. If you plan to build tables, beds, or workbench frames with mortise and tenon joints, it is worth adding one in a 1/4 or 3/8 inch size. Do not use a thin bench chisel for heavy chopping, because you can chip the edge or even crack the handle.
A tip from real shop life: always keep both hands behind the cutting edge. Many of the worst cuts come from a slipped chisel and a hand held in front of it. Clamp your work in a vise or to your workbench, and you will stay safe and cut more accurately.
A wooden mallet is the right partner for a chisel with a wooden or plastic handle. It gives a soft and controlled blow that does not damage the handle the way a steel hammer would. A round mallet is a popular choice because it strikes well from any angle.
Good technique matters more than force. Use light and steady taps rather than big swings, and let the mallet weight do the work. Chop halfway through from one side, flip the board, and finish from the other face to avoid blowing out the back. A claw hammer is still useful in the shop for nails and for tapping parts into place, but it should stay away from your chisels.
If there is one skill that separates happy woodworkers from frustrated ones, it is sharpening. A sharp tool is safer, faster, and much more fun. A dull tool slips, tears the grain, and makes you push harder than you should. Plan on honing your tools often, even for a few seconds mid project.
You have three main choices, and each has fans. Waterstones cut fast and give a very fine edge, but they need soaking and regular flattening. Oilstones are tough and last a long time, and they work well with a bit of light oil. Diamond plates stay flat, never wear out in a normal shop, and work with just water, which makes them great for beginners who want less fuss.
A simple setup is one coarse stone around 1000 grit and one fine stone around 6000 to 8000 grit. 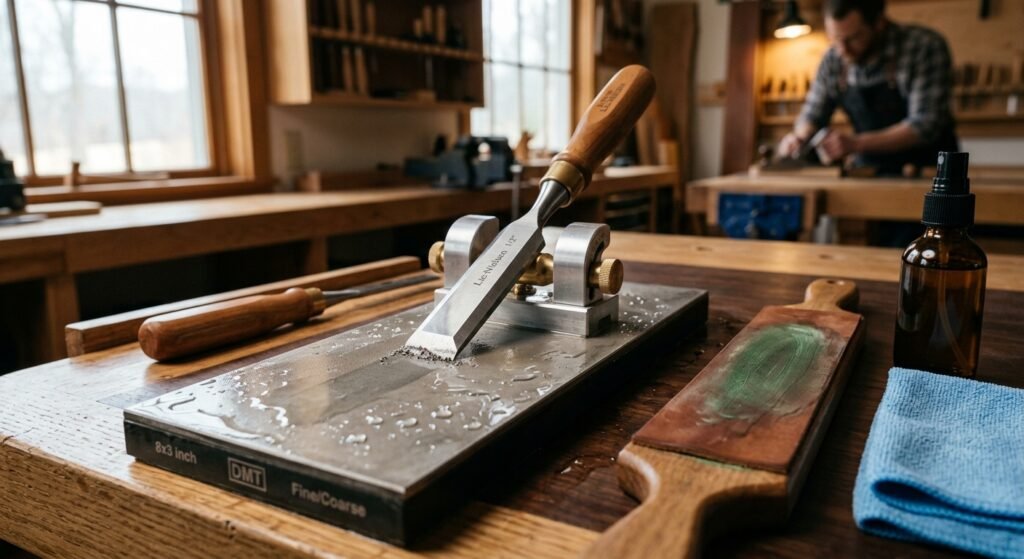 Grind the bevel on the coarse one until you raise a tiny burr, then move to the fine one to polish. Finish by stropping on a piece of leather to hone away the burr. You can add a honing guide at first to hold a steady angle, around 25 degrees for most chisels and plane irons, and then go freehand once you gain confidence.
One last point is flattening the back of each chisel and plane iron. You only need to do it once, and then you just touch up the bevel. It takes patience, but it makes every sharpening session faster.
Rust is the quiet enemy of any hand tool shop, especially in damp weather. Wipe your tools after use with a dry cloth, and add a thin layer of camellia oil or paste wax to steel surfaces. A small silica pack or a cedar block in your toolbox will help too.
For storage, a tool chest or a wall rack keeps chisels and planes from banging into each other. Store planes with the blade pulled back, and rest them on their side so the edge never touches the bench. Keep your saws in a dry spot with the teeth protected. A little care after each session adds years to the life of your tool set.
You do not need every tool on the market to start. A smart beginner kit has a combination square, a marking knife, a wheel marking gauge, a steel rule, a ryoba saw, a dozuki, a coping saw, a jack plane, a #4 smoothing plane, a low angle block plane, a set of bench chisels, a mallet, and a sharpening setup. Add a few clamps and a solid workbench with a vise, and you have a full woodworking set for your first projects.
Start with a small box, a cutting board, or a simple stool. Each project will show you which tool you reach for most and which gap you need to fill next. Over time your tool list will grow in a way that fits your own style of work. Pick up your first tool this week, make a mark, and make a cut. That is the best way to learn the basic skills of woodworking and enjoy every minute of it.
Start with a combination square, a marking knife, a hand saw, a block plane, a set of bench chisels, a mallet, and a sharpening stone. These cover marking, cutting, shaping, and joinery. You can add more tools as your projects call for them.
No, you can build fine furniture with hand tools alone. Many woodworkers mix both, using a power tool like a drill or a sander for rough or repetitive jobs and a hand tool for fine work. A table saw, planer, or router table can speed things up, but they are not required to get started.
Most beginners find a Japanese pull saw easier to control because the blade stays under tension and cuts with less effort. A ryoba is a great first choice since it handles both ripping and crosscutting. Western saws are still excellent, so try both if you can.
A low angle block plane is the best first choice for most people. It is small, affordable, and useful for trimming end grain and softening edges. After that, add a #4 smoothing plane and then a #5 jack plane.
Hone them whenever you notice the edge tearing the wood or needing extra force. For regular use that may mean a quick touch up on a fine stone every 20 to 30 minutes. A full grind on a coarse stone is only needed when the edge is chipped or the bevel has lost its shape.
You can put together a solid kit for a few hundred dollars if you buy wisely. Spend more on marking tools, chisels, and planes, because their quality affects your results. Buy clamps, a mallet, and a basic saw at a mid range price, and look at used tools at flea markets and online for good deals.
Use a dry space, a tool chest or a wall rack, and keep edges protected. Wipe steel with a light coat of oil or wax to stop rust, and avoid letting tools touch each other. A little care after each session keeps your hand tools ready for the next job.